kcs1967
Chairman
SWLA-SETX PINE SCENTED
Posts: 1,726
|
Post by kcs1967 on Mar 23, 2011 15:40:18 GMT -5
Excellent progress, Very nice build, Thanks for sharing.
|
|
|
|
Post by danraitz on Apr 17, 2011 22:15:08 GMT -5
Finally finished with all the plastic work!!! ;D ;D All that I have left to do on the bodies are the handrails/stanchions. For those I am going to be using a mixture of Smokey Valley and Utah Pacific parts. Then it's on to the underframes. 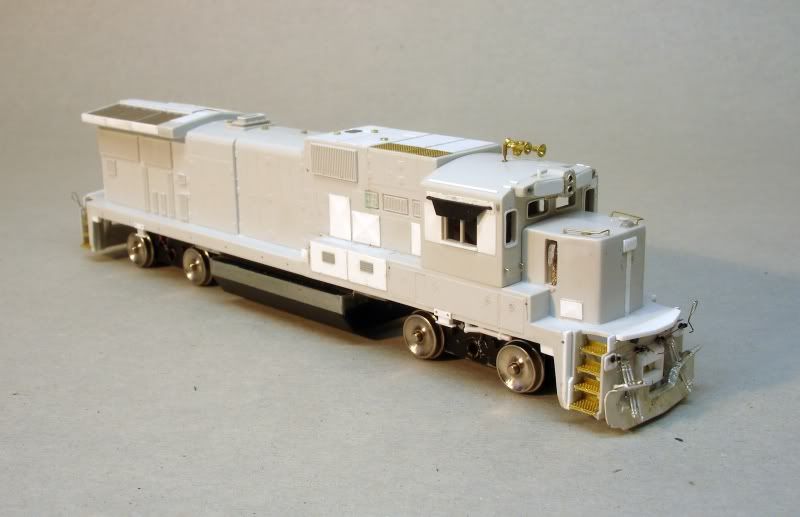 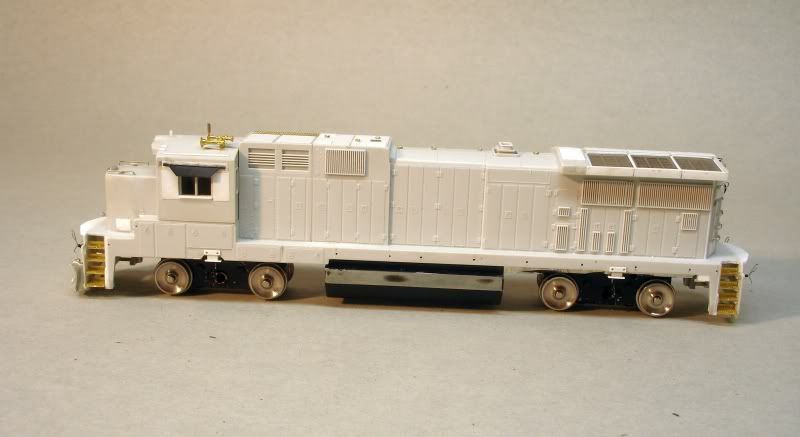 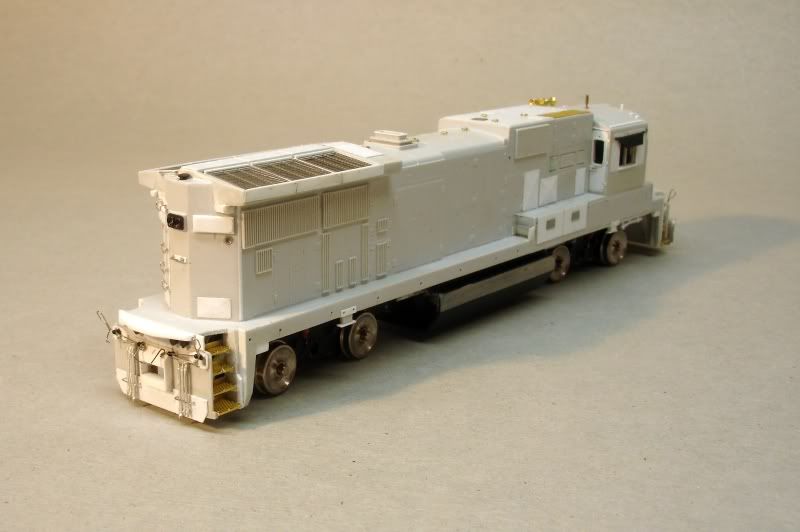 Enjoy! Dan |
|
|
|
Post by danraitz on Apr 17, 2011 22:27:17 GMT -5
The last things that I had to work on were the jacking pads and cab sub-base steps. 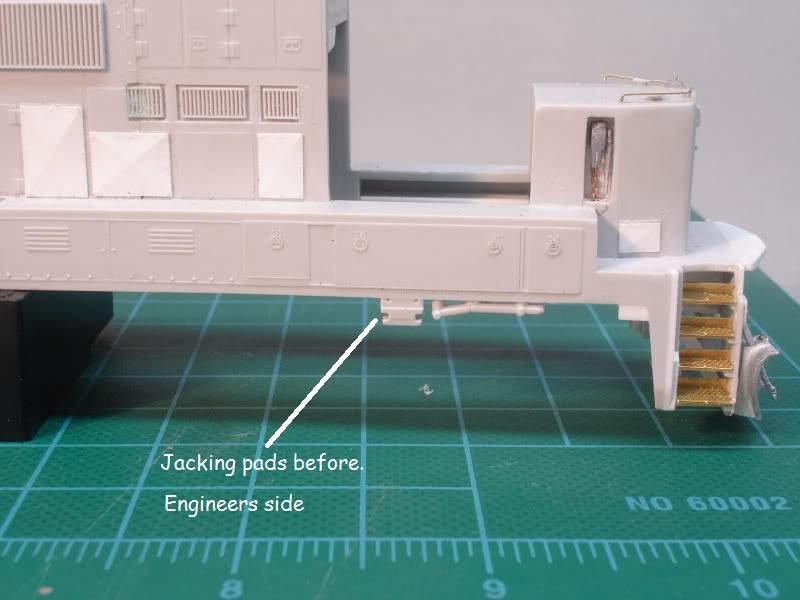 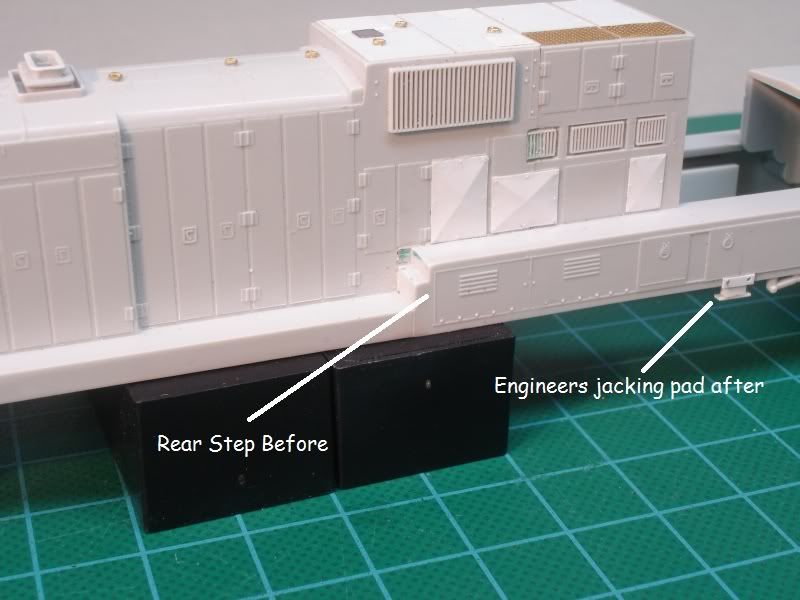 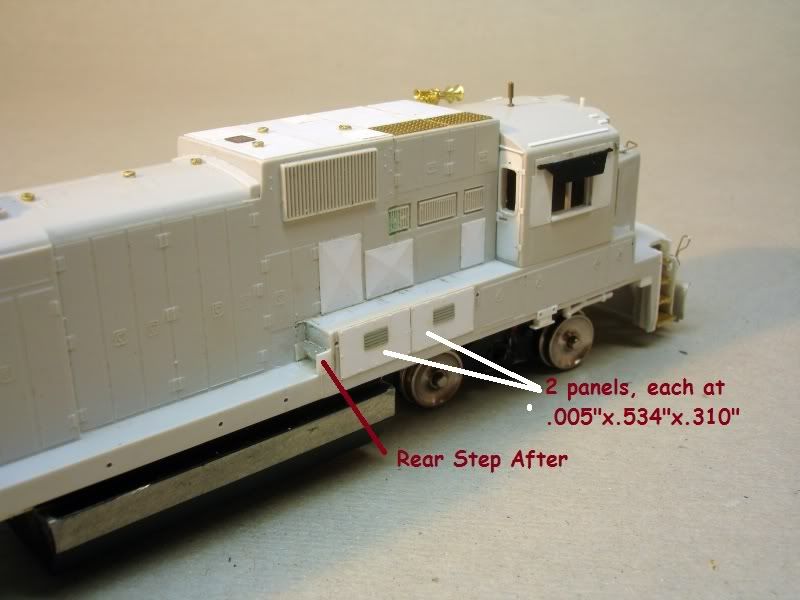 The two panels just forward of the rear step were replaced because the forward one was to large. The louvers were salvaged from a scrap P2K shell. 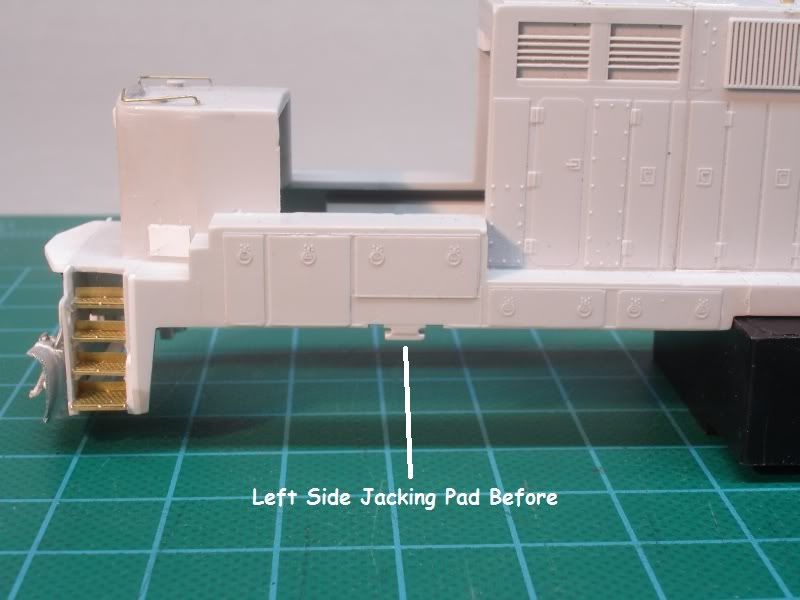 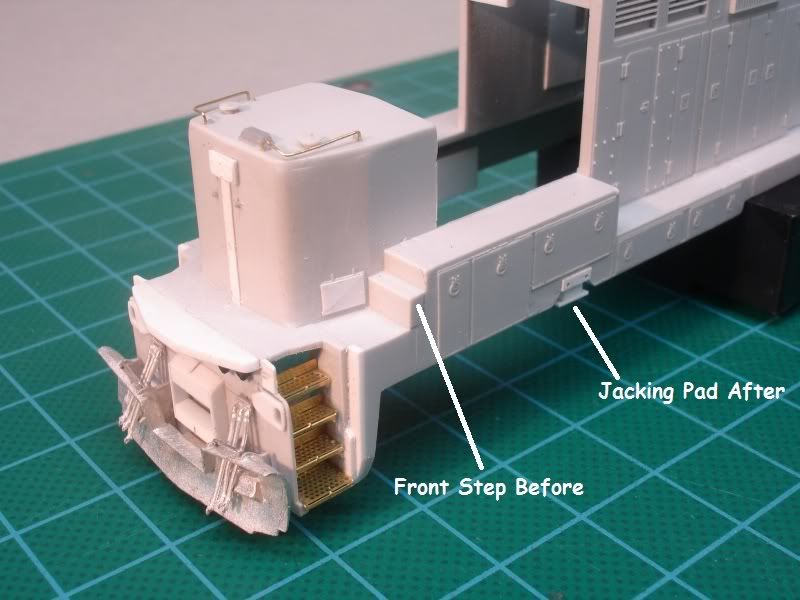 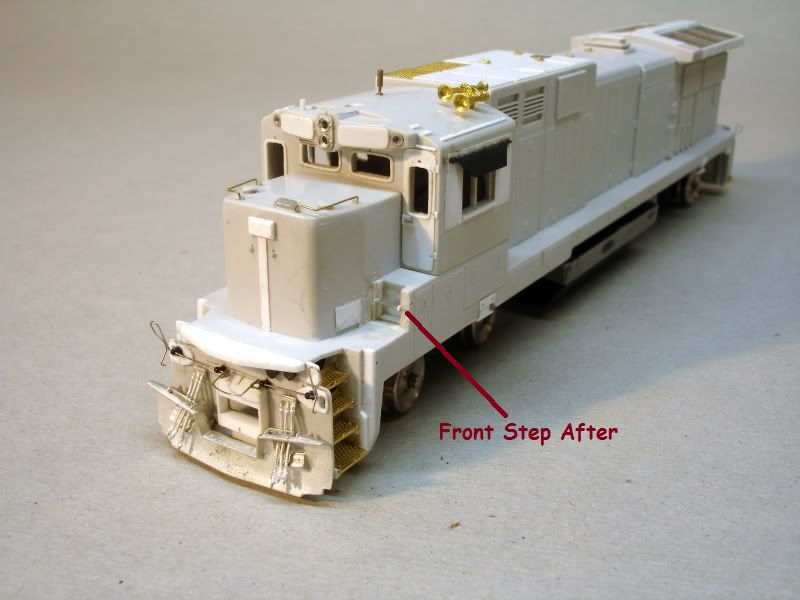 The coupler pin lifters are from Railflyer Model Prototypes, item #6573. Enjoy! Dan |
|
|
|
Post by steve4 on Apr 17, 2011 23:45:59 GMT -5
that is a mean looking beast - I like...
|
|
kcs1967
Chairman
SWLA-SETX PINE SCENTED
Posts: 1,726
|
Post by kcs1967 on Apr 18, 2011 8:27:38 GMT -5
Awesome Job!!
|
|
|
|
Post by icghogger on Apr 18, 2011 8:43:41 GMT -5
WOW, That is Excellent, Dan!!
|
|
|
|
Post by diesel on Apr 18, 2011 18:21:17 GMT -5
now that is just crispy lookin... now ya got the brass model beat for sure.
|
|
|
|
Post by danraitz on Jul 9, 2011 16:26:17 GMT -5
|
|
|
|
Post by Randy Earle on Jul 9, 2011 18:23:55 GMT -5
Absolute masterpieces Dan!!!
|
|
|
|
Post by icghogger on Jul 10, 2011 7:44:40 GMT -5
WOW, THAT is some Amazing Work, Dan!!  |
|
|
|
Post by m a y o r 79 on Jul 10, 2011 10:53:05 GMT -5
Those are impressive unpainted! Shows how much work went into them. Get em into the paint booth fast though.......I think everyone wants to see them finished! I know I do  |
|
bcrail
Superintendent
Posts: 162
|
Post by bcrail on Jul 10, 2011 14:29:12 GMT -5
My god those are impressive beasts.  |
|
|
|
Post by diesel on Jul 11, 2011 10:48:13 GMT -5
wow, those really came out nice. do you have an idea of number of total hours it took you to do these?
|
|
Bruno
Probationary Member
Posts: 17
|
Post by Bruno on Jul 12, 2011 8:34:36 GMT -5
Amazing work, Dan ! Thanks for sharing the steps of this detailing. It is very instructive. What DA parts did you use for the radiator? |
|
|
|
Post by danraitz on Jul 12, 2011 22:18:54 GMT -5
wow, those really came out nice. do you have an idea of number of total hours it took you to do these? I guessimate that there are about 100 hrs into them so far. Not each, but total. Dan |
|
|
|
Post by danraitz on Jul 12, 2011 22:21:25 GMT -5
What DA parts did you use for the radiator? I used Detail Associates C32-8 grille set #2722. Dan |
|
Bruno
Probationary Member
Posts: 17
|
Post by Bruno on Jul 13, 2011 2:33:33 GMT -5
Thank you, Dan. Looking forward to see the painted models!
|
|
|
|
Post by nsc409w on Jul 13, 2011 14:13:45 GMT -5
Hi Dan, These are some of the most impressive models I have ever seen. Keep up the outstanding work it is highly apreciated to see the efforts that you have put in.
Shane
|
|
|
|
Post by diesel on Sept 8, 2011 15:15:11 GMT -5
Hey Dan, have U done anything else to these lately? -maybe the first hit of paint?  |
|
|
|
Post by danraitz on Sept 8, 2011 22:20:00 GMT -5
Haven't done a whole lot to them this summer.  But, I did get a new roof put on the house and garage  and am currently working on rebuilding my workbench area.  |
|