|
|
Post by danraitz on Jan 20, 2011 17:45:55 GMT -5
Tell us how you did the X-braced panels. Actually these were a lot easier then I thought they'd be. 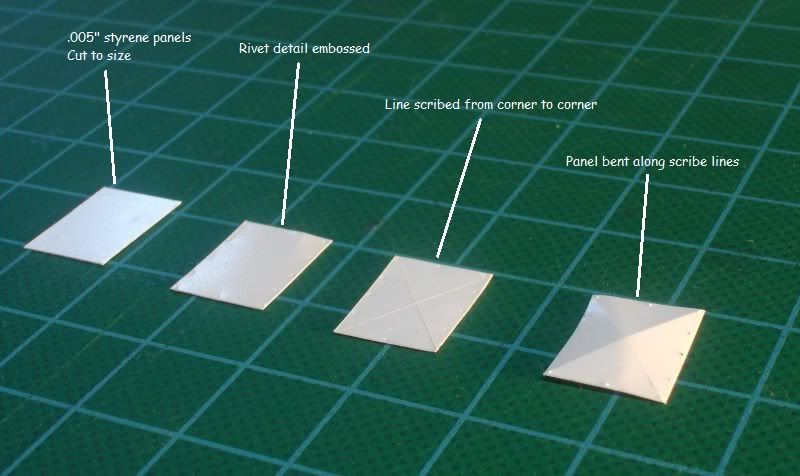 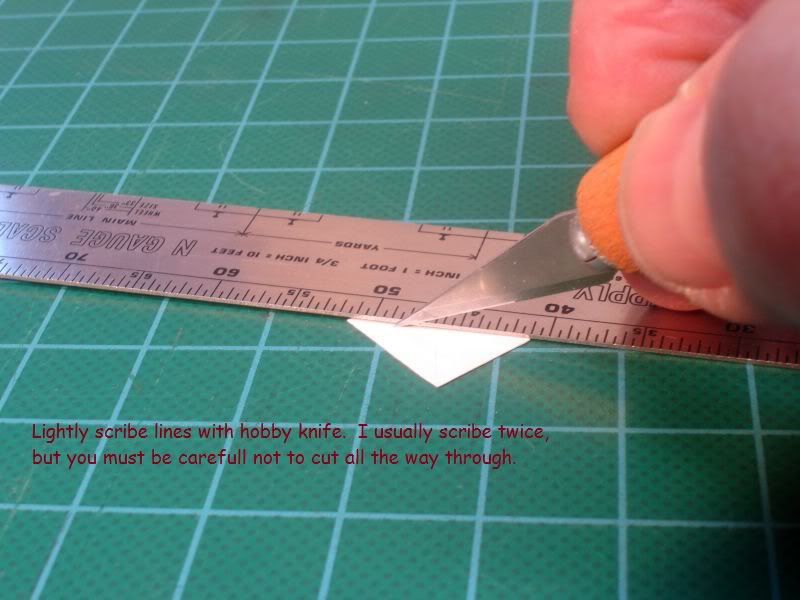 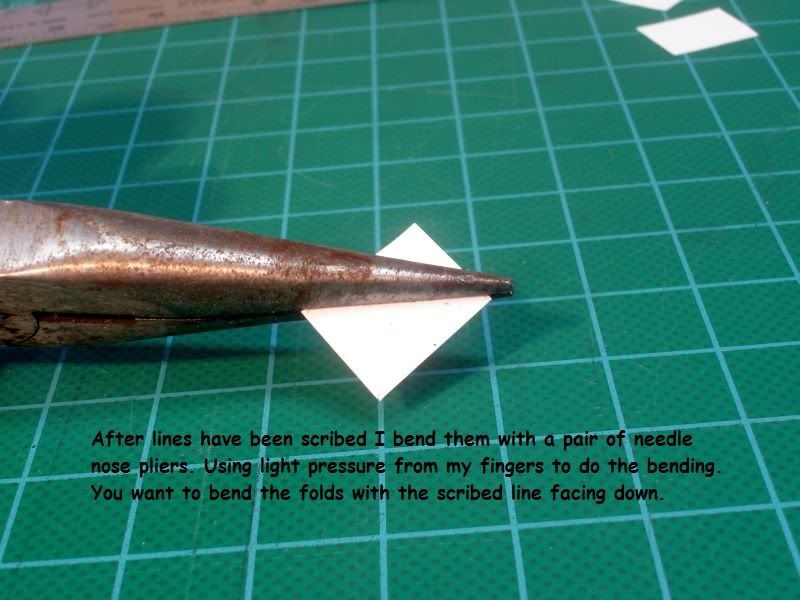 Hope this quick little photo essay helps  Dan |
|
|
|
Post by ranchwagon on Jan 20, 2011 20:11:59 GMT -5
Great build and a great how-to on those panels!
|
|
|
|
Post by icghogger on Jan 22, 2011 13:07:40 GMT -5
Thanks, Dan, that's an excellent technique!
|
|
|
|
Post by danraitz on Jan 23, 2011 23:45:55 GMT -5
Did some work on the radiator section this weekend. I first tried cutting the opennings as-per Dan Bourques' C32-8 article in the April '99 issue of Mainline Modeler. 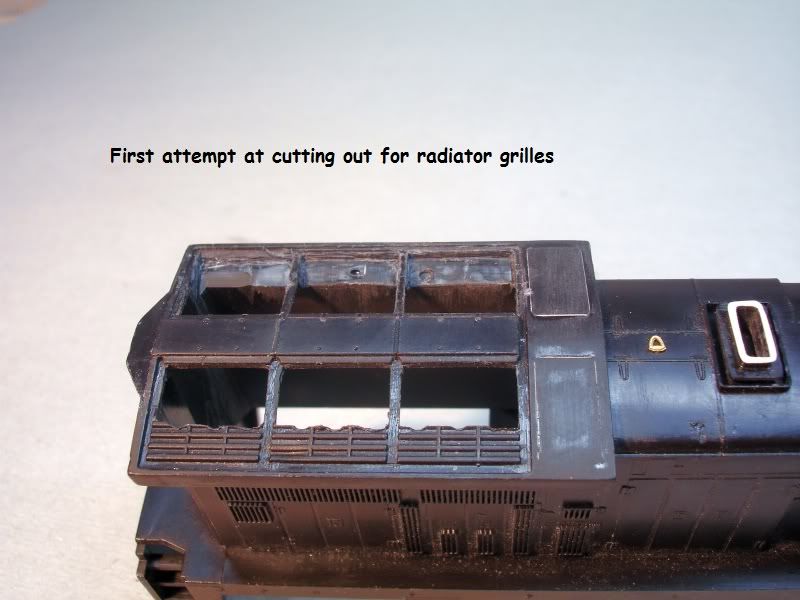 But I quickly felt that this wasn't working for me. So I figured I'd remove most of this section and rebuilt the radiator area from scratch. 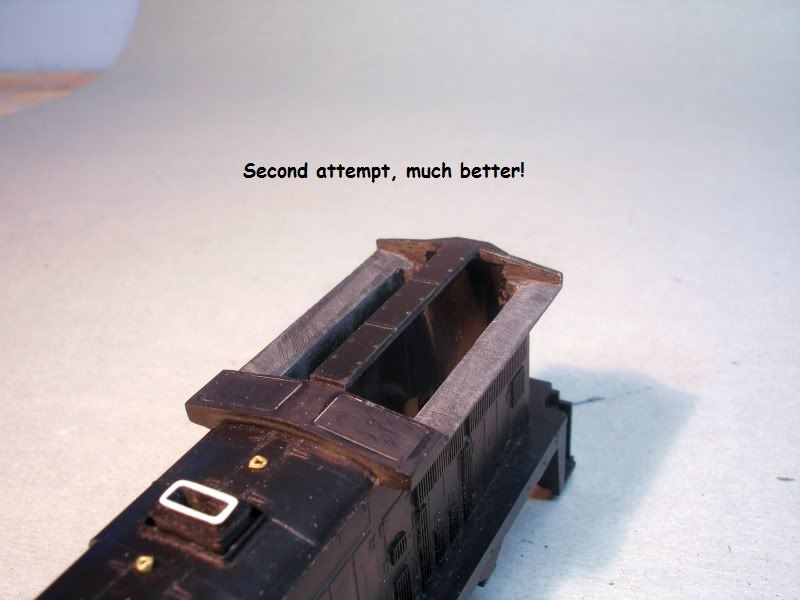 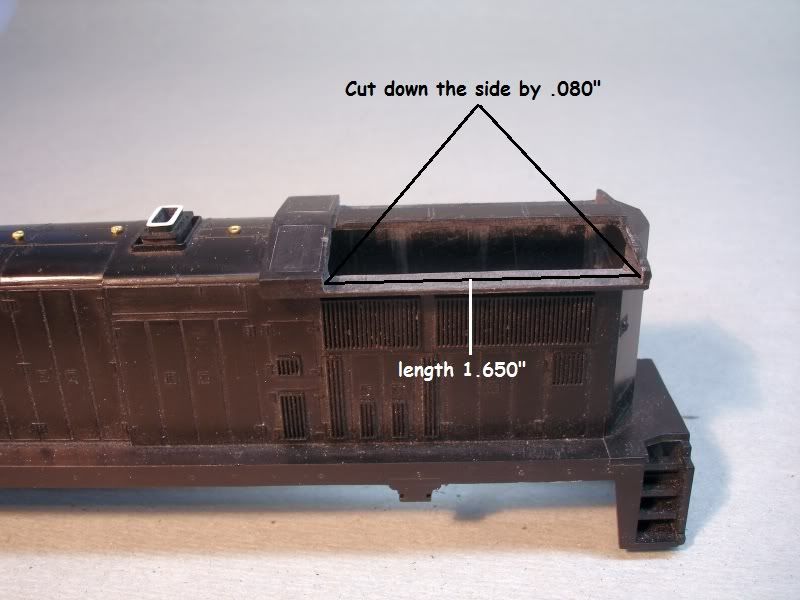 Here are a couple of shots showing how I rebuilt the radiator sections. 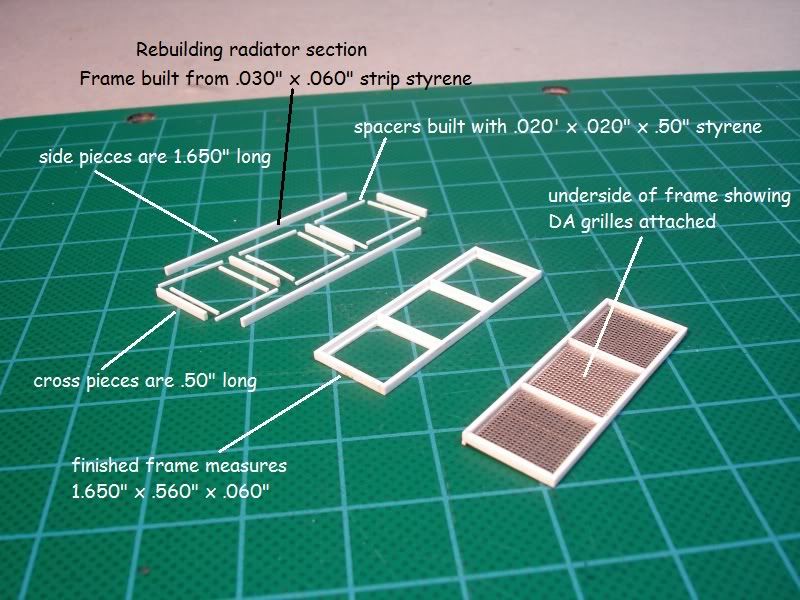 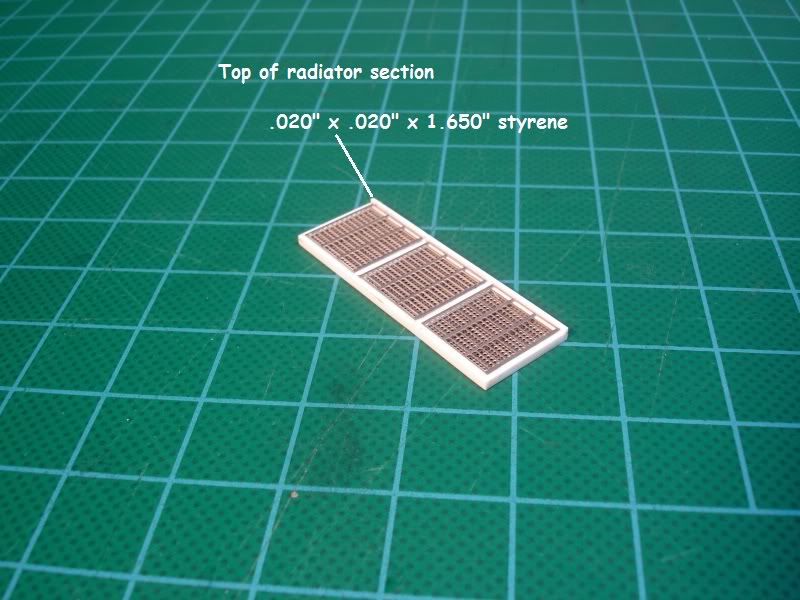 I used the .020"x.020" styrene strip for a spacer between the two layers of DA grilles. I must say that having a "Chopper II" made quick work of cutting all those little pieces. ;D Here is a shot showing what it will look like. 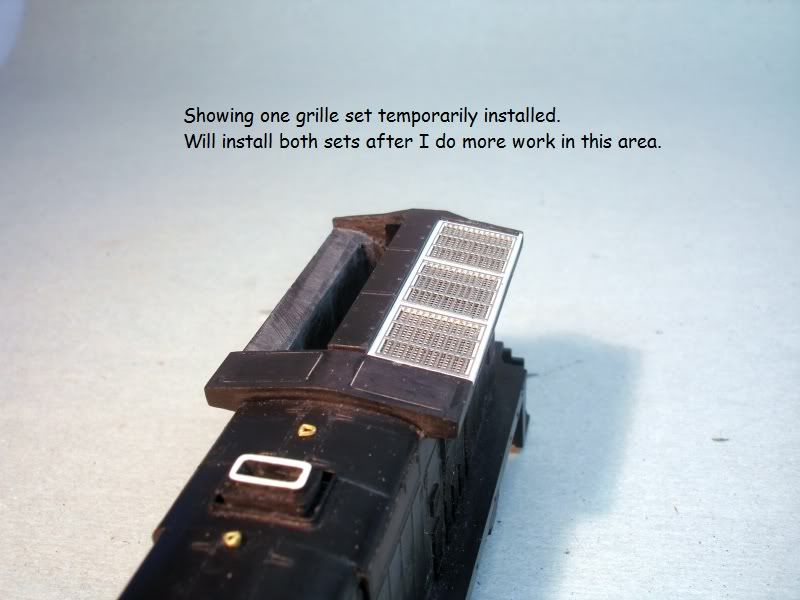 Enjoy, Dan |
|
|
|
Post by Matthew on Jan 24, 2011 5:41:26 GMT -5
Looks good. Makes me wish I had this on one of mine before it was painted.
Matthew
|
|
|
|
Post by icghogger on Jan 24, 2011 14:28:42 GMT -5
Way to go, Dan, those radiator sections are Cold-Blooded Killer!! ;D You have the making of one sweet build, my brother!!
|
|
|
|
Post by danraitz on Feb 15, 2011 23:20:46 GMT -5
finished up the rad section this weekend. 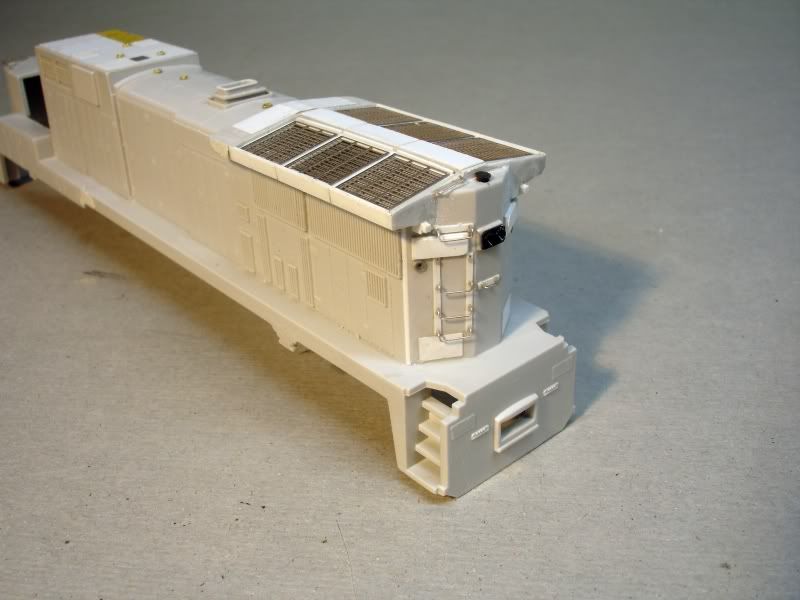 The first thing I did after the major cutting and sanding work, was to correct the radiator screens. The first step in this is to correct the mis-match molding line between the body and the end hood. To do this I added a scale 2x4 to this area and then sanded it down to match the sides and end. 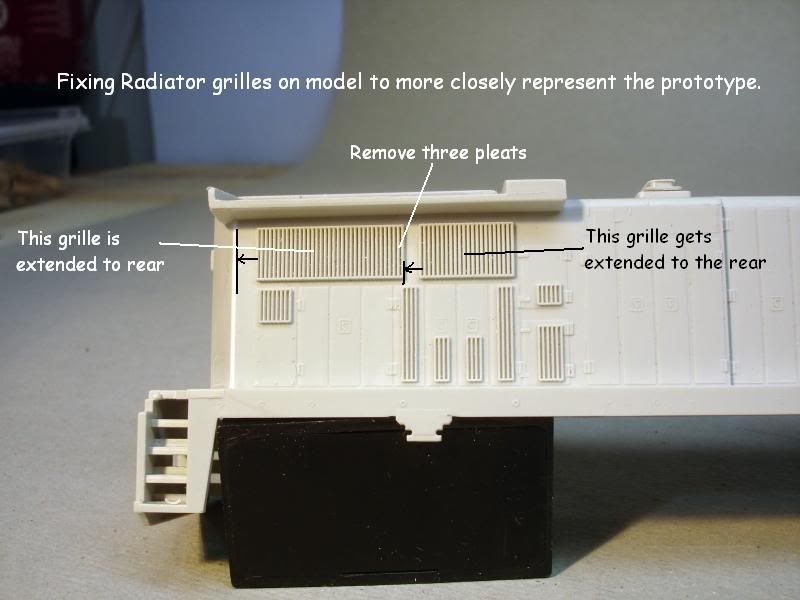 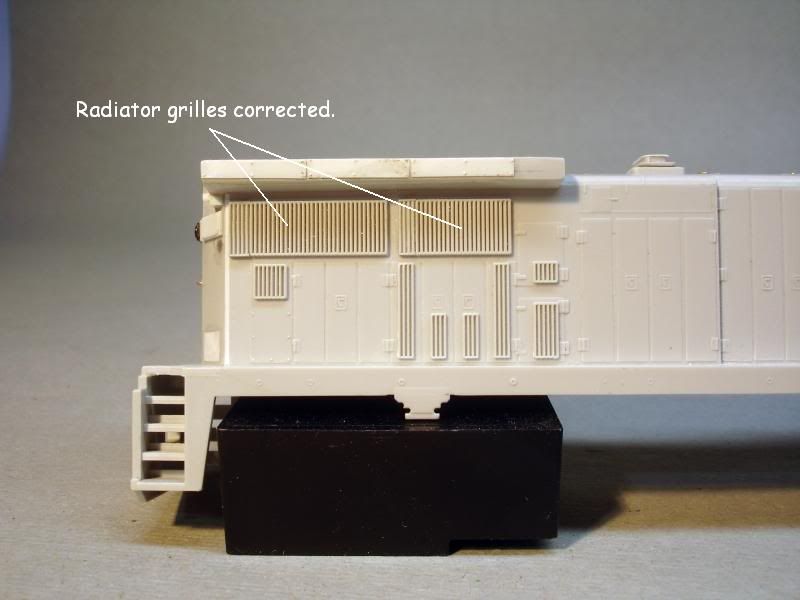 To do this I used one of my modified Xacto #17 blades to chisel out the 3 pleats on the rear rad grill. 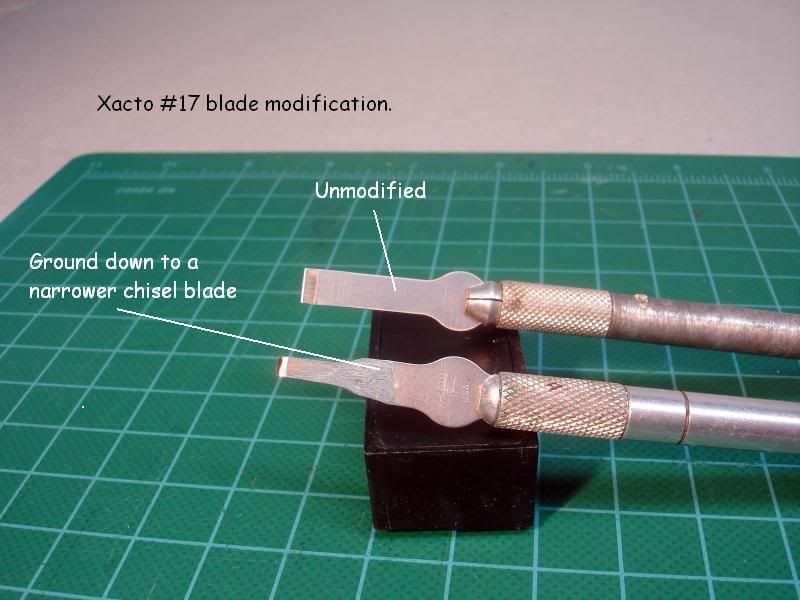 I used the extra small grilles that come with the RPP B23-7 kit to do this. 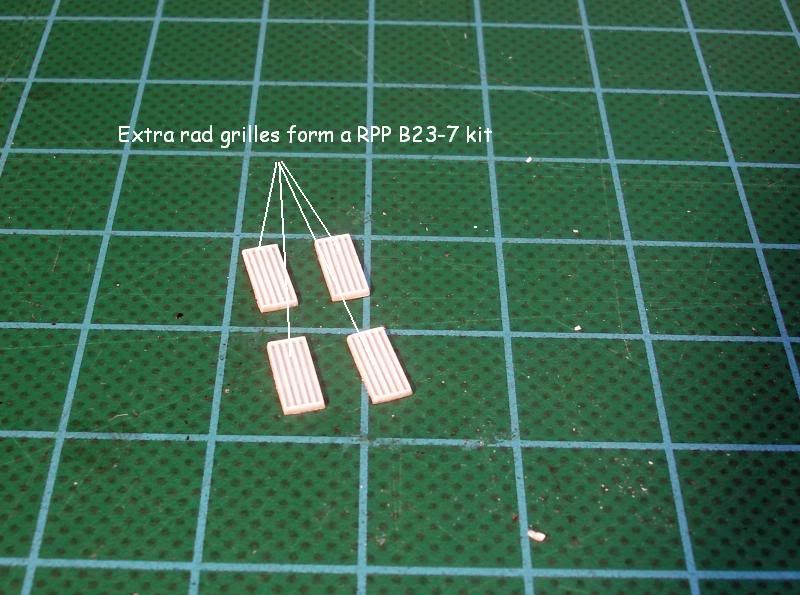 Enjoy,  I'll post more in the AM |
|
|
|
Post by Randy Earle on Feb 15, 2011 23:56:43 GMT -5
This is a really great build Dan. Very inspiring.
|
|
|
|
Post by danraitz on Feb 16, 2011 8:45:27 GMT -5
|
|
drgwguy
Chairman
Modeling the DRGW in the 70s-80s!!
Posts: 528
|
Post by drgwguy on Feb 19, 2011 23:46:10 GMT -5
DAMN Dan! You are blowing this one out of the water.........no USN pun intended.........okay, it was!  You are amazing at your craft and I can't wait to see this thing in Cascade Green. Rick |
|
|
|
Post by diesel on Feb 21, 2011 1:06:03 GMT -5
holy mermaids! Dan, if you cut off the cast pilots and redo those, noone would believe you started with a RailPower shell.
|
|
|
|
Post by canadaandsouthern on Feb 23, 2011 20:46:48 GMT -5
very nice
|
|
deez
Chairman
Midland Belt Railway
Posts: 949
|
Post by deez on Feb 24, 2011 0:39:28 GMT -5
Thats some awesome work! Fantastic radiator section too! Bravo.
|
|
|
|
Post by mrogden on Mar 8, 2011 23:32:29 GMT -5
Looking extremly Awesome. As with the others, can't wait to see the finished model.
|
|
|
|
Post by danraitz on Mar 20, 2011 11:08:45 GMT -5
Update: Worked on the pilot faces and step wells. Here is a shot of the work, so far. 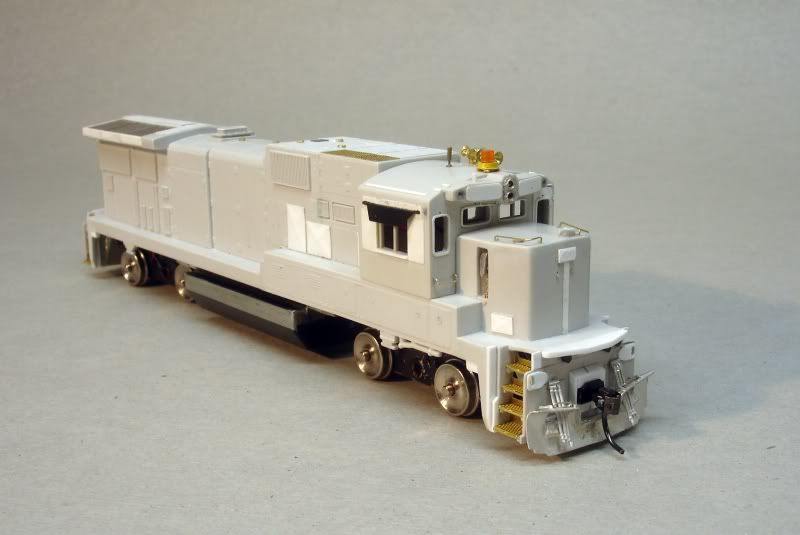 The first thing I did was to reduce the thickness of the pilot to only .020". Here are some before & after shots. 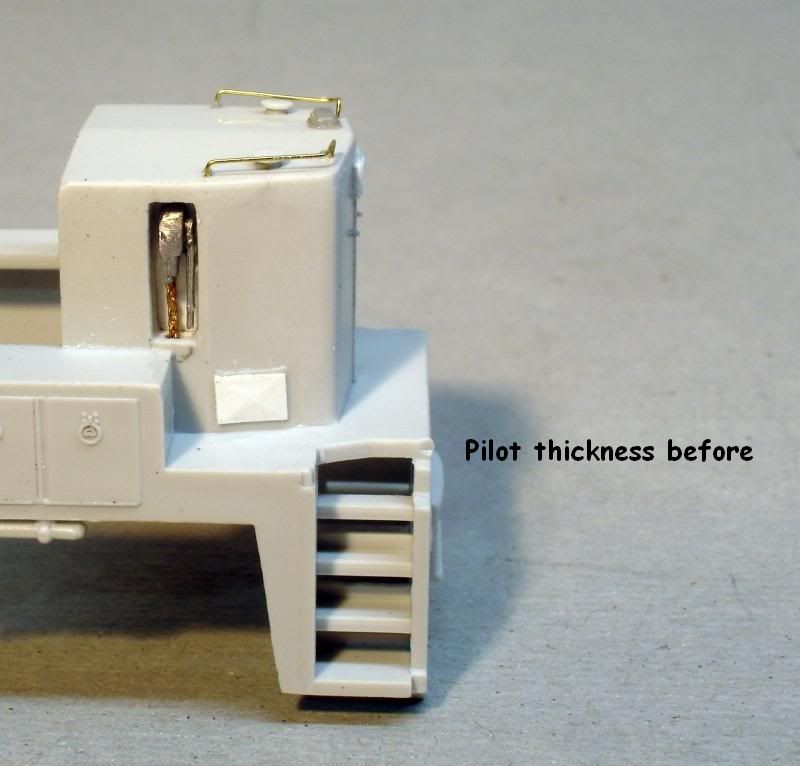 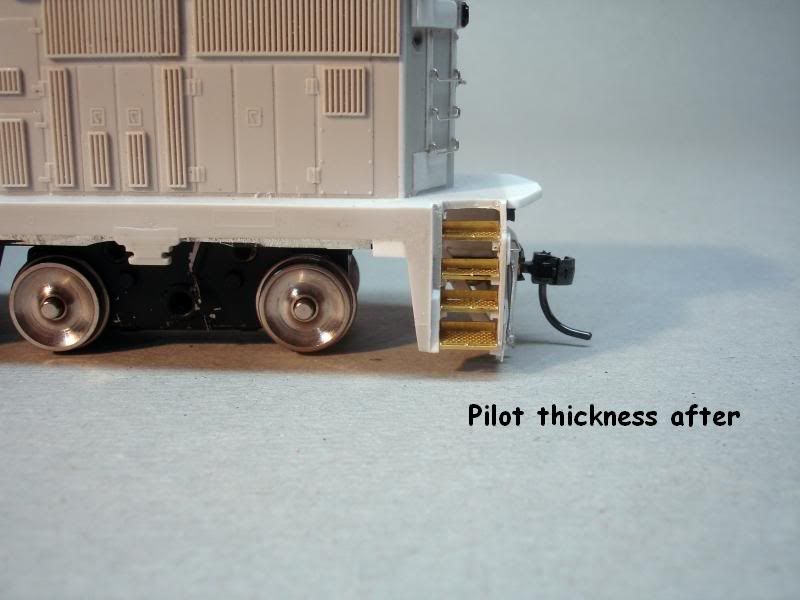 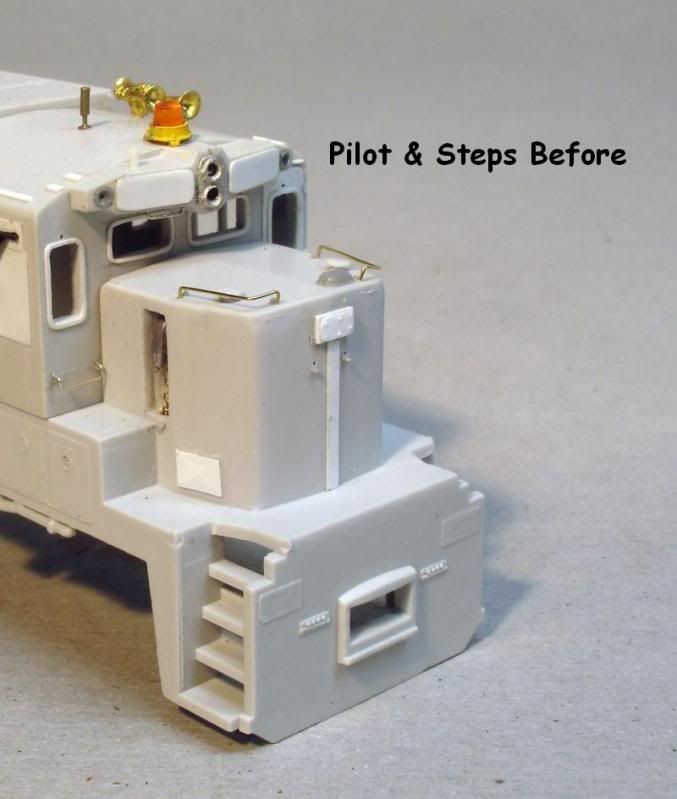 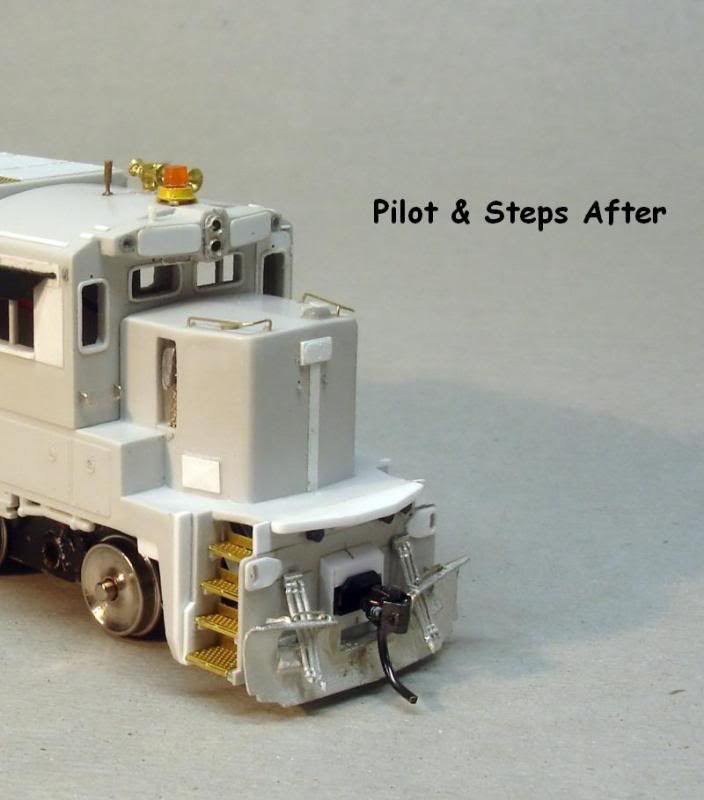 Enjoy  |
|
|
|
Post by danraitz on Mar 20, 2011 11:16:33 GMT -5
Here are a couple of shots showing the parts used. For the steps I used the A-Line #29246. For the "notches" on the back side of the step wells. I cut & sanded until they were approx: .040"wide x .080"deep, although in most cases I got a little too wide so I had to rebuild them back out.  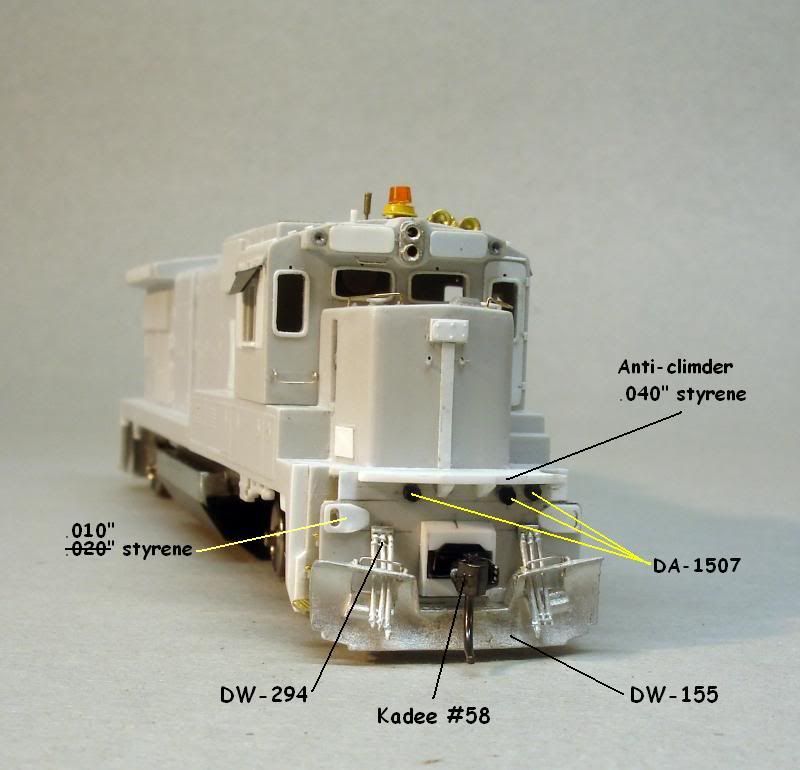 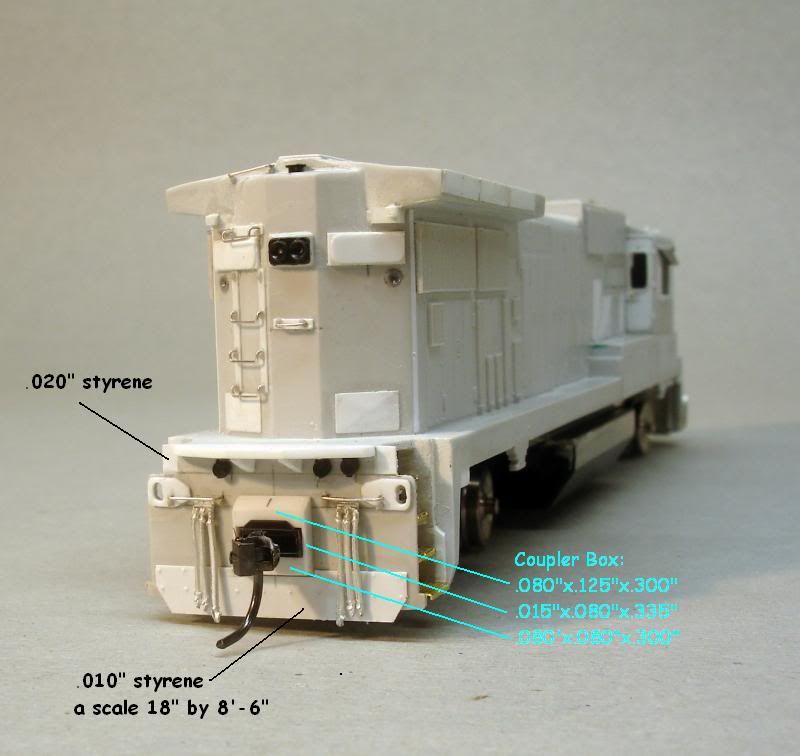 Enjoy  |
|
|
|
Post by diesel on Mar 20, 2011 11:17:55 GMT -5
 OK NOW... There is a brass version of this in the shop in Manhattan. I think yours is gonna look even nicer as I don't think the brass actually has all the details you placed. How did you do the pilots? Cut them off and replace? Very nice details on the stepwells! The nice thing about this build is that most of the pieces you're adding are scratch built. thanks for the update!
|
|
|
|
Post by danraitz on Mar 20, 2011 11:25:48 GMT -5
 OK NOW... How did you do the pilots? Cut them off and replace? Nope  I got out the sanding blocks/sand paper and sanded them down to the proper thickness. The only thing that you to be carefull about is keeping the sanding even as you reduce the thichness. |
|
|
|
Post by icghogger on Mar 21, 2011 10:29:19 GMT -5
WOW, Dan, Super Job on the pilot mods!! Looks like perseverence still pays BIG dividends!!
|
|
|
|
Post by m a y o r 79 on Mar 23, 2011 12:31:47 GMT -5
This is truly an unbelievable build! I'm just amazed at the detail your putting into a RailPower shell.
|
|