|
|
Post by John on Dec 28, 2010 17:39:43 GMT -5
I'm just getting back into the hobby after being away for nearly twenty years.
Here's some pictures of my first new locomotive. This is an Athearn GP38 RTR model, in Chicago Belt livery. The ebay auction picture showed the model in the box, so it wasn't until I got it that I realised just how bad it really was.
Luckily I got a refund for most of what I paid for it, so in the end it has only cost me £15 UK which is a reasonable price for an Athearn.
I've ordered some new Cannon & Co. parts to detail it with, and some replacement Athearn plastic handrails. The biggest problem is the body mounting lugs, which are in bad shape. I may need to get a replacement body for this one before I spend time detailing the shell.
|
|
|
|
Post by icghogger on Dec 29, 2010 11:35:13 GMT -5
Welcome to our Forum, AJ, and Good Luck with your Cheap Build!! ;D
|
|
|
|
Post by diesel on Dec 29, 2010 16:48:40 GMT -5
Welcome again ajuk. I second the repaint option. Strip completly and repaint into whatever. I always file those lugs down so they don't interfere with my DW air tanks ect.
|
|
|
|
Post by John on Dec 29, 2010 17:59:52 GMT -5
Yes I'm definitely going to strip and repaint it, the body is pretty good apart from the lugs, but I reckon a new shell might be the best route (The lugs are really in bad shape).
I'm not sure what would be the best way to body mount using the couplers as suggested by Pier? Can you point me to more info on that?
I'm modelling the Norfolk Southern so this GP will be receiving a Conrail paint scheme with NS number panels, or possible just going straight to NS scheme.
I've attached a picture of the body lugs to show how bad they are.
|
|
|
|
Post by Randy Earle on Dec 29, 2010 18:24:00 GMT -5
Cut em off, body mount the couplers, drill through the coupler pads on the frame and mount it all with screws. Every one here should have #50 drill bits and 2-56 taps.
|
|
|
|
Post by nssd70m on Dec 29, 2010 21:32:58 GMT -5
A couple of broken lugs shouldn't keep you from fixing up that geep. I have a couple of Athearn units with damaged lugs, I cut them off.Some of my units I drill thru the metal coupler pads and tap the hole for the Kadee's. Some units I stack some styrene in the pilots, drill and tap the hole for the couplers. Earl...
|
|
|
|
Post by diesel on Dec 29, 2010 22:30:49 GMT -5
Here's another thing I want to start doing to more units busted lugs or not: www.6axlepwr.com/NREX_9402_7.htmlon that page, half way down you will see how build up a functional and proto looking coupler mount. Of course, you should put your own spin on it. Once you have the pilots taken care of, you can then use the coupler box to hold the shell on. This doesn't work out as well as if you want to use the Details West pilot buffer plate as the box wouldn't go through the pilot providing a tight fit. If you want to do it that way you would have to find another way of securing the body. |
|
|
|
Post by John on Dec 30, 2010 14:10:39 GMT -5
Wow that SD40 is amazing work!  I don't have a tap and die set, but I might go with something like a small bolt at each end of the chassis, with a nut for each bonded to the shell (not as classy as a custom tap but it should work I reckon). |
|
|
|
Post by m a y o r 79 on Dec 30, 2010 14:27:18 GMT -5
A tap set is definately worth the money, they're not that expensive. I'm pretty sure mine cost less than $10 (US).
|
|
|
|
Post by Randy Earle on Dec 30, 2010 14:52:02 GMT -5
|
|
|
|
Post by John on Dec 31, 2010 11:09:33 GMT -5
That tap is not so expensive, I'll pick one up today. I expected it to be more than £10.
Are you tapping into the plastic?
|
|
|
|
Post by Randy Earle on Dec 31, 2010 12:32:18 GMT -5
You will need to build up a block of plastic behind the pilot, and drill it with the number 50 drill making sure you don't drill all the way up through the deck. Then you can tap it for the 2-56 screw. You'll need to make sure the plastic block is level with the coupler mount so you can use the Kadee coupler box. Then drill a larger hole into the metal pad on the frame so the screw will go through and hold the body on.
|
|
|
|
Post by torikoos on Dec 31, 2010 12:41:49 GMT -5
Welcome AJUK, if you're in the UK, you might be familiar with Model Junction? They're a good store that do mail order of all sorts, and can get almost anything that's also in the Walthers catalog. find them at: www.modeljunction.info . If you visit my blog (link below) you'll find loads more links on the right if you scroll down, and can find many that link to UK based shops and sites that can help modeling US railroads when you're based outside the US like myself. |
|
|
|
Post by John on Dec 31, 2010 15:27:24 GMT -5
Yes I'm in the UK, I've heard of Model Junction but I haven't yet visited them. I will be dropping by in the new year. I used to use Pentonville Models (now closed) and a couple of Scottish suppliers back when I was active in the hobby before. It's amazing the difference the internet and ebay makes to modelling US and getting hold of the parts and models that you want. So much easier these days!  |
|
|
|
Post by torikoos on Jan 1, 2011 14:17:48 GMT -5
Great, you'll be sorted then. Model Junction may not be too far for you, I'm in Devon, so I'll keep it to mail order for now, besides, walking into a shop like that is like a child in a candy store, and I'll be walking out with more than I needed......
|
|
|
|
Post by John on Jan 2, 2011 14:37:28 GMT -5
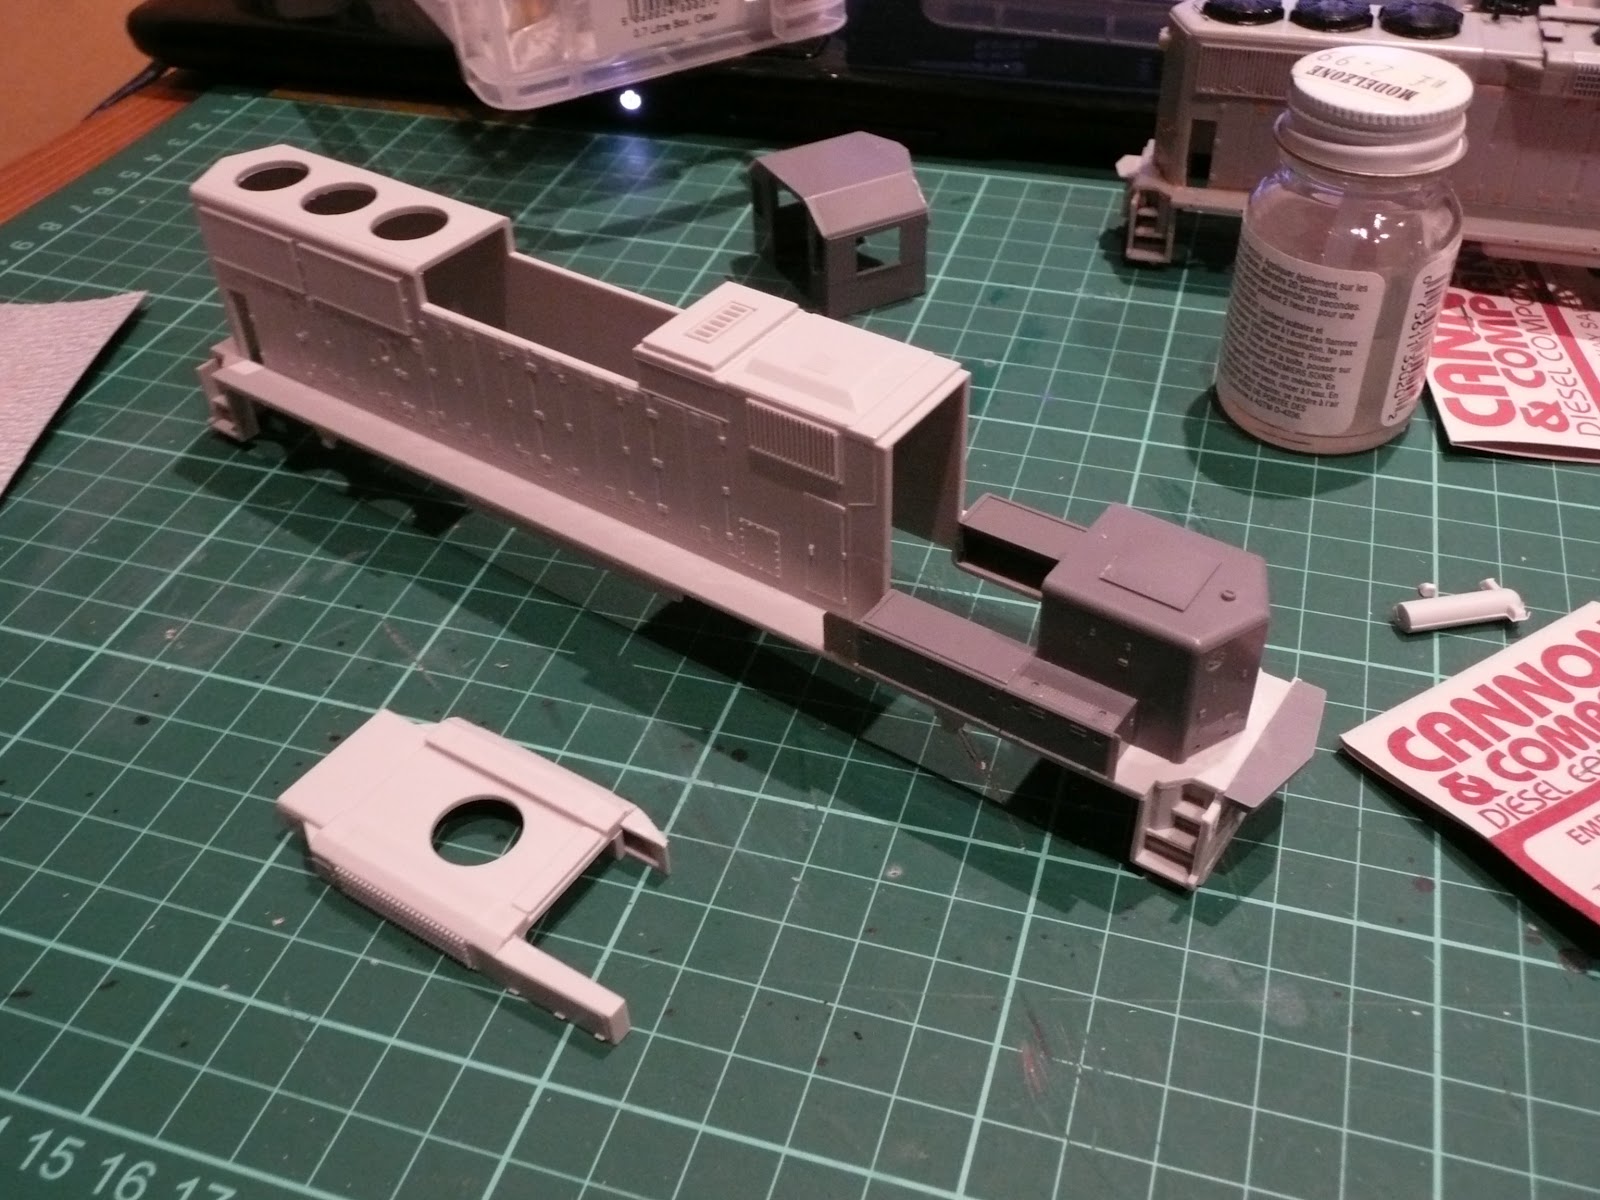
I started work on the basket case Athearn GP38-2 today, stripping the paint with 99% Alcohol. It took a lot longer than I expected, nearly five hours of soaking, and a lot of scrubbing with a toothbrush. Here's a 'before' shot showing the previous owners attempt at weathering. 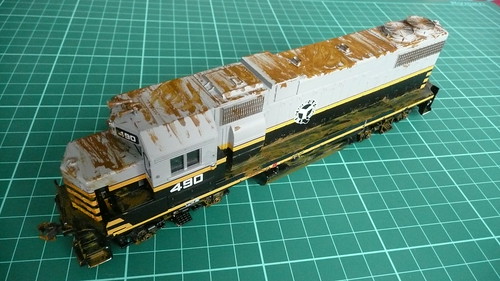 Here's the parts soaking in a tupperware tub. 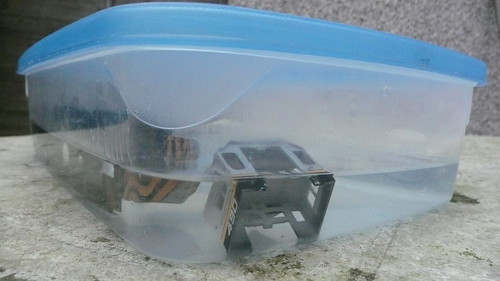 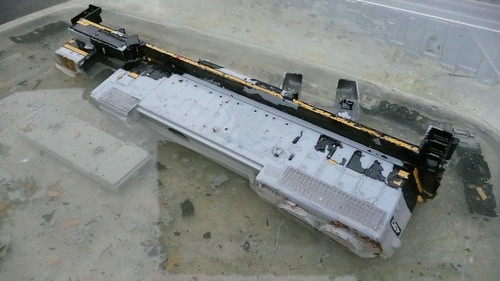 Here are some shots of the stripped engine. There are still some areas of black paint clinging on, especially in the nooks and crannies of the truck sides, and the underside behind the steps. 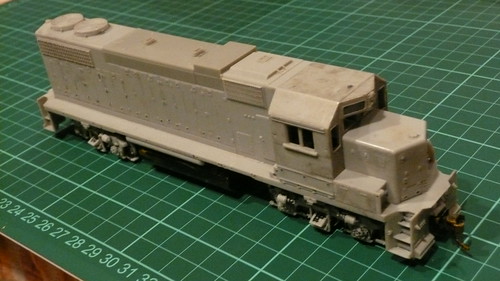 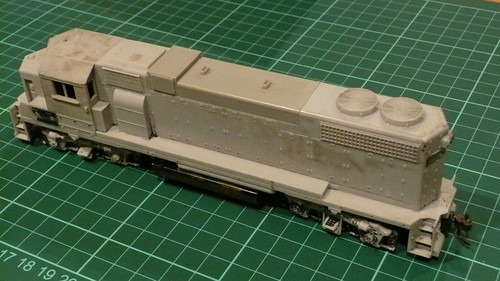 Annoyingly, I've managed to lose the small cab step edge from behind the cab, it probably fell off during the scrubbing process! I will need to fabricate a new edge from plasticard. Two of the body mounting lugs fell off in the alcohol, so I guess they had hairline fractures or were already loose. I am going with the suggested screw mounting for the body, so that shouldn't be a problem. Next step will be to begin drilling the holes for the various Cannon & Co grabirons I purchased for this build. I've also purchased a Dynamic Brake housing to replace the non-dynamic section on the roof. |
|
|
|
Post by torikoos on Jan 2, 2011 15:42:34 GMT -5
Looking forward to this project. :-) Which colours (rail road) have you decided on, Conrail or NS?
|
|
|
|
Post by John on Jan 2, 2011 15:54:39 GMT -5
I'm planning to make this one Norfolk Southern 5273 (ex Conrail) No 5273 is an engine which was still in Conrail livery as recently as a year ago. I don't know if this engine has since been repainted into the Black NS livery, but I will be modelling it as seen here, in Conrail Blue, with a white air conditioner on the roof. 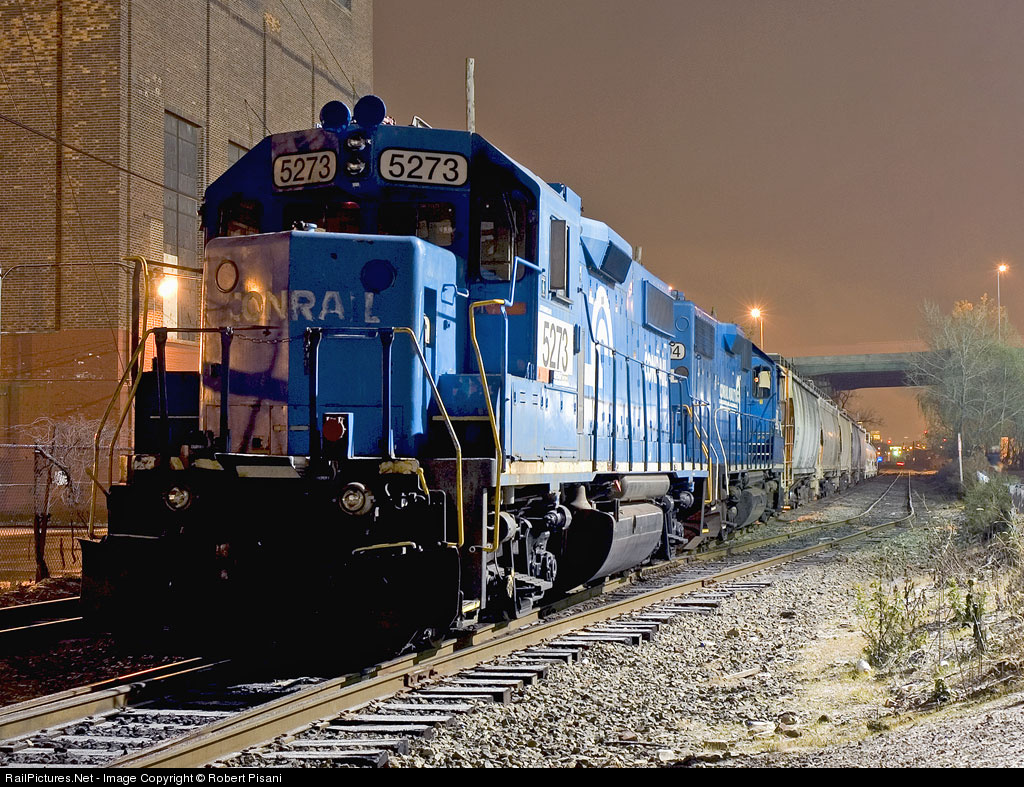 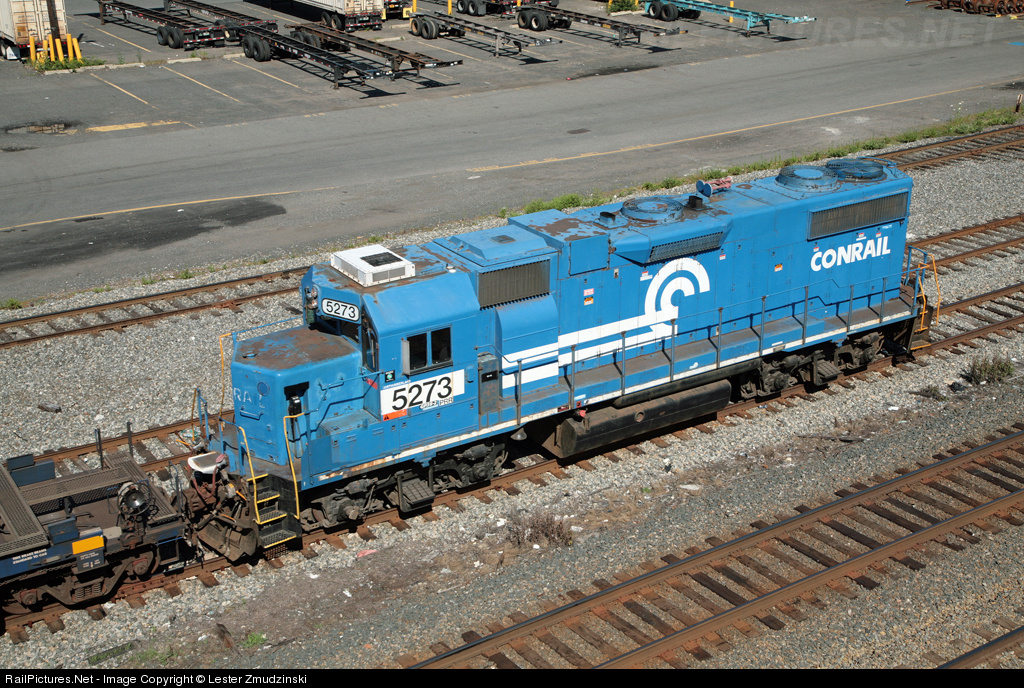 |
|
|
|
Post by John on Jan 2, 2011 16:04:46 GMT -5
|
|
|
|
Post by graftonterminalrr on Jan 21, 2011 16:25:41 GMT -5
Ajuk, interesting choice of loco to model! It appears that NS 5273 is an ex-CR, exx-Penn Central loco. You can see some PC paint coming through on the roof.
Looks like a late Phase 1 GP38-2 as is the Athearn shell. Has the 81" nose, ratchet handbrake lever, rad fans closely spaced together, small anticlimber, and square PAF box on the roof. Oddly, it has the later corrugated radiator grilles (a phase 2 detail). Must have been retrofitted during an overhaul, probably where the early style dynamic brake fan and the forward radiator fan came from (the rear one is the correct one).
The new Athearn handrails look much better than the original formed metal style. Good choice.
|
|


.JPG)

