|
|
Post by John on Jan 26, 2011 18:15:59 GMT -5
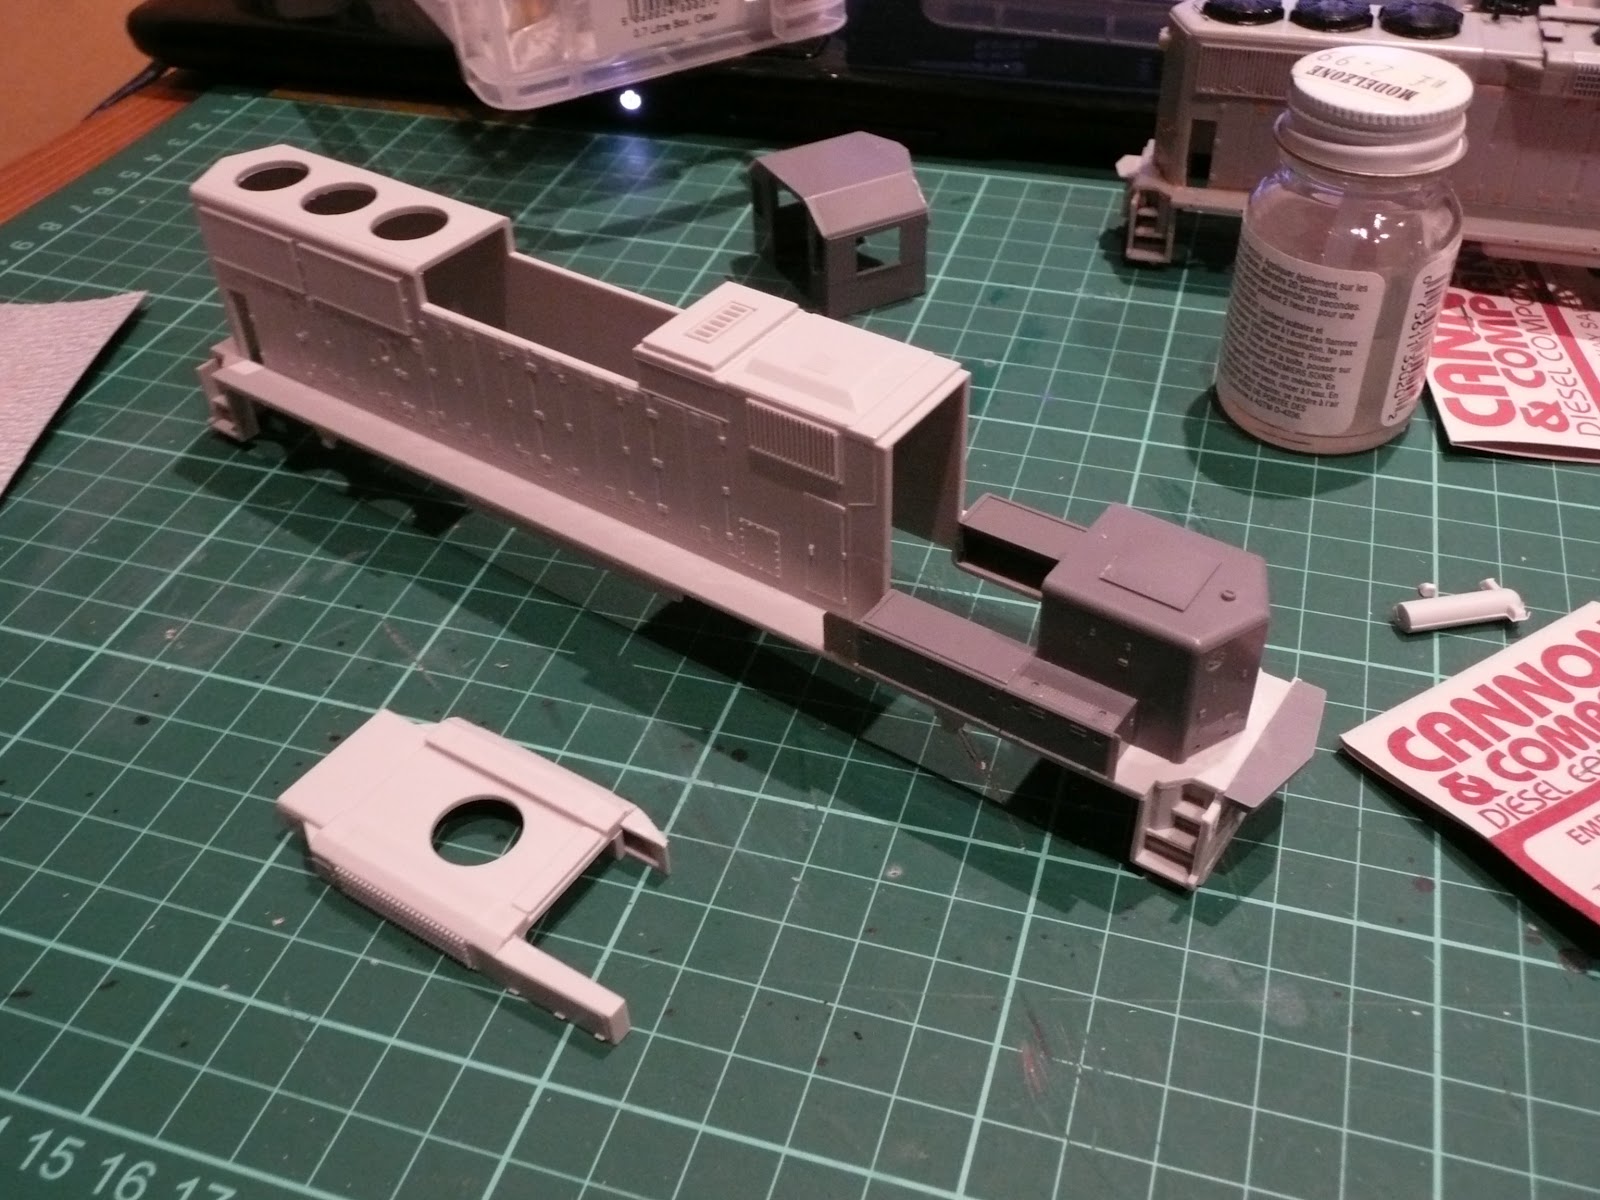
   Here's a quick update on progress with the rebuild. I've added grab-irons to both nose ends, some etched brass walkway treads, front coupler lift bar and air-conditioner to the roof. I'm trying to decide if I want to replace the side radiator grilles, or just go with the athearn detail. Also I need to figure a way to match the different fan types without going too far into drilling and cutting the shell to fit cannon ones. This is my first time using most of these parts, I never did much more than repaint and add grab irons to any of the engines I had when I was younger! I've filled the slots in the pilot plates with plasticard and added styrene blocks inside the shell ready to be drilled and tapped to hold the chassis in place. This project is definitely a lot of fun, but as this is the first time out for me in many years, and this engine is a bit of a test-bed for techniques, I'm probably not going to get too bogged down in creating an exact replica of every last detail on the engine, I just want to get the main elements. I still have a number of Details West/Cannon parts to add including snow plow, mu hoses, windscreen wipers, lift hooks, airhorns and rear coupler lift bar. |
|
|
|
Post by Randy Earle on Jan 26, 2011 19:01:05 GMT -5
Coming along very nice.
|
|
keiffer
Trainmaster
SD40t-2
Posts: 102
|
Post by keiffer on Jan 26, 2011 23:10:23 GMT -5
Good stuff, I'm slated to model the same unit as it spent some time on the road I model during my time period.
I look forward to seeing this completed.
|
|
|
|
Post by torikoos on Jan 27, 2011 11:18:14 GMT -5
I've just added a Tsunami sound decoder to my own GP38-2 a few months back. These 4 axle hood units are quite tight for space but I managed in the end. I've mounted the speaker (an 18mm oval type) under the rear two fans facing down. I did cut the back and the two mounting lugs of it, but put it pretty tight against the body so that the body will function as the rest of it's housing.
Don't forget to isolate the motor from the rest of the loco frame!
Koos
|
|
|
|
Post by John on Jan 28, 2011 4:01:14 GMT -5
I don't have a picture of the underneath yet, but I will take one once I've got the mounts finished (I warn you though... it's not a pretty sight under there!) I am not a master craftsman by any means  I used thin evergreen plasticard to fill the gap, it's 1mm so more or less the same thickness as the Athearn pilot plate. I have left a gap for the coupler boxes which are spare Atlas parts. I still need to build up some styrene mounts for the couplers and drill the frame holes to line up with the blocks. I will definitely be adding sound to this engine, I have purchased a Digitrax decoder for it, but I may need to invest in a smaller speaker. |
|
|
|
Post by torikoos on Jan 28, 2011 15:17:58 GMT -5
if it's of any help, I've purchased my speaker from www.dccsupplies.com, they're uk based, and have a whole range of speakers available. look for one of 18mm width to fit your shell. |
|
|
|
Post by John on Jan 29, 2011 4:58:33 GMT -5
Thanks for the www.dccsupplies.com/ link, I hadn't seen that website before. Prices look pretty reasonable. |
|
|
|
Post by torikoos on Jan 29, 2011 12:38:23 GMT -5
|
|
|
|
Post by diesel on Feb 8, 2011 0:33:26 GMT -5
nice!
|
|
|
|
Post by John on Feb 26, 2011 17:45:19 GMT -5
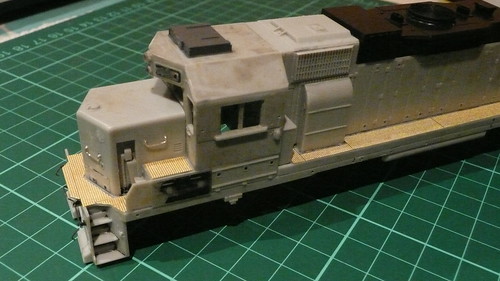
 Here's a quick update on progress with the build. After a long wait for the airmail shipping, I finally received my latest parts order and have now swapped the side radiator grilles to the correct type for this unit.  I'm working on the fans now, I have purchased some Cannon & Co thinwalls to replace the moulded Athearn fans, but I'm having a tough time figuring out how to remove the moulded fans cleanly. Can anyone point me to a 'how to' for how to prep an athearn shell for thinwall fans? I assumed it would just be a case of slicing off the detail and glueing on the cannons, but they look as if they are designed to fit a neat hole of a particular size? How do you guys add these fans to Athearn shells? |
|
|
|
Post by nssd70m on Feb 27, 2011 2:24:27 GMT -5
I used the step-drill with a cordless drill. The object to this method is drilling very slow. Earl...
|
|
|
|
Post by John on Feb 27, 2011 3:17:24 GMT -5
Thanks for the tip! I've ordered up a set of step drills, that should make things a bit easier!
|
|
dtinut
Chairman
Modeling the DT&I of the 60's & 70's
Posts: 661
|
Post by dtinut on Feb 27, 2011 23:46:16 GMT -5
|
|
|
|
Post by John on Mar 4, 2011 8:37:52 GMT -5
I ordered both a set of step drills and a tapered reamer. So I'll be able to try out both methods. The step drill arrived really quickly and I have to say it did an amazing job of cutting a neat hole in the shell!
My digital camera is out of juice, but I will post some shots of the finished fan mountings as soon as I can, it's really made a massive difference to the shell.
I realised that I needed to order two types of radiator fan to complete this unit, so I've placed an order directly with Cannon & Co as the ebay store I usually use is down for now. I also ordered some Cannon tank piping details for this project.
I'm in danger of straying outside the catagory of 'cheap build' at this rate, but I reckon it should still be under $100 as the initial cost of the base model was so low.
I've got a second Athearn GP38-2 lurking in the background that will become an NS painted companion unit for this one, so I may start that build soon so both can be primered at the same time.
|
|
|
|
Post by John on Mar 4, 2011 15:27:47 GMT -5
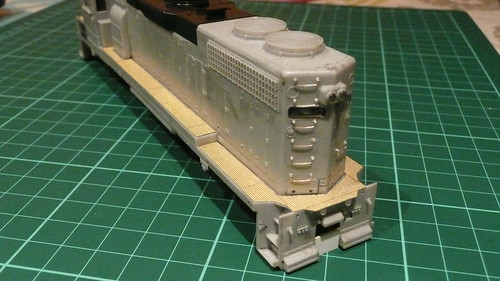
Here are a couple of pictures showing the shell after using the excellent step drill bit. So much easier than trying to slice off the moulded fans.   |
|
|
|
Post by m a y o r 79 on Mar 15, 2011 12:15:57 GMT -5
I've never used a step drill on any Cannon fans I've installed. I just very carefully trim out the hole and do lots of test fitting. Might take a little bit of time but I've always gotten good fits, and once you do a couple you start to get a feel for how much material to remove. Though I'm tempted to try the step-drill idea next time to see how it works.
|
|
|
|
Post by Randy Earle on Mar 15, 2011 12:23:25 GMT -5
I bought one of those reamers you linked to. Good price!
|
|
|
|
Post by John on Mar 15, 2011 13:00:42 GMT -5
The step drill is really fast, only took seconds to make the hole. Much, much quicker than carving it out piece by piece. Definitely a vital purchase. |
|
|
|
Post by John on Apr 25, 2011 11:49:12 GMT -5
Time for an update on progress with this build, its a bank holiday weekend here in the UK, so I managed to get some time to work on 5273, and it's coming along nicely. ;D 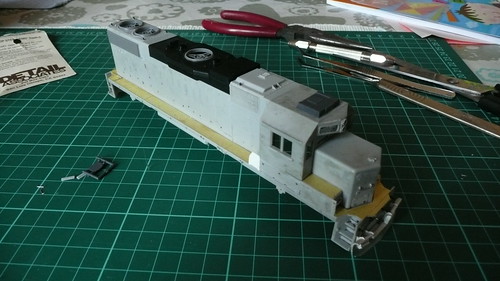 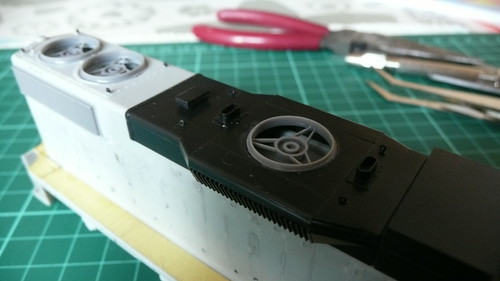 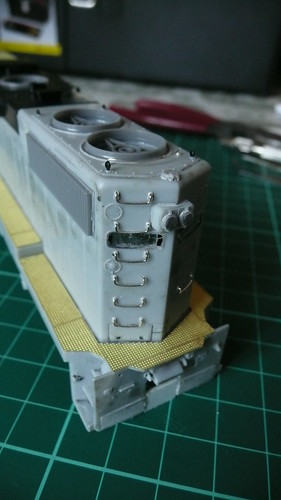 Today I added the plow, lift rings, rear fan grab iron, fans and rear coupler lift bar. Tomorrow should see the final details added to the shell and perhaps even a coat of primer (which will be nervewracking as I haven't touched an airbrush in twenty years). I'm really enjoying bringing this engine back from the edge, and it's been really inspiring to see the work everyone on this forum is doing. |
|
|
|
Post by John on Apr 25, 2011 11:50:30 GMT -5
 Here is a shot of the coupler and chassis mounting blocks I added to get around the broken body mounting lugs. |
|