|
|
Post by John on Apr 26, 2011 10:21:47 GMT -5
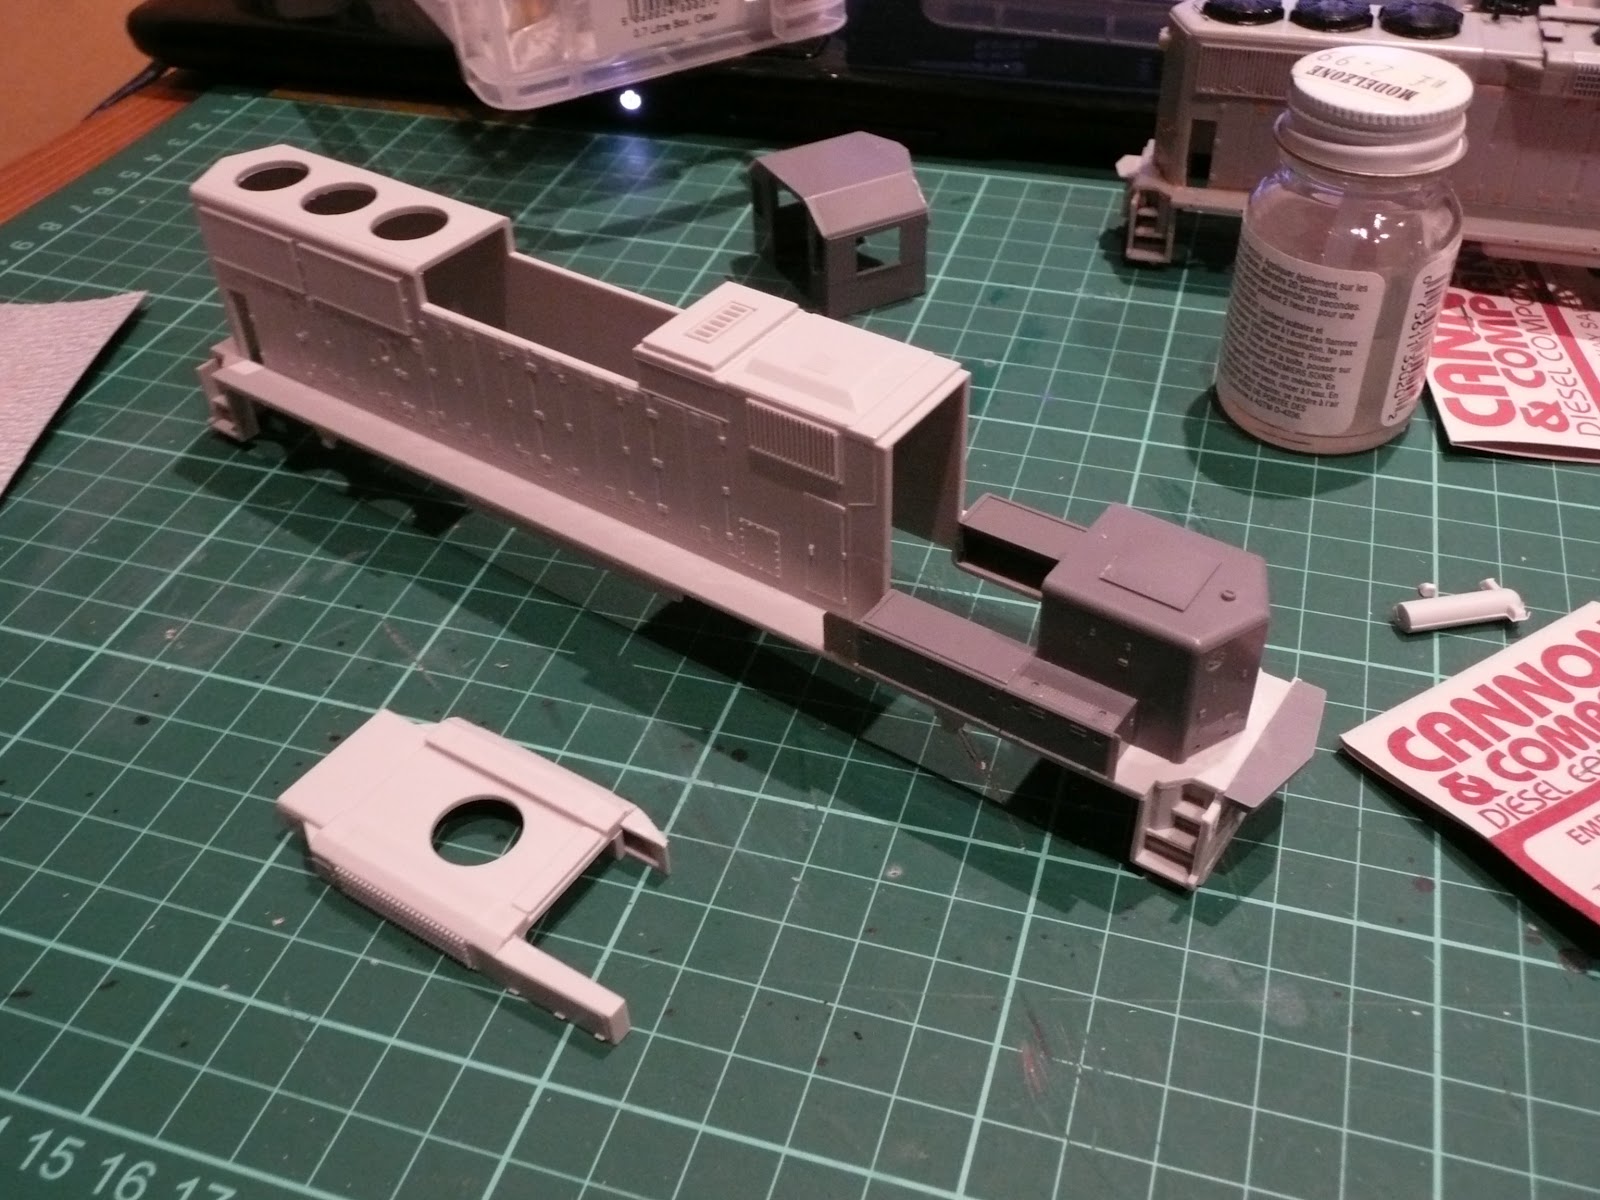
  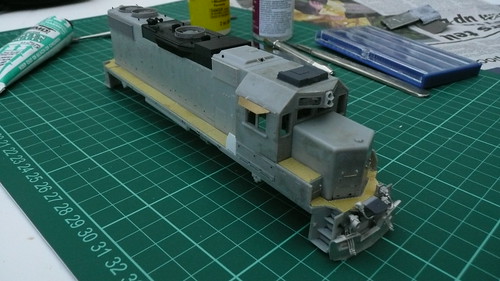 Another couple of hours sorted out the remaining details for the shell, and I now have all the fans in place, the mu hoses, ditch lights and cab sunshade. It's looking pretty good, and I'm pleased with the results, the pictures show it with the original plastic horn, as I had ordered the wrong type when I bought the parts for this build. However as luck would have it I managed to find the correct type of horn on a replacement shell I had bought back when I first started this engine and was planning to bin the original due to the broken mounting lugs.  The next step is to prime the shell and then lay on the Conrail blue. |
|
|
|
Post by John on Apr 26, 2011 11:50:57 GMT -5
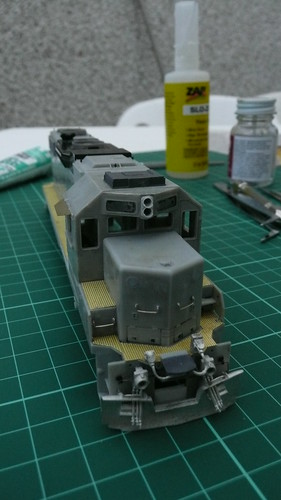
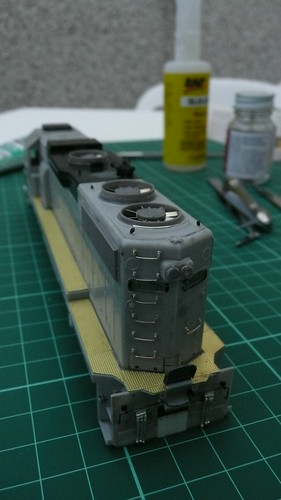
After an afternoon with a makeshift spraybooth, I've got the first coats of paint onto 5273. ;D It's my first time using an airbrush in twenty years, so predictably the first attempt went disasterously wrong... with runs and blobs in the paint. A panic moment for sure, but thanks to the miracle of acrylic paint, it was one which was quickly fixed by washing the primer off before it dried. The second attempt went perfectly and the colour coat went on without a hitch. I'm using Pollyscale Conrail Blue, but it's drying a very different colour from my Athearn SD50 shell and my Atlas 8-40B. This could be a problem later on as I need to partially repaint my SD50 shell... does anyone know of a paint colour that will match the Athearn blue exactly? Here's some shots to show how the painting for 5273 went down. 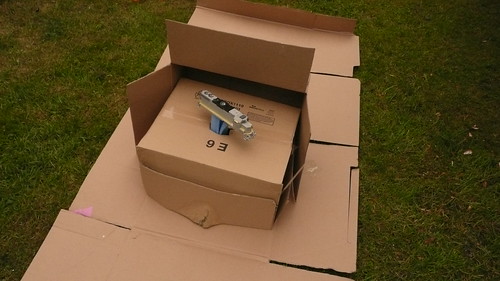 The makeshift cardboard spray booth. 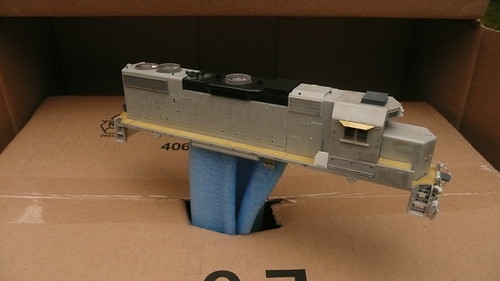 The shell ready for paint. 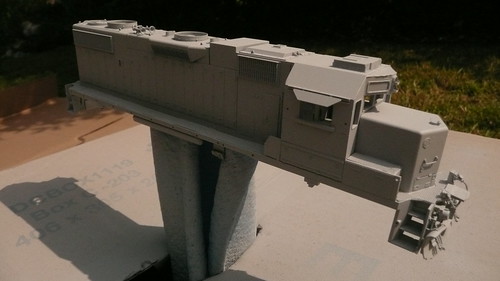 The primed shell. 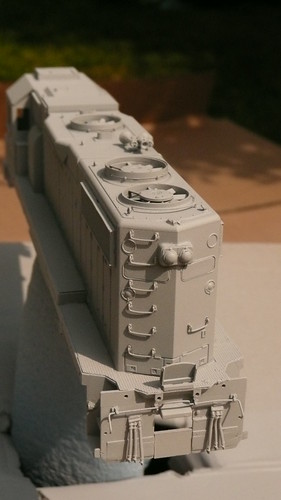 The rear details of the primed shell. 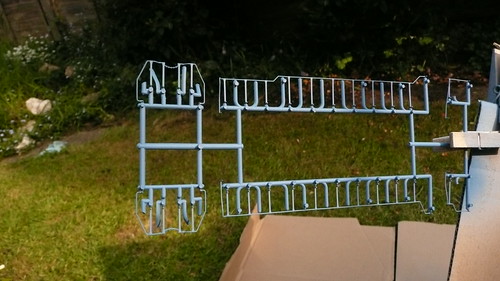 The painted handrails. 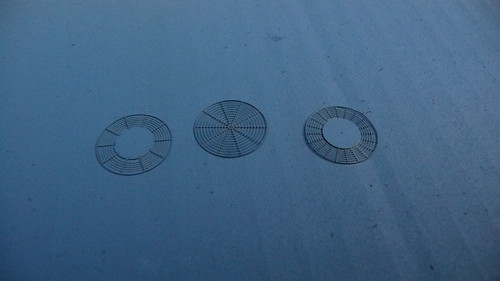 The painted fan grilles.  Rear view of the painted shell. 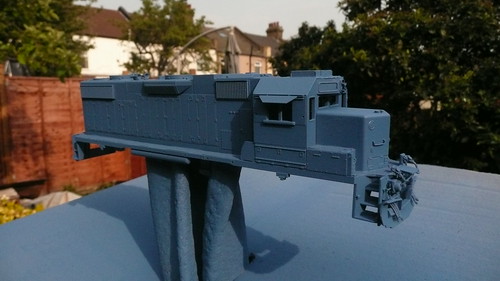 Side view of the painted shell. Next I will be masking and spraying the black parts of the shell, adding the damaged sections of paint on the nose and roof, and then adding the Conrail decals prior to weathering. The chassis is also underway, although I need to get some better reference images to help place the various fuel tank details from the Cannon kit. |
|
|
|
Post by diesel on May 31, 2011 17:17:34 GMT -5
NICE! I knew the repaint/detail option would be best!
|
|
|
|
Post by torikoos on Jun 1, 2011 7:07:55 GMT -5
After an afternoon with a makeshift spraybooth, I've got the first coats of paint onto 5273. ;D It's my first time using an airbrush in twenty years, so predictably the first attempt went disasterously wrong... with runs and blobs in the paint. A panic moment for sure, but thanks to the miracle of acrylic paint, it was one which was quickly fixed by washing the primer off before it dried. The second attempt went perfectly and the colour coat went on without a hitch. I'm using Pollyscale Conrail Blue, but it's drying a very different colour from my Athearn SD50 shell and my Atlas 8-40B. This could be a problem later on as I need to partially repaint my SD50 shell... does anyone know of a paint colour that will match the Athearn blue exactly? Here's some shots to show how the painting for 5273 went down. The makeshift cardboard spray booth. The shell ready for paint. The primed shell. The rear details of the primed shell. The painted handrails. The painted fan grilles. Rear view of the painted shell. Side view of the painted shell. Next I will be masking and spraying the black parts of the shell, adding the damaged sections of paint on the nose and roof, and then adding the Conrail decals prior to weathering. The chassis is also underway, although I need to get some better reference images to help place the various fuel tank details from the Cannon kit. It great to read your thread, I've been struggling with similar issues myself. I also find it difficult as a non US based modeler, to find pictures of everything under the frame for detailing like this. We can't just travel to the nearest rail yard and take a few snaps on a mobilephone or digital camera.. hint hint hint (just seeing if anyone will bite, how about starting a photo database here for every loco type with pictures from every angle, including the under the frame shots? :-) ) Koos |
|
lucas
Trainmaster
Posts: 149
|
Post by lucas on Jun 1, 2011 10:03:45 GMT -5
Incredible how it turn from scrap to a great piece!! So, do you unpaint it with alcohol... here´s my question, do you sumerge the body in alcohol and keep there 5 hours? then remove with a brush?
|
|
|
|
Post by Christopher on Jun 1, 2011 11:53:46 GMT -5
This project is looking great. Nice to see a clunker get recycled into a true model.
Koos, I've been collecting underframe shots for awhile now. PM me next time you need something and I'll see what I've got.
|
|
|
|
Post by John on Aug 4, 2011 2:42:20 GMT -5
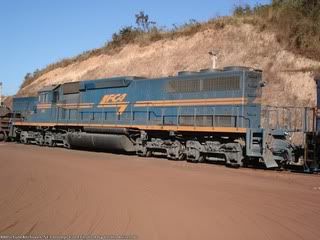
 Time for a long overdue update on my GP38-2 build. It's still ongoing, I started applying the decals at the weekend, and immediately ran into problems with the Microscale Conrail set I bought on ebay... turns out these decals are either too old, or they have got damp at some point, because getting them off the backing paper was almost impossible! The brand new 'patch' number set I bought direct from Microscale worked great, so obviously the lesson there is to always buy new when purchasing decals! I persevered and managed to get the decals applies, but they are pretty torn up and cracked. Luckily the engine is supposed to be an old patched unit, so the state of the decals is not so mush of an issue. For my next engines I will make sure I have new decals for all the placements. The next steps for the engine will be to apply the rest of the decals and then add the weathering and extra detail painting (window seals, door handles etc). I am planning to replicate the peeled paint effect seen in the reference images of the real locomotive, so the nose, walkway and roof will show the underlying Penn Central burgandy paint. The other task is to add the DCC and sound. This will be the second time doing this as I added a new Athearn DCC-Ready motor and board to the chassis and then succesfully installed a Digitrax sound chip... ran the engine around for over an hour back and forth with no issues. But then I have the darn thing go up in smoke the second time I tried to run it a few days later! I have no idea what happened, but I am going to have to get it looked at by some of the guys at the club before I risk installing another chip in it. |
|
|
|
Post by John on Aug 4, 2011 15:37:02 GMT -5
So, do you unpaint it with alcohol... here´s my question, do you sumerge the body in alcohol and keep there 5 hours? then remove with a brush? Yes, I left it in a tub of 99% alcohol for a few hours at a time and scrubbed with an old toothbrush to remove the stubborn areas of paint. It took a long time to get all the paint off, and some of it refused to move at all, especially in the deeper grooves. The alcohol was completely safe on the Athearn shell, but I have heard that this method is not good for Kato and other brands, so take care to test it before committing an expensive locomotive to the bath! |
|
|
|
Post by slowfreight on Aug 5, 2011 0:39:10 GMT -5
I started applying the decals at the weekend, and immediately ran into problems with the Microscale Conrail set I bought on ebay... turns out these decals are either too old, or they have got damp at some point, because getting them off the backing paper was almost impossible! The brand new 'patch' number set I bought direct from Microscale worked great, so obviously the lesson there is to always buy new when purchasing decals! Use the Microscale liquid decal film and brush it liberally over the old decals before use. I've done this on some very old sets that were falling apart and it works wonders. Even brushing it on, the stuff dries clear enough that it doesn't leave discoloration or brush marks. |
|
|
|
Post by John on Aug 5, 2011 8:02:01 GMT -5
That's a great tip thanks, I will give the decal film a try.
|
|
|
|
Post by m a y o r 79 on Aug 6, 2011 7:27:00 GMT -5
Very nice, gives me hope for the old athearn go38-2 ive got.
|
|
|
|
Post by tamaman on Aug 7, 2011 20:01:51 GMT -5
Great tip slowfreight, and nice work on the unit. I can't wait until it is done.
|
|
|
|
Post by bikingmike on Sept 11, 2011 4:20:46 GMT -5
Considering its state at the start of this thread, you've worked wonders with it!
What are you using to paint it? It seems like you've painted the entire "spray booth" at the same time!
Cheers from NZ
Mike
|
|
|
|
Post by tamaman on Sept 12, 2011 9:36:22 GMT -5
Wow great lookin unit!
|
|
EMDX6043
Chairman
Future ex-modeler
Posts: 838
|
Post by EMDX6043 on Sept 13, 2011 6:34:32 GMT -5
That's a good tip with the emery paper-I'll have to try that on the decals I printed at home on the laser printer!
|
|
|
|
Post by John on Oct 8, 2011 3:08:17 GMT -5
I managed to find some time to work on my GP38-2 project this week, adding the rest of the decals and some weathering to the shell. I applied the decals before weathering, thinking that would give a more realistic appearance, but it turned out that I should definitely have done things the other way around. Some of the drybrushing has clung to the white conrail logos and numberboards, so I will need to re-apply some of the decals to fix it. Duh. I was originally hoping to have this engine done in time to take to the NMRA convention in Bournemouth next weekend, just for fun. Unfortunately with work being so busy, it's not looking likely that I will have it finished, although if I find some time this week to work on the remaining details... |
|
|
|
Post by icghogger on Oct 8, 2011 8:07:33 GMT -5
Looks good to me, AJ, post more when you can!
|
|
kcs1967
Chairman
SWLA-SETX PINE SCENTED
Posts: 1,726
|
Post by kcs1967 on Oct 8, 2011 9:10:33 GMT -5
Looks Great!!!
|
|
|
|
Post by John on Oct 8, 2011 16:53:08 GMT -5
Thanks for the encouraging feedback guys. I've spent some more time working on 5273 this evening, and I got the cab glazing in and fitted the handrails. It's looking pretty good now, and all that remains is to redo the numberboard decal, paint the wipers, add the light lenses and replace the missing fan grill. If I get another good solid evening of work on this project then I reckon it will finally be done. |
|
|
|
Post by piedmontpeddler on Oct 11, 2011 13:33:53 GMT -5
ajuk,
That is a great cheap build that you saved from the rubbish! You mentioned the drybrushing process silvered the edges of the decals? Did you dullcoat after the decals and before the weathering?
|
|