|
|
Post by lindsaya99 on Jan 19, 2011 11:50:44 GMT -5
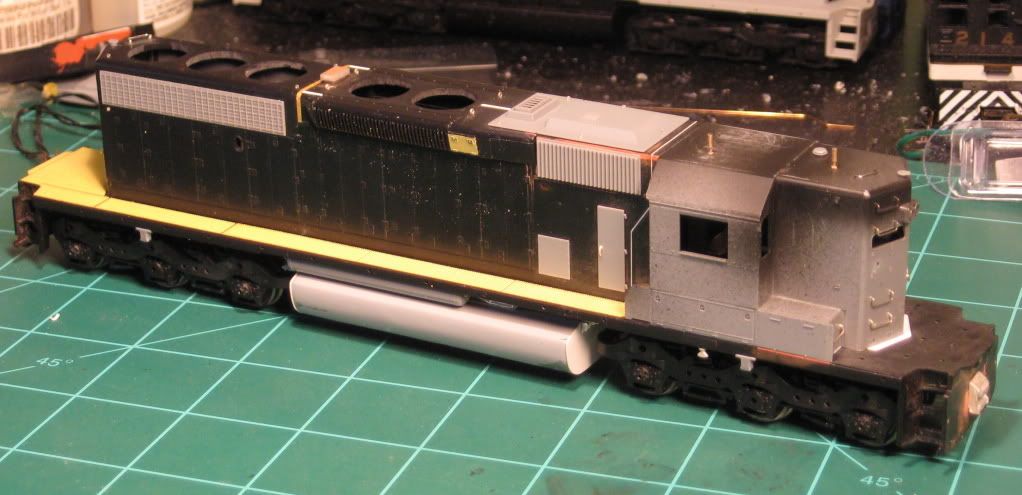
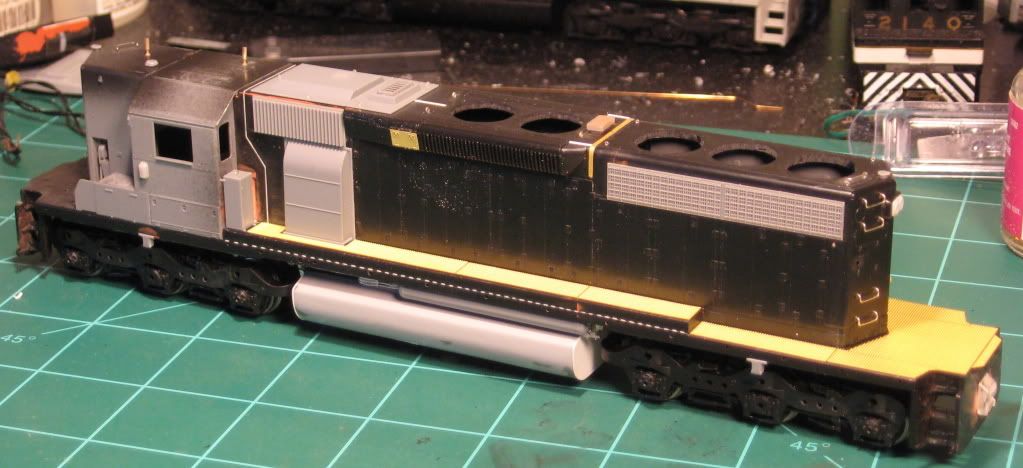
This is my first Norfolk Southern engine. It is also my first "modern" diesel. It is an Athearn blue-box model from one of the later runs. As you can see, I have replaced a lot of the factory details with Cannon parts. I'm still waiting on the tread plate for the short hood end. There are a couple of recently released detail parts that I'm using on this one. First are the scale coupler buffers from Details West. I had to fill gabs on either side with styrene but I'm pretty happy with the look of the pilots now. I'm making good progress with this one so I'll post more pics soon. Charlie   |
|
|
|
Post by Randy Earle on Jan 19, 2011 13:30:23 GMT -5
That's a great build so far, it reminds me of my Norfolk & Western SD40-2 build. It really picks me up to see a high hood build here. I installed the Details West #245 Brake Vent Valves on mine. You can see it hanging down from the frame.   |
|
|
|
Post by hotshot3305 on Jan 19, 2011 13:43:03 GMT -5
Charlie, You've got a great start to the 3219!! Here's a scan of the unit for you to go by if you need it. Bob  |
|
|
|
Post by lindsaya99 on Jan 19, 2011 14:11:20 GMT -5
Randy,
Thanks for the shots. The brake regulators really stand out when they are painted grey. I'll have to get that part when I pick up the rest of the tread plate.
Bob,
That is a great shot of 3219. One of the reasons I chose it was because it went until at least 2004 without side sill stripes. That gives me a little more flexibility with the modeling era. I just added the two of the four Overland horns you got for me. Thanks again.
|
|
|
|
Post by ranchwagon on Jan 19, 2011 14:49:19 GMT -5
Very nice job, I'll be watching for updates!
|
|
|
|
Post by sd45longhoodfoward on Jan 20, 2011 17:29:06 GMT -5
you make my heart happy to see a High hood of Southern heritage she is the original southern belle/great job on her! Lindsay
|
|
|
|
Post by peter on Jan 24, 2011 22:45:56 GMT -5
Charlie, you've done a great job so far. I like the way you filled in the gap and blended the back edge of the dynamic brake section with the front edge of the radiator section. Good luck the rest of the way. Looking forward to seeing pictures when you have it done.
Peter
|
|
|
|
Post by lindsaya99 on Jan 25, 2011 11:21:40 GMT -5
|
|
|
|
Post by diesel on Jan 25, 2011 12:57:02 GMT -5
Nice job on that Charlie. Will you be adding cables ect. under the sill as well? Randy's pic shows the tracion cables in 2 spots.
|
|
|
|
Post by Randy Earle on Jan 25, 2011 13:36:27 GMT -5
I make my rivet strips with thin plastic and a tracing wheel. I use the top one most of the time. It cost about .99 cents.   |
|
Deleted
Deleted Member
Posts: 0
|
Post by Deleted on Jan 25, 2011 14:28:02 GMT -5
It is nice to see something else I have designed that Details West offers now being used. That being the scale coupler pockets. I am glad Paul at Details West wanted that part and I think he did a great job casting it.
Brian
|
|
|
|
Post by lindsaya99 on Jan 26, 2011 15:49:27 GMT -5
Nice job on that Charlie. Will you be adding cables ect. under the sill as well? Randy's pic shows the tracion cables in 2 spots. Thanks. The high angle shots don't show them but I did put traction motor cables on. I used Details West since I applied them straight to the Athearn frame. I have a couple of builds planned where I will use the Railflyer etched brackets and 0.010" solder for cabling. Those frames have been milled so I can use styrene channels for the frame . |
|
Deleted
Deleted Member
Posts: 0
|
Post by Deleted on Jan 26, 2011 15:53:47 GMT -5
Don't use 0.010 solder, use .015 which is almost dead on for the correct diameter.
I like how you did the seam between the cab and clean air room. Did you use the stretched sprue method? Very nicely done.
Brian
|
|
|
|
Post by diesel on Jan 26, 2011 21:00:07 GMT -5
ya I can't wait to use those brackets from RF. I really need to order those as I was gonna try and get by on a couple of current projects with the DW cables, but in areas where the 4x1 sections lie flat they don't look good because there's only detail on the one side. maybe I'll just tilt them so you can only see that.
Also lindsaya, I took a second look and you already had those on there!
|
|
|
|
Post by lindsaya99 on Jan 27, 2011 0:48:35 GMT -5
Don't use 0.010 solder, use .015 which is almost dead on for the correct diameter. I like how you did the seam between the cab and clean air room. Did you use the stretched sprue method? Very nicely done. Brian Thanks Brian. I got the idea from your website. It is 0.010 diameter styrene rod. I have never had much luck with stretching sprues. I used a scribing tool to make the existing seam deeper and then glued in the rod. I went over it a few times with Tamiya liquid cement. The weld beads on the blower duct were done the same way just with smaller lengths of rod. The contrasting colors make it really stand out. I'm hoping that once it is painted, it will blend in more. |
|
|
|
Post by Randy Earle on Jan 28, 2011 13:12:18 GMT -5
I just picked up 3 sets of those Details West coupler pockets. They look so small.
|
|
Deleted
Deleted Member
Posts: 0
|
Post by Deleted on Jan 28, 2011 15:28:11 GMT -5
Yes, they are small. The measurements were taken from a UP GP40 in Phoenix and an SP GP38-2 coupled to it.
The drawback to using scale coupler pockets is you have to find an alternate method of securing the shell to the frame. I do not like floating shells. If I could get through to manufacturers, I have a really nice method for them and I would give it to them for nothing, but nobody will listen. I am just a dumb modeler that does not know anything about the industry or designing models. We are an annoyance to them.
I have given thought to the traction motor cable thing as well and have come up with another idea based on what I have seen in this thread. There is one problem with RF traction motor cable blocks or pillow blocks. It is not Chris's fault because I designed them for him. I take blame for it. The problem is they are not correct. They are very close, but not how the prototype is.
Plastruct makes a 0.015 styrene rod. I was thinking about using it for traction motor cables. It is flexible, easy to work with and will not kink like solder. Just a thought.
I was thinking of making my own traction motor cable blocks. See the incorrectness of the RF blocks is the cables are not bunched together. The cables need to be touching each other. Basically the blocks "gather" the cables together and hold them in place. The way I designed the ones for Chris is they are separated. My apologies.
Brian
|
|
|
|
Post by Randy Earle on Jan 28, 2011 16:21:13 GMT -5
That's why I stick to the DW traction motor cables, plus all my stuff ends up black anyway.
|
|
|
|
Post by lindsaya99 on Mar 10, 2011 9:37:04 GMT -5
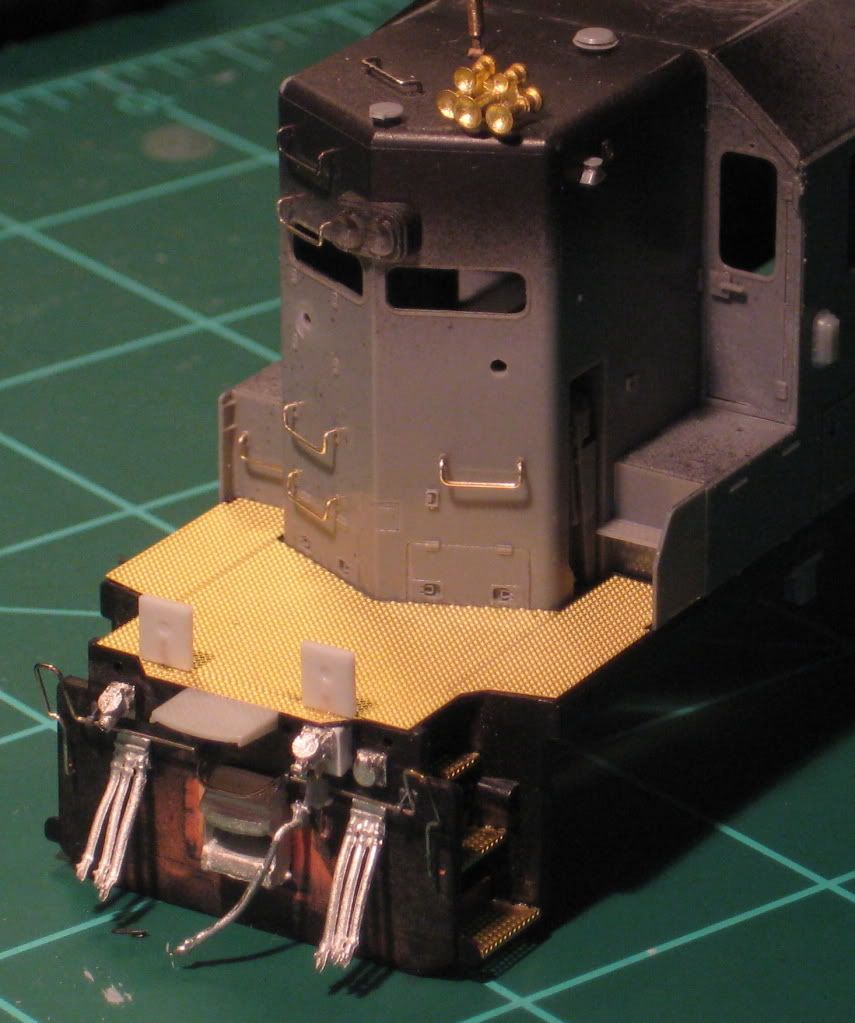
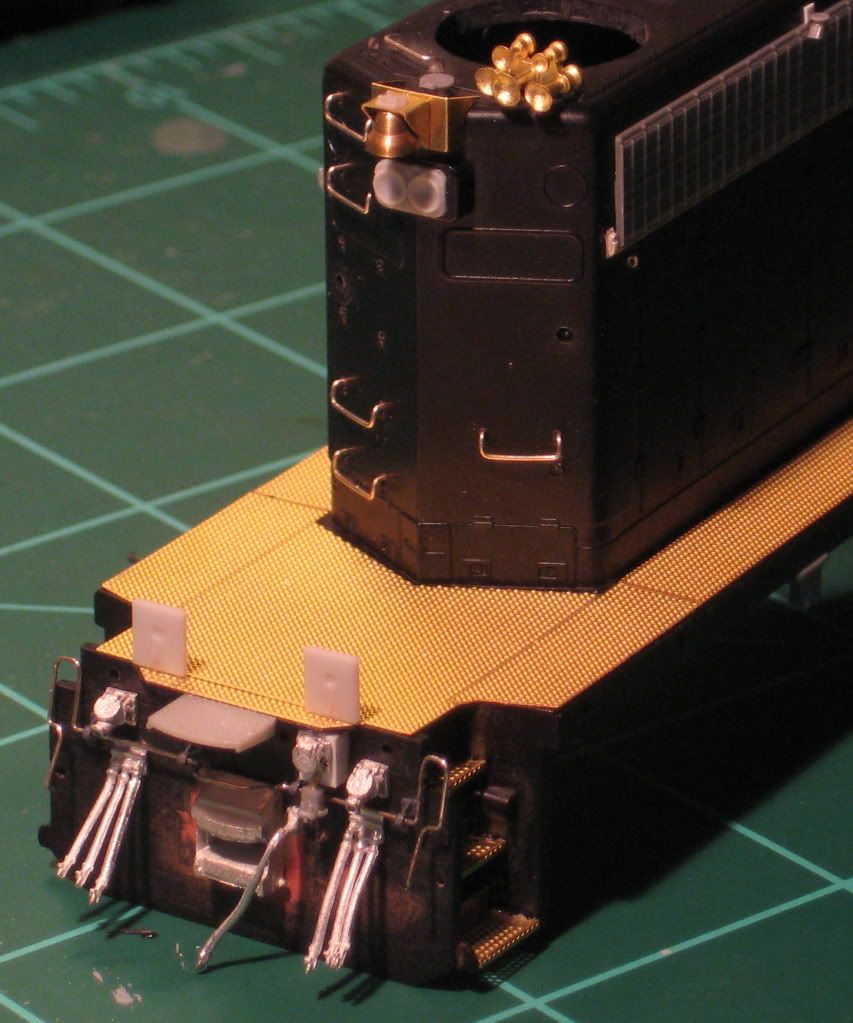
It has been a while since I have posted anything on this build. I was finally able to get some work done on it in the last couple of days. I finished applying the Cannon treadplate and steps and I detailed the front and rear pilots. Here are a couple of photos of my progress. Once I get the fans on I will pretty much be done with detailing the shell. Then I will move on to the trucks and frame. Charlie   |
|
|
|
Post by lindsaya99 on Mar 10, 2011 9:43:18 GMT -5
Sorry Chris,
I forgot to mention the Railflyer bell and sand filler on the long hood end. Both parts look great. I still need to add the air line to the bell.
Charlie
|
|