|
|
Post by danraitz on Aug 19, 2008 19:56:25 GMT -5
a.k.a. my SD30 project. I've always wanted to do one of these imagineered units since first seeing the SD30 drawing in the Sept.'72 RMC. I know that there have been multiple SD30's kit-bashed by others, but I wanted to do one correctly ;D. I thought that if EMD had actually designed an SD30 they would not have put the extra length in the engine compartment (as every kit-bash has done, to the best of my knowledge), but instead they would have put it in the area below the radiators. So, using that drawing in the RMC and the one at paintshop.railfan.net as a guideline I decided to start cutting up a couple of Bachmann GP30's. Here are a couple of shots of my work so far. The first shows the front section. 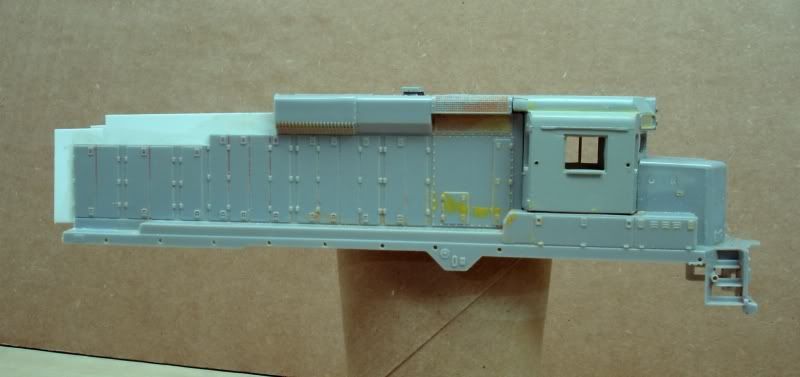 The next shows the rear section. 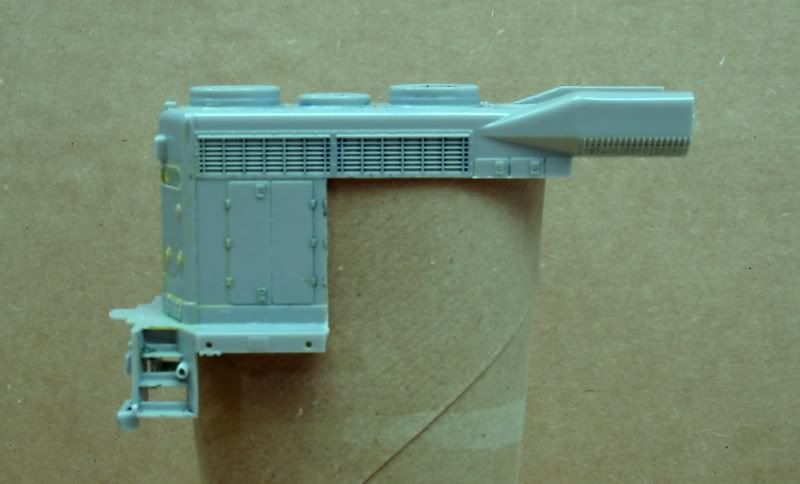 Here are the two sections slid together. 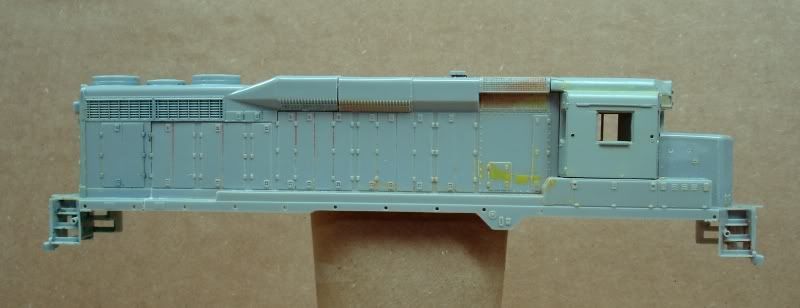 So good do far!  ARRRGH   When I went to set the body on the SD9 chassis I am going to be using I got this  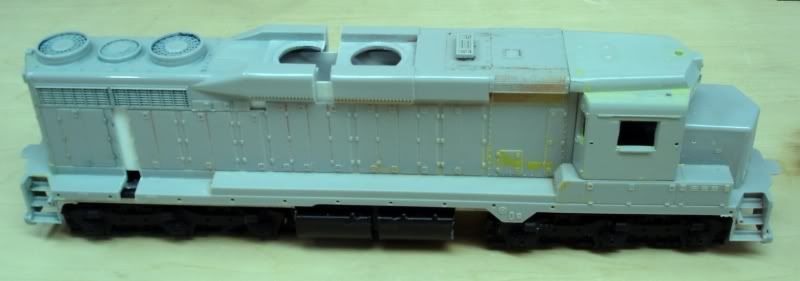 Heres a closer look. 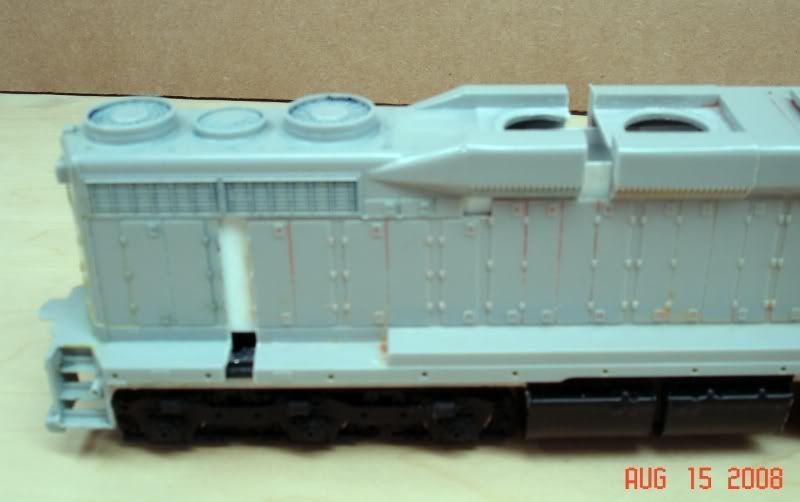 After taking a few minutes to calm down. I took another look at everything. In comparing the model to the drawing, I noticed that although the body was the right length, I did notice that it was too short from pilot face to pilot face. In both drawings the artists have added more room between the end of the body and the pilot faces. So, it looks like I get to get out the razor saw again   . Dan |
|
sarge
Chairman
Posts: 1,132
|
Post by sarge on Aug 19, 2008 20:15:35 GMT -5
Lookin' good Dan, after the F45 I can't wait to see this one progress ;D
|
|
CIOR
Chairman
Posts: 2,046
|
Post by CIOR on Aug 19, 2008 21:39:58 GMT -5
After that I might have taken it out on the chassis and cut that..LOL
Looks good, the GP30 was always a fav of mine, especially in the Chessie paint...(only if it says C&O)!!!!!
|
|
|
|
Post by Randy Earle on Aug 19, 2008 22:34:18 GMT -5
BTTDB...Back to the Drawing Board. I always figured the SD-30 would have shared the same wheelbase and door arrangement with the SD-35, with only the dynamic fairing and cab area being different. So if you start with an SD-35 shell, you would only need to graft the GP-30 parts on with a longer dynamic section to accomodate the extra dynamic fan. The blower duct is different, and the 30 has traction motor ducts on both walkways.  |
|
|
|
Post by danraitz on Aug 20, 2008 7:35:54 GMT -5
Randy,
I would be using a SD35 Chassis and walkways for this project, if I had one ;D.
But being frugal (read cheap!) I'm using whatever items I have on-hand, which means GP30 bodies and an SD9 chassis.
Dan
|
|
sarge
Chairman
Posts: 1,132
|
Post by sarge on Aug 20, 2008 7:51:50 GMT -5
I have an old (Roco) Atlas SD35 shell that is probably a prime candidate for a chop, cut rebuild.
|
|
sarge
Chairman
Posts: 1,132
|
Post by sarge on Aug 20, 2008 7:54:48 GMT -5
I have an old (Roco) Atlas SD35 shell that is probably a prime candidate for a chop, cut rebuild. let me know if you want it. Heck I would trade it for some of your left over F45 parts if you got any  |
|
|
|
Post by danraitz on Aug 20, 2008 22:20:42 GMT -5
Here are some shots of my solution to this problem. I've decided to add the extra length to the end walkways. First I removed the ones from the existing body. 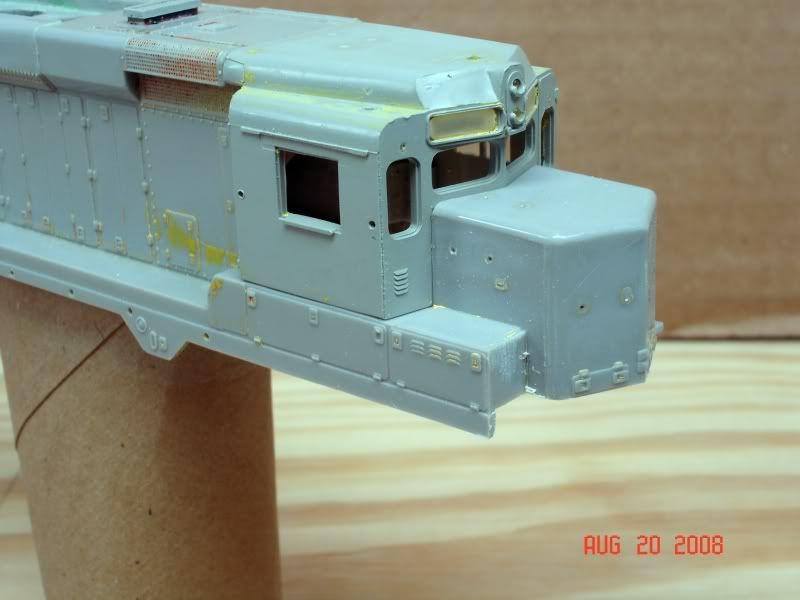 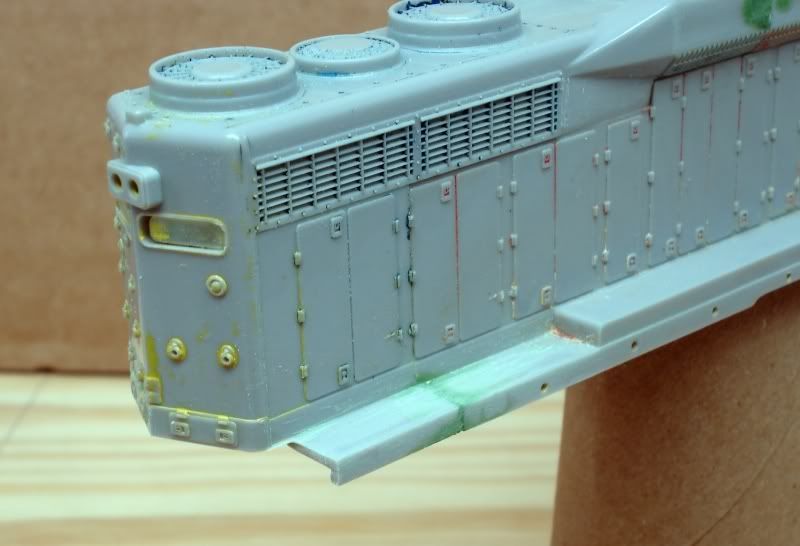 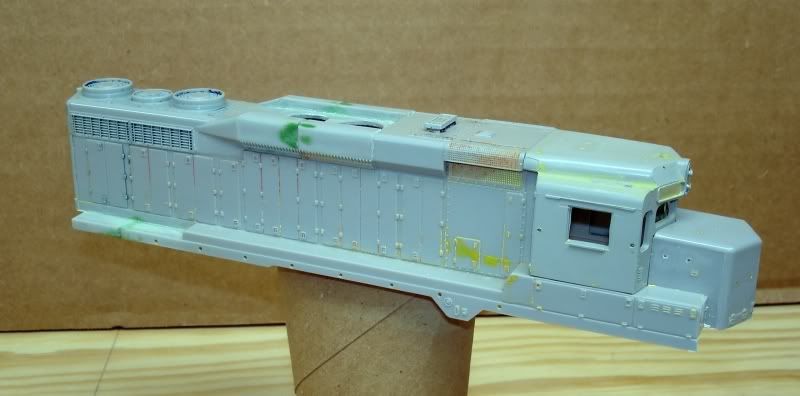 I then took the step wells and pilot faces from the left over shell pieces, and along with some walkway pieces and sheet styrene I built up the replacement pieces. 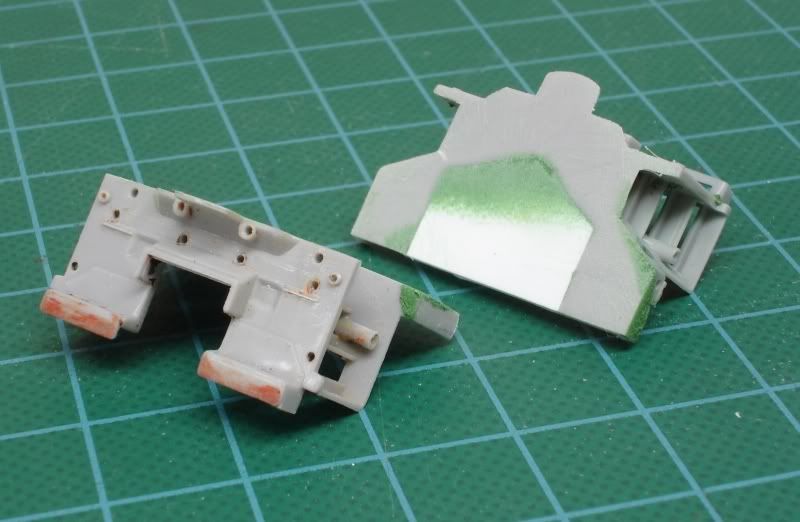 Now, all I have to do is sand the back of them down to where the ends of the body come up to the pencil line. 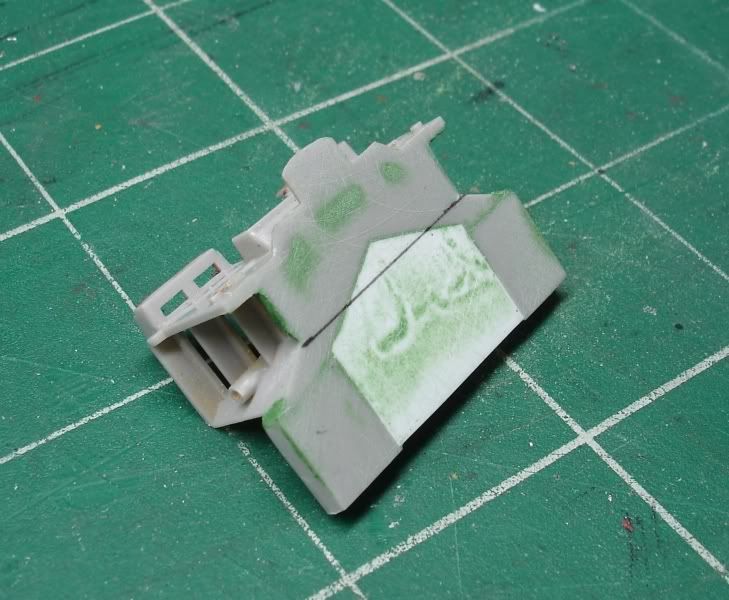 Dan |
|
|
|
Post by Randy Earle on Aug 20, 2008 22:28:04 GMT -5
Looks great, sand that casting line in front of the intake near the rear of the cab, every one of those shells has that.
|
|
|
|
Post by danraitz on Aug 20, 2008 22:33:04 GMT -5
Yeah, I know, I've been seeing a LOT of casting lines on these things  Dan |
|
|
|
Post by Randy Earle on Aug 21, 2008 11:07:58 GMT -5
Keep us udated Dan, looks like it's gonna have porches for sure.
|
|
|
|
Post by danraitz on Aug 24, 2008 10:30:53 GMT -5
Well, I'm finally done with the major surgery. Re-installed the front & rear walkway/pilot sections and removed most of the plastic from the area where the fans will be going. For the radiator fan hatch I'll be using the Plano Model products #186, GP35 Fan Hatch. For the dynamic brake fans I'll be using some sheet styrene. 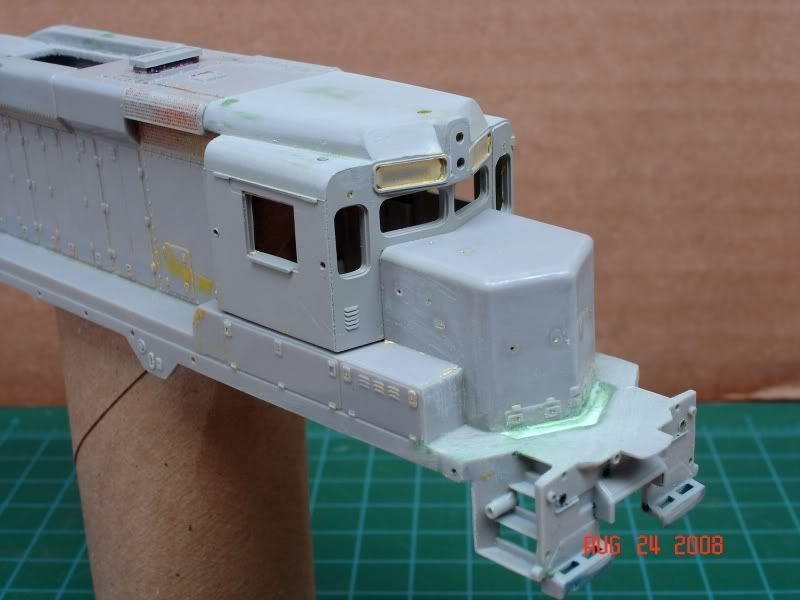 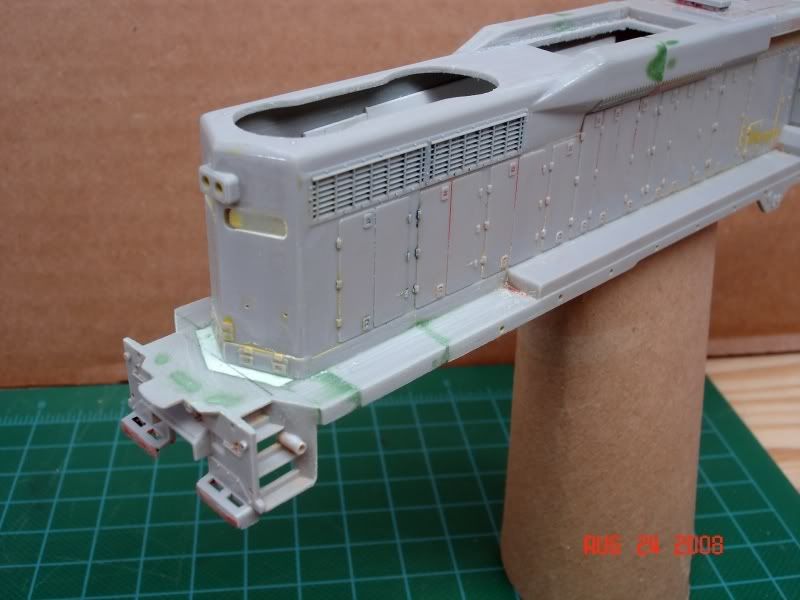 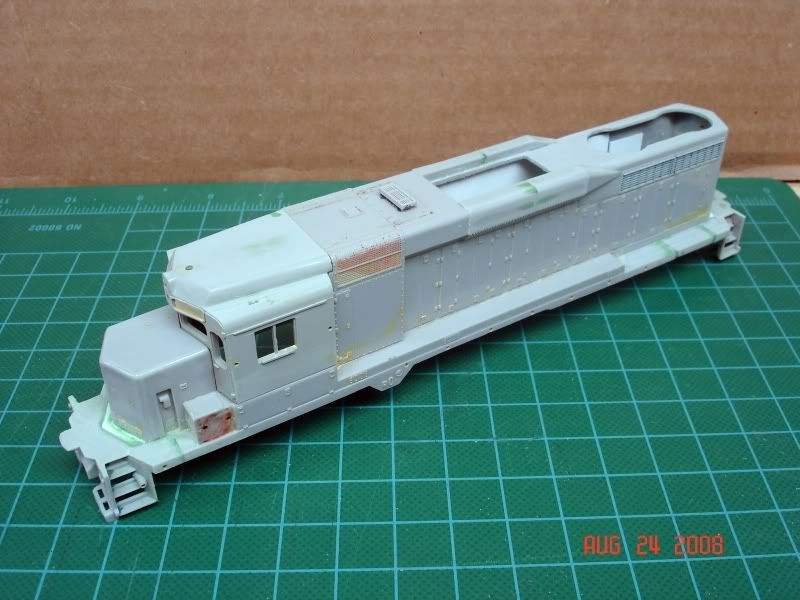 Dan |
|
|
|
Post by Randy Earle on Aug 24, 2008 10:36:07 GMT -5
It's really looking good! I may have to do one of those now! Are you going to replace those cast on drop steps? What other changes do you have in mind? I hope you detail it like the FP you're working on!
|
|
|
|
Post by danraitz on Aug 24, 2008 10:46:00 GMT -5
Randy,
It depends which fans I finally decide on using. I have some LL P2K GP30 fans laying around, but have been looking at the Cannon & Co. fans. I definitely want to rebuild the pilot faces though.
Dan
|
|
|
|
Post by Wayne Snyder on Aug 24, 2008 17:41:18 GMT -5
Hi Dan,
its Wayne, how are you and the wife . Give me a email and let me know whats up
rwsnyder5@earthlink.net
Wayne Snyder
|
|
|
|
Post by danraitz on Sept 4, 2008 21:00:30 GMT -5
Have some more shots showing what I've gotten done so far. If you'll notice that the shell I'm using has no separate step on the rear engineers side of the cab. 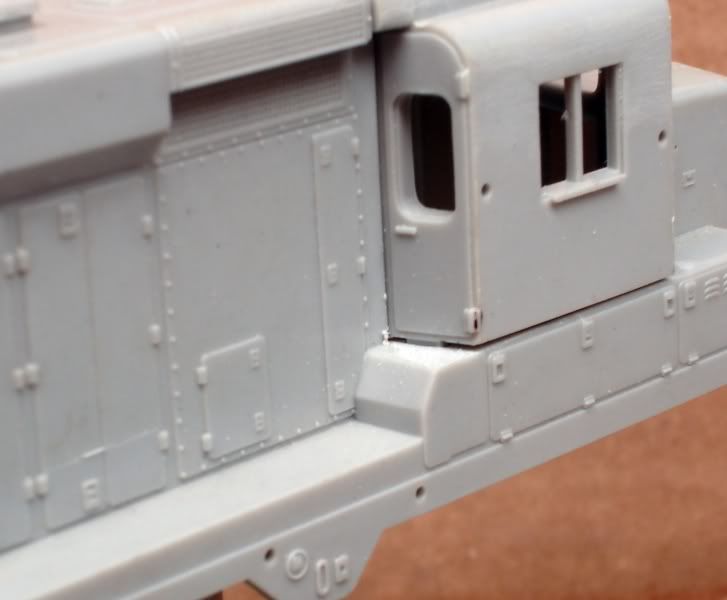 To fix that I cut out that area and then rebuilt it with styrene and a piece of step material that I had in my junk box. 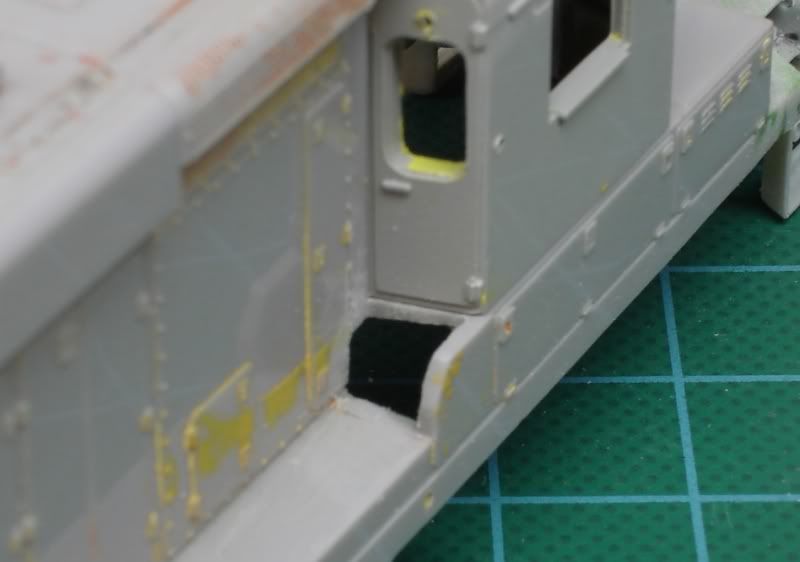 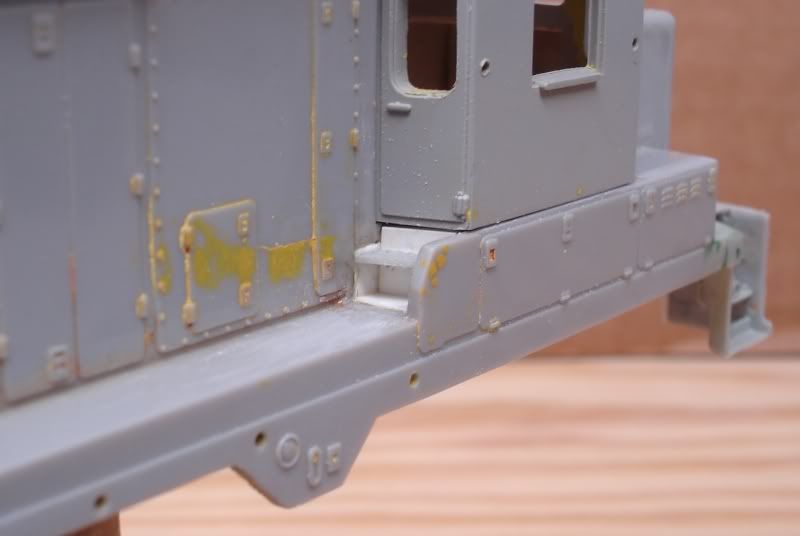 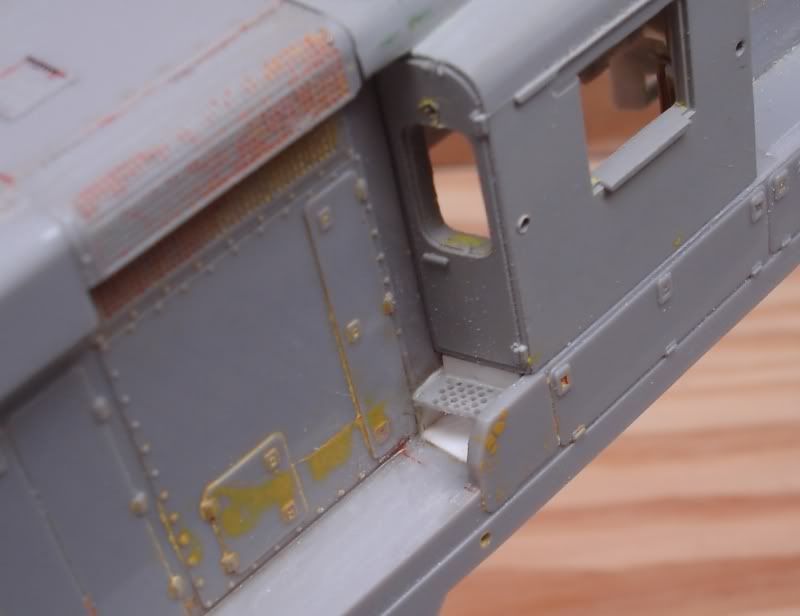 Dan |
|
|
|
Post by danraitz on Sept 4, 2008 21:02:21 GMT -5
I also worked on the pilots, so heres a quick shot showing whats been done so far. (the holes are for the plow) 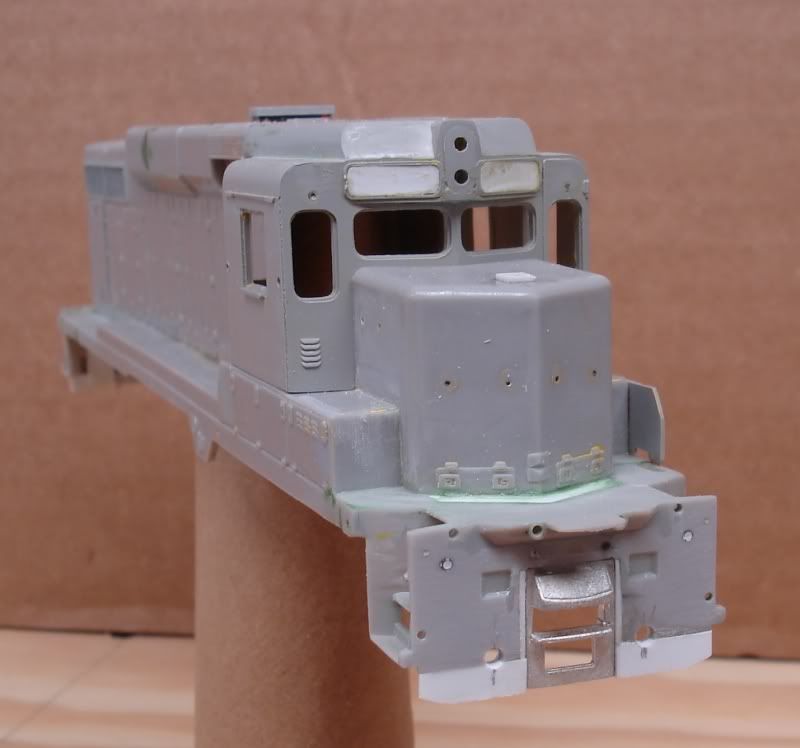 Dan |
|
|
|
Post by danraitz on Sept 4, 2008 21:19:00 GMT -5
As for the fans, I decided to go with the P2K ones that I had in the junk box. Why not the Cannon & Co. fans, you ask? Because I felt that in view of the quality of the body work, i.e. doors, latches, grills and general sharpness, it would have been a waste to put those on this unit.  Now, if I would have been using P2K GP30's to built this loco, then YES I would've definitely been using the Cannon fans. ;D I had planned on using the Plano GP35 fan hatch (#186) for this built. But when I test fit the P2K fans into it, the 36" fan was way too small for the hole in the hatch plate. So, I had no choice but to rebuilt the fan hatch from sheet styrene. Here are a couple of shots showing the hatches in place and the holes for the fans reamed out. 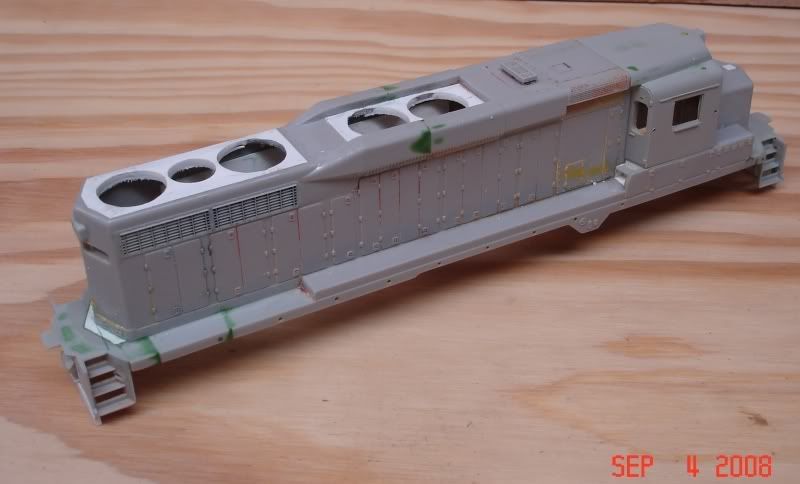 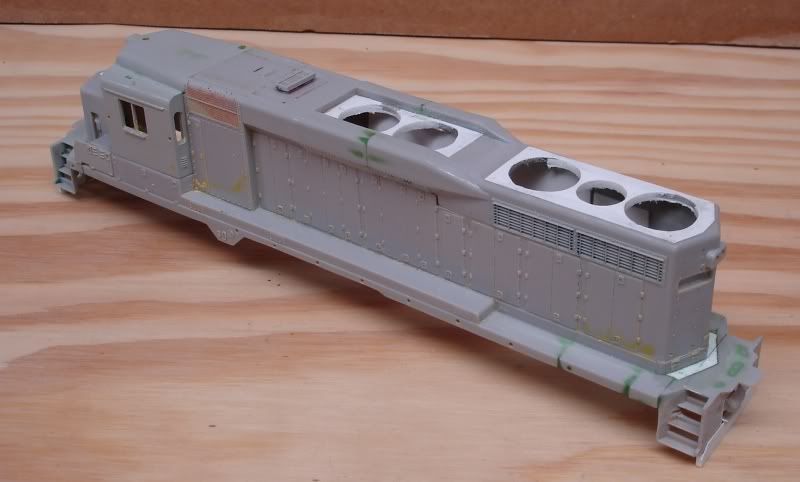 Then here are some showing the fans installed. 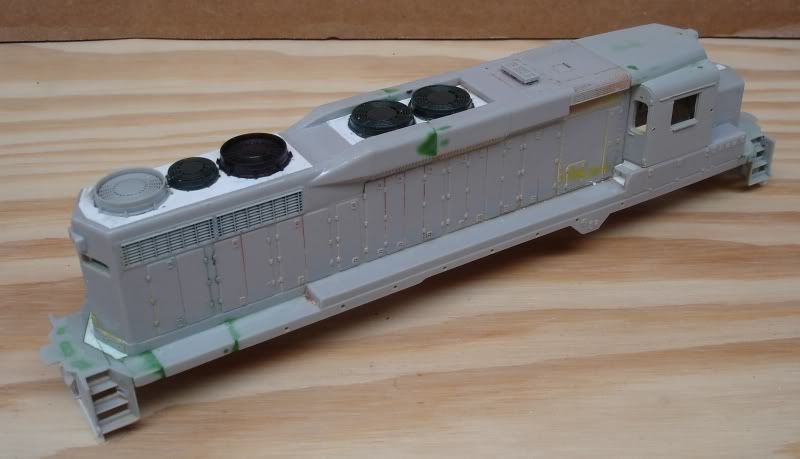 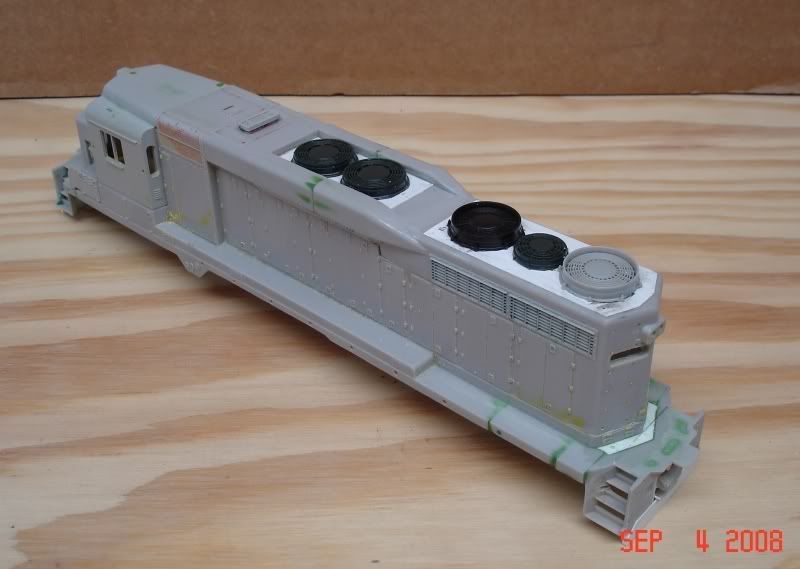 Dan |
|
sarge
Chairman
Posts: 1,132
|
Post by sarge on Sept 4, 2008 21:58:13 GMT -5
That is coming along great  |
|
|
|
Post by danraitz on Sept 17, 2008 8:27:54 GMT -5
|
|