|
|
Post by railfanalex on Jul 13, 2009 16:21:28 GMT -5
Well I finally found some time to do a bit of modeling, thanks to all the bad weather we have been getting. This is the progress I've made on my MLW C424 so far: 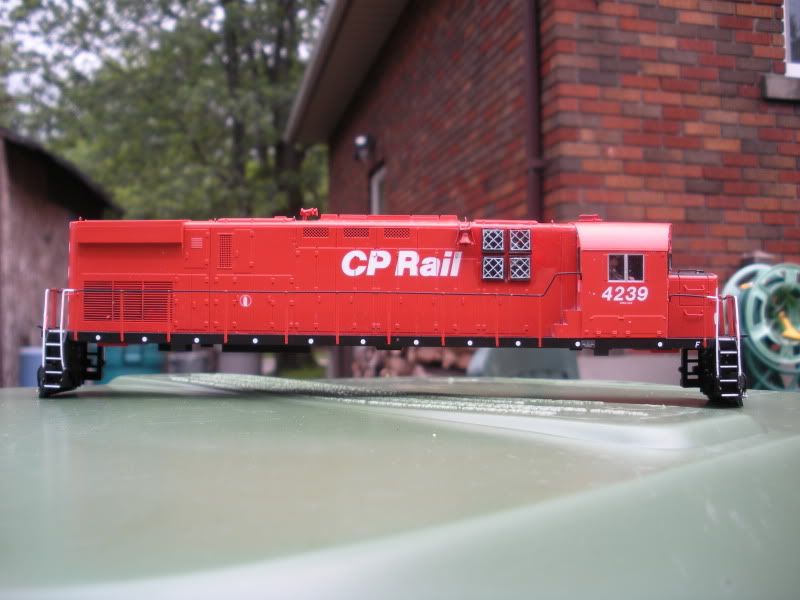 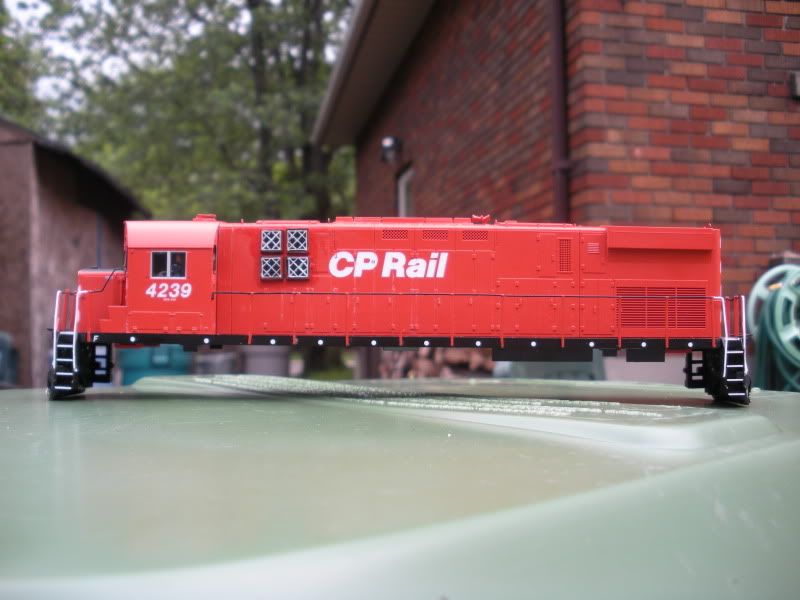  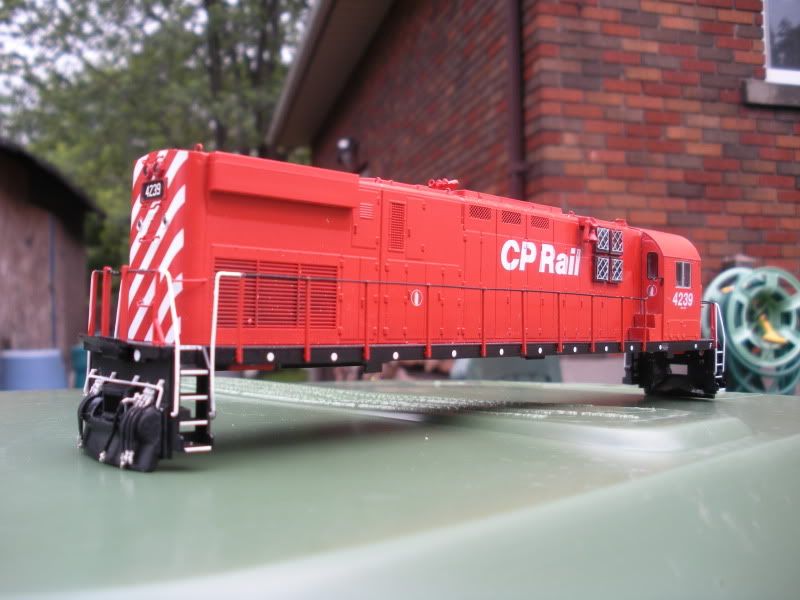 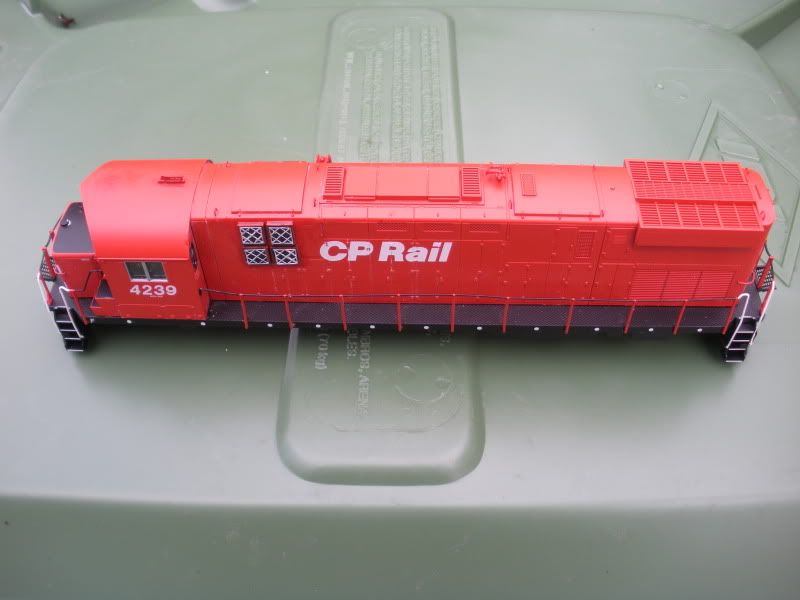 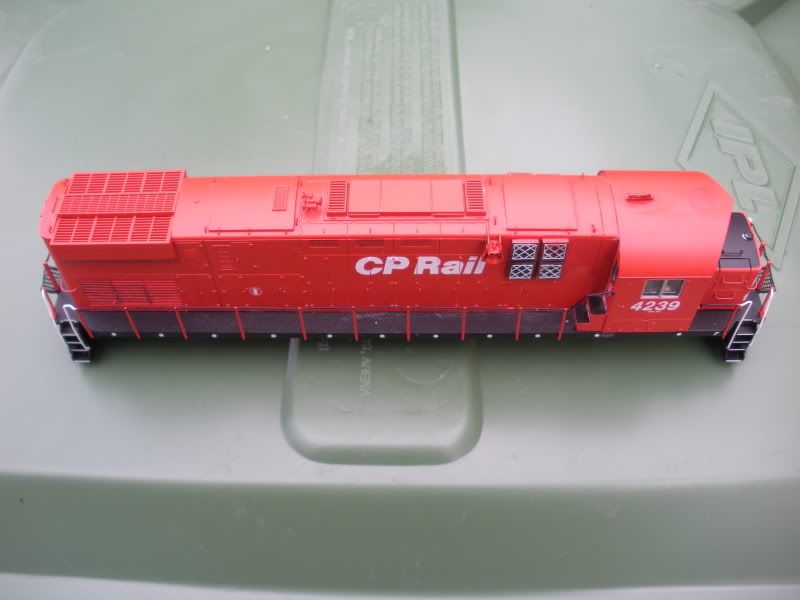 I added various DW, MBE, DA and Railflyer parts. All that’s left is to add the ditch light castings and light them, and maybe change some of the louvers to better represent the CP modifications. A little bit of weathering it’ll be done! The 4 filters on each side are oversize I know, and some are a little crooked. Also I found out the doors on the model are all wrong for the 1990’s. CP must have changed the doors with handles over to the knuckle buster style sometime in the 80’s. I might fix that in the future. For now, the work I have done represents the prototype well. Overall I am happy with this project. It is my first “complete” detailing project, all the others that I have done are still on the shelf, waiting for parts or money… |
|
|
|
Post by icghogger on Jul 13, 2009 16:24:03 GMT -5
Very Nice Work, Alex!
|
|
|
|
Post by antlorch on Jul 13, 2009 18:29:01 GMT -5
I am not a CP or an Alco fan by any means but you have done a really nice job with this one.Some weathering and that would top it off.......Besides the bottom half..........
|
|
|
|
Post by Randy Earle on Jul 13, 2009 19:24:35 GMT -5
Okay, now I gotta clean the droooool off my keyboard. ;D
|
|
|
|
Post by rdg5310 on Jul 13, 2009 20:55:26 GMT -5
That is sweet! I agree with Jay, some weathering will really set it off. I remember those sliding down to Allentown, Pa on the D&H! Lots of shots of those and those monster M636s!
|
|
|
|
Post by railfanalex on Jul 13, 2009 23:03:38 GMT -5
Hey Thanks guys! I didn't think I'd get that much attention on my first attempt!  Stephen, Stan guessed right, I used the Railflyer Air Filter part: railflyermodelprototypes.myshopify.com/products/dp-6900-alco-cpr-c424-air-filtersI used some .40" styrene sheet cut into little squares, then I glued the Railflyer part on them after I painted them separately. I made the backings a little oversize I think, but it doesn't look too bad. __________ Since the weather wasn't so nice this evening, I sat down at the workbench for a few hours and fiddled around with the ditch lights. So first we have a size comparison: That's a Kadee coupler, the ditch light castings w/lenses and of course the LED's.  Here is one of the ditch lights wired up: It isn't my best soldering work, but remember, these things are small and pretty darn difficult to handle!  The two LED's now wired and painted: I paint the metal parts with a few layers of paint to help avoid any shorting in the brass ditch light casting, which could potentially burn the decoder. The inside of the ditch light castings are also painted. 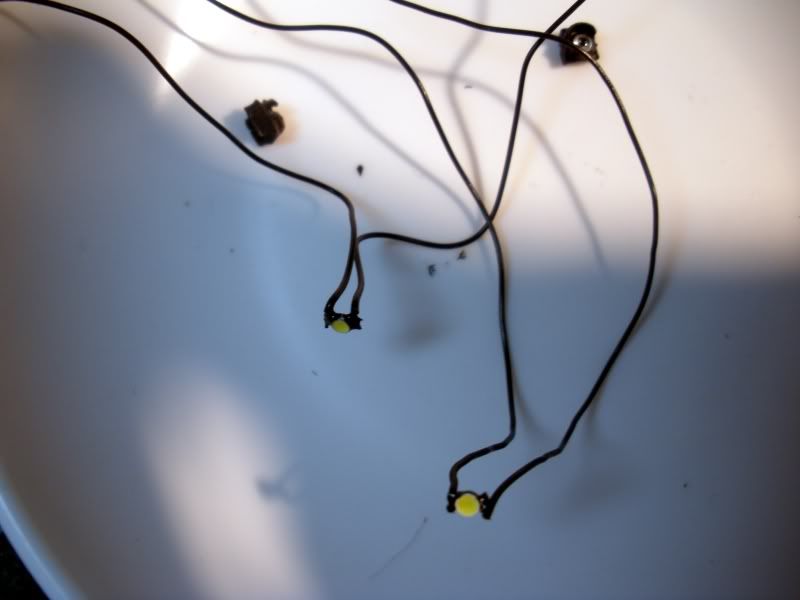 Now they are installed in the castings: 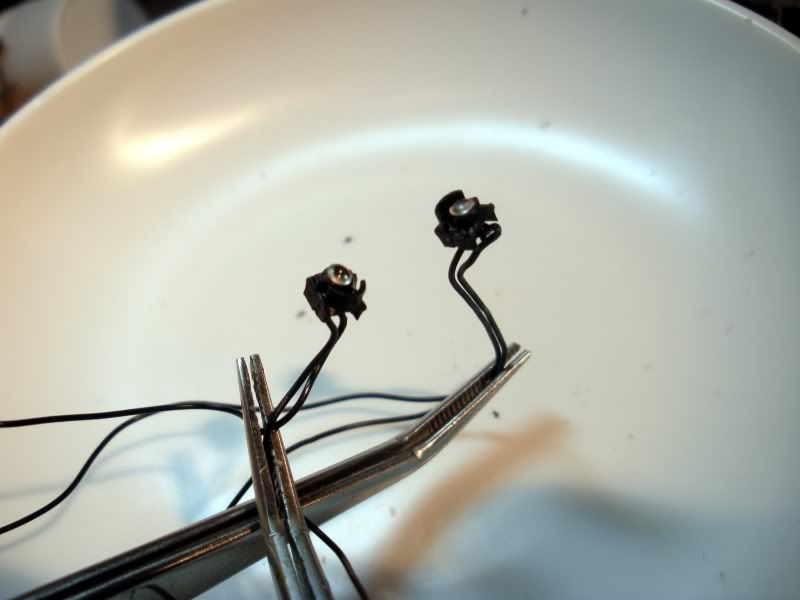 Here's what they look like on the locomotive. It's all assembled again now: 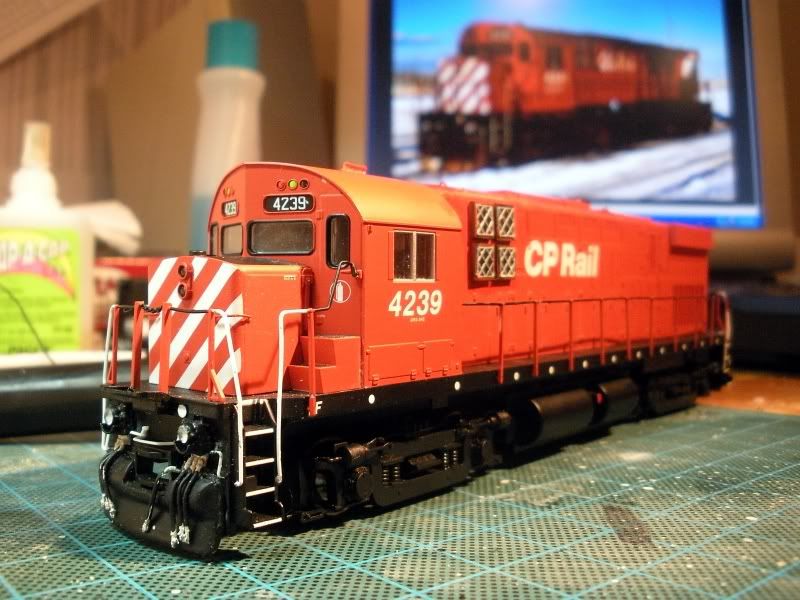 Another: The protoype sits in the background.  Here they are lit: Not the greatest shot, but you get the idea.  What's left to do: Tint the LED's with clear yellow paint so the colour is more like an actual ditch light. Install Cab Deflectors/Mirrors. Install Windshield Wipers. Weather it like the prototype. I broke my last #80 drill bit, so I need to go over to the LHS to get a few before I can drill holes to install the last detail parts. I'll take some better outdoor photos once she's all done. ;D |
|
|
|
Post by railfanalex on Jul 14, 2009 8:49:32 GMT -5
|
|
|
|
Post by RunningExtra on Jul 14, 2009 19:12:24 GMT -5
I will have to agree with Jeff, you have done a superb job on that locomotive!
|
|
|
|
Post by gnsteve on Jul 14, 2009 23:06:58 GMT -5
That's a good looking CP unit. I'd be hard pressed to give it more than a lite dose of weathering.
|
|
|
|
Post by railfanalex on Jul 17, 2009 9:33:13 GMT -5
Thanks guys and merci Miguel! -Alex, dont let few gentleman (suppose modeller) upset you because ahhh this unit do not have this or that, you have done it this way that's it, it is this way and stand up with your idea. I have no intention of getting upset, I use their information to improve my modeling! ;D |
|
|
|
Post by railfanalex on Jul 17, 2009 14:32:20 GMT -5
I think the critiques & suggestions were all made with good intentions. The more we learn the better we get. Come on guys! I knew you all had good intentions and I didn't take any comments the wrong way. One of the reasons I joined this forum is because I want to hear what you guys have to say about my work. There's always room for improvement, and I don't EVER plan on taking your suggestions negatively. How else am I supposed to know how I'm doing? I find it difficult to judge my own work, and, well my parents and sisters would just take a quick peek at it and say "it looks cool", even if it was an Athearn BB without added details! ;D Afterall, we're all here to have fun, it's a hobby! --------- Well in other news I did install the rest of the details, and I've been studying the dirt and grime on CP C424's from photos that past day. I think I'll be ready to weather it tomorrow. I also went and got a few pastel chalk powders for weathering. I'll try them on an old boxcar, and I'll see what the results are. The plan is to use a mix of powders and airbrushing. |
|
|
|
Post by railfanalex on Jul 17, 2009 15:52:41 GMT -5
I browse Rick's site regularly and I am actually reading "Done in a Day" right now!
|
|
Smoke
Chairman
The Ski Train!!!!
Posts: 753
|
Post by Smoke on Jul 17, 2009 16:00:41 GMT -5
-Let's get to positive modelling, on the internet there is a site about weathering....if I'am right the owner is Rick Dividio. Just read an you learn lot's. Also there is a very good book by Pelle K.Soeborg, (Done in a day). -Hope its help. Miguel That forum is definaely one of a king in the weathering world. Its true that if you read it you will gain alot of knowledge but the best way is to post something and get some feedback. You have to be able to take it though, some of the things they say aren't always nice to hear, but is very informative. I think this forum is the same category, great advice is given, and is intended to encourage and help the modeler out. I like this forum because of the way that people act, as in there are never any flame wars. -Andrew |
|
nysw240
Chairman
Modeling the Delaware Valley
Posts: 297
|
Post by nysw240 on Jul 21, 2009 20:48:14 GMT -5
Looks great Alex! ;D Got to start mine . I have the 4220 that Ill run on my D&H trains. what color of red did you use on the new horn and bell ? Cant wait to see it weathered . Thanks Michael Tierney
|
|
|
|
Post by railfanalex on Jul 22, 2009 0:43:46 GMT -5
All done guys!  Let me know what you think: 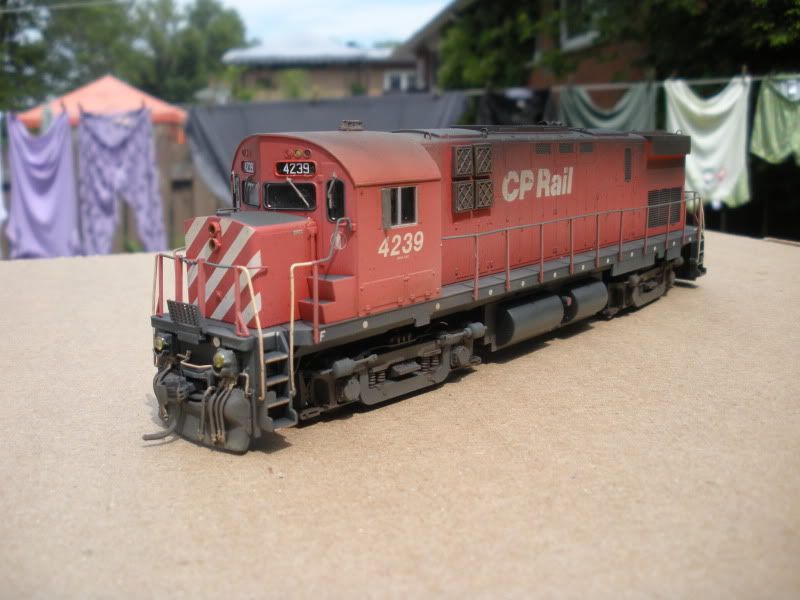  This was my first time weathering a "real" model, I've been practicing on some old Tyco stuff since January! ;D I used a mix of airbrushing, chalk powders and washes. I used dull-cote over everything when I was done. Windows were masked. First I went over grills with several washes of oily black. After that I dusted the entire model with white/gray with the airbrush to fade the paint, then the oily black on the roof, along with rust around the trucks and the cab. I also made a dirt/earth/mud mix and sprayed that on the trucks and frame. I also painted the wheels a dirty, rusty color. Finally I mixed several chalk powders to look like rust, and used that on the trucks, bottom of fuel tank and along the bottom of the frame and walkway. I'm pretty happy with how it turned out, and I can't wait to start the next project!  |
|
|
|
Post by antlorch on Jul 22, 2009 7:00:59 GMT -5
Alex you did a great job.The weathering is not over done and looks "real" .The details are done neat and clean,again you have a done a very nice job.Keep the projects coming.........
|
|
|
|
Post by icghogger on Jul 22, 2009 8:46:18 GMT -5
Practice really paid off, Alex, that is superb! I can smell the hot oil all the way down here!  |
|
|
|
Post by graftonterminalrr on Jul 22, 2009 10:23:29 GMT -5
Oh, wow. That unit looks like it's sitting on a siding in Florenceville, NB in about 1989 or so. Very, very well done.
|
|
|
|
Post by Randy Earle on Jul 22, 2009 11:04:17 GMT -5
Alex, that's a very nice weathering job! Hope the laundry on the line wasn't affected by it. ;D
|
|
c420
Road Foreman
Posts: 75
|
Post by c420 on Jul 22, 2009 17:31:01 GMT -5
Fantastic job.  |
|