|
|
Post by rdg5310 on Mar 13, 2009 12:05:07 GMT -5
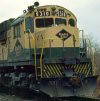
I had originally started a Rail power SD38 for my slug set project. But when Athearn came out with their version I bought one real cheap at evilbay. Because of the way they redid the body, I felt it would make my life a tad easier to go with theirs. I have the pictures here of the mods that I started.  I cut away the old cab and battery boxes in favor of Cannon parts. I had to add styrene strips because of the gaps. The Athearn shell along with the Rail power shell is 1/2 scale ft too long. This will end up adding to the front porch. I was going to make the alterations to the shell to correct the length. But I decided it would be a little nuts considering what I would have to do to the frame just to make it all look right. So I decided to leave it go. I also replaced the non-dynamic hatch with a old Athearn GP38-2 one. It gave me better detail. The Athearn has a nice batten strip on the rear with rivet detail. The filter box also was also better. I cut the hatch down the middle and glued it together. You can see on the picture how I set the body up with addition bracing so I could keep the part straight as I glued it together from underneath. I will post pics of the hatch after it dries thoroughly and I fill and sand the seams. I also had to do mods to the frame so I could use the Cannon cab set up. I will also post those latter. |
|
|
|
Post by Randy Earle on Mar 13, 2009 12:12:46 GMT -5
Excellent Ron!!! More...More!!!! ;D
|
|
Smoke
Chairman
The Ski Train!!!!
Posts: 753
|
Post by Smoke on Mar 13, 2009 14:15:35 GMT -5
Awesome, these are the builds that I enjoy watching!! I can't wait to see more!
|
|
|
|
Post by Randy Earle on Mar 13, 2009 18:53:53 GMT -5
I never even saw those Stan.
|
|
|
|
Post by rdg5310 on Mar 13, 2009 21:36:18 GMT -5
Thanks to everyone. And thanks Stan for that info. As many times as I visited the website, I seamed to have missed that detail. Here's the frame mods picture. As you can see by the rotten picture I took ( that's why I added arrows) you see the milling that had to be done to allow the Cannon setup be added.  I did these mods with a mill and dremal tool. Not the cleanest mods, I didn't feel like setting up the milling machine to do the work and besides it's old and I need to rebuild it or buy a new one. For years when I've done this type of work, I use a Cannon mock up to show me the fit and finish before I try to finish. I progressed as Cannon produced the parts. I started this when the battery boxes and nose came along. I use this setup for all projects that I'm replacing the old cab and nose. This way I can see how true the walkway is and what mods I might need for the frame. When I'm happy with the mods I made, I then build the actual Cannon set up for the project. I know this might sound stupid to some. But there's a method to my madness. For instance, I was having problems getting the cab setup to sit flush to the deck. There was interference by the frame. It ended up popping the bottom front of the nose. So it had to be glued again. I would rather have this setup piece take a little abuse than the part I want to permanently mount to the project. It works for me. More pics coming. |
|
|
|
Post by rdg5310 on Mar 14, 2009 17:54:51 GMT -5
Hey Stan, No offense to anything. I worked at a machine shop for awhile. I bought this 3rd hand 14 yrs ago from a guy who use to make masters for light fixtures and so on. He was closing shop at the time. The X and Y both had some issues then. But that was corrected to the point where the next step is to replace some parts. What the main thing is the motor is shot. I did all the normal cleaning of brushes and armature. It hums and smokes. It's old. It would be cheaper to have the motor rebuilt but the guy I bought it from got it second hand from a machine shop. It served it's purpose, it's been hammered. A friend wants it so I'm selling it to him for a couple of bucks. I'm trying to decide what I want to do at this point. The mini mills are pricey. I just have to decide if I want to part ways with some money. Right now that's tough. The good news is I'm not going to let it stop me. I have more pics on the way for this project.
|
|
|
|
Post by Randy Earle on Mar 14, 2009 18:13:58 GMT -5
But we like to get out our Dremels, scare our Wives, and get all covered with Metal Grindings!  ;D ;D |
|
|
|
Post by rdg5310 on Mar 14, 2009 23:43:09 GMT -5
My wife doesn't like the noise of any of my power toys. That's why I'm a basement dweller. ;D
|
|
|
|
Post by Randy Earle on Mar 14, 2009 23:50:23 GMT -5
My wife doesn't like the noise of any of my power toys. That's why I'm a basement dweller. ;D LOLOLOLOLOLOLOLOL!!!!! ;D BEWARE OF THE DREADED CELLAR DWELLER! |
|
|
|
Post by RunningExtra on Mar 15, 2009 8:48:22 GMT -5
Ron,
Looking foreword to your updates on this one, the SD38 is one of my all time favorite engines
|
|
|
|
Post by rdg5310 on Mar 15, 2009 9:20:03 GMT -5
I have some updates here, I started the pilot detailing. I removed the cast hose brackets, added some angle to the bottom of the step board plate and added styrene to the top of the pilot edges. The top of the pilot at the edge of the deck was narrow by a scale 3/4 of a foot. It now measures a correct 7ft across. I then filed some curving to those edges and the pilot.  I also filled in around the main air line area. This was to large of an opening. I still have to fill and sand this part. I will also fill and relocate the stanchion holes on the pilot. And there's my mock up cab I use for all my re-builds. Updates to the body included scribing the part seam behind the cab and adding the access panel. I also cut the Athearn radiator screens. I removed the plain panel and glued it to the shell. The Cannon radiator screen fits perfectly in the void.  You can also see the Athearn GP38-2 non-dynamic brake section I cut and modified to fit. |
|
|
|
Post by RunningExtra on Mar 15, 2009 9:28:12 GMT -5
Sweeeeeeet  |
|
|
|
Post by Randy Earle on Mar 15, 2009 10:27:49 GMT -5
I used to see these working the hump at Conway. Great work so far.
|
|
|
|
Post by rdg5310 on Mar 15, 2009 19:35:26 GMT -5
Hey Stan, I wasn't offended by your comments. So no need to worry. The mill had issues when I bought it. It's no longer my problem now. I just have to decide if I want to spend some money right now. For me it was not worth the rebuild. To update the SD38 build, I built the Cannon battery boxes, nose and cab today. While they are drying, I continued working on the long hood, filled and sanded the area around the radiator grille section, removed the stock rear headlight and replaced it with a DA one. Did some more work to the pilots. Drilled out the holes for the deck stanchions. I will glue the cab assembly to the body latter this week. I then will start removing the cast steps to replace them with photo etched ones. I'll update the pics when that is complete.  |
|
|
|
Post by rdg5310 on Mar 24, 2009 12:05:20 GMT -5
After beating my head against the wall with the MT6, I continued to make progress with the SD38. I milled a little more from the frame and started the detailing. I also made modifications to the frame to include a set of Atlas trucks. I wanted to make sure that this set will be matched in operation. I will be using a Atlas motor also. My Cannon cab and sub Assemblies are complete and ready for mounting. I still have to add step details, diamond plate the deck and etc,etc. No I didn't take any pics yet.  I will take the frame pics later this week along with the MT6 and post them. |
|
|
|
Post by rdg5310 on Mar 27, 2009 12:27:44 GMT -5
Here are the some pics of the added Cannon parts. I still have to do the steps, add the Cannon walkways and air tanks. When that's done I will finish the pilot and body details. Then add the handrails. My holdup is that I have parts on back order. I will take pics before painting.   So I'll be taking a break from the body to finish the frame. I hope to have that done over the weekend and I will post those pics and explain what I did to the frame. |
|
|
|
Post by RunningExtra on Mar 27, 2009 16:46:22 GMT -5
Looking good Ron |
|
|
|
Post by Randy Earle on Mar 27, 2009 21:43:23 GMT -5
I love it when a plan goes together, looks good Ron.
|
|
Smoke
Chairman
The Ski Train!!!!
Posts: 753
|
Post by Smoke on Mar 30, 2009 0:06:05 GMT -5
Keep up the good wrk and keep showing us the good pics. I have a SD38 and I'll be detailing it once I get the time.
One question, did the grilles on the rear of the long hood come off, or did you take them off, and recess the area?
Thanks!
-Andrew
|
|
|
|
Post by icghogger on Mar 30, 2009 9:52:57 GMT -5
Excellent Work, Ron!
|
|


 ;D ;D
;D ;D


 I will take the frame pics later this week along with the MT6 and post them.
