|
|
Post by lindsaya99 on Aug 25, 2010 11:29:58 GMT -5
I bought this little gem on ebay for $18. Obviously this engine has been through a lot. Most of the detail parts are either damaged or missing. The handrails are a complete loss. The footboards and half of the grilles are gone and there is a large crack in the shell. I haven't checked the drive yet but I plan on replacing the gears and motor anyway. I have so work to do. Eventually, it will emerge from the shop as Central of Georgia #171 in tuxedo paint. www.rr-fallenflags.org/sout/cg171.jpg 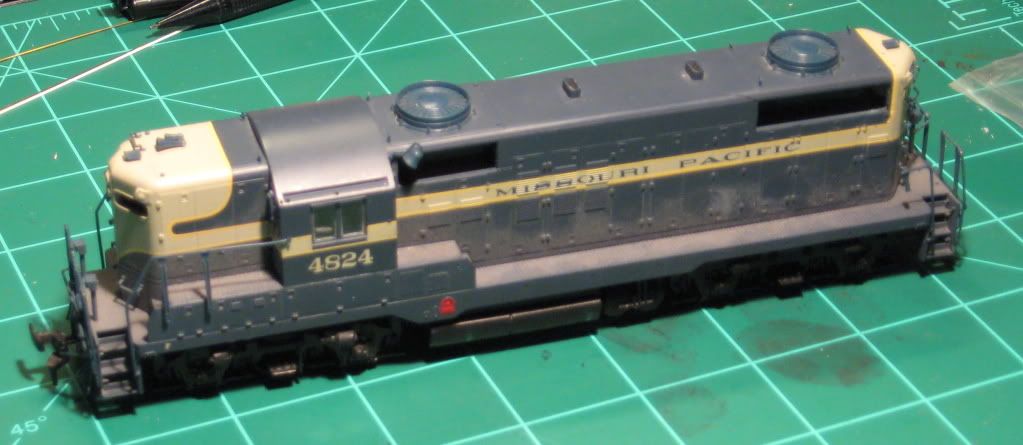 |
|
|
|
Post by icghogger on Aug 25, 2010 11:45:32 GMT -5
This will be an interesting project to follow. Please keep us posted with photos of your progress.
|
|
|
|
Post by CP_8530 on Aug 25, 2010 23:21:49 GMT -5
What a wreck! Those early P2K geeps not super-fine-scale like some of today's offerings, but they're still quite good and rugged. Never had a problem with the motor on one (except a unit that had one of the armature windings come loose and short against the magnets, but I fixed that...).
May I suggest ripping out the directional lighting diode circuit, as well as short shank Kadee #23's if you're keeping the stock coupler boxes? Those things have a hot frame so sticking some metal 5's or 58's on her might short out on other units (unless you use the Kadee plastic coupler boxes), and IMHO the standard shank seems to stick out too much in the stock boxes.
|
|
kcs1967
Chairman
SWLA-SETX PINE SCENTED
Posts: 1,726
|
Post by kcs1967 on Aug 26, 2010 2:52:37 GMT -5
lots of potential, the horn is a bit odd isn't it?
|
|
|
|
Post by Randy Earle on Aug 26, 2010 12:17:41 GMT -5
I decided to get my GP-18 out and do a little work to it also. My version is the P2K GP-18 with the GP-20 type high fans. I replaced them with the proper round top fans from the Atlas SD-24.
|
|
|
|
Post by graftonterminalrr on Aug 26, 2010 12:54:13 GMT -5
Lots of potential there! Older P2K geeps that haven't been taken care of are prime candidates for the paint stripper.
My advice:
The Atlas SD24 cab is a drop-in replacement for the Proto cab. You lose the opening doors, but you gain a correct roof profile.
The Atlas GP7 grabirons fit in the pre-drilled P2K grab holes. P2K drilled the holes kinda weird in that they are angled, as opposed to straight through, and so did Atlas on their GP7s. For this reason, if you want to use DA grabs, you have to re-drill the holes, but Atlas GP7 grabs will work well.
If you need GP18 grilles, let me know as I have a bundle. Yours free. I converted a bunch into GP9s with the Smokey Valley conversion grilles.
|
|
|
|
Post by lindsaya99 on Aug 26, 2010 18:16:29 GMT -5
After the pictures were taken I disassembled the "victim" and give it a nice bath in alcohol. Life-like must have used a different paint formula for their earlier products. Usually, Proto paint comes off in sheets but this paint job just dissolved. Anyway, once it was cleaned up I got to work on the big crack in the shell. It extended from the radiator cut out across about one third of the roof. Luckily, the affected area doesn't have any detail. Just a smooth area of the roof so its turning out to be an easy fix. A couple of drops of CA on the inside and once that dried, some liquid plastic cement on the outside. I still need to add some putty and sand it down but so far it is looking pretty good.
The rest of the body work is proceeding well. I've already removed the molded on headlight and class light detail. I'll replace those with Detail Associates parts drilled out for clear lenses. I'm also going to replace the exhaust stacks with DA parts. The shell had quite a few mold parting lines that needed to be dressed up. I have taken care of those using various sanding sticks. I'll post a pic later.
|
|
|
|
Post by lindsaya99 on Aug 26, 2010 19:58:22 GMT -5
Here is a photo of today's progress. I raided my stash of Atlas SD24 parts for a cab and two fans. Nothing has been glued together yet. Just wanted to see how it all comes together. I still have more body work to do before I start adding details. 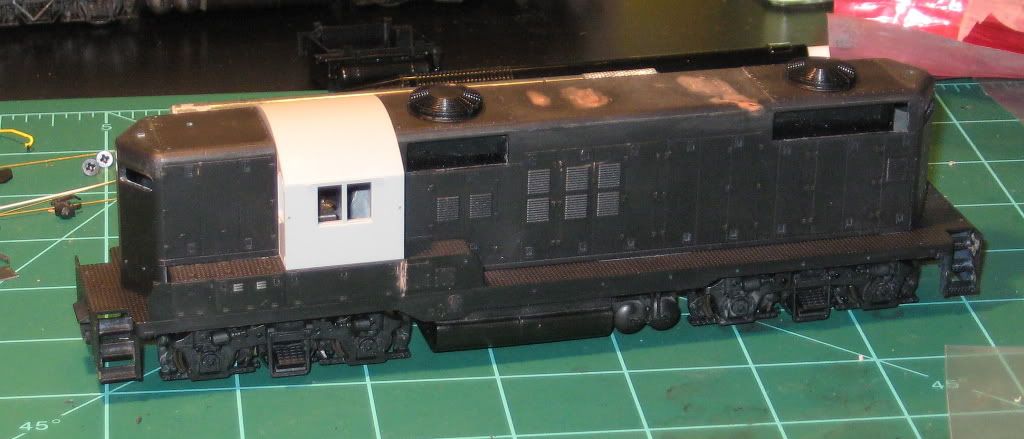 |
|
kcs1967
Chairman
SWLA-SETX PINE SCENTED
Posts: 1,726
|
Post by kcs1967 on Aug 26, 2010 20:14:55 GMT -5
Wowza!!!!!! Great progress!!!!!!!
|
|
|
|
Post by icghogger on Aug 27, 2010 8:53:03 GMT -5
Excellent start. Lindsay, those fans really make a difference!! Also, the cab looks good, did you have to do much work to make it fit?
|
|
|
|
Post by lindsaya99 on Aug 27, 2010 10:40:58 GMT -5
No, the cab was a pretty easy mod. The Life Like shell has channels that the original cab slides down into place on. The Atlas shell has a similar type set up but the rooflines are different between the SD24 and GP18. To get it to fit I removed the top part of the channel that runs along the roof of the short and long hood. This allowed the Atlas cab to slide down in place. I didn't need to modify the cab other than removing the small tabs at the base. Once I did that it was almost a perfect fit. I say almost because the Atlas cab is about 0.020" longer than the Proto cab. To fix that I took about that much off the front of the mounting tabs at the base of the short hood. That causes the hood to slide forward about 0.020". This leaves a small gap between the short hood and the front of that battery boxes but that can be filled with styrene. If I get to work on it today I'm planning to fill all the grab iron and lift ring holes with styrene rod. I'll drill them out for metal parts later. Also I'll try to work on the roof a bit more. There are some small scratches I need to fill with Mr. Surfacer and then wet sand. Once that is done I'll start working on the walkway and pilots.
|
|
|
|
Post by lindsaya99 on Sept 1, 2010 14:55:02 GMT -5
Here is a photo after today's progress. Most of detailing is done on the cab and hood. The cab didn't require much work. I used the Details West etched sunshades and tracks. There were really easy to put on thanks to the drilling template on the fret. The only other modification was replacing the cast on door handles. They are etched metal ones from a Highliners kit. Cast brass ones would probably be better but I have a ton of the etched ones in my stash. The long and short hoods took a bit more work. I modified the cut outs for the radiator grilles so they will now sit flush with the sides of the hood. Once that was done the rest was a matter of adding the various detail parts. The Sand filler hatches are from Atlas. Everything else is either Details West or Detail Associates. Charlie Lindsay 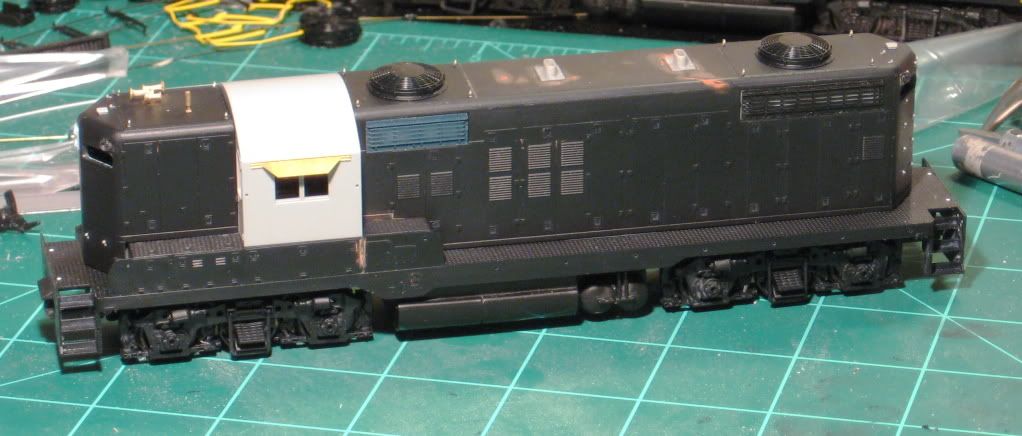 |
|
|
|
Post by Randy Earle on Sept 1, 2010 15:14:28 GMT -5
That is a very nice looking unit.
|
|
|
|
Post by icghogger on Sept 1, 2010 15:34:59 GMT -5
Charlie, that rescue job is coming together nicely! How much do you think you will have in it when complete?
|
|
|
|
Post by atsf90 on Sept 1, 2010 16:21:37 GMT -5
That is looking great. Can't wait to see some paint on it.
|
|
CIOR
Chairman
Posts: 2,046
|
Post by CIOR on Sept 1, 2010 19:28:48 GMT -5
Gotta love those types! Dip and all is well with the world.
I loved the early first generation of P2K offerings, these made a great engine for the time!
|
|
|
|
Post by lindsaya99 on Sept 1, 2010 21:22:50 GMT -5
This one is turning out to be like a good book. I'm having trouble putting it down. Back to reality tomorrow so it may be a few days before I get back to this build. Tonight I got the shell components glued back together. Since the Atlas cab is a bit longer than the original Proto cab, I had to move the short hood forward about 0.020". The grab irons are in as well as the radiator grilles. I glued those in with 50/50 Barge and MEK. That should keep them from popping out. The last of the detail parts went on the roof. A Details West bell and Handcock air whistle. I even added the air line to the bell with 0.006" brass wire. Next up are the pilots, fuel and air tanks, and the trucks. The Central of Georgia ordered their GP18s with smaller fuel tanks so I'm going to have to do some frame modifications. I'll post more photos when that is done. Out.
Charlie Lindsay
|
|
|
|
Post by lindsaya99 on Sept 1, 2010 21:29:25 GMT -5
Charlie, that rescue job is coming together nicely! How much do you think you will have in it when complete? I'm probably have between $30 to $40 in this project including the purchase price of the engine. The only other details I need to purchase are handrail stanchions. I'm not sure how much money I'll need to invest to get the drive into shape. I have some can motors on hand but I'll need to buy the decoder. My guess is that once it is complete, it will have cost me around $80. |
|
kcs1967
Chairman
SWLA-SETX PINE SCENTED
Posts: 1,726
|
Post by kcs1967 on Sept 1, 2010 22:34:01 GMT -5
Charlie
Great job, what 3, maybe 4 days and you'll be decalling, incredible progress!!!
|
|
|
|
Post by lindsaya99 on Sept 6, 2010 19:24:12 GMT -5
I started working on the handrails. The stanchions are Precision Scale with 0.015" phosphor bronze wire. I ran out of stanchions so I have ordered some more for the ends. That will pretty much wrap up the detailing on the shell. The underframe still needs a lot of work but I think I can have it done by week's end. So far I have modified the fuel tank and cleaned up the air reserviors. Central of Georgia's GP18s had smaller fuel tanks than the Proto model. I used a hacksaw to cut a section out of the frame between the fuel and air tanks. Then I shortened an extra fuel tank from a Proto 2000 GP30. The profile of the tank looked about right, I just had to cut it to the correct length. That is about a far as I have gotten. Next I will need to add plumbing to the air tanks and detail the truck sideframes. I'll post another pick once all that is done. 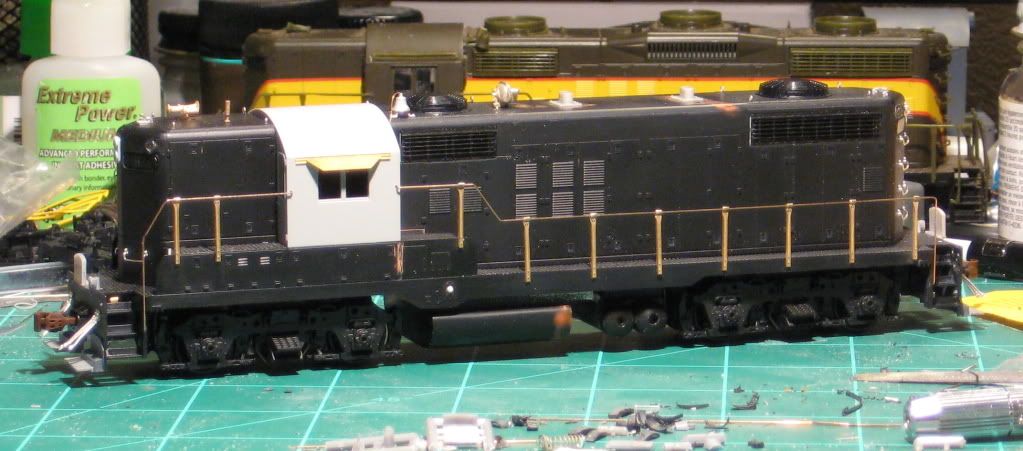 |
|