artur
Chairman
Posts: 580
|
Post by artur on Nov 7, 2014 16:17:17 GMT -5
|
|
dekon
Staff Member
Posts: 634
|
VIA E8
Nov 10, 2014 16:42:42 GMT -5
Post by dekon on Nov 10, 2014 16:42:42 GMT -5
Looking good!
|
|
artur
Chairman
Posts: 580
|
VIA E8
Nov 14, 2014 21:38:14 GMT -5
Post by artur on Nov 14, 2014 21:38:14 GMT -5
I finally stripped the shell, about 4 applications of oven cleaner but very little elbow grease.  |
|
dtinut
Chairman
Modeling the DT&I of the 60's & 70's
Posts: 661
|
VIA E8
Nov 15, 2014 13:02:30 GMT -5
Post by dtinut on Nov 15, 2014 13:02:30 GMT -5
Proto stuff strip very easily using 91% Isopropal Alcohol, which can be had at most drug stores for about 2 bucks a qt.
Most stuff today strips easily with the Al, stuff that doesn't is usually painted with some sort of Ink, vs paint.
Kato can be stripped using the Al in a bath with a dremel brush on a motor tool, which Brian Banna demonstrates in one of his videos, and I agree - it works really well.
Using other stuff can sometimes damage the plastic, as certain chemicals leach out polymers in the plastic leaving thm weak/brittle or crumbling apart.
Looks like a cool project - will be interesting to see how the drive works with 2 motors.
What decoder will you use to control it? Will it handle the draw of 2 motors?
Brian
|
|
artur
Chairman
Posts: 580
|
VIA E8
Nov 15, 2014 15:09:19 GMT -5
Post by artur on Nov 15, 2014 15:09:19 GMT -5
I have to try Isopropal Alcohol on the next one, the oven cleaner has been very effective so I haven't tried anything else. I'm using an older MRC 1634 sound decoder, I would like to upgrade what decoder would be best for the E8?
The current draw is less with both motors compared to the original Proto/Athearn motor, Ill also be wiring in a stay alive since I got rid of the fly wheels.
|
|
dtinut
Chairman
Modeling the DT&I of the 60's & 70's
Posts: 661
|
VIA E8
Nov 15, 2014 23:23:32 GMT -5
via mobile
pacbelt likes this
Post by dtinut on Nov 15, 2014 23:23:32 GMT -5
Hmm, we'll I'd look at the TCS WOW decoders, as you can get them with the keep alive. Friends have good things to say about them. I am not into sound myself, and I have only 2 sound units. A paragon/BLI H10 2-8-0, and a P2K GP7 with a Loksound -
|
|
artur
Chairman
Posts: 580
|
VIA E8
Nov 20, 2014 18:57:41 GMT -5
Post by artur on Nov 20, 2014 18:57:41 GMT -5
|
|
artur
Chairman
Posts: 580
|
Post by artur on Nov 21, 2014 23:48:17 GMT -5
|
|
artur
Chairman
Posts: 580
|
Post by artur on Nov 24, 2014 17:34:15 GMT -5
|
|
|
|
VIA E8
Nov 24, 2014 20:58:06 GMT -5
Post by CP_8530 on Nov 24, 2014 20:58:06 GMT -5
here are some pictures of the E8 painted in VIA colours. When I was masking and prepping for paint I noticed that the side rad grills are thinner on the model, because of that I almost screwed up my paint job luckily I caught it in time. Yep, that was one of the minor issues with the ol' P2K E8 tooling, which is probably around 20 years old now. Another that comes to mind is the roof profile is a bit too round, as are the front windows. One minor thing, CP removed the rear diaphrams from the rears of their E8's and their F's (in the 60's sometime I think?) leaving just the diaphragm housings. This carried over to VIA. Nice progress on the model! |
|
artur
Chairman
Posts: 580
|
VIA E8
Nov 24, 2014 22:48:05 GMT -5
Post by artur on Nov 24, 2014 22:48:05 GMT -5
Thanks for the info, is the diaphragm housings detail part available? would it be the same as the F-unit.
|
|
|
|
VIA E8
Nov 25, 2014 6:58:48 GMT -5
Post by CP_8530 on Nov 25, 2014 6:58:48 GMT -5
Same as the F-unit. I think Details West makes the part as part of their Athearn F upgrade kit, and American Ltd makes some diaphragms although I'm not sure if they make just that part.
I got lazy on my CP E8 build and just removed the movable part from the stock P2K diaphragm. I might have to revisit that in the future...
|
|
artur
Chairman
Posts: 580
|
VIA E8
Nov 26, 2014 23:24:29 GMT -5
Post by artur on Nov 26, 2014 23:24:29 GMT -5
|
|
|
|
VIA E8
Nov 26, 2014 23:53:32 GMT -5
Post by PVRR 2647 on Nov 26, 2014 23:53:32 GMT -5
Artur~
I like the idea of the two motors, it makes it more of a true e unit. Nice job so far. I am curious so see what you are going to use for the uncoupling levers? I am also more curious about the final disposition of the removed motor?
PVRR2647
|
|
artur
Chairman
Posts: 580
|
VIA E8
Nov 27, 2014 10:23:38 GMT -5
Post by artur on Nov 27, 2014 10:23:38 GMT -5
Artur~ I like the idea of the two motors, it makes it more of a true e unit. Nice job so far. I am curious so see what you are going to use for the uncoupling levers? I am also more curious about the final disposition of the removed motor? PVRR2647 I really like those motors they are very quite and smooth running. The loco starts moving on step 2, with the original motor it didn't start to move till step 8. You're welcome to have the motor, i can send you pictures of it. make me an offer. I was going to purchase F-unit uncoupling levers but there is nothing out there that looks half descent, so I'm going to make them out of brass wire. |
|
|
|
VIA E8
Nov 27, 2014 11:17:05 GMT -5
Post by iomalley on Nov 27, 2014 11:17:05 GMT -5
I always enjoy your project Artur, you're always breaking new ground! If I could make a suggestion though, Miniatures by Eric make the proper rear headlight, as the one you used is a tad too big. Its MBE L19 heres the link... www.miniaturesbyeric.com/itm00137.htm |
|
artur
Chairman
Posts: 580
|
VIA E8
Nov 28, 2014 16:11:38 GMT -5
Post by artur on Nov 28, 2014 16:11:38 GMT -5
I always enjoy your project Artur, you're always breaking new ground! If I could make a suggestion though, Miniatures by Eric make the proper rear headlight, as the one you used is a tad too big. Its MBE L19 heres the link... www.miniaturesbyeric.com/itm00137.htmThanks  you're right about the light, i was thinking of sheaving half of it. I would love to get my hands on the rapido rear light, I'm not sure about the Miniatures by Eric light I have to get a better look at it. |
|
|
|
VIA E8
Nov 28, 2014 17:13:08 GMT -5
Post by iomalley on Nov 28, 2014 17:13:08 GMT -5
Here it is mounted to the top of my RDC, I just bent down the peg into the roof. It's not 100% accurate for the RDC, but it is the MBE L19. It even has the conduit coming out of the side. 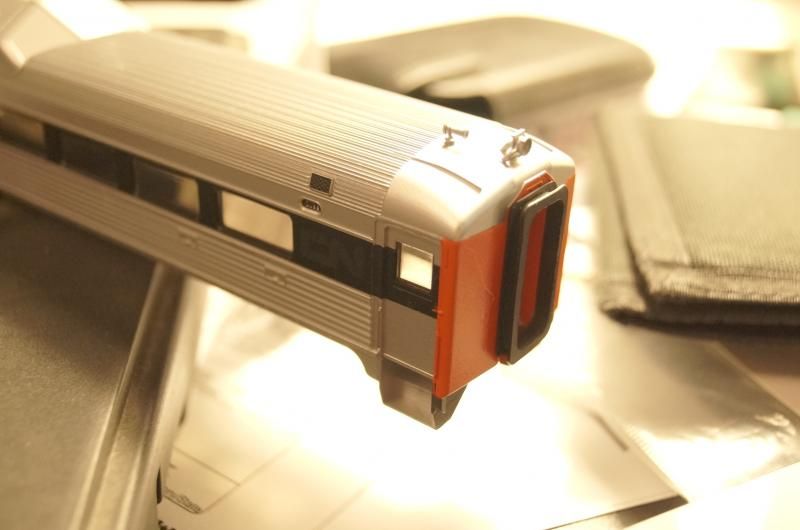 |
|
artur
Chairman
Posts: 580
|
VIA E8
Dec 3, 2014 0:14:39 GMT -5
Post by artur on Dec 3, 2014 0:14:39 GMT -5
After an hour of bending wire for the uncoupling levers here are the results, I'm happy with it.   |
|
|
|
VIA E8
Dec 3, 2014 4:46:32 GMT -5
Post by icghogger on Dec 3, 2014 4:46:32 GMT -5
Nice Work, Artur!!
|
|

 .
.


