|
|
Post by Raeder on Aug 23, 2009 1:48:27 GMT -5
Hi all,
No more photos today either, although I was tempted to take one of my work area. Shavings and swarf everywhere. I have soldered leads to all the surface mount LED's I will be installing on the TEBUC6 project though, now to install them in the beacon and stratolite bodies. I also soldered up a quartet of them for installation in ditch light castings. Those are working out nice! I originally ordered them to match the headlights I was using, and they are a very close match, and look very nice and bright coming on at you. I'm looking forward to seeing what happens with these beacons and flashers when they are installed.
Kevin
|
|
|
|
Post by Raeder on Aug 23, 2009 20:54:54 GMT -5
For those of you who want a picture, here is a picture.  No, there is no TEBUC6. Instead, there is a Dash 9 set I have been working on. Actually the third one is at the other end of the train in a DPU setup, shoving. And yes, they are all powered. Actually the reason I have this photo here is to show off the ditch lights. I practiced soldering some surface mount LED's I had for ditch lights before I tied into the smaller Ngineering units. As you can see, they work really nice. Not only that, but they are color and intensity matched to the headlights! Kevin |
|
|
|
Post by mountaingoatgreg on Aug 23, 2009 21:15:36 GMT -5
I like you backdrop!! Is that a club set-up or your personal layout?
|
|
|
|
Post by Raeder on Aug 25, 2009 11:22:07 GMT -5
That is actually the painted backdrop on the wall at the club. We have some very talented painters! For more info on the club, and to see a train running on the layout, take a look at this YouTube video one of the guys shot.
Kevin
|
|
|
|
Post by Raeder on Sept 12, 2009 16:39:40 GMT -5
Hi everybody, Progress has been made. I have wired in a new beacon on the TEBUC6, and here is what it looks like now: 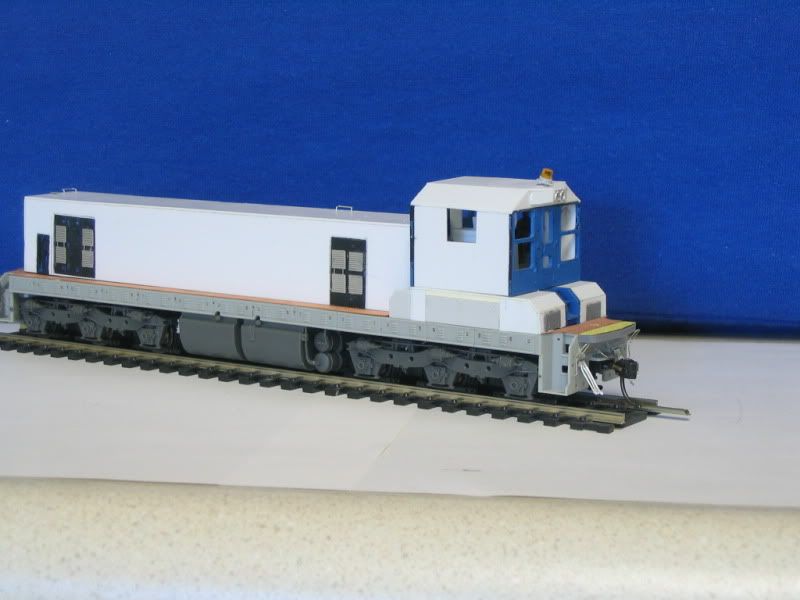 The beacon has been tested and has been working good so far, so we'll just go with it as it is installed. A little more orange than I would like, but changing the resister out for some other sizes did not give me the effect I wanted, so we'll use what we have here. I have to neaten up the install inside the cab some, but that'll be taken care of a little later after painting. For now, the beacon has not been glued down, so I can paint around it without a lot of work. I am working on all the beacons on the SD38P roof, and hope to have them finished before tomorrow, so I can take them to the club and test them. We'll see what happens with that. |
|
|
|
Post by RunningExtra on Sept 12, 2009 17:17:52 GMT -5
Great job Kevin, I think you will be much happier with the scale size beacon, you have done a phenomenal job so far and your efforts are reflecting well in your model!!
|
|
|
|
Post by mrlfan on Sept 12, 2009 17:51:56 GMT -5
Kevin your hard work has paid off, that looks excellant!! Glenn
|
|
|
|
Post by Raeder on Sept 12, 2009 20:47:14 GMT -5
Hi all, Here is the picture of both units modified with the new beacons.  Neither one has the air conditioner or beacons glued on yet, as they will interfere with painting, but they are all installed and all functional. Thanks for the nudge/push/kick to get the scale size equipment installed, it does look nice now that it is there. I do have Kadee #5's installed on the front of both units, because these will be used for switching club assigned equipment, which is mandated to be equipped with Kadee's of one flavor or another. There are Sergeant couplers installed between the two units at the tail. Kevin |
|
|
|
Post by Raeder on Dec 30, 2009 20:15:57 GMT -5
More progress has been made on the TEBUC6. I tackled a project I have been putting off for a while and rebuilt the cab wall on the engineer's side. It had a large gap between the bottom of the wall and the top of the batterybox/relay box underneath the cab. Now that it has been fixed, I will actually see about painting it sometime soon. Here is how it sits right now. 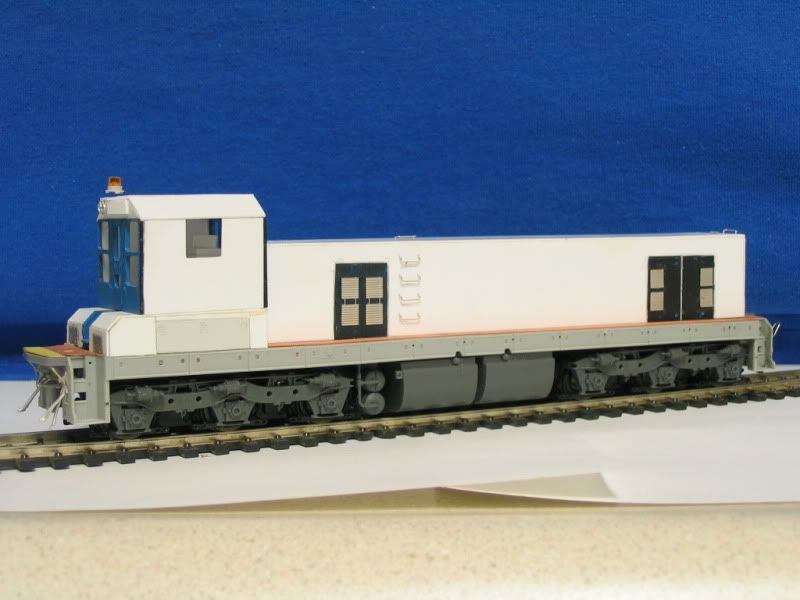 Kevin |
|
|
|
Post by Raeder on Jan 2, 2010 14:29:20 GMT -5
I love being on vacation. I get things done... Like hand rails. The long handrails on both sides, to be exact. I also added in the missing steps in each stairwell. You can't see them that well in these photos, but they are there. I figure I'll glue up the handrails today and get them set off to the side for painting. The end handrail on the SD38P end will be the stock kit handrail from the SD7 kit I am using, and the other end will have to be bent up from scratch. I kinda wish I was using thicker wire, as the stanchions don't crimp onto it at all, but the thinner wire looks nice, too. 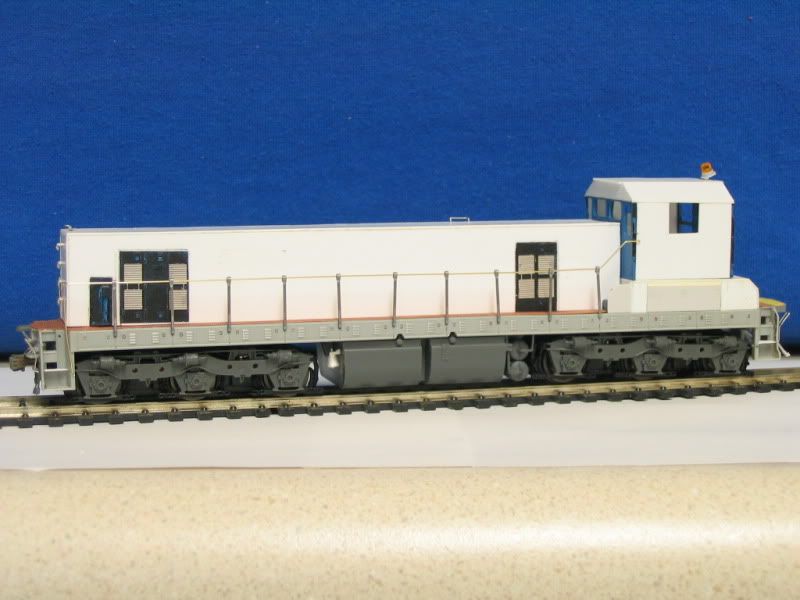 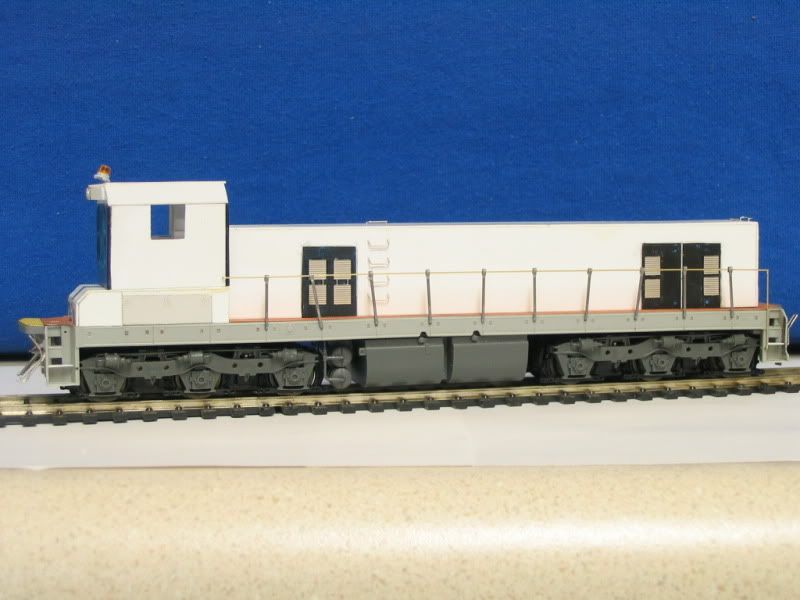 Kevin |
|
|
|
Post by mrlfan on Jan 2, 2010 21:25:01 GMT -5
Kevin, that is just simply awesome.
Glenn
|
|
|
|
Post by stewarttrains98 on Jan 4, 2010 13:45:05 GMT -5
very nice looking unit that you are building. love the details that you are doing as well.
|
|
|
|
Post by diesel on Jan 16, 2010 18:37:07 GMT -5
very nice execution of these units. I've wanted to try these, but I think within a year or so I'll get on it. You guys who do these units that are on my list first are taking a lot of the guess work out of it for me!
again, nice work Kevin!
|
|
Freightrain
Chairman
Modeling CSX from 1995 to present
Posts: 625
|
Post by Freightrain on Jan 16, 2010 20:31:24 GMT -5
There is pics of these type of units in the book "North American Railyards" by Michael Rhodes, on page 34, In the Pasco, WA section, BN SD40-2 #6263 is hooked to BN TEBUC6 #6297, and behind them is BN SD40-2 #6262 hooked to BN TEBUC6 #6296.
|
|
|
|
Post by atsf90 on Jan 16, 2010 21:31:46 GMT -5
Those are awesome, very good work. I remember when we had a set assigned to Cherokee yard in Tulsa.
|
|
|
|
Post by Raeder on Jan 17, 2010 10:52:49 GMT -5
Thanks for the comments guys!
I thought about using an SD40-2 on this set, but I found out that the BN had the SD38P's assigned to them as well, and it seemed to make sense that if one unit was going to be rebuilt this extensively, I should try to do something with the other one as well.
The units are also used at Pasco, as was pointed out, and I've seen photos of them at Argentine. I imagine they see some use at Interbay in Seattle, which I think is where they go for service. I don't know where else they have been used. I am actually lucky enough to be friends with an engineer who ran a set of these, and I have been asking him all kinds of random questions, like how big the gap was between the bridging plates when the units were coupled together.
Kevin
|
|
deez
Chairman
Midland Belt Railway
Posts: 949
|
Post by deez on Jan 17, 2010 14:27:30 GMT -5
Excelent work Kevin! I dont know if I missed it on the last 4 pages but have you figured out what to do about the gap between the hood and the walkway? I have the same problem on all of my Atlas SD35's.
|
|
|
|
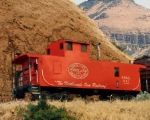
Post by Santa Fe Sammy on Jan 19, 2010 21:42:17 GMT -5
Great work on a seldom modeled locomotive set! Maybe this pic will help you? Tulsa, OK 10-2-2004  |
|
|
|
Post by Raeder on Jan 19, 2010 23:26:10 GMT -5
Hi Mark,
I have not corrected the gap on the SD38P under the cab yet, but the plan is to drill and tap some .25"x.25" styrene and bolt it to the floor and have it touching the corners of the cab, then glue the cab to the styrene. That should pull that gap closed. If not, we'll be reworking the cab, maybe adding some strip styrene on the bottom and sanding it down until that gap gets closed. That is the plan for now, we'll see how it works out. Would really like it if the cab would just bolt on and set right down, but soemtimes things just don't work together that easy.
Kevin
|
|
deez
Chairman
Midland Belt Railway
Posts: 949
|
Post by deez on Jan 20, 2010 14:12:50 GMT -5
Hey Kevin, Well I took a look last night at one of the Atlas SD35's I had apart. This is what they look like with the gaps under the cab and blower bulge.  What I think will help is to knock off the tabs on the inside of the walkway deck. There is four of them. I'm pointing at one below.  I think these tabs over time have slightly bent the walkway down too. When I knocked these tabs off the hood and cab instantly sat closer to the walkway.  In the pic above I am barely pinching the two pieces together. The fact is that the walkway and hood are better off being attached to each other in some way to get rid of any gap. Theres plenty of ways to do that but I would still knock off the four tabs to keep them from pushing the walkway down. |
|