mkl194
Trainmaster
accelerating rust on purpose
Posts: 131 
|
Post by mkl194 on Jan 4, 2016 15:55:08 GMT -5
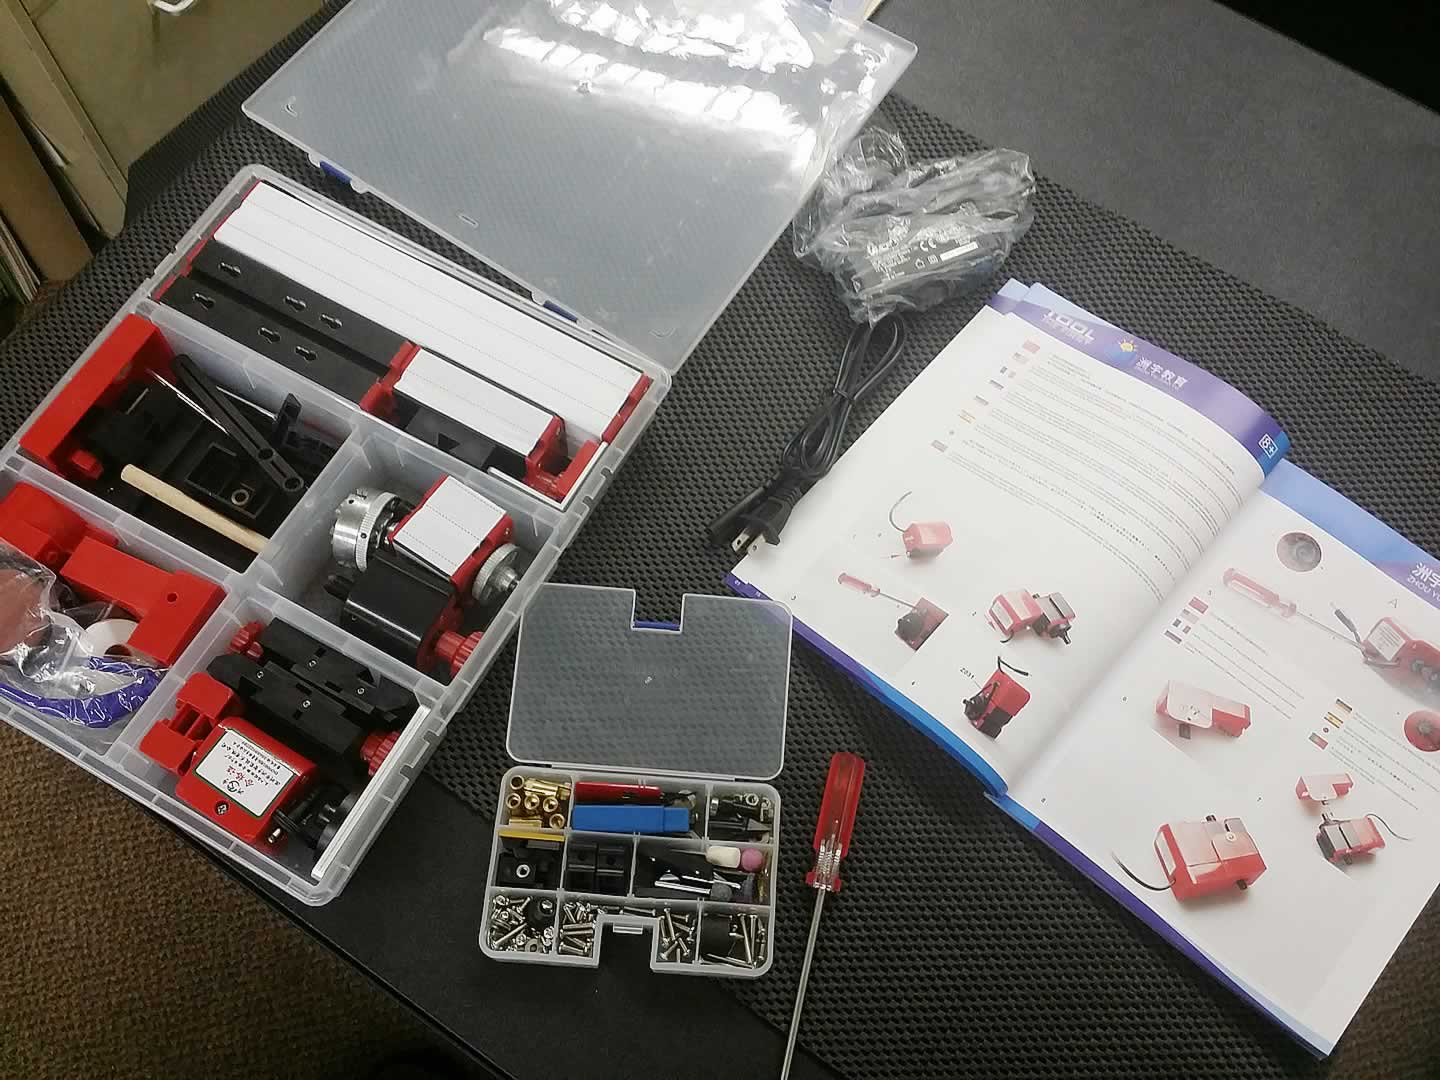
You've all probably seen this machine before but passed on it because there are so many negative comments about it when you try to find reviews. Here's the link to the video that got me thinking about getting this machine: 6 in 1 Machine ShopI went ahead and bought this machine on ebay from prettyworthshop here: prettyworthshopIt cost me about $150 with shipping and took 12 days to get here (during Christmas rush). I've experimented with it just a little so far and have some things to report. Here's the box:  Here's the contents:  It took me about 5 minutes to figure out the assembly system, it's very simple. So I decided that I would try the vertical mill using a dremel bit. My goal was to remove the grid from an Athearn Blue Box U28C in a better way than freehanding a moto tool.  So this is what I've learned so far: The vise is very small and wasn't meant for a shell this big. Even though the core components are made of aluminum there's not a lot of weight to the machine which affects accuracy. The tool depth has to watched very carefully or the machine goes off course. The travel distance is short on the vise, but longer on the rail so you have to reset cuts a few times to make it work. The motor is slower than a moto tool. The vise is plastic. Just like all the negative comments you will find, this machine is not meant to mill metals. But I already knew these things before I bought it. What got me hooked was something the guy in the video said: the machine comes with tool blanks to make you own tools. I was talking to a friend who's an old school machinist and he told me something very interesting. He said that since it's a learning machine, one of the goals is to make parts to improve the machine itself. Everything on this machine can be replaced. My first replacement part will be a bigger vise more suited to HO scale. All of the aluminum rails happen to match standard sizes of metals found at the hardware store so making a longer rail system is pretty simple. I used tool box liner on top of my bench and that held the machine surprisingly steady, but if I bolted it to the bench it would be better. It's got plenty of places that would allow it to be bolted down. The motor can be replaced, but so far I like the fact that it's slower than a moto tool which leads to very little melting. I've also tried using my razor saw wheel and that worked so well that it made the machine totally worth the very little money I spent on it. As the machine is improved it will become more and more useful. Soon I'll be trying out the lathe to polish road wheels from a Sherman tank model I've been working on for quite a while. As I learn more about this machine, I continue to update this review, but so far I'm really liking it. |
|
|
|
Post by iomalley on Jan 4, 2016 21:15:59 GMT -5
This looks cool! How did it do in knocking the rad grilles off that U boat?
I always wanted a machine that could knock the door detail off the carbodies so I could add my own applique doors...
|
|
mkl194
Trainmaster
accelerating rust on purpose
Posts: 131 
|
Post by mkl194 on Jan 5, 2016 7:46:11 GMT -5
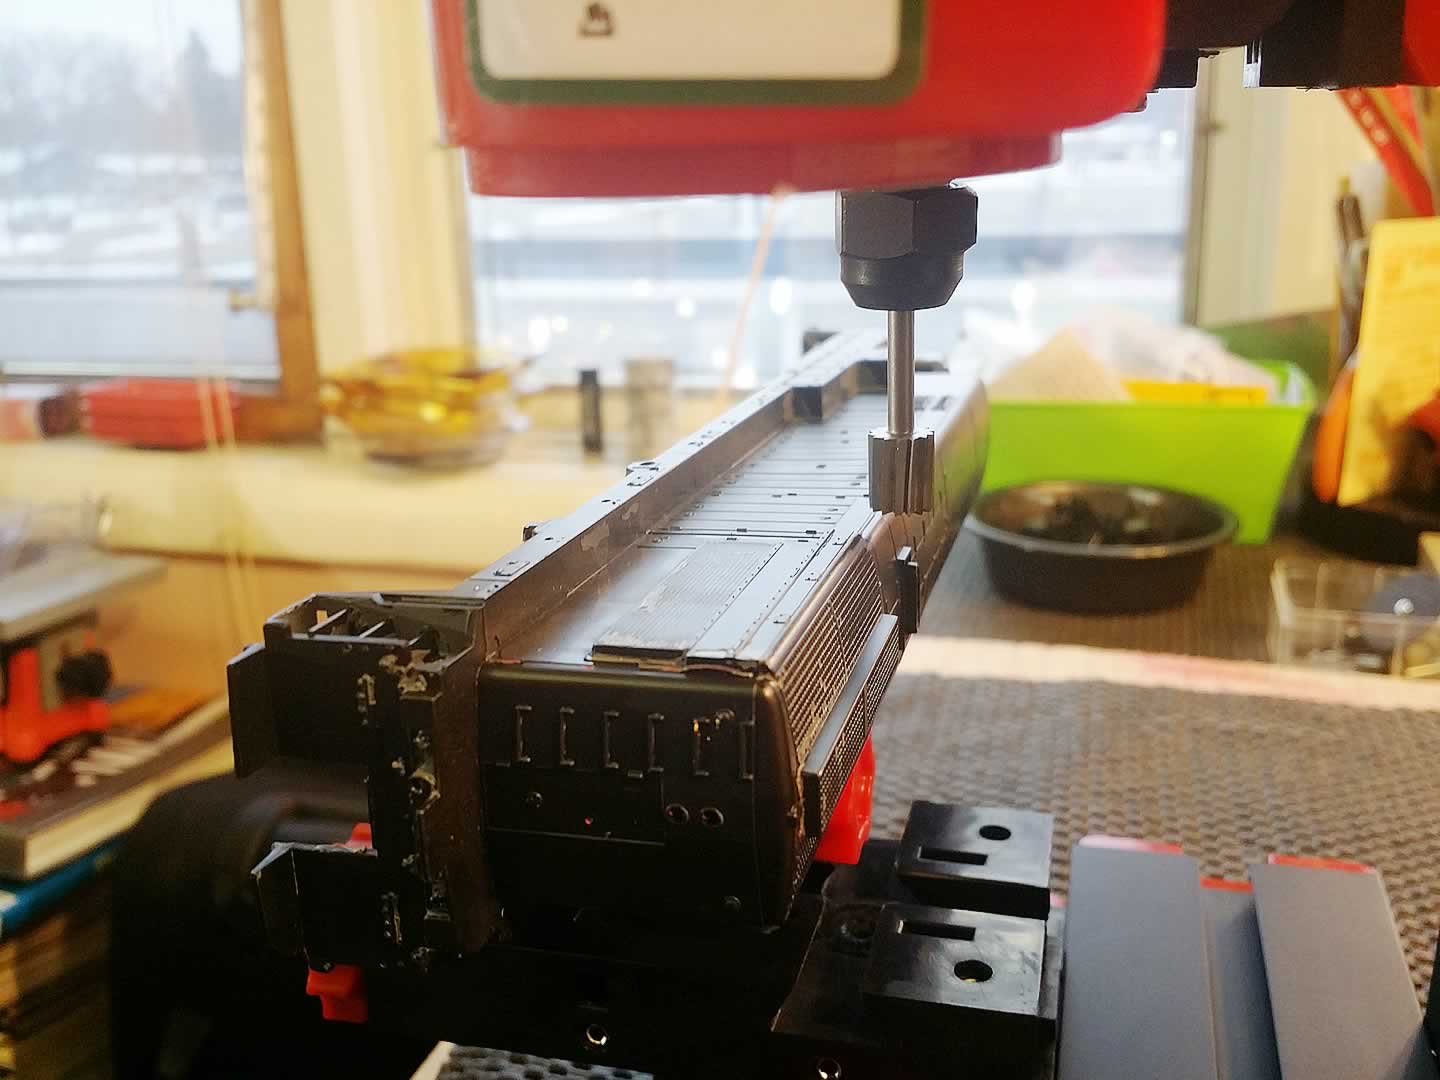
I started with the tool shown and it did pretty good, but not super accurate. When I switched to the circular razor saw tool things improved dramatically.
With the larger, heavier vise I'm pretty sure you could accurately take off doors. I might actually test that with a flapper sanding tool...
|
|
|
|
Post by sbhunterca on Jan 5, 2016 15:04:27 GMT -5
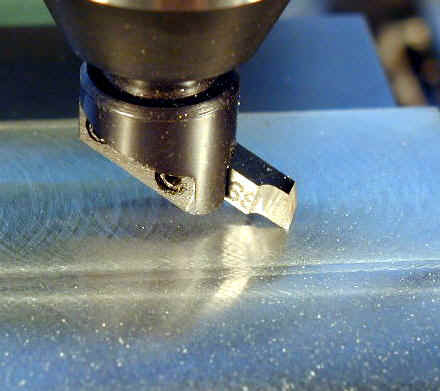
Have you tried a small fly cutter? These tend to work well with a small mill, since the power requirements are low and at low feed levels they can produce a nice smooth finish. I'm not sure the little mill/lathe combo is up to making one, but they can be purchased as well. I've made a number of them for special jobs over the years but none this small. An image of a fly cutter:  Steve |
|
mkl194
Trainmaster
accelerating rust on purpose
Posts: 131 
|
Post by mkl194 on Jan 5, 2016 20:18:55 GMT -5
So I watched Tom's Techniques on how to make and use a fly cutter: Use of the Fly Cutter on the Milling Machine
When I looked through the box with the tools in it I found a tool that matches the one he makes in the video. If it wasn't for the video I would never have known what it was, but he shows the diamond shape on the end when he's done grinding it. This machine can make that tool in the size that the blank tools come. Once I figure out how the tool holder works I'll try it to smooth a surface. |
|
mkl194
Trainmaster
accelerating rust on purpose
Posts: 131 
|
Post by mkl194 on Jan 6, 2016 13:02:30 GMT -5
I found a Micro Mark fly cutter with a quarter inch shank for $10 so I'll be ordering that....
I also picked up a 4 inch drill press vise and I'm going to try an experiment where I leave the vise stationary and just move the tool.
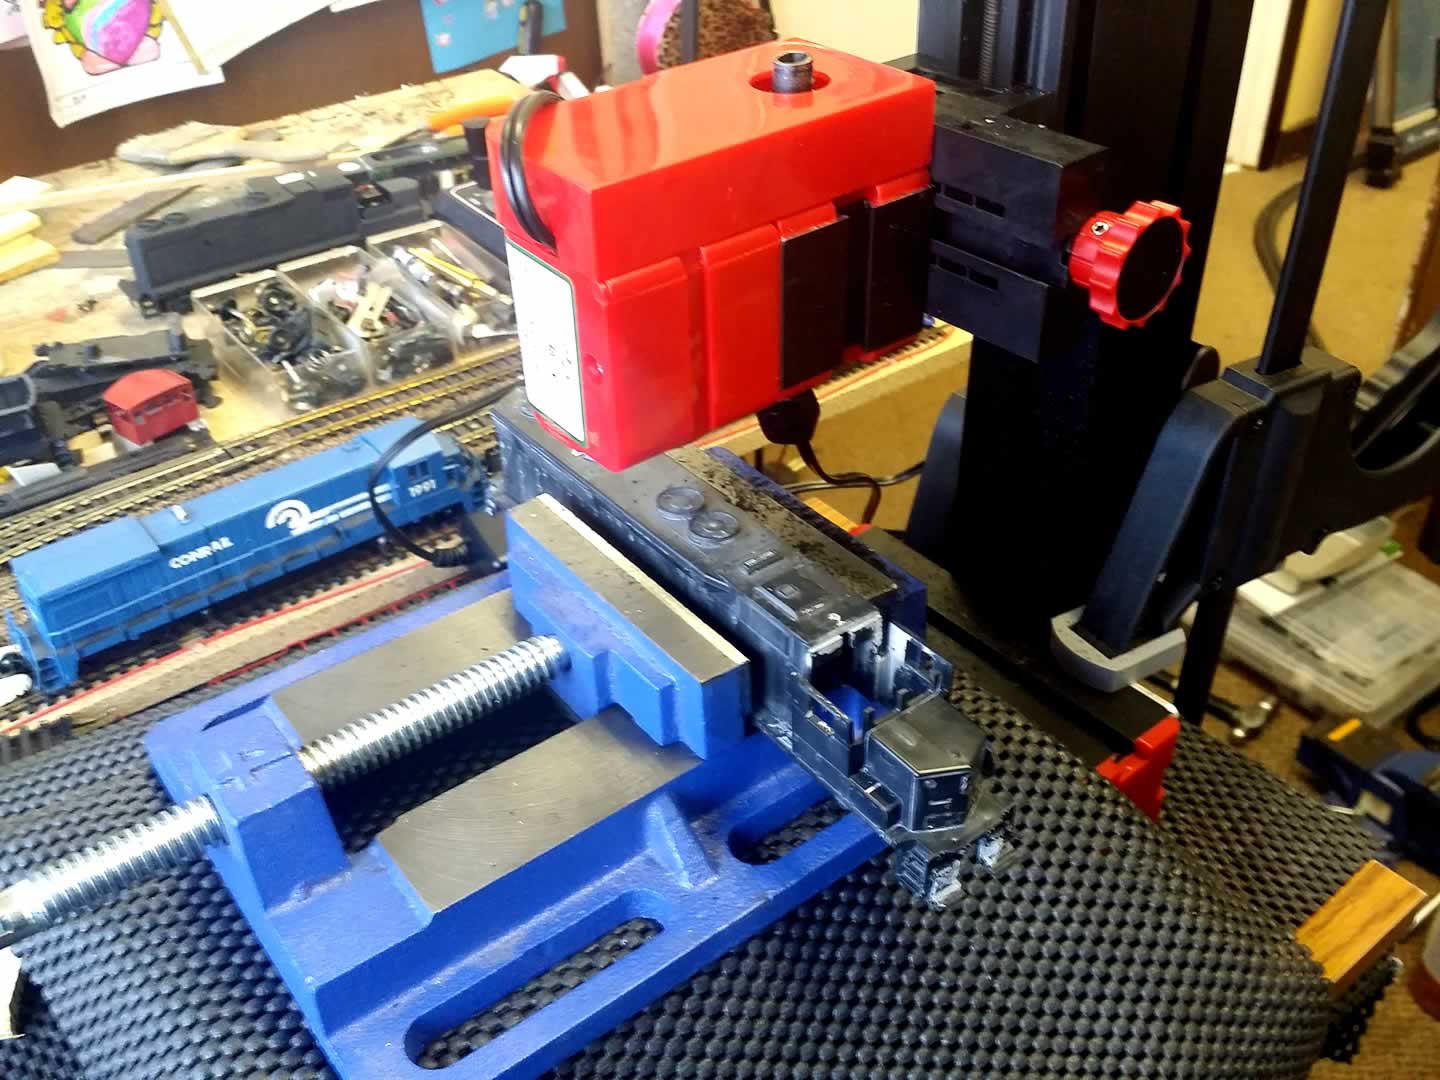
This attempt will be on a Blue Box SD45 to remove the dynamic brakes using a small cutter that came with the machine.
|
|
|
|
Post by sbhunterca on Jan 6, 2016 14:06:21 GMT -5
Good luck!
Remember to keep your spindle speed low to avoid melting, cutting depth shallow, and feed slow to avoid having the toolbit grab the shell and cause it to flex/ pull out of the vise. You also don't want the machine's extruded aluminum column to flex.
Steve
|
|
|
|
Post by Eccentric_Crank on Jan 6, 2016 18:57:46 GMT -5
Don't try "climb milling" with a small light machine, unless you're willing to break things.
The bit will snatch and wreck something.
Most beginners cut too deep and too slow.
Fly cutters are great, but the interrupted cut will rattle your brain.
I bought a couple of super cheap airbrushes to fill with water as coolant for plastic cutting.
I'm going to mount them in dial indicator stands on my Sieg mini-mills.
Dan M.
|
|
dtinut
Chairman
Modeling the DT&I of the 60's & 70's
Posts: 661
|
Post by dtinut on Jan 6, 2016 19:46:16 GMT -5
Climb milling is always a problem and usually causes vibration and/or chatter. Climb milling is like a dragsters doing a burnout. I use regular cutters with plastic, too fast, and the material melts, too slow, chatter/rough finish is result. Play on some junk, learn the tool. Be safe! Brian Don't try "climb milling" with a small light machine, unless you're willing to break things. The bit will snatch and wreck something. Most beginners cut too deep and too slow. Fly cutters are great, but the interrupted cut will rattle your brain. I bought a couple of super cheap airbrushes to fill with water as coolant for plastic cutting. I'm going to mount them in dial indicator stands on my Sieg mini-mills. Dan M. |
|
mkl194
Trainmaster
accelerating rust on purpose
Posts: 131 
|
Post by mkl194 on Jan 7, 2016 13:17:22 GMT -5
So I tried 2 different bits on the SD45 shell, one of them caused melting and the other did a nice job. What I need to do now is make an XY table that really works. The 4" vise is perfect for HO shells. Here is a video of someone making an XY table for a 3D printer using OpenBuilds products... OpenBuilds XY table
I think I might try something out of wood first just so I can learn the build better before spending a ton of money on this machine. It really is a learning machine and I'm learning a lot of stuff I didn't know. |
|
mkl194
Trainmaster
accelerating rust on purpose
Posts: 131 
|
Post by mkl194 on Jan 7, 2016 16:05:21 GMT -5
Here's the setup I tried earlier. This is where 1 tool did a good job and the other melted plastic. Fortunately this is an extra shell I have on hand just for testing things like this:  |
|
|
|
Post by sbhunterca on Jan 7, 2016 19:15:55 GMT -5
Re fly cutters... experience counts but there's only one way to get that. With a light mill, you'll want to keep the toolbit pulled in so it cuts a fairly tight radius... this will minimize chatter. Play with the scrap shell, try varying feed rates, cut depths, and spindle speeds. Play until you learn what works on that machine.
You won't get away with stuff that's taken for granted on Cincinnati, Bridgeport, or other professional machines but you'll never buy one at a low price either, LOL.
A note re that vise... hopefully you can bolt it down!
:-)
Steve
|
|
mkl194
Trainmaster
accelerating rust on purpose
Posts: 131 
|
Post by mkl194 on Jan 22, 2016 14:32:51 GMT -5
So I'm ready to take the first big step in the process of improving the machine... if you haven't read everything above, this machine is called the "learning machine" and one of its primary purposes is to teach you how to improve the machine...
Above you can see the drill press vise that I have. The next step is to make an XY table to handle the vise. I went to the lumber yard and picked up a 3' piece of 3/8" threaded rod and 2 nuts and 4 collars. I also got some small brass rod to use as a T handle. If this scheme works I'll pick up a couple handwheels from Amazon.
Earlier, I bought a small desktop vise mounted on a ball socket that uses a threaded rod with 1 nut and a collar. It's construction is very simple and I plan to copy exactly that design for the XY table.
I also picked up a 3/16" brass rod and I'm going to try it on the lathe. I hadn't planned on using any metal with this machine, but to make a fair assessment I think I'll try to make an air tank with a section of brass...
|
|
|
|
Post by Eccentric_Crank on Jan 25, 2016 16:58:11 GMT -5
I like the concept of this machine. I hope you can make it work for you. Have a look at the accessories for the Taig machines; www.taigtools.com/accessories.htmlbetter pictures here; www.leevalley.com/en/wood/page.aspx?p=50249&cat=1,330,50260&ap=1 I bought the top-slide and milling attachments for my Sieg C-0 micro lathe. They are good quality that will work with your future machine collection(now that you're addicted). Dan M. |
|
mkl194
Trainmaster
accelerating rust on purpose
Posts: 131 
|
Post by mkl194 on Jun 11, 2016 14:00:41 GMT -5
I currently have it setup as a disk sander. I have to say the low speed is really nice. This is probably one of the best configurations available on this machine.
I've used it a lot for squaring up structures doing some finishing work on locomotive shells. It's super easy for putting a 400 or 600 disk on it and doing some polishing.
|
|
Deleted
Deleted Member
Posts: 0
|
Post by Deleted on Sept 7, 2016 11:04:24 GMT -5
MK,
If you are going to stick with this mill, get some REAL milling bits. Those Dremel bits will melt teh crap out of the plastic. To much friction going on. Some small 1/16", 3/32" and 1/8" bits will do you just fine. You can also get micro bits that can cut things off very nicely.
|
|
mkl194
Trainmaster
accelerating rust on purpose
Posts: 131 
|
Post by mkl194 on Sept 7, 2016 12:29:00 GMT -5
I haven't tried setting it up again as a mill because the disk sander really works nice, but I have been shopping around for different bits for my other machine...
|
|
Deleted
Deleted Member
Posts: 0
|
Post by Deleted on Sept 22, 2016 10:19:13 GMT -5
I use this place to buy my bits. At elast my standard 1/32, 1/16, 3/32 and so on. www.use-enco.com. Enco became MSC. Same web site though. I buy the cheap import bits. Good enough for the soft metal and plastic we cut. For the really small bits such as 0.005 and up, I go to the Amazon market place and find them. |
|


