|
|
Post by emd16645 on Dec 5, 2015 13:51:49 GMT -5
I believe the CN/CP rebuilds were primarily completed in the 80s, wrapping up in the early 90s. Think you need to shift to the mid 80s Vince  NOOOOO!!! Don't make him change his mind AGAIN!  hehehehe ~ Carmine Come on Carmine, we all know that would never happen! |
|
Deleted
Deleted Member
Posts: 0
|
Post by Deleted on Dec 5, 2015 15:10:46 GMT -5
I believe the CN/CP rebuilds were primarily completed in the 80s, wrapping up in the early 90s. Think you need to shift to the mid 80s Vince  NOOOOO!!! Don't make him change his mind AGAIN!  hehehehe ~ Carmine Oh behave Not changing agian just looking for connections with interesting units involved That is if it's okay with you beavis hehehehehe |
|
Deleted
Deleted Member
Posts: 0
|
Post by Deleted on Dec 5, 2015 15:15:21 GMT -5
NOOOOO!!! Don't make him change his mind AGAIN!  hehehehe ~ Carmine Come on Carmine, we all know that would never happen! Actually not happening I'm set and i wonder if 91 percent alcohol will affect intermountain shells soaking for a month forgot to remove them from the dip before i left As i'm now working for another company and have to wait a month for my first check But my version of a freelanced BN connecting with cp/cn via my Midland Ltd is why i was asking about this chop shop geep |
|
pacbelt
Chairman
Building Layout #11!! ;)
Posts: 682 
|
Post by pacbelt on Dec 6, 2015 1:50:26 GMT -5
GREAT news Vince!!!  I know you weren't worried!!  |
|
Deleted
Deleted Member
Posts: 0
|
Post by Deleted on Dec 6, 2015 2:06:54 GMT -5
GREAT news Vince!!!  I know you weren't worried!!  Actually i felt like the Milwaukee pull back from the NW looking for work or the (cp) take over of the IC |
|
|
|
Post by CanadianRails43 on Dec 6, 2015 17:57:04 GMT -5
Here's a new progress update at last! Ok, so things have been slow, I know. I wanted to finish up a few things before I got this posted. To start, I got the rear coupler cut lever fabricated and ready for paint in mid October. The lever rings are from my Bachmann GP38-2, and the lever itself is copper electrical wire hand bent myself. 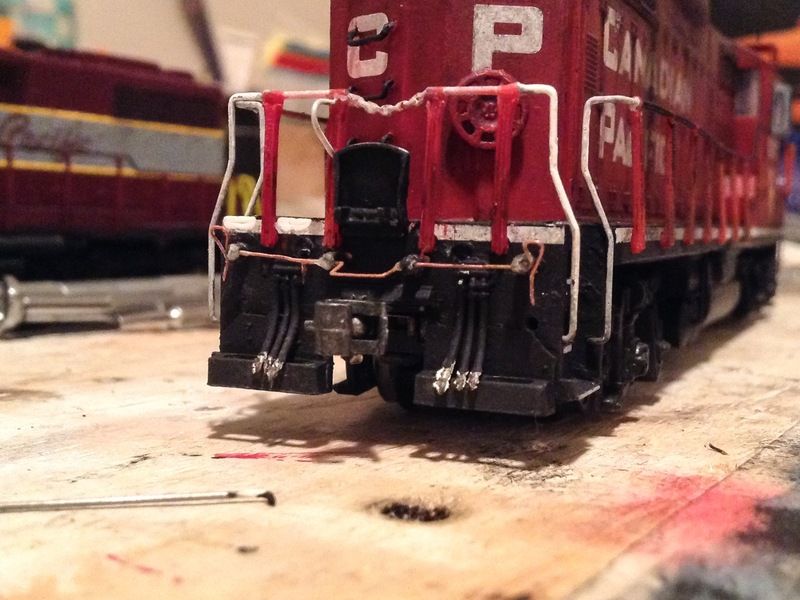 Another thing I finished was the rear pilot block. All sides except the top face are made from styrene. The top is cardboard paper. This took longer to do after I ran out of CA, and had to wait a bit until I could pick up more. 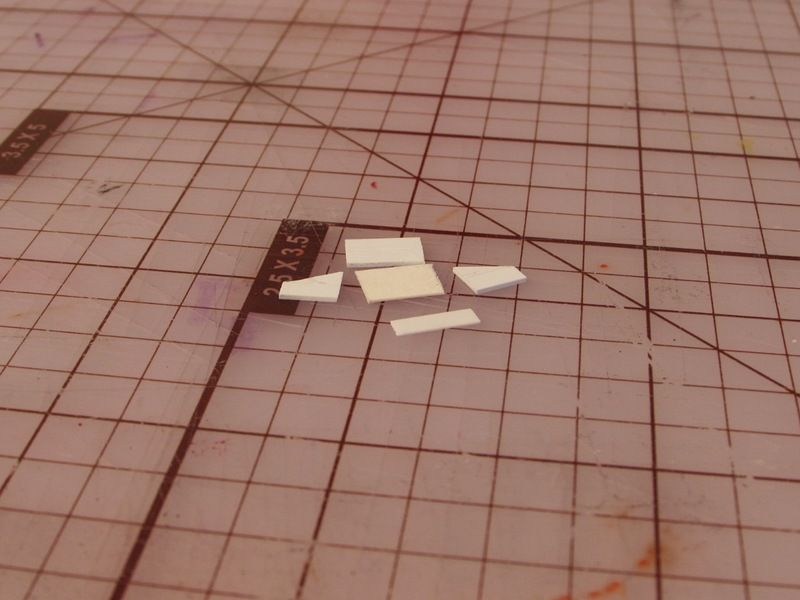 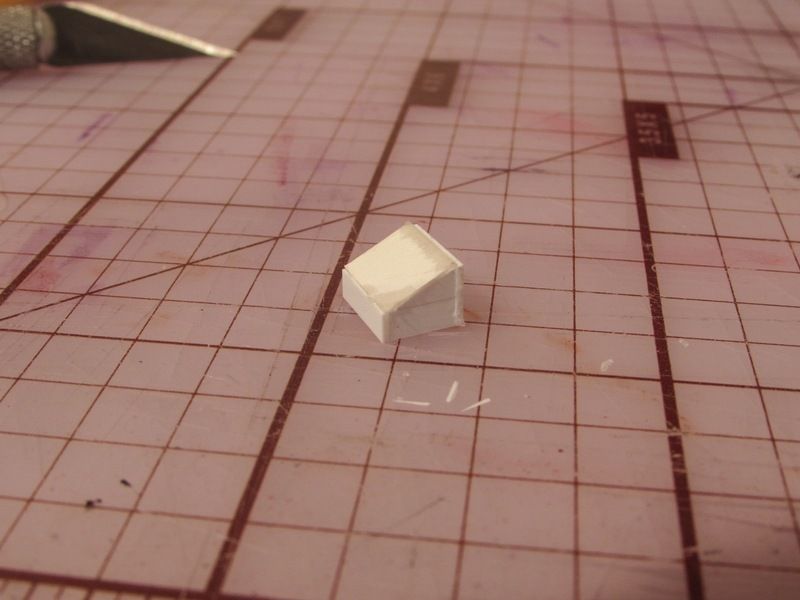 One more area I worked on was the front of the nose. I removed all the weathering and decals, did a light sanding to smooth out imperfections, and did a "repaint" using watered down Crimson acrylic. New MS decals were applied soon after. 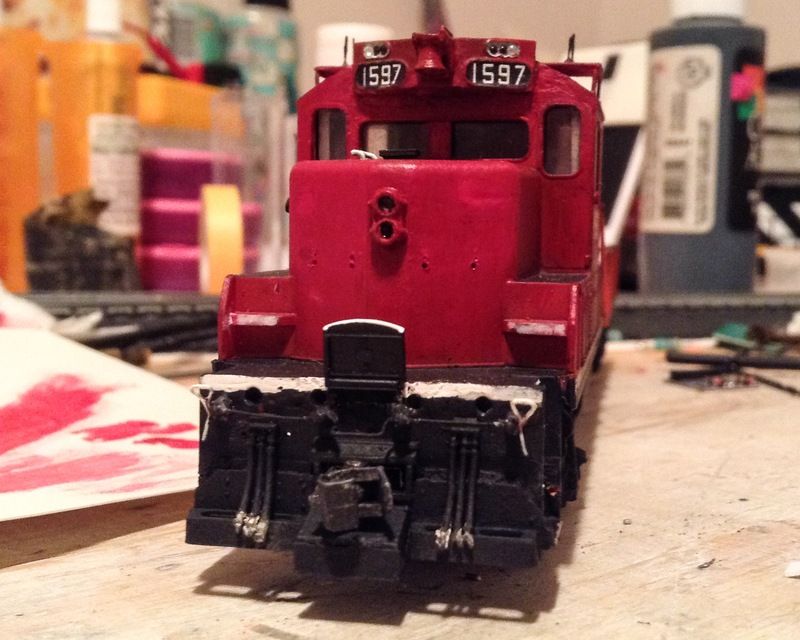 So here's the model now. Additional details include Details Associates drop steps, which replace the previous Miniatures By Eric castings. And then the DA MU stands. The red paint turned lighter after drying, so that will need to be fixed. All in all though, they look great, especially the front stand painted with the bottom cover grey, prototypically correct for this unit. One more thing finished was updating the weathering. Focused heavily on the carbody seams and a little bit on the roof, using soot powder. The blend went perfect and enhances the look that much more! 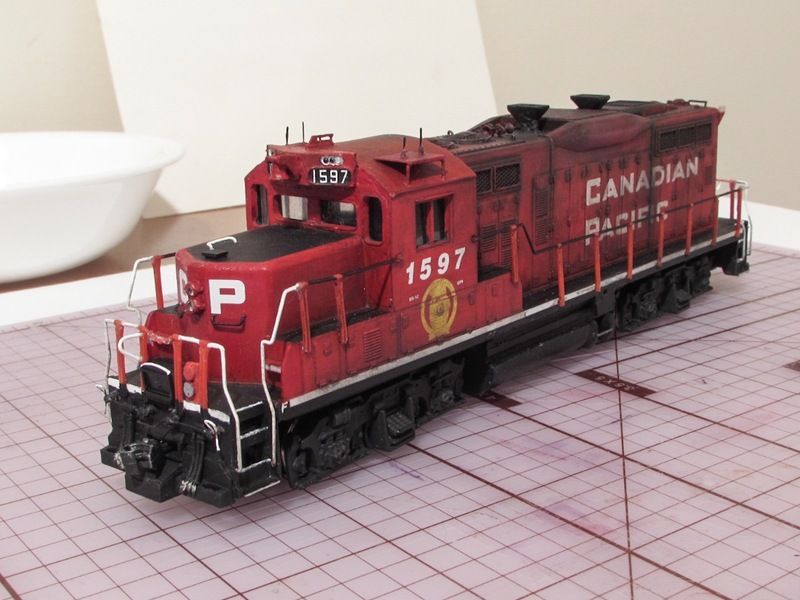 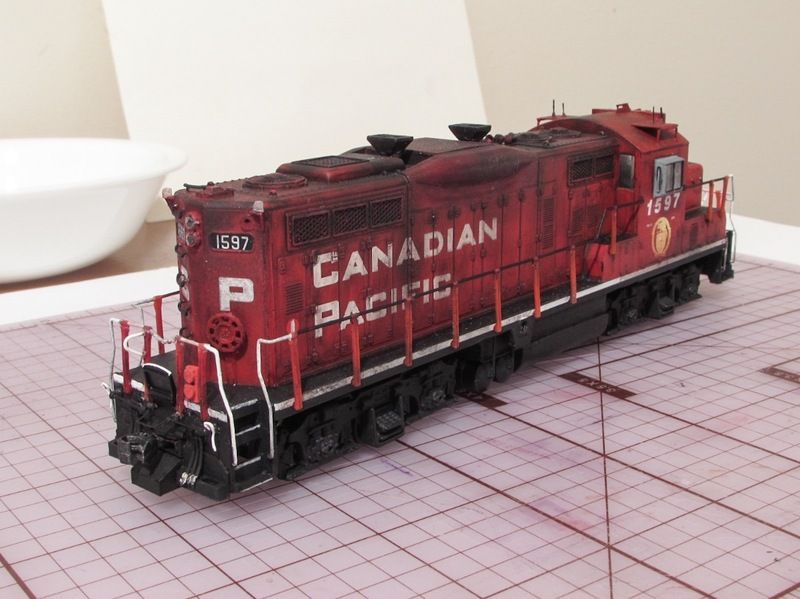 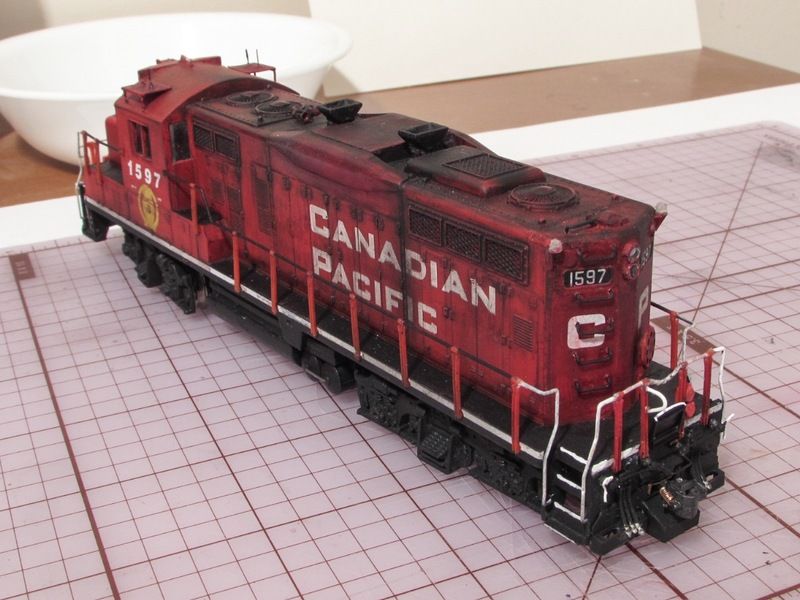 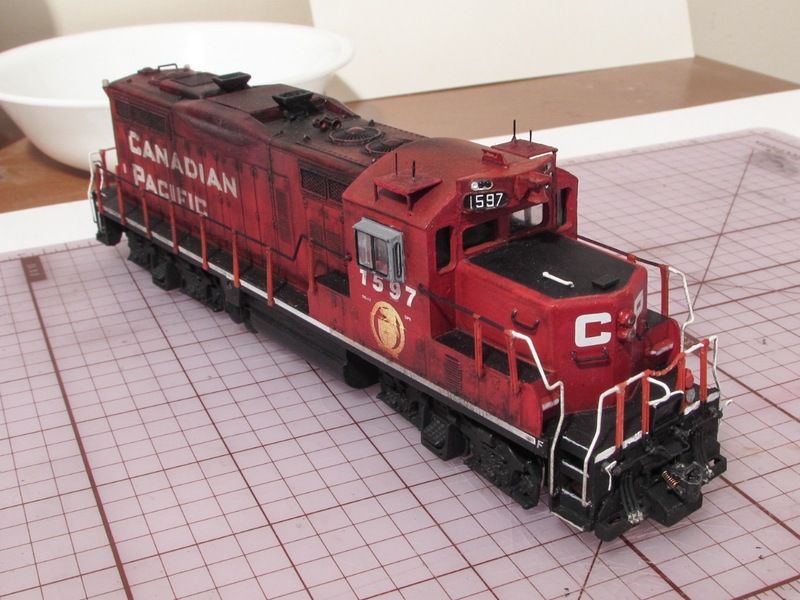 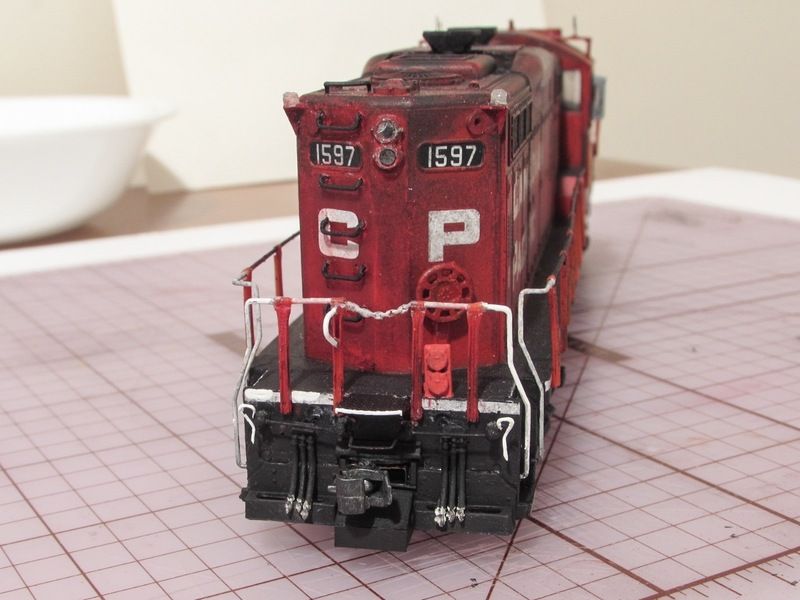 So that's it for now. More progress may be on the way when more gets finished. |
|
Deleted
Deleted Member
Posts: 0
|
Post by Deleted on Dec 6, 2015 18:10:03 GMT -5
Very nice B
|
|
pacbelt
Chairman
Building Layout #11!! ;)
Posts: 682 
|
Post by pacbelt on Dec 6, 2015 19:29:07 GMT -5
That REALLY looks fantastic!!!
|
|
|
|
Post by lajmdlr on Dec 7, 2015 14:24:09 GMT -5
Don't forget the brake pipe hoses between the coupler & MUs. Gotta have brakes for the rest of the train! |
|
pacbelt
Chairman
Building Layout #11!! ;)
Posts: 682 
|
Post by pacbelt on Dec 8, 2015 2:28:16 GMT -5
Yeah... you may want brakes for the train!!  ~ Carmine |
|
|
|
Post by emd16645 on Dec 8, 2015 5:03:53 GMT -5
Yeah... you may want brakes for the train!!  ~ Carmine Nah, brakes are overrated. Aren't trains supposed to move freight, not stop it?  |
|
|
|
Post by lajmdlr on Dec 9, 2015 11:08:36 GMT -5
Yeah... you may want brakes for the train!!  ~ Carmine Nah, brakes are overrated. Aren't trains supposed to move freight, not stop it?  But they at least have to stop to deliver the freight. Don't think any RR throws it off going by especially on a spur! |
|
|
|
Post by emd16645 on Dec 9, 2015 11:57:56 GMT -5
Nah, brakes are overrated. Aren't trains supposed to move freight, not stop it?  But they at least have to stop to deliver the freight. Don't think any RR throws it off going by especially on a spur! Delivering freight is a minor detail here! |
|
|
|
Post by CanadianRails43 on Jan 25, 2016 15:45:09 GMT -5
Here's an update regarding some more progress! And a big thanks to the admin for the birthday wishes  Not a whole lot to present here, but I figured it would be good to show what's been done so far anyway. I'm almost finished as far as detailing goes, it's just the steps behind the cab that need to changed out. Not happening for now because I don't have the materials to do it yet. And I'm contemplating a possible change for the windshield, which needs more height. To start, I changed out my fibre optic classification lenses, made brand new versions, and instead of just colouring them with black sharpie, I used red and green sharpie as appropriate. The green isn't permanent, so it isn't as dark as I'd like. But I prefer these over my previous method. 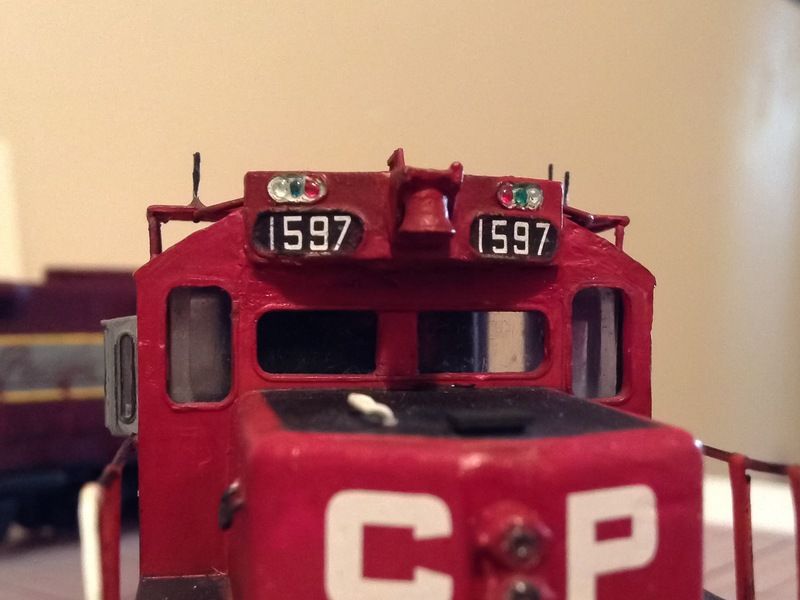 Next, an often over-looked GP9u detail, one that I personally have never seen on any model GP9u. This… or 'these' are the electrical conduits that connect the CANAC Beltpack R/C antennas to the locomotive. These conduits are such small details, nobody really notices them on the prototypes. But I figured it would be cool to replicate them regardless of how small they are. I took two pieces of 0.015" music wire, bent them accordingly to match a somewhat realistic bend, painted them black, glued them with one end under the antenna stand platforms, and the other end hiding behind the numberboards before finally painting them red. They may be minuscule, especially for small models. But once they are present, they contribute greatly to the rest of the model complimenting all other details nicely. 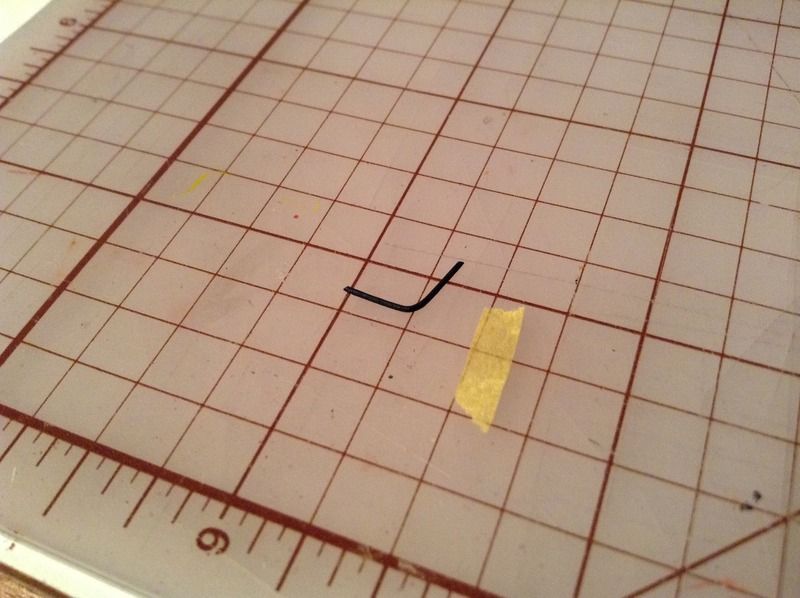 Another detail I added were louvers. I scored a pack of Plano EMD Switcher louvers to install on the battery box door below the conductor-side window. Four of these were applied after removing most of the "Golden Rodent" factory decal. After application, I brushed red paint over top and put a new MS golden beaver decal to essentially "seal the deal". All that's left is dullcote to thoroughly seal everything, and blend with the rest of the model. 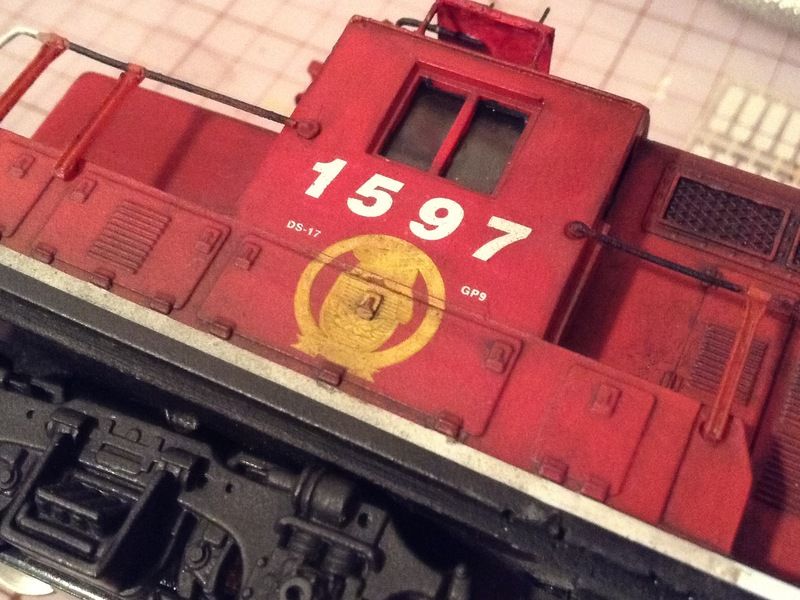 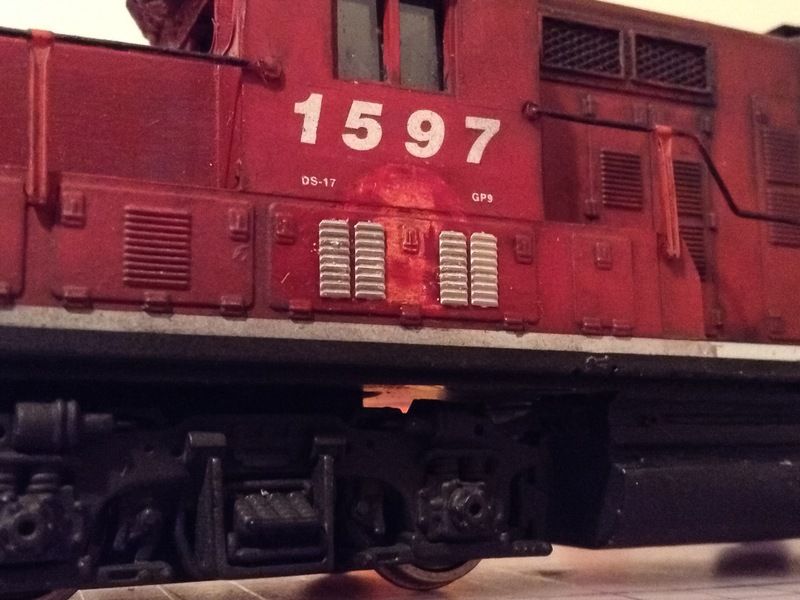 Everything complete. 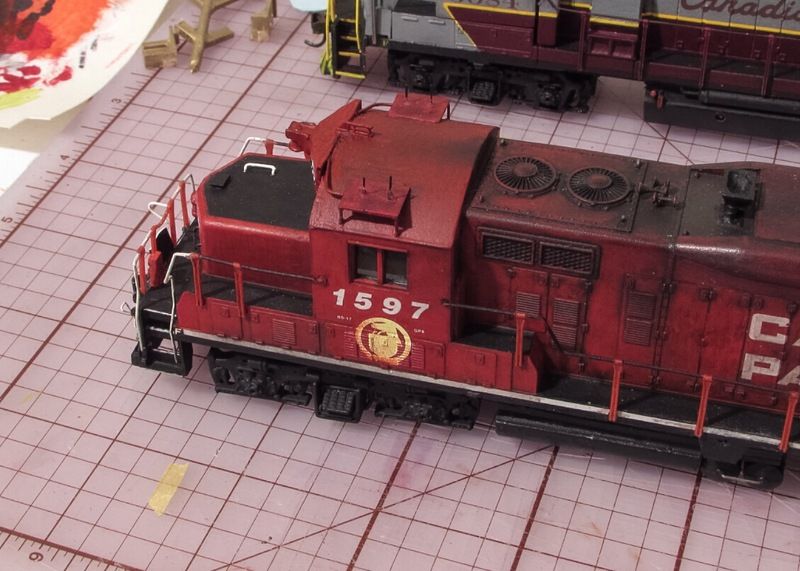 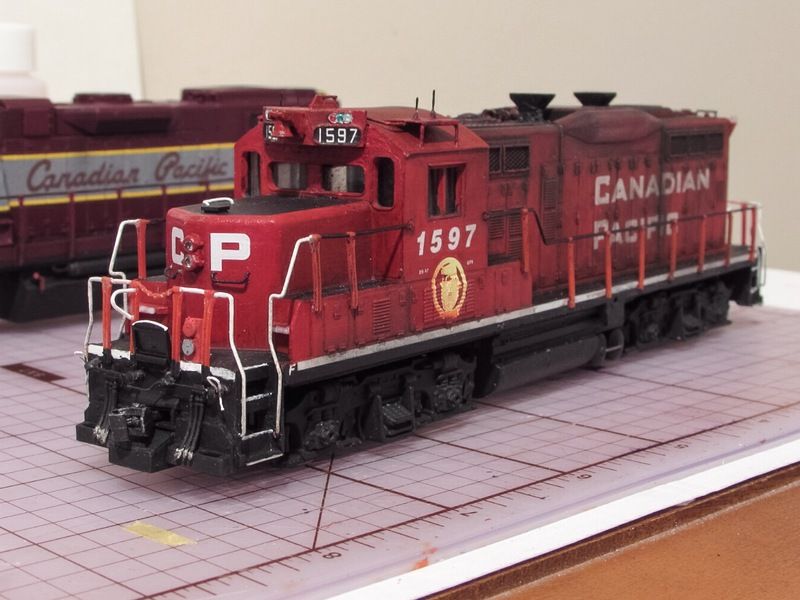 And that covers the latest changes! I know, I will look into some air hoses for brakes and whatnot  More still to come as I progress through this Walthers Trainline project! |
|
|
|
Post by m a y o r 79 on Jan 25, 2016 21:51:45 GMT -5
I see what you mean about the antenna conduits, they kinda blend in with the rest of the roof. All of those small details sure add up. Very nice looking build. Looks nice and filthy too.  |
|
|
|
Post by CanadianRails43 on Jan 26, 2016 11:18:44 GMT -5
I see what you mean about the antenna conduits, they kinda blend in with the rest of the roof. All of those small details sure add up. Very nice looking build. Looks nice and filthy too.  Thanks Mike! Yes, once they're red… they really blend in. Haha, filthy as it should be! These Winnipeg switchers got covered in exhaust soot, oil, you name it! Still need to simulate the dirt on the trucks, just don't have the powder to do it yet. Appreciate the comment!  |
|
|
|
Post by CanadianRails43 on Jun 2, 2016 12:14:06 GMT -5
Sorry I've been gone a while, just haven't been doing much for new stuff lately, but I am making progress on some locos in my fleet. In the meantime, I got this put together for the GP9u project. It's not entirely finished, but is very close. This is the current model with pics of the original Walthers Trainline GP9m it started out as back in September 2013. I'll admit, it's quite a contrast! 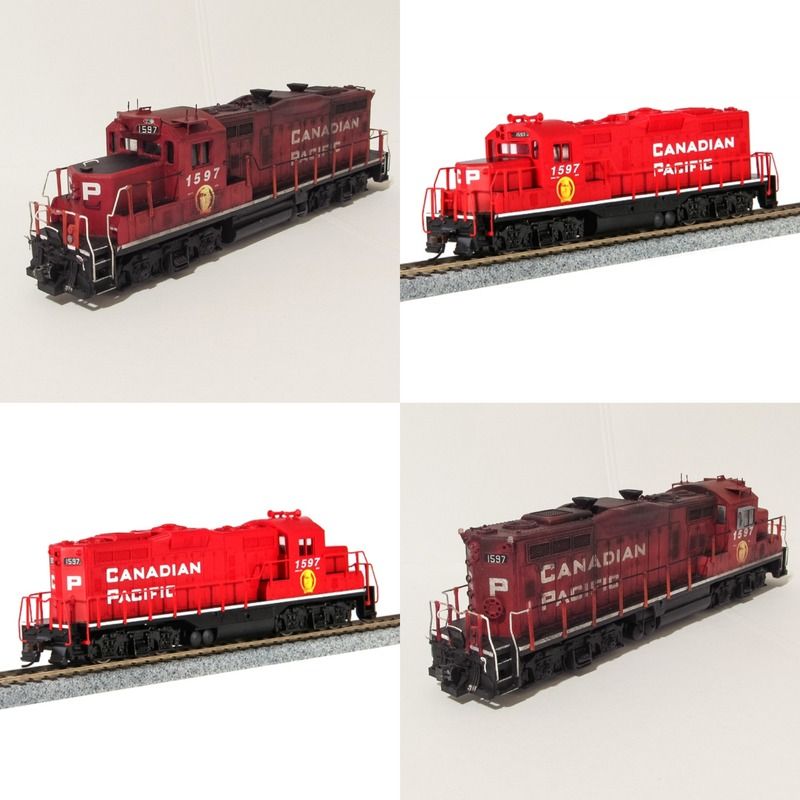 |
|