|
|
Post by CanadianRails43 on Jul 30, 2015 17:39:44 GMT -5
Hi all! Besides my introductory post, this will be my first thread on Diesel Detailer. I'm still very new to the workings of the forums, with all the boards to post in. I hope this thread is fine for this board. Anyhow, let's begin. Currently, my biggest ongoing project is a CP GP9u, being converted from… a Walthers Trainline GP9m. 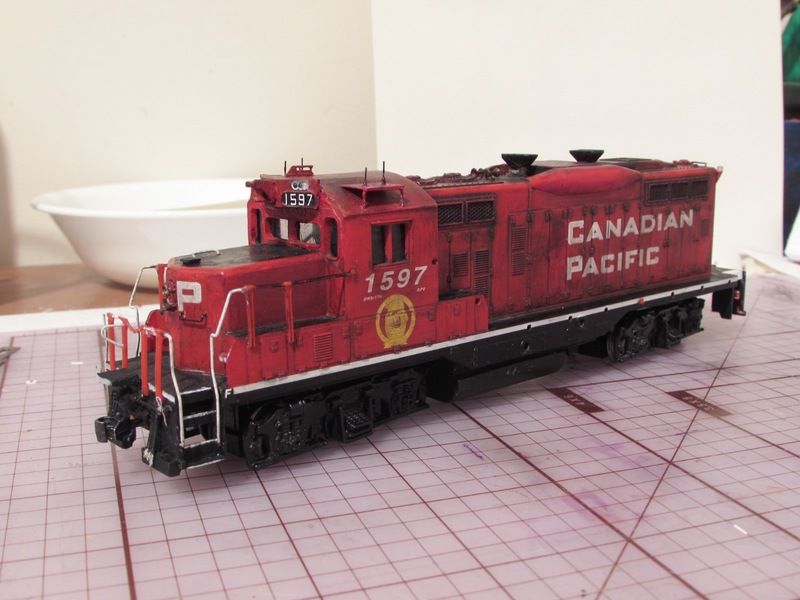 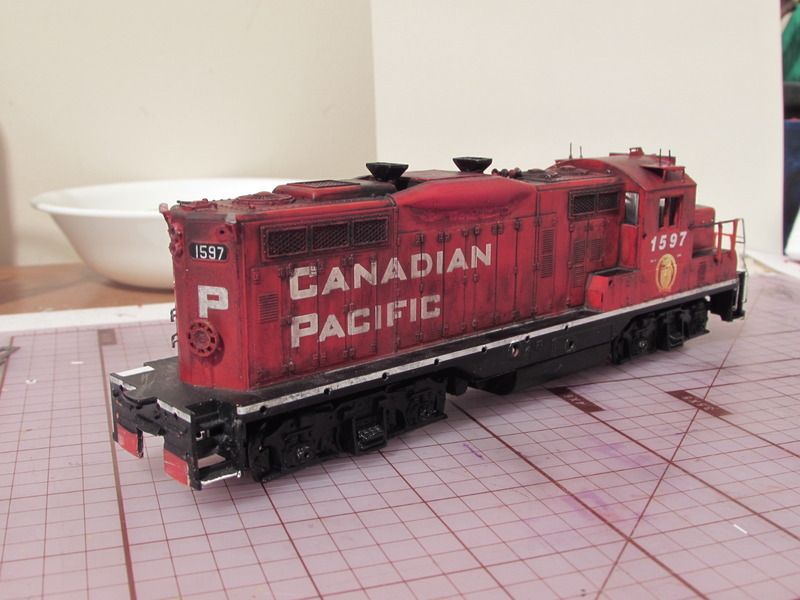 Prototype PhotosCP 1597 Roster photos Prototype PhotosCP 1597 Roster photos
HistoryMany of you probably know what the GP9ms look like, out of box. If you don't, just google image search "walthers trainline gp9m" and you'll know right away. It's not that it's a bad model. The biggest problem really is the nose and longhood, which are wider than they should. This project started way back in September 2013, with little expectations since this model would be the starting point of all my detailing, scratchbuilding, and kitbashing. I never intended to go so into it. However, time goes on and your mind wanders, dreams, and gets motivated. So here I am almost two years later, with a GP9u shaping out to be very close to the prototype. The list of details I've added (plus scratchbuilt) is quite long and still growing. There are also details that are stand-ins until better ones can be applied. When all is done, I will still need to go over and touch up various areas that are a bit rough-looking. In the meantime, here are more photos and the list of details, changes, mods, etc, of the project currently. 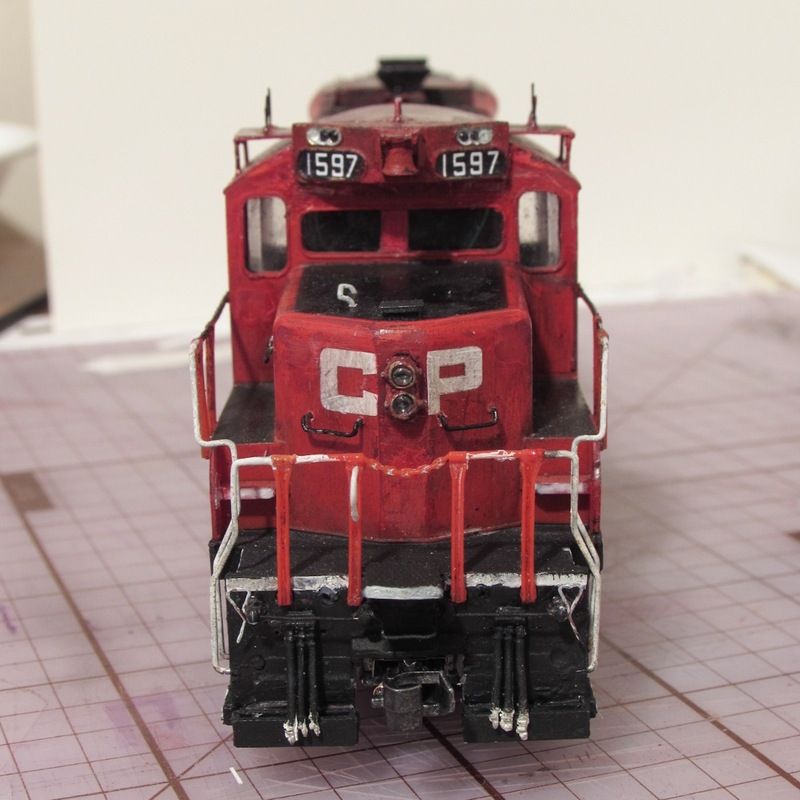 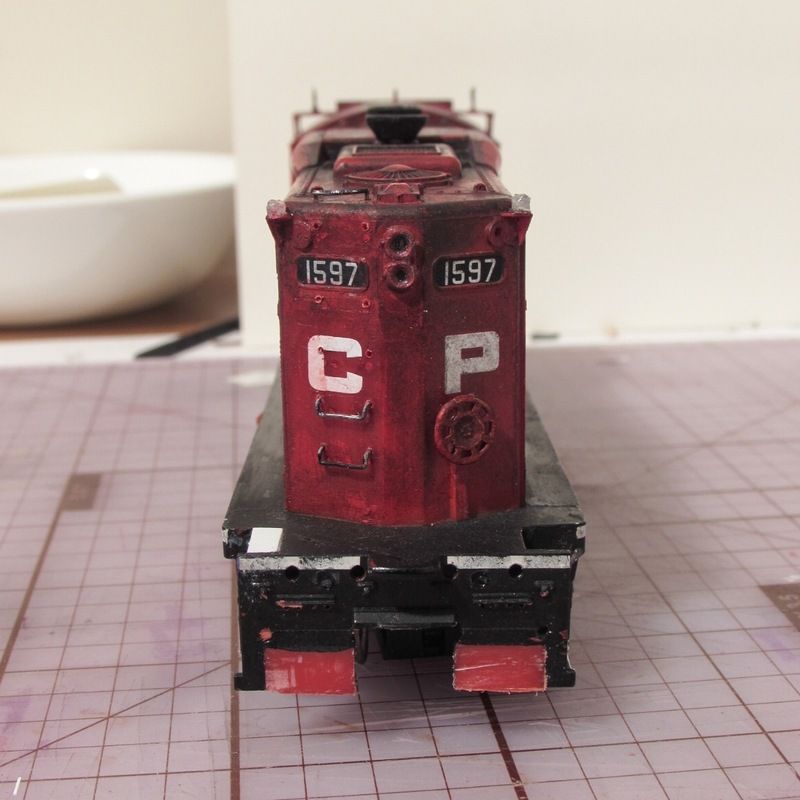 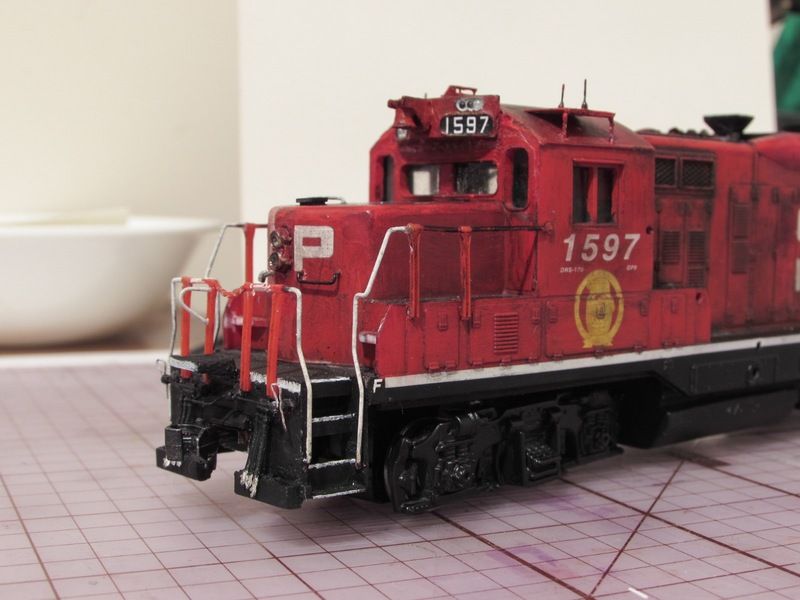 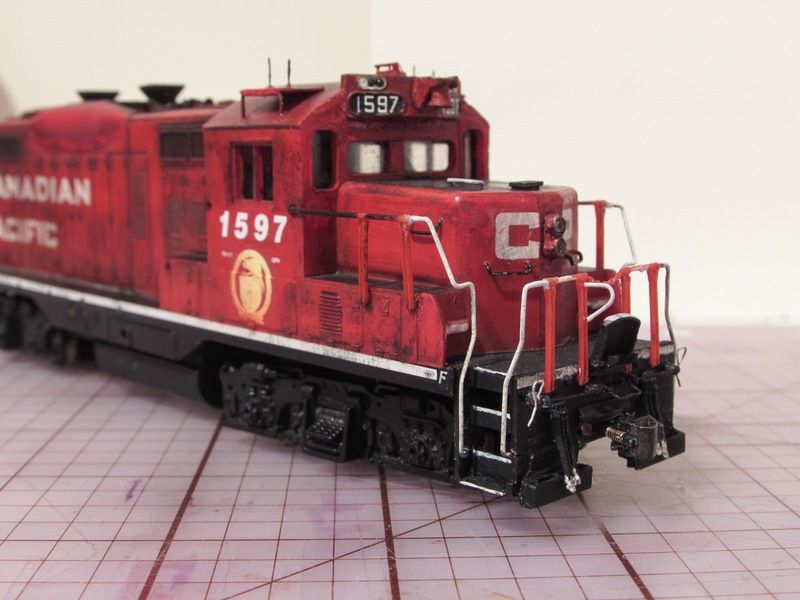 Details applied: Details applied:•MBE front headlight •Details West rear headlight •MBE Numberboard casting •Athearn RTR K3LR2 (or M3HL) horn and Sinclair radio antenna(from CP AC4400CW) •Juneco Scale Models bell and bracket •Juneco Scale Models exhaust stacks(modified ALCO/MLW S-series switcher stacks) •MBE operating dropstep on front(rear yet to be done) •Custom coupler cut lever on front(hand bent and cut from copper electrical wire) •Details West 3-cluster MU cables on front(rear yet to be done) •Cable pockets scratchbuilt from styrene(rear yet to be done) •No.10 Staples hand bent and cut for grab irons •R/C antenna stands scratchbuilt from No.10 staples and cut pieces of cardboard paper •Fine broom bristles cut for antennas •Rear R/C beacons made from dried Weldbond glue •Rear R/C beacon support platforms scratchbuilt from styrene •cardboard paper for Dynamic brake fan plate •fibre optic ends(expanded) for classlights •MV Products lenses in front headlight •Scrap brake wheel on rear •GMDD vertical-style steps on front scratchbuilt from styrene(rear yet to be complete) •0.015" music wire hand bent and cut for front end railings(rear yet to be complete) •Microscale decals(in certain areas. The rest are still original factory decals) More photos and progress updates are still to come in the future! |
|
|
|
Post by CanadianRails43 on Jul 30, 2015 18:50:37 GMT -5
|
|
|
|
Post by PVRR 2647 on Jul 30, 2015 22:47:09 GMT -5
Braedan~
I like your method of masking off the areas that need to be protected while you are altering other details. I wish I had done that when I was working on my GP40 RD Slug conversion. Nice efforts so far, keep us posted on your progress, and don't feel shy about asking questions. Even if you think someone has already asked them, someone can usually answer them or point you to the right thread for the answer. Keep up the good work.
Sincerely,
PVRR2647
|
|
|
|
Post by CanadianRails43 on Aug 1, 2015 12:23:33 GMT -5
Thank you for the kind comment PVRR2647! I prefer masking as it protects most of the detail from the harm of work. Ok, here's another progress update. Not much, but it's progress  Got the first GMDD-styled vertical step-well complete on the rear of the GP9. Using .010"x.125" styrene, I cut everything at approximate lengths to resemble the prototype. Now all glued up, the steps are ready for black paint. 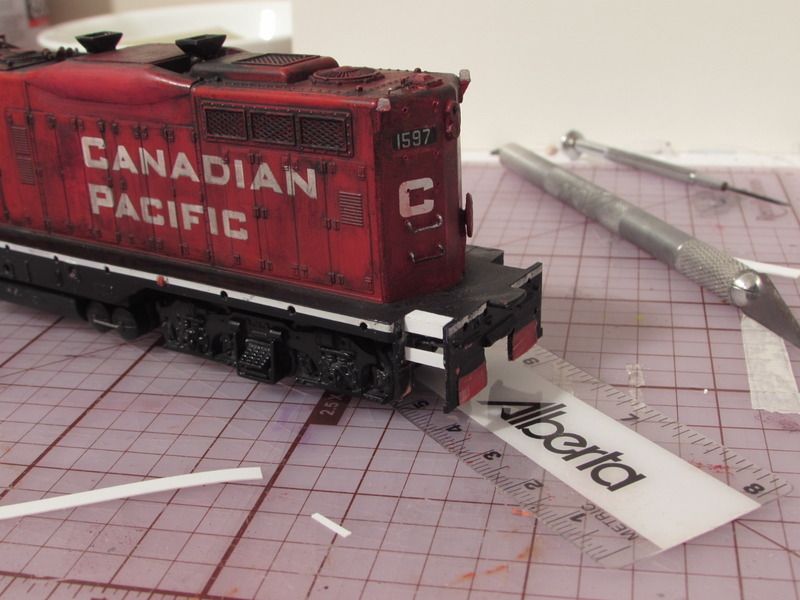 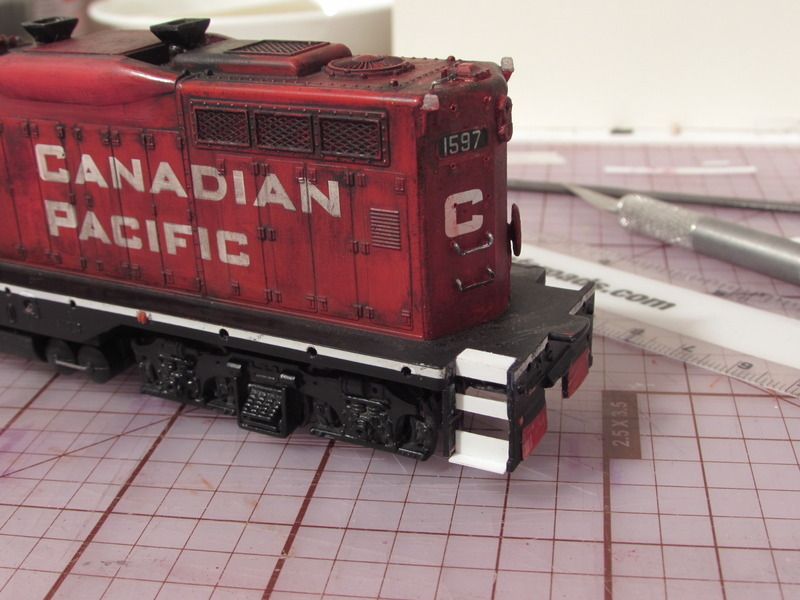 Another half-finished area is the fuel tank skirting. Because the plastic is so thick, I had to drill 1/32 holes in-line with my intended cut to make things easier. The fuel tank itself needed a facelift, where I had to cut and file the large indent, as per prototype. The other side still needs to be done. 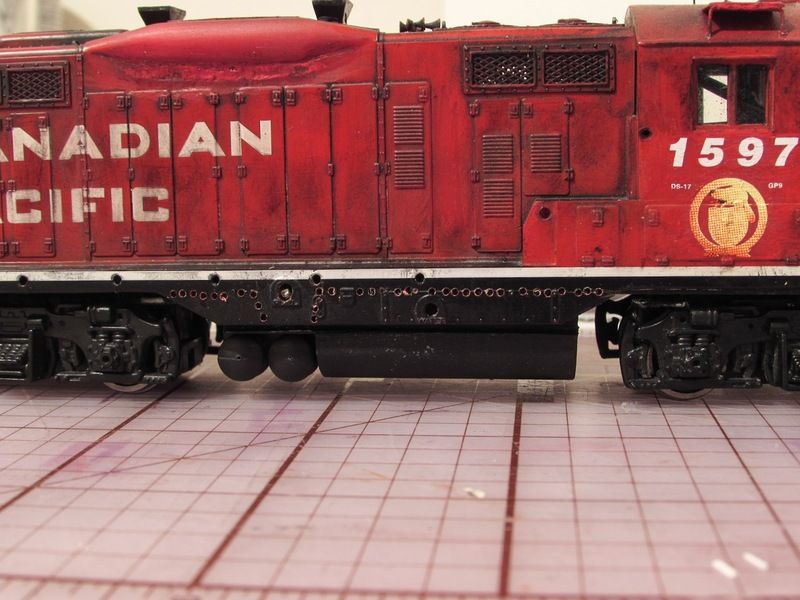 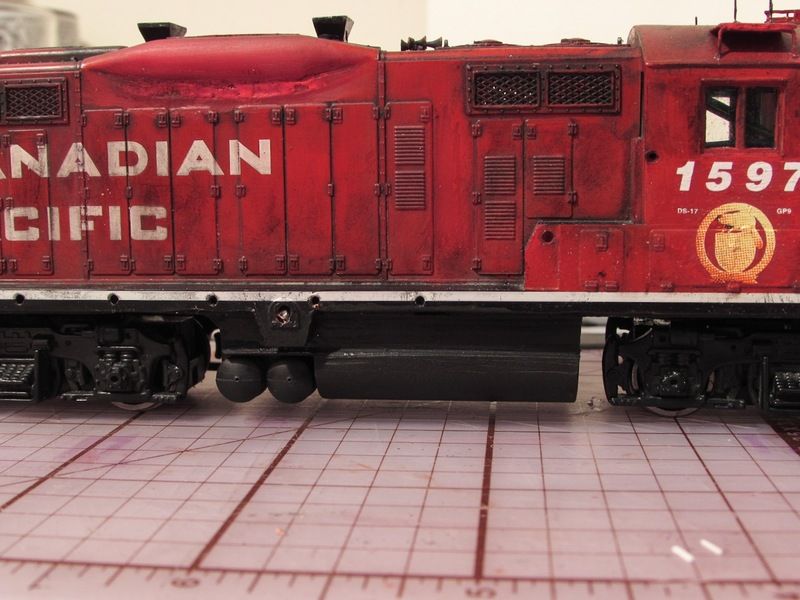 Finally, another area I'm working on is separating the couplers from the chassis and applying them to the shell. This makes it easier to add pilot blocks when the time comes, plus it keeps me from having to worry about imperfections between the shell and chassis due to detailing. The front coupler is already applied to the shell. The rear is next in line. 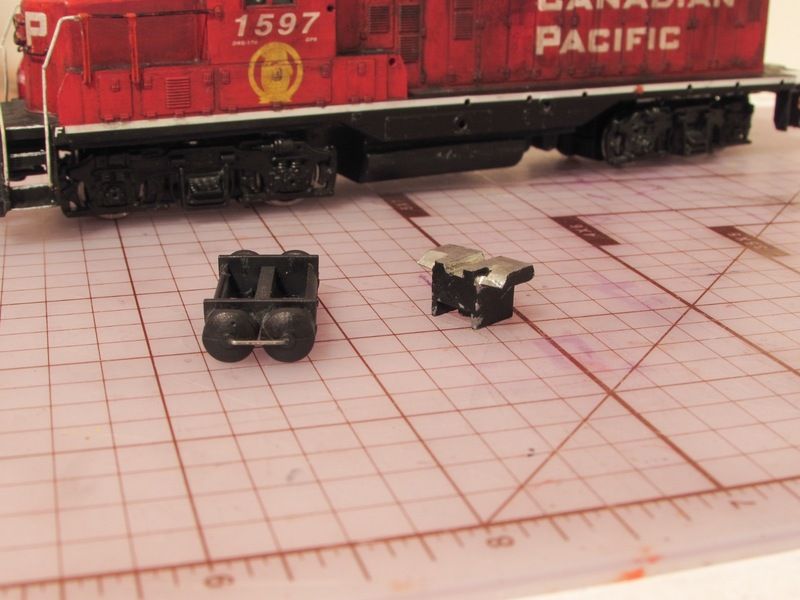 |
|
|
|
Post by PVRR 2647 on Aug 1, 2015 20:06:24 GMT -5
Braedan~
I always thought that the Walther's GP9m was an often overlooked model that is a good candidate for modifications and enhancements. I feel the relatively low cost offsets the few inaccuracies that it has. I was planning on detailing a couple of them as US Army units 4601 and 4602, for use on my PVRR layout. But the Army sold them to the Tennessee Valley Authority back in 2006. Keep up the good work and post when you get the chance.
Sincerely,
PVRR2647
|
|
|
|
Post by cpcnguy on Aug 18, 2015 21:28:12 GMT -5
I have a few of these kicking around. Always wondered what they would look like with a little time and effort. Nice job!
|
|
|
|
Post by iomalley on Aug 20, 2015 13:55:57 GMT -5
I gotta say Braedan, I really like your weathering wash!
|
|
|
|
Post by CanadianRails43 on Aug 22, 2015 12:53:01 GMT -5
I gotta say Braedan, I really like your weathering wash! Thanks! The weathering is a staggered mix of acrylic paint and soot powder, applied by drybrush. Areas will need to touched up, thanks to me continuously handling the locomotive to do more work. But the combination has shown its worth!  |
|
|
|
Post by CanadianRails43 on Aug 22, 2015 13:49:48 GMT -5
Alright, time to bring on another progress update! Let's begin at the front of the model. A few weeks ago, I sent a Walthers parts order to my local hobby shop Model Baron Hobbies. Included in the parts order were a couple packs of Details Associates wood Footboards. The parts arrived a week ago and I quickly began work with the footboards(all I needed were the cable pockets, not the actual footboards). I removed my scratchbuilt cable pockets, sanded the pilot down a little more, and applied the pockets. After that, I made a successful attempt at scratchbuilding the pilot block that goes underneath the coupler, between the pockets. With everything in place, black paint was applied and the MU cables reinstalled. 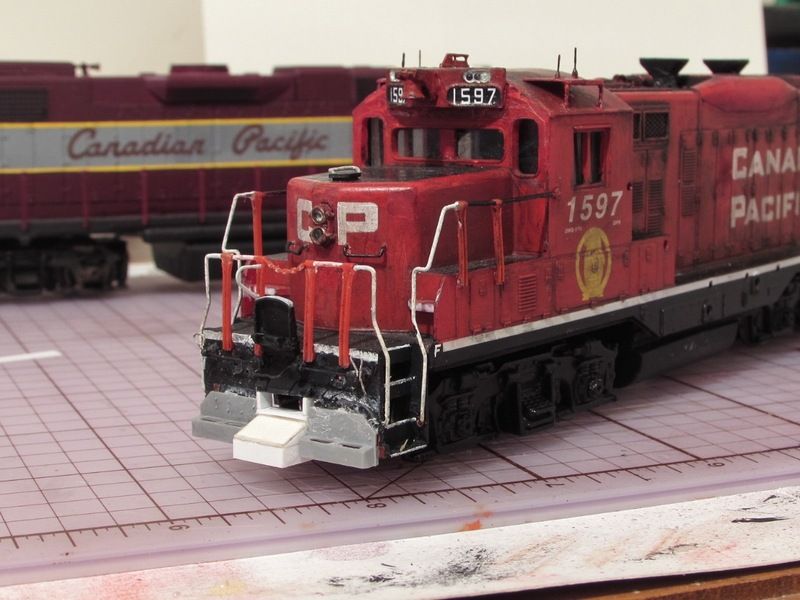 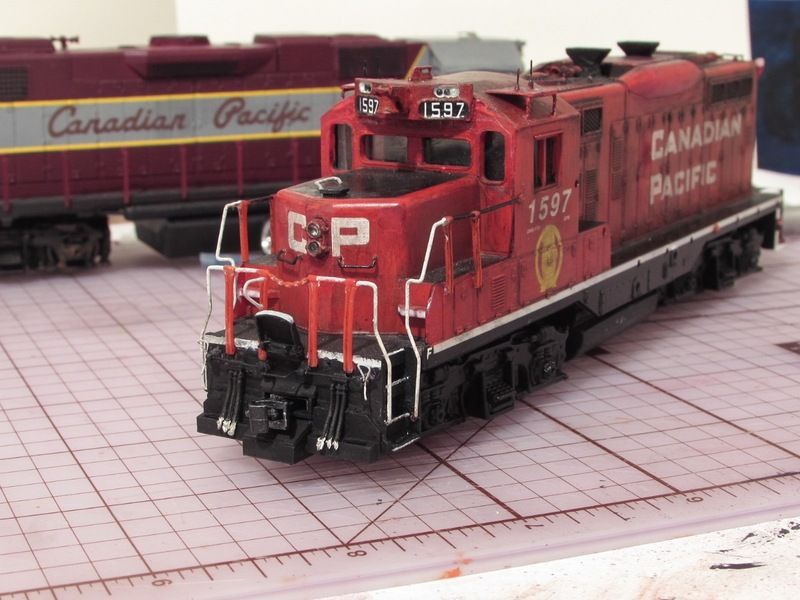 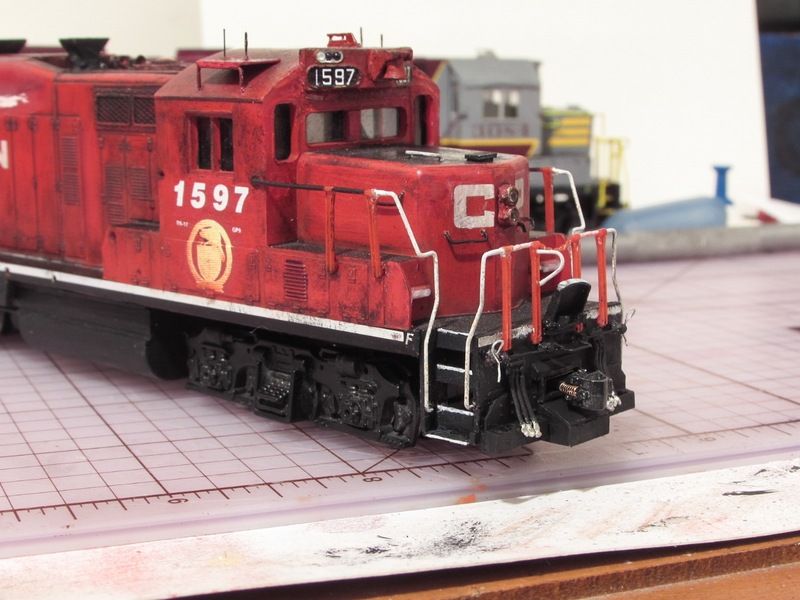 Now turning over to the rear, where a good amount of work has been completed. Still not quite halfway finished though. With extra sanding on the pilot, I attached the other two cable pockets, then glued the coupler mount to the shell, with a Kadee no. 5 coupler installed. I also removed the molded cross-over step and replaced it with the other MBE GP9 dropstep (I may replace these MBE dropsteps for the more realistic Details Associates versions). 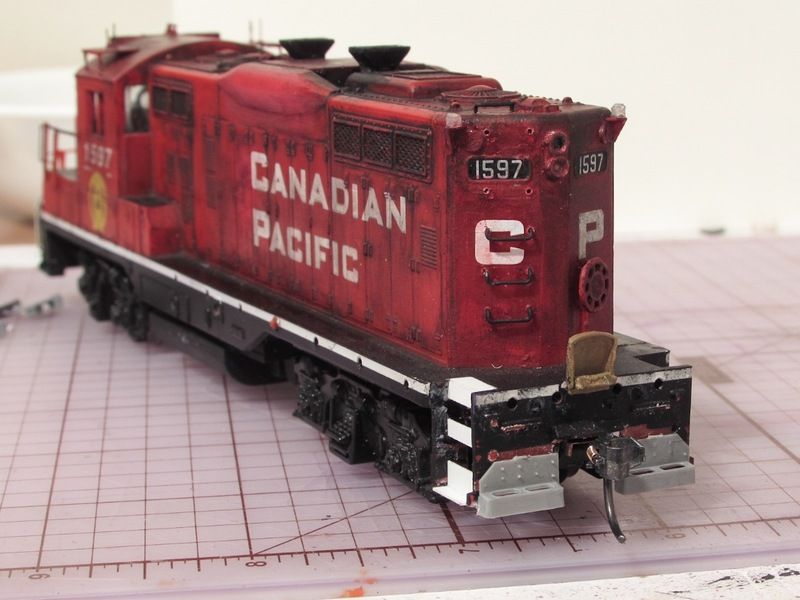 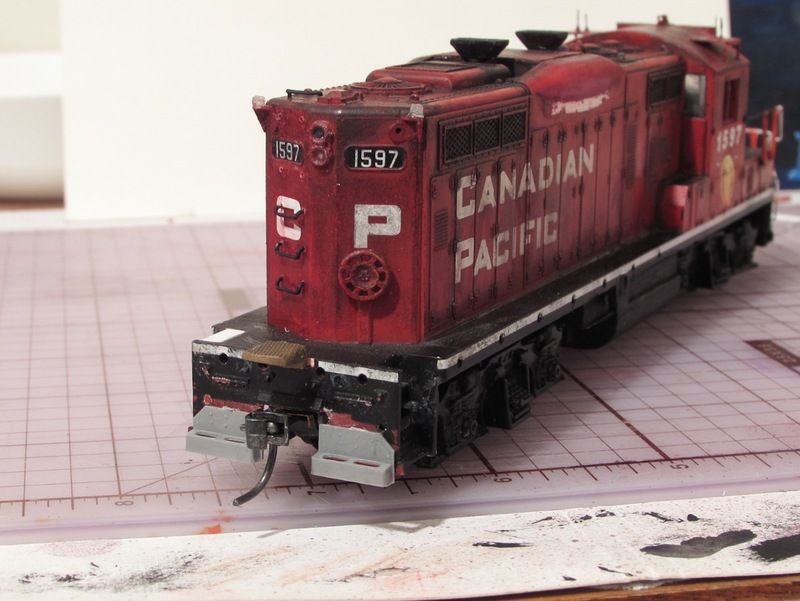 |
|
|
|
Post by CanadianRails43 on Aug 30, 2015 18:19:59 GMT -5
Little progress update! With my work now focused on the rear of the model, I know I'm getting closer to finishing this project, which has been ongoing ever since late September 2013. So, my main areas of interest have been the steps and handrails. I finished the steps a couple days ago, now have to finish painting. The handrails (or step railings, end railings, whatever you want to call them) took most of today to do, as they require full attention and precision. Here's what the stock railings looked like. 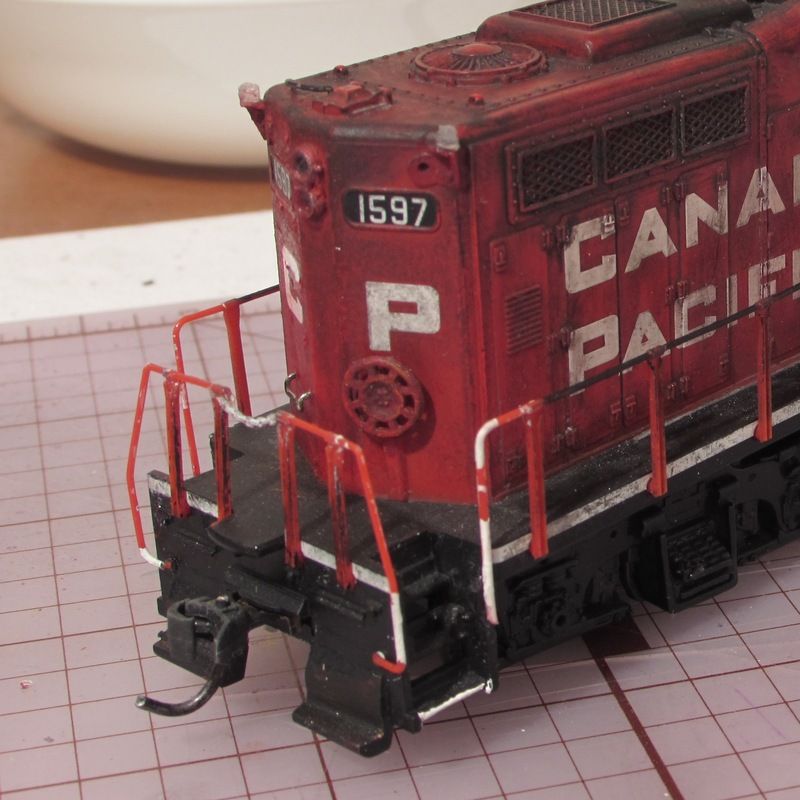 Using 0.015" music wire, I hand bent and cut the wire to match the prototypical look. I'm a tiny bit off with some of the measurements, but nothing close to being a serious problem. You just have to work with what you got and everything will take shape in the end. 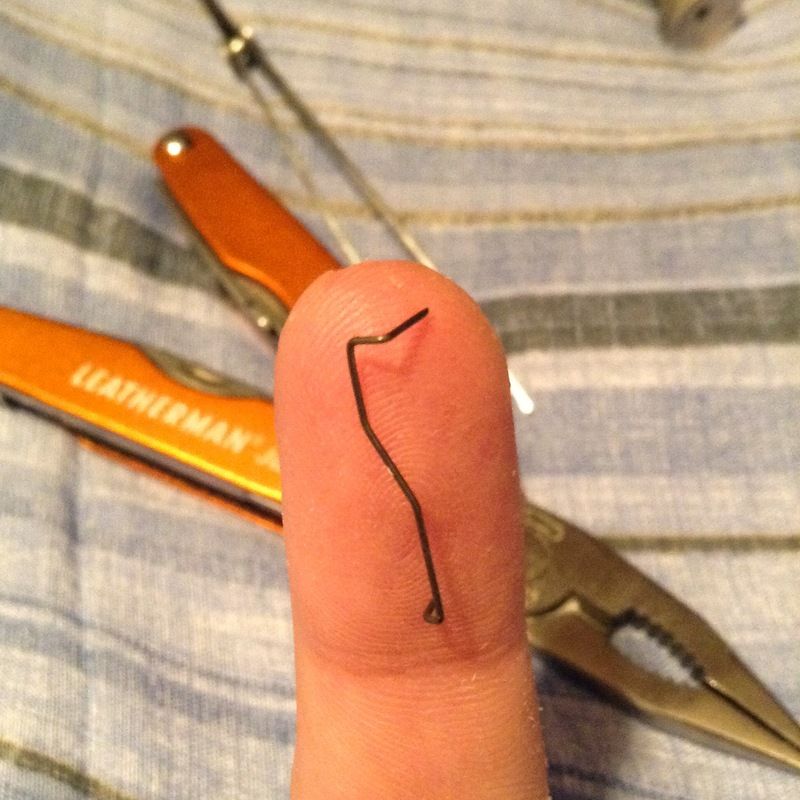 Getting all the wire bent is rather easy. Especially when compared to our next step… getting the new railings attached to the main railings and shell. This task is one of the tedious parts of the whole operation. I'm sure Dan ( CP_8530) would agree with me on this.  Starting off, the stock railings have to be cut clean off from the stanchion, which will leave a good surface for what's next. Now you have to drill out part of the stanchion to fit the new railing in for gluing. It can be very easy to miss and wreck the stanchion when doing this. I take a very sharp thumbtack and line up the point to the centre of the rail housing before carefully pressing the tack into the stanchion. Once everything looks good and square, I can start drilling in with a pin-vise. Instead of using an actual drill bit, I use a piece of scrap music wire for a correct hole and snug fit for the railing. Only makes sense right? The cut end of the music wire is usually sharp enough to eat into the plastic, but care is still top priority. I only go about halfway into the stanchion. Don't need to risk it any longer. 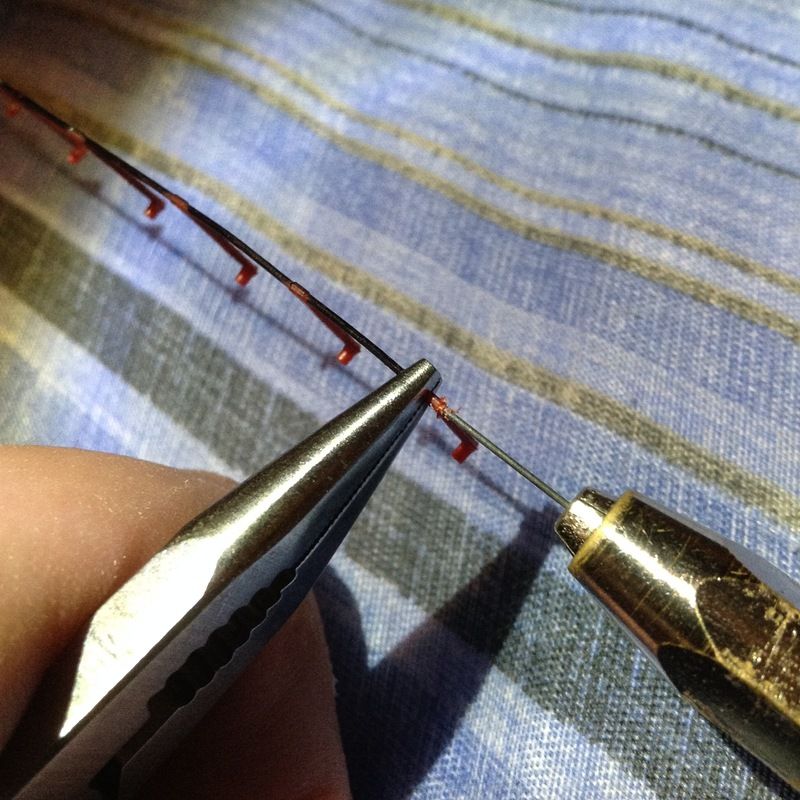 After that, all the railings get glued in and painted white. Here's the final look. I also finished the rear grab irons. I bend my own grabs using No.10 staples. Some don't turn out exactly the same as others, but can be easily replaced if needed  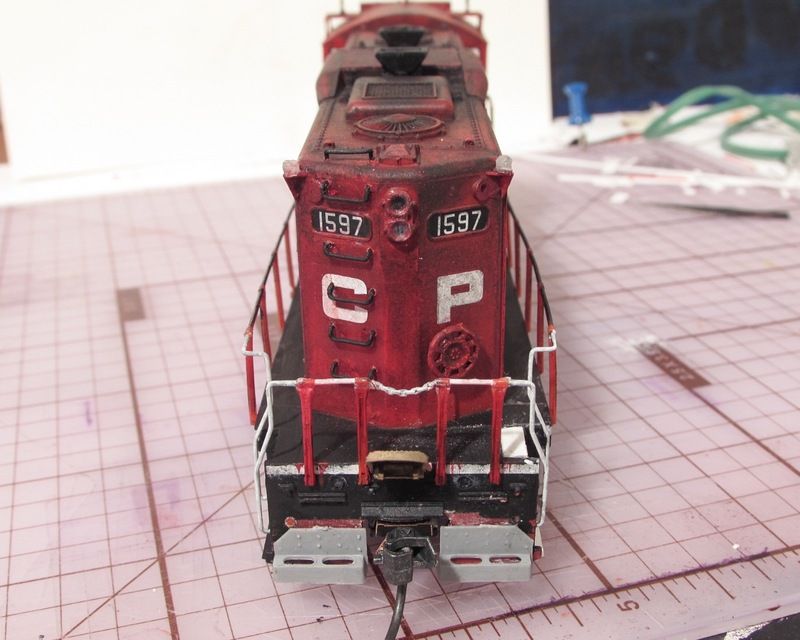 Another area I added on to were the tanks (no idea of what these tanks are for) behind the fuel tank. The prototype has a line from each tank going up into no man's land on the engineer's side. So I used more music wire and stuck them in, and finished with black paint. 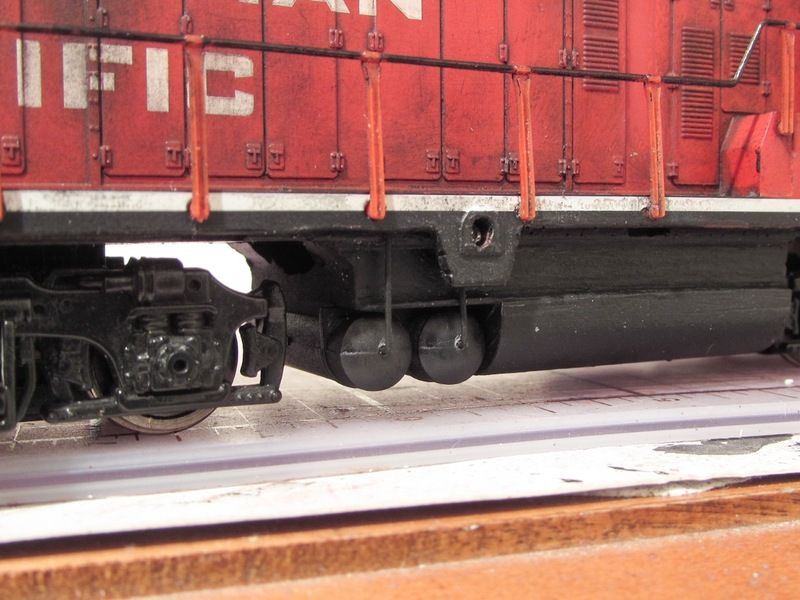 |
|
|
|
Post by CP_8530 on Aug 30, 2015 21:03:37 GMT -5
Nice progress! Yes, those handrails are a real PITA to do, as I've found out on my 3 ongoing rebuilds. You're doing it the easy way by not drilling out all the stanchions and replacing the whole wire.  |
|
|
|
Post by CanadianRails43 on Oct 3, 2015 17:03:41 GMT -5
Hey everyone! Just posting to let you know I'm still working on this GP9u project. Pretty much, little by little, all the time. Still finishing up details, touching up some spots, and so on. Almost completed everything I want to do to this model. The front windshield is going to need a change-out for larger, modern EMD windows. Once I can get a parts cab from either a GP38 or an SD40, everything should hopefully be smooth sailing from there. Mind you, the rear pilot is not yet done. Needs a pilot block and the coupler cut lever. Things are slow-going right now, due to school, other models, our local model railroad club, etc… Here are two photos of the locomotive currently. Just front and back, as I want to spare the rest for later. There are new details applied that can be seen, like the all-weather window on the engineer's side and the rear MU hoses. 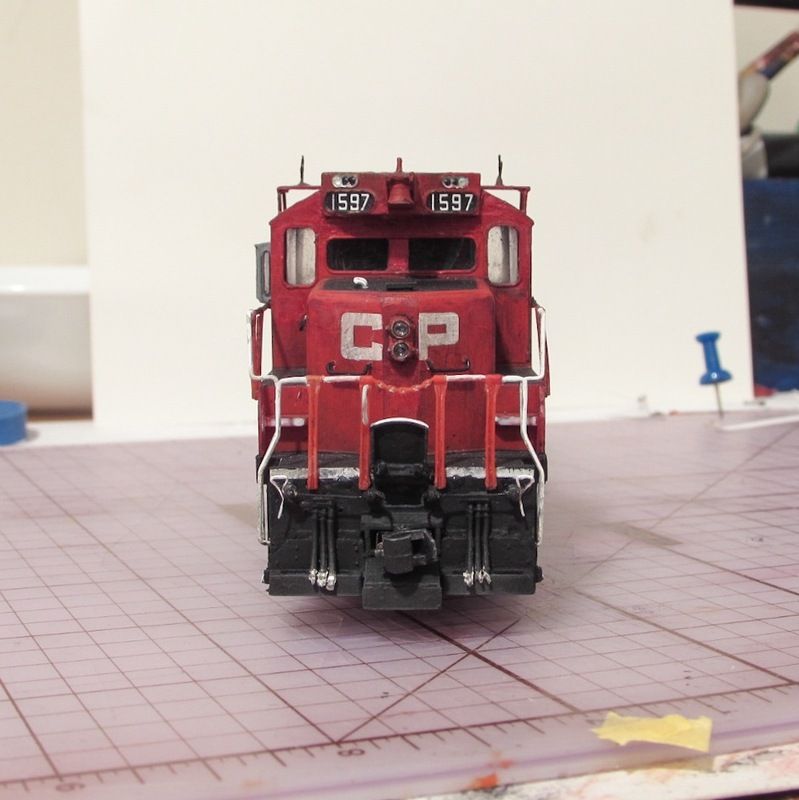 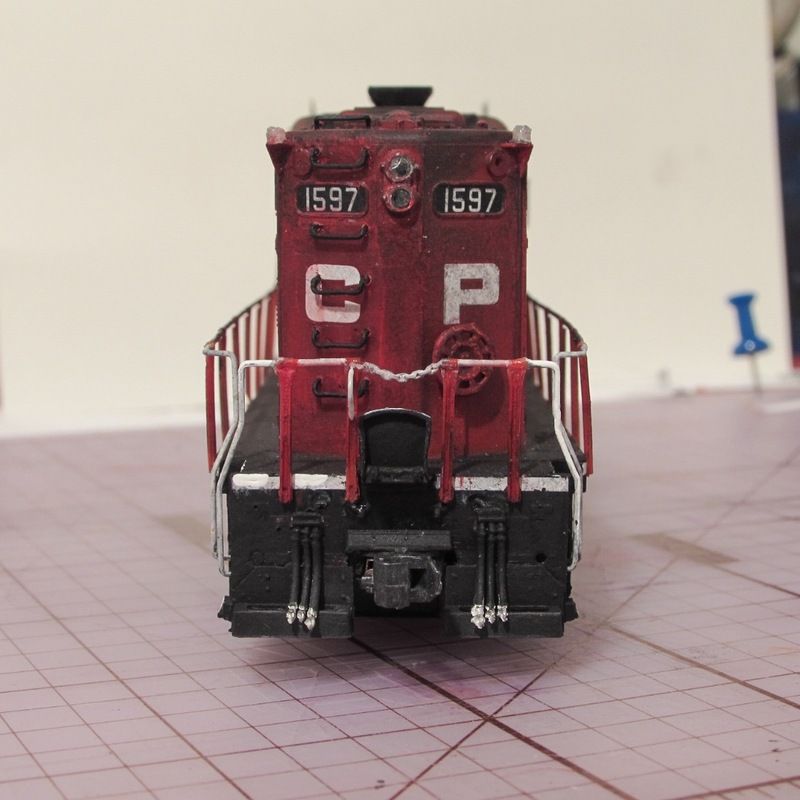 I'm hoping to get more finished in the next week and a half, like completing the rear pilot, in time for our club's mid-October open house, which will be held on the weekend of the 17th. CP 1597 will be operating along with Rapido CN GMD-1 1063 and another one of my locomotives. |
|
pacbelt
Chairman
Building Layout #11!! ;)
Posts: 682 
|
Post by pacbelt on Dec 4, 2015 13:07:13 GMT -5
That really looks GOOD! I'm considering taking some cues from Canadian Roads, into my Freelance PNW Railroad....
It's plausible, that I could have gotten some CN used equipment on my 1970's RR!
You have a knack for weathering too!
~ Carmine
|
|
|
|
Post by CanadianRails43 on Dec 4, 2015 15:31:25 GMT -5
That really looks GOOD! I'm considering taking some cues from Canadian Roads, into my Freelance PNW Railroad.... It's plausible, that I could have gotten some CN used equipment on my 1970's RR! You have a knack for weathering too! ~ Carmine Thanks pacbelt! I can admit that it looks much better than its original GP9M appearance, that's for sure  CN would be great to work with in terms of power. A lot of CN-unique models from the 70s are available, including the GMD-1s. Haha, thank you! I'm still learning and practicing my technique on weathering. This model has faced the brute of my attempts, and always seems to grab attention. Surprises me, but makes me proud of my work! |
|
Deleted
Deleted Member
Posts: 0
|
Post by Deleted on Dec 5, 2015 1:38:15 GMT -5
Those two tanks are the air reservoirs or air tanks
|
|
pacbelt
Chairman
Building Layout #11!! ;)
Posts: 682 
|
Post by pacbelt on Dec 5, 2015 2:58:50 GMT -5
Yeah.... that WOULD make a good excuse for getting a GMD-1!! I've always been fascinated with those!  ~ Carmine |
|
Deleted
Deleted Member
Posts: 0
|
Post by Deleted on Dec 5, 2015 3:23:29 GMT -5
I need to get a couple of N GMD1's
When did they rebuild these gp's would they fit the mid late 70's ?
Your unit is a work in progress i like it
|
|
|
|
Post by emd16645 on Dec 5, 2015 11:48:46 GMT -5
I believe the CN/CP rebuilds were primarily completed in the 80s, wrapping up in the early 90s. Think you need to shift to the mid 80s Vince  |
|
|
|
Post by CanadianRails43 on Dec 5, 2015 12:35:15 GMT -5
@bicentennial, CP did their major 10-year Geep rebuild program from 1980 to 1990. HOWEVER! The first chop-nosed GP9us appeared in the 70s! 8633-8635 were first chopped as an experiment for hump service in March 1971. The three were used on the hump at Calgary's Alyth yard. Later on, they became 1576(8633), 1579(8634), and 1580(8635) in the 80s. Another, CP 8530 was chopped in March 1975 after being rebuilt due to a wreck in 1973. 8530 later became 8203. You can see pictures and info by visiting the CP Diesel roster at www.mountainrailway.com/Diesel%20Roster%20Page.htm |
|
pacbelt
Chairman
Building Layout #11!! ;)
Posts: 682 
|
Post by pacbelt on Dec 5, 2015 13:15:46 GMT -5
I believe the CN/CP rebuilds were primarily completed in the 80s, wrapping up in the early 90s. Think you need to shift to the mid 80s Vince  NOOOOO!!! Don't make him change his mind AGAIN!  hehehehe ~ Carmine |
|


