|
|
Post by CP_8530 on Jul 10, 2015 4:27:45 GMT -5
This one's already progressed quite a bit, but I'll start from the beginning: In 1959, Alcan and CN jointly developed a new type of hopper, one of a tubular design made of aluminum with rounded sides and no centre sill. It was also slightly shorter than the current "slab side" hoppers CN & CP were using, but of the same 3000cuft capacity. Made in 4 and 8 hatch versions, they ultimately lead to the later steel design cars, and the fully cylindrical cars purchased en-masse by many Canadian outfits. The earlier cars were given the nickname "tank hoppers", and CN and CP both purchased aluminum versions made by MLW, Marine Industries and National Steel Car (CN didn't buy the later steel ones, CP bought both types). There were minor variations between the orders and builders, as well as CN vs CP cars (end air brake tanks, side tabbed air line mounting, skirting between the bays, re-enforcements welded to the sides by the RR's later on). CP's were off-roster by the late 80's IIRC, CN had one or two kicking around a few years back in idler car or sand service. As with most oddball equipment are only available in brass or resin kits. In the latter via Sylvan Scale Model's out of production kits, of which they produced many different versions. Back in March, a friend alerted me to someone selling a pair of cars on eBay for a reasonable price. 2 available, listed as CPR 4-hatch cars (that would be a steel one for CPR) but all the photos were of a CNR 4-hatch Aluminum car (kit 1060). I buy one, friend buys one. I ask the seller if it's a CPR or a CNR car since it says CPR in the listing but photos are of the CNR car - he says CNR car. Fast forward a week or two, I get mine in the mail (right on my birthday) and it happens to be...an 8-hatch CPR Aluminum car! (kit 1059, which is perfect). Friend gets his which turns out to be...a CN 4-hatch Aluminum car. 'Erryone happy in the end. The decals were a surprise, I had originally wanted to do a black steel CP tank hopper, but all the aluminum ones were aluminum with markings on them, even in the multimark days. There were notable capacity differences (3000cuft aluminum vs 3400 cuft steel) so you can't substitute one type for the other. As well, good luck finding photos of these aluminum cars - I've only found a grand total of 4 photos of the CP cars, and one in the multimark livery. Maybe about half a dozen CN shots. 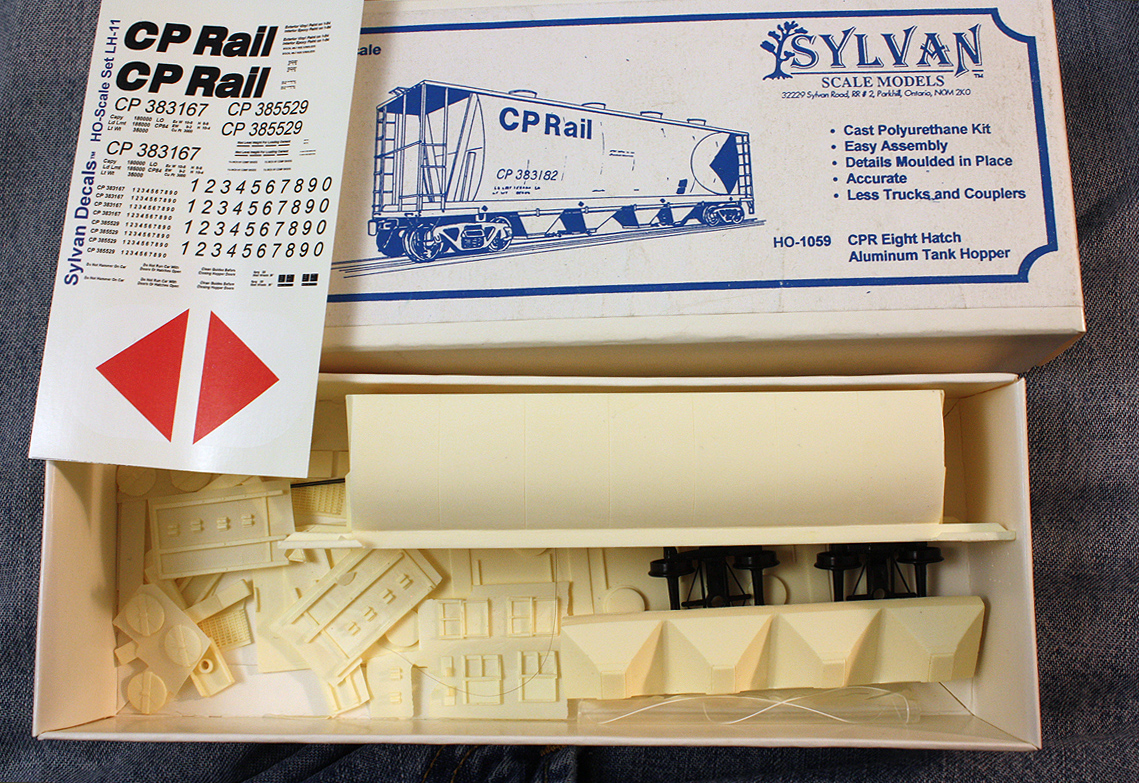 As usual, once all the parts were verified to be there and A-PLUS-PLUS-PLUS-PLUS FIVE STAR SKEET SKEET WOW feedback left, the parts were given a resin prep wash. 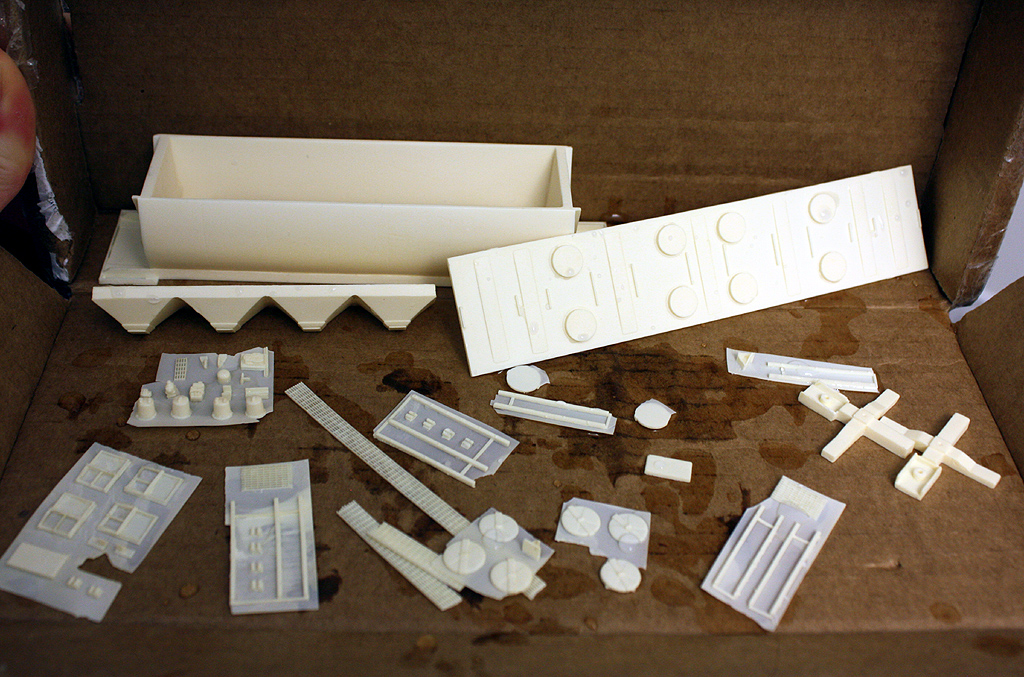 Now the fun really begins... |
|
|
|
Post by tankcarsrule on Jul 10, 2015 14:42:16 GMT -5
A real kit! This is going to be a great looking car. BTW, is the kit still available?
Regards, Bobby
|
|
|
|
Post by analogbeatmaker on Jul 10, 2015 17:11:01 GMT -5
A-PLUS-PLUS-PLUS-PLUS FIVE STAR SKEET SKEET WOW feedback left HAHAHA!  Looking forward to seeing this hopper come to life.  |
|
|
|
Post by iomalley on Jul 10, 2015 19:40:10 GMT -5
Oh my, good luck, but if anybody can pull it off, you can...
|
|
|
|
Post by CP_8530 on Jul 10, 2015 23:20:41 GMT -5
The kits are out of production (and occasionally show up on eBay), but someone contacted Sylvan about them recently and they'd be willing to do a rerun provided they get a certain number of orders. Oh my, good luck, but if anybody can pull it off, you can... If I had known how much work this would have been, I would have asked someone to talk me out of buying it.  Well, at least I came up with a solution for all the stupid ladders... A-PLUS-PLUS-PLUS-PLUS FIVE STAR SKEET SKEET WOW feedback left HAHAHA! Looking forward to seeing this hopper come to life. If anyone ever sells something to someone in Wood-a-bridge-a, and he leaves "A-plus-plus-plus-plus-plus-plus-plus-plus" feedback...  |
|
|
|
Post by CP_8530 on Jul 11, 2015 1:05:35 GMT -5
There was some unfortunate warping on the body. In addition to the roof casting being a bit warped both length-wise and width-wise, one of the sides of the carbody was cast thicker than normal, and sort of bulged out. Maybe the car is pregnant with a mini-hopper or maybe it's been eating a lot of Tim Hortons donuts, I don't know. Due to the thickness of the sides, there was no fixing this error with hot water and firm pressure. After a good amount of sanding and getting not very far I said to hell with it, and just lined up the warped edge of the roof with the warped side of the carbody. Blind leading the blind. 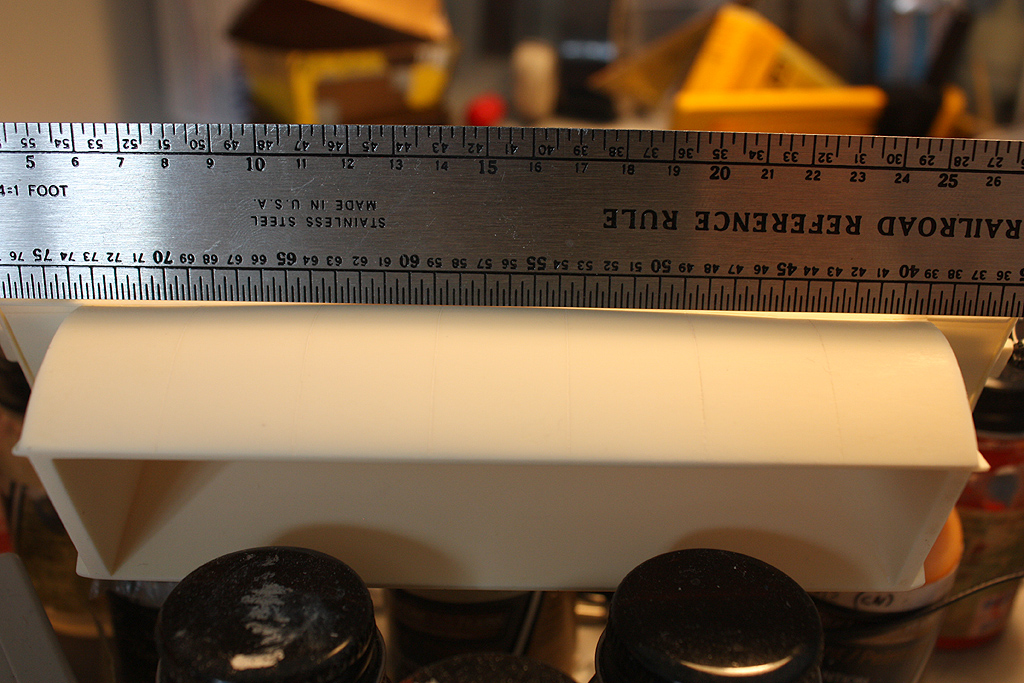 Dan's not impressed. But moving on... All those spare chopped weight bits from chopped Proto 2000 GP9's came in handy for adding some weight in the car before sealing the roof up. Since I wasn't sure how well supergluing the weights to the slippery resin floor inside would hold up over time, I drilled the weights and floor, tapped and put in some long 2-56 screws in. I bought a few bulk packs from China for cheap recently, so I literally have screws to burn. 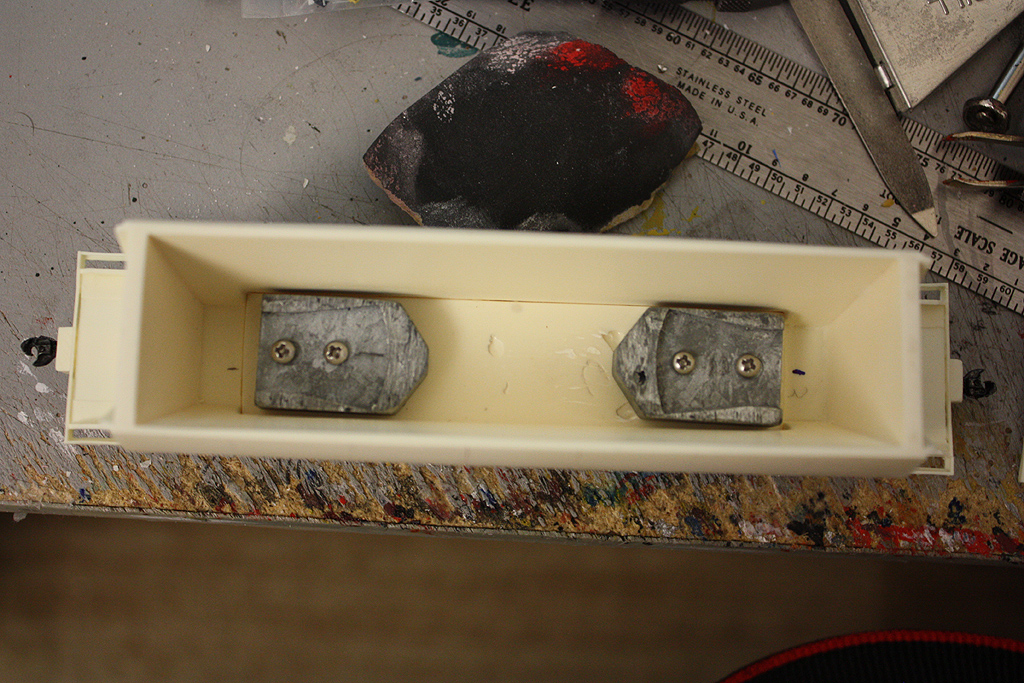 After supergluing the roof on (I used pieces of styrene glued on the inside to work out exact positioning before gluing the whole thing on) and gluing the roof hatches on, I decided to start building the end brake piping setup before tackling the end cages. This is where the trouble, guestimating and excessive digging came into play, as photos of these cars are difficult to find, much less photos giving a good view of the end details. In all my travels over teh internets, I've only been able to locate two photos of these CP aluminum cars, and 2 photos in a book. Exactly one low-resolution photo gives a poor view of the B-end setup. The CN cars are similar, but again, few good photos and there were differences in the air tanks and rigging setups. I had to built a larger custom tank for the top from a piece of spare styrene sprue, round it off, and make bigger mounts out of styrene (as well as improving the mounts for the lower tank with more styrene). The instructions were of little to no help, as they didn't match the single end photo of the CP aluminum car I dug up showing the B-end, and included no piping instructions or diagram. I think two of the end variation illustrations were actually mixed up too. Working off what photos I had, I was able to put together some semblance of a brake system. There were a few guestimations here and there. It still needs a few more pipes before being enclosed in the end cage: 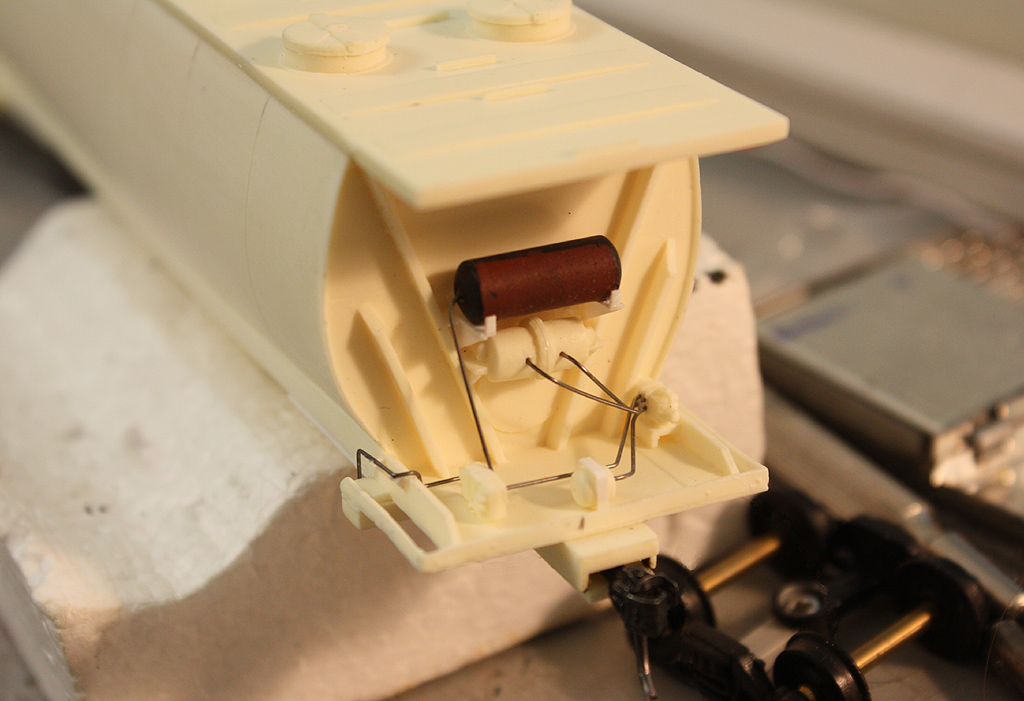 Turning my attention to the A-end, I found the stock resin end bars to build the end cages to be too fragile, and the tiny styrene rungs it advises to use not very durable. Initially I decided to drill out the stock bars for new brass wire rugs, but after installing them and not all the rugs lining up correctly, and having one bar break, they were ripped out and it was back to the drawing board. I also found a little discrepancy in the Sylvan instructions: the aluminum cars only had one bar in the middle on both the end cage assemblies (slightly offset to the left), as opposed to two on the B-end of the steel cars (A-end had only one, offset to the right). The Sylvan instructions show two in the middle for all variations, and probably assume both ends are the same. Again, easy to miss all this due to lack of reference photos. The solution in the end was to make new ends using close-enough Tichy end ladders, brass 0.010" wire and styrene rod. The ladders and rods all had holes drilled in the ends for 0.015" wire, which fit into holes I drilled in the car's roof and floor ends, to make them more durable in the event something were to happen. The styrene rod is a bit more flexible and stronger than the somewhat brittle resin bars with the kit. The Tichy rig spacing was a hair tighter than the prototypes, but otherwise a pretty good match. I cut the left side bar off two ladders and used them as end ladders to butt against the bar of the side ladders. Brass wire was used for all the other grabs, rugs, etc according to photos. All the ladders and grabs were drilled out before mounting, and holes marked and drilled in the roof where the wire would fit. 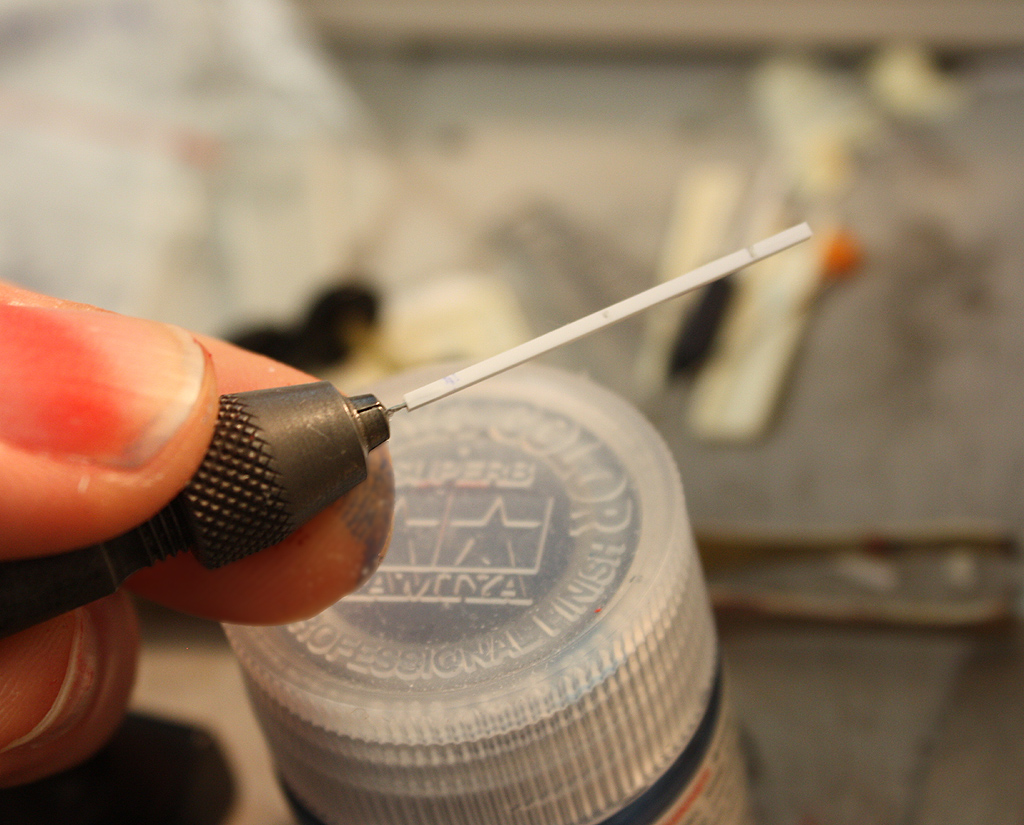 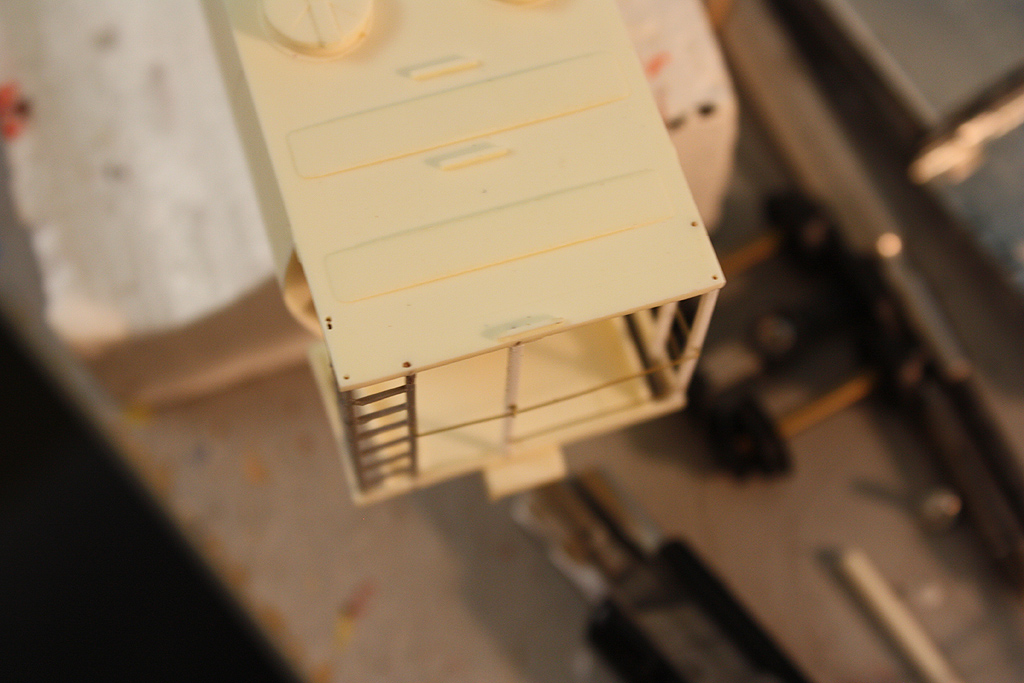 (One interesting A-end variation on the aluminum and steel tank hoppers was CP (probably in the 70's) torched off the upper 2 rugs of the side ladders and the corresponding half of the top roof grab (but left the adjoining end ladder and top grab intact). Probably a modernization effort similar to cutting down full height boxcar ladders, but leaving the end one intact for roof hatch access. The B-ends weren't modified.)  Showing the side cage setup, for the bottom I just looped a piece of wire, and then glued it on the inside of the car frame: 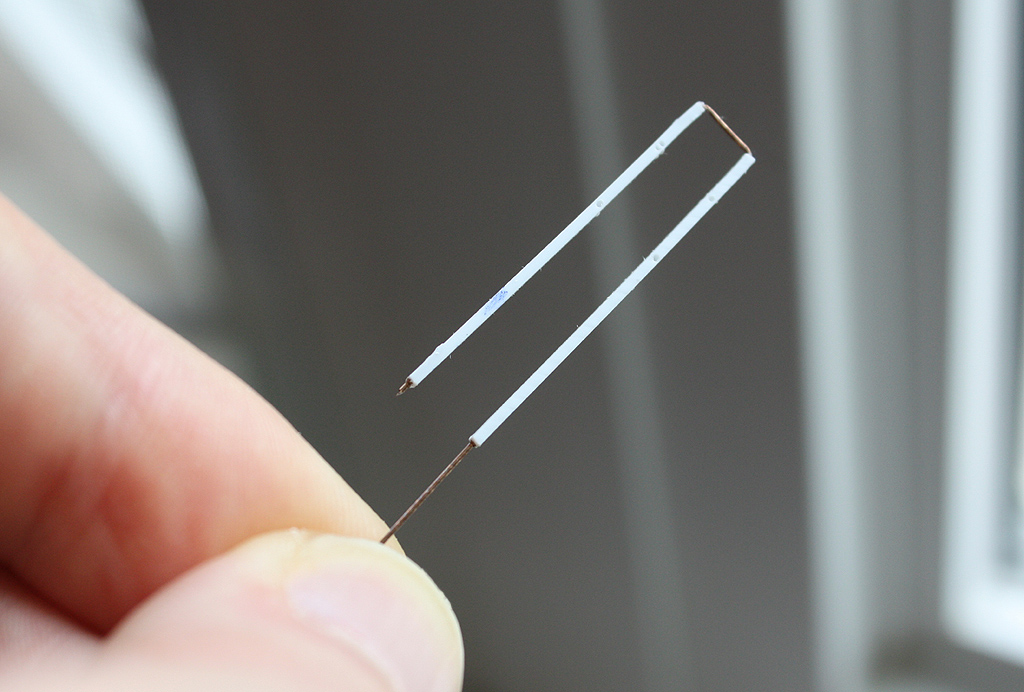 Next installment will be caging the B-end, installing the roofwalk, and a few other things before moving to the bottom areas. |
|
|
|
Post by simulatortrain on Jul 11, 2015 1:40:18 GMT -5
Interesting way of doing those end cages. Would any of these cars have seen much use in the US?
|
|
|
|
Post by CP_8530 on Jul 11, 2015 2:36:20 GMT -5
Yup, they frequently went south of the 49th parallel, two of my reference photos are of them in Illinois, and Dallas TX. The latter was in assigned styemite service based out of Havelock ON, along with some slab site hoppers. There were others assigned to potash service out west too. Illinois: canadianfreightcargallery.ca/cgi-bin/image.pl?i=cp383202&o=cprailThis one's probably in Ontario somewhere: www.images.technomuses.ca/searchpf.php?id=226384&lang=enCommon cargos would be potash, sand, cement, fertilizer, flour, sugar, salt, whatever styemite is... |
|
|
|
Post by iomalley on Jul 14, 2015 15:45:24 GMT -5
I probably shouldn't even show you this, but I took a slightly different approach to the end cages...one piece photo etch... 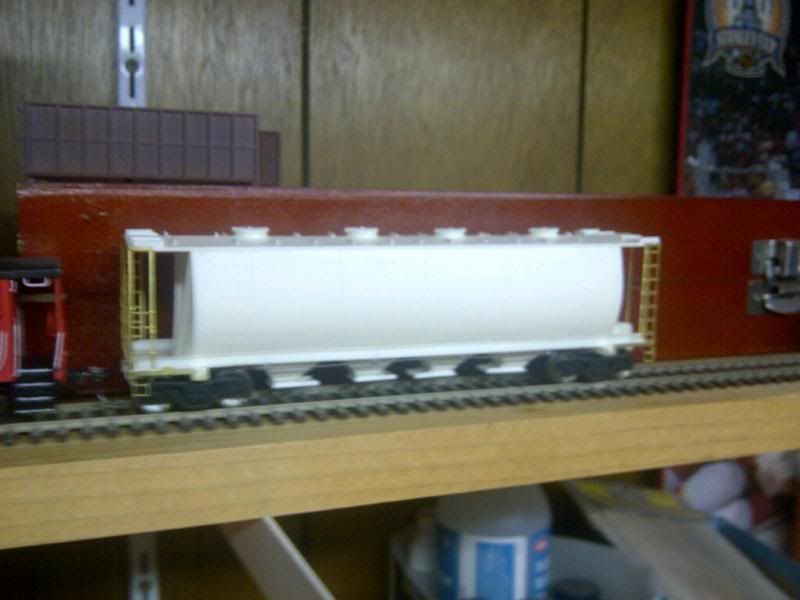 I have one of these cars left, and no cages  so I might follow your lead on this... |
|
|
|
Post by CP_8530 on Jul 15, 2015 7:25:04 GMT -5
I saw that in the CN car build thread, but didn't want to pay more for the etchings than I paid for the entire car Slipping some brass wire grabs in the non-ladder corners (all the holes were measured and drilled before installing the end cages, easier to drill them that way): 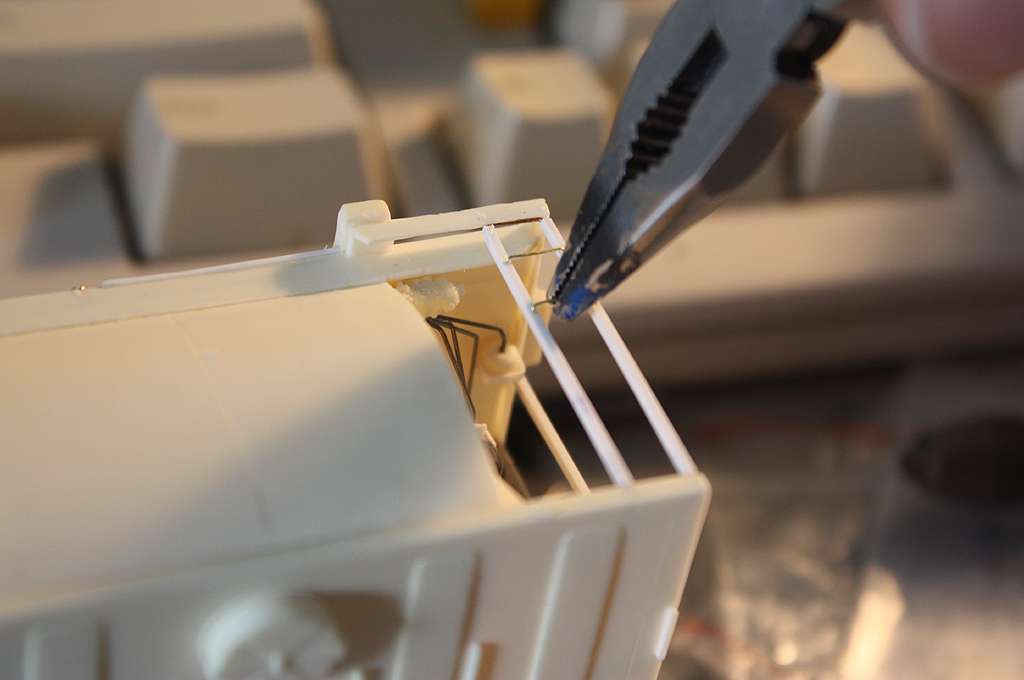 B-end cages built up, with a little boo-boo after a fall that had to be rectified. 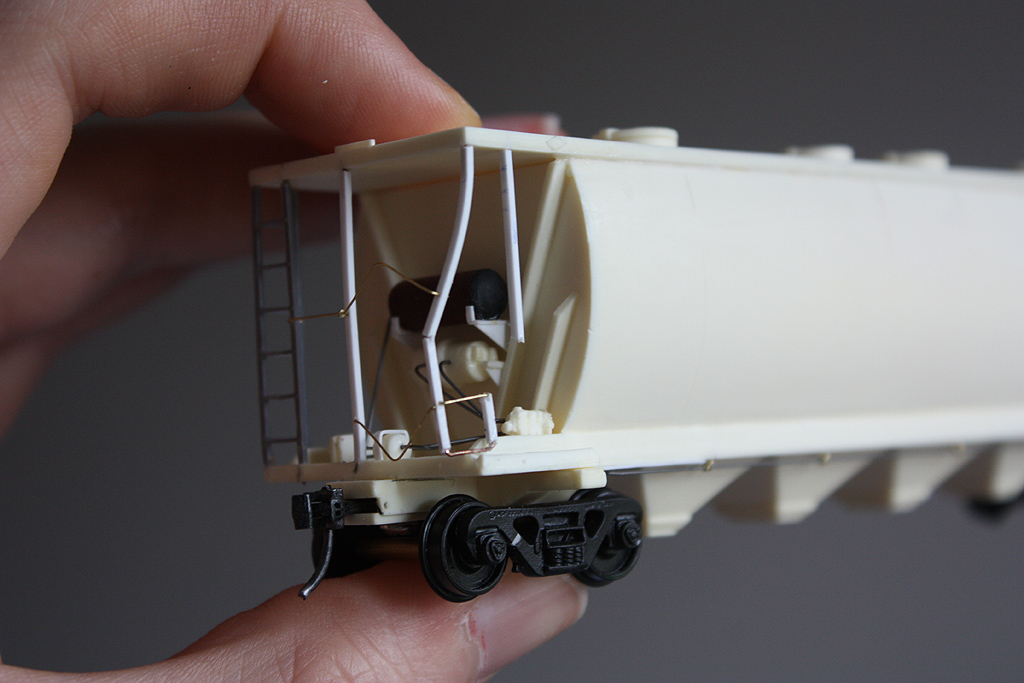 Brake rigging area set up too, with new longer platform supports made from styrene, and brake rigging built using A-line chain and 0.010" brass rod. Bottom rigging rocker was fabricated from styrene, CP's aluminum cars had it mounted under the frame, CN's had it mounted just above. Some extra brake piping was also run up the side of the car from underneath to inside the cages. Again, the lack of photos means some of this had to be guestimated. 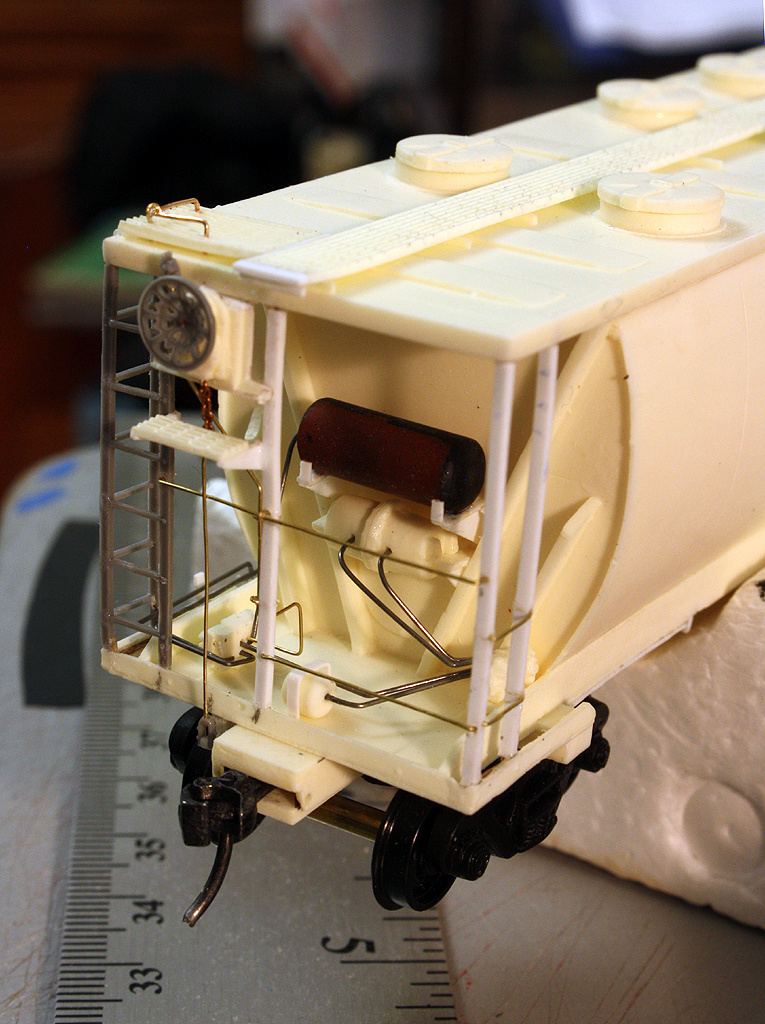 A few miscellaneous Tichy parts were used for the bottom brake rod bracket, and top air valve thingy by the brakewheel (which came with the kit, probably another Tichy part). The wire roof corner grabs were installed, with some roofwalk retaining straps made of styrene and bent down the roof sides. The roofwalk was a little short, so I extended it with bits of styrene. 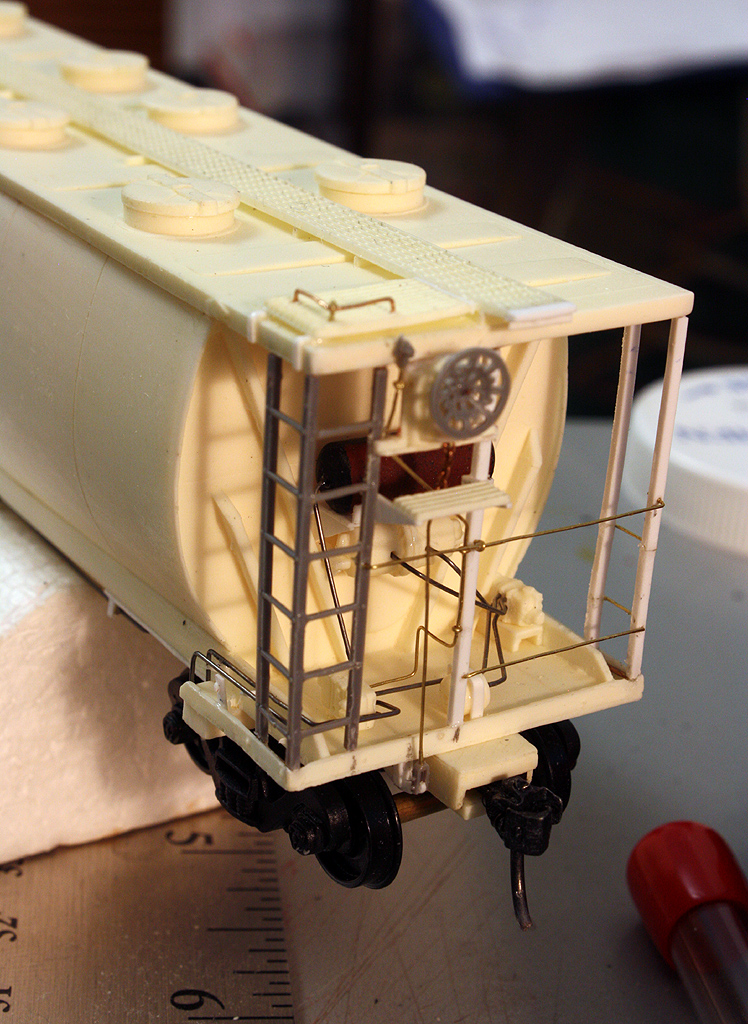 |
|
|
|
Post by tjmfishing on Jul 15, 2015 17:32:32 GMT -5
Looks good my friend. I like the addition of the grey styrene ladder (Tichy?). It looks a lot better than the resin and would have been a lot cheaper than photo etch  |
|
|
|
Post by simulatortrain on Sept 11, 2015 18:36:04 GMT -5
This looks related, but I don't know if it's anything helpful or not.  |
|


 Well, at least I came up with a solution for all the stupid ladders...


 so I might follow your lead on this...
