|
|
Post by CP_8530 on Feb 10, 2014 22:47:31 GMT -5
This was built up much like the Kaslo SD60F kit, and alongside it, so I didn't take many photos of the process. The main issue was, again, mounting it to the drive. A Genesis SD45-2 was obtained as a donor, since it was the same wheelbase, had trucks that allowed swapping the sideframes for Smokey Valley roller bearing sideframes with ease, and had a plastic fuel tank making it easy to cut out the area for the stepwell. The frame was modified similar to the SD60F, with the major difference being I modified part of the shell just under the draper taper to clear and sit over the blower duct bulge in the metal frame, rather than cutting that part of the frame away. The SD45-2 was a tighter fit inside the stepwells, and as a result I had to cut some material off the sideframe ends and insides of the stepwells to get the trucks to swing and clear properly. It was also modified for frame-mounted couplers, which meant removing the resin block behind the pilot ends for mounting the coupler boxes. Other work included shaving off the incorrect knuckles on the rear pilot, splicing the plow wider with styrene (now painted black), adding a new rain gutter above the front of the cab made out of styrene, cleaning up the winterization hatch and cutting the screen smaller to flush-mount, adding all the etched parts and fans, bending some of the wire handrails, drilling the holes for most of the details including stanchions, appying the lift tabs (drilled and installed wires through them for more stability), notching the coupler boxes to clear the frame like on the SD60F, cutting the steps into the fuel tank, and cutting the stock resin air tanks smaller to apply (I used Athearn ones on the SD60F). This is a build for someone else who wanted Sergent couplers, so they were installed (had to shave the shank skinnier for them to swing freely in the coupler boxes). Some quick photos with some parts test-applied: 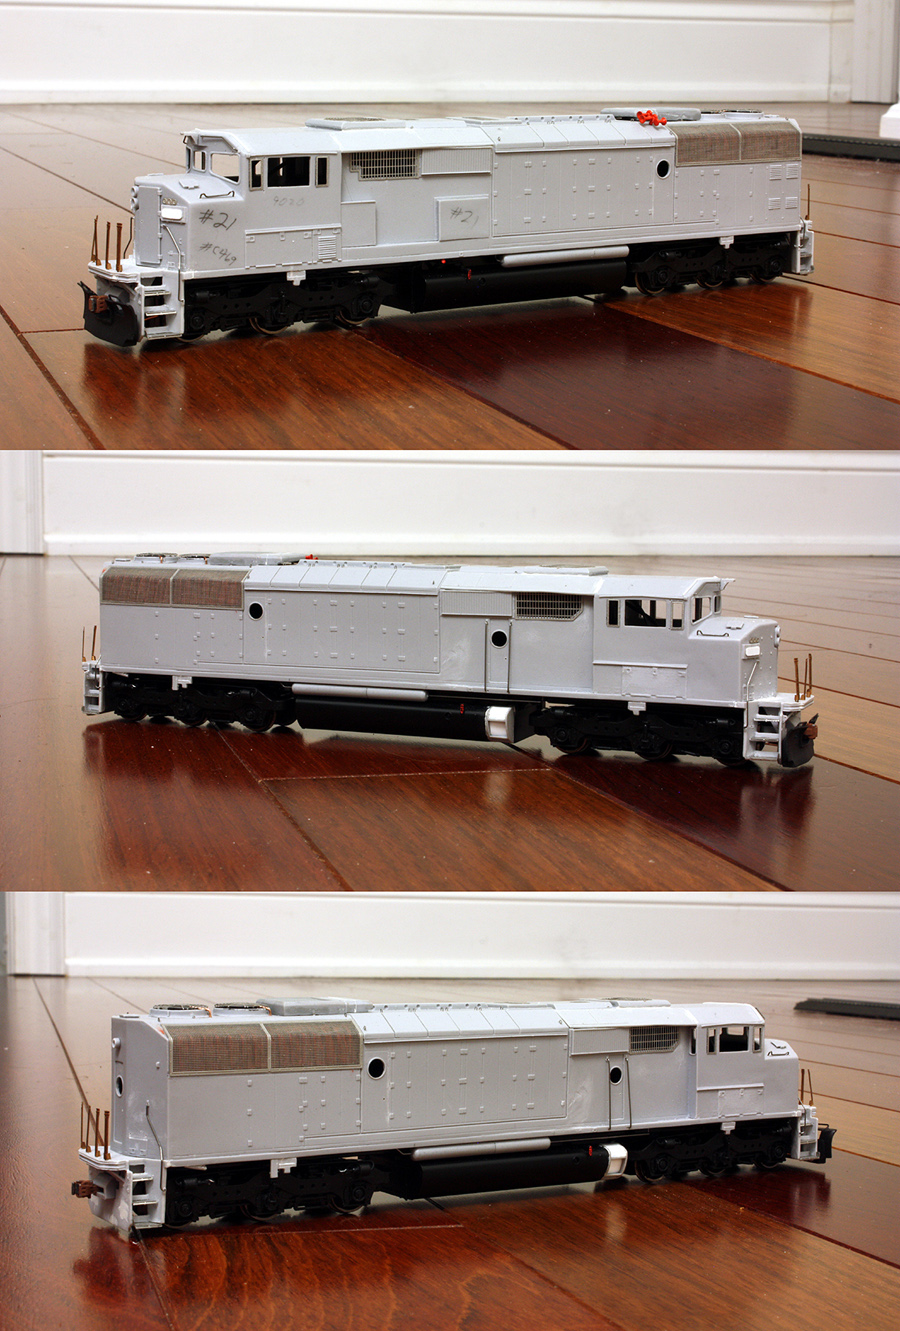 |
|
|
|
Post by CP_8530 on Feb 10, 2014 22:57:05 GMT -5
I should probably mention, the Kaslo Resin SD40-2F shells were done exclusively for Southern Alberta Rail, which is where I got mine from. They run about $109 CAD each + S&H. They probably turn up in the usual places (eBay, swap meets, etc) once in a while.
|
|
|
|
Post by m a y o r 79 on Feb 11, 2014 6:55:00 GMT -5
Looks good. How did you get the steps cut into the fuel tank so clean? They turned out great.
|
|
|
|
Post by CP_8530 on Feb 21, 2014 5:04:54 GMT -5
Cutting in the fuel tank steps is fairly straightforward. Kaslo includes a resin step piece in the kit you install, so just cut a notch out, file smooth and glue in, making use the top and sides are level with the tank profile. Easier if you're using a unit with a separate plastic fuel tank, rather than a metal affair like earlier Athearn models. I used the ol' drill-a-buncha-holes method, but a good hobby would make short work of it too. Once installed, I filled in the steps with styrene squares as the Kaslo ones are just too deep. Some quickie photos (not the best quality, but my workspace doesn't have ideal photo lighting, so on some I've played with the exposure to bring out the details): 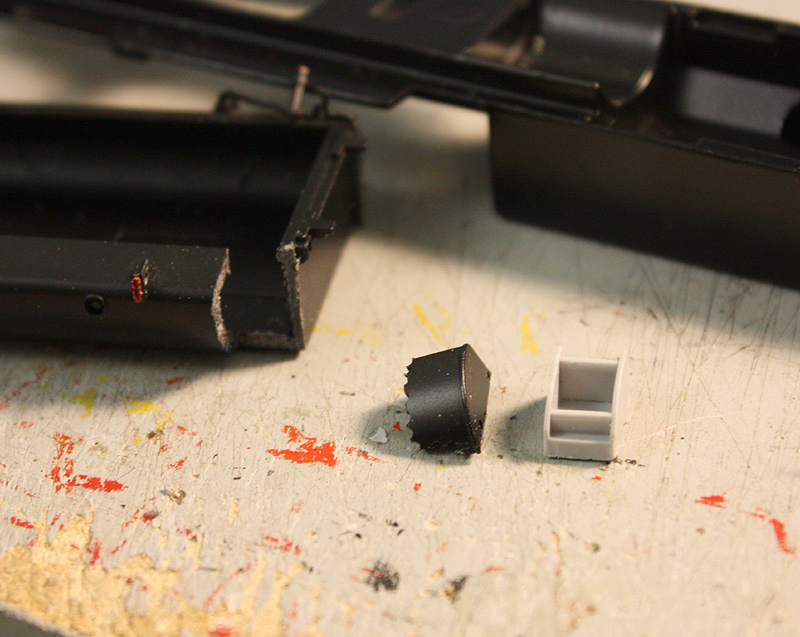 ... More on modifying the Genesis SD45-2 chassis to fit the Kaslo shell, or in this case, a lot was the other way around: rather than modify the frame on this one, I decided to try and modify the shell to fit. The major mod was cutting part of the taper inside the shell out in order for it to clear the cast-on blower bulge on the frame and sit level. You only need to do this on the left/conductor's side. Beware - cut or drill too far and you'll go right through the shell, or damage that area. You can also see the jacking pads. I installed them with a piece of wire through them, but had to trim the insides of the shell thinner so it exposed some of the wire. 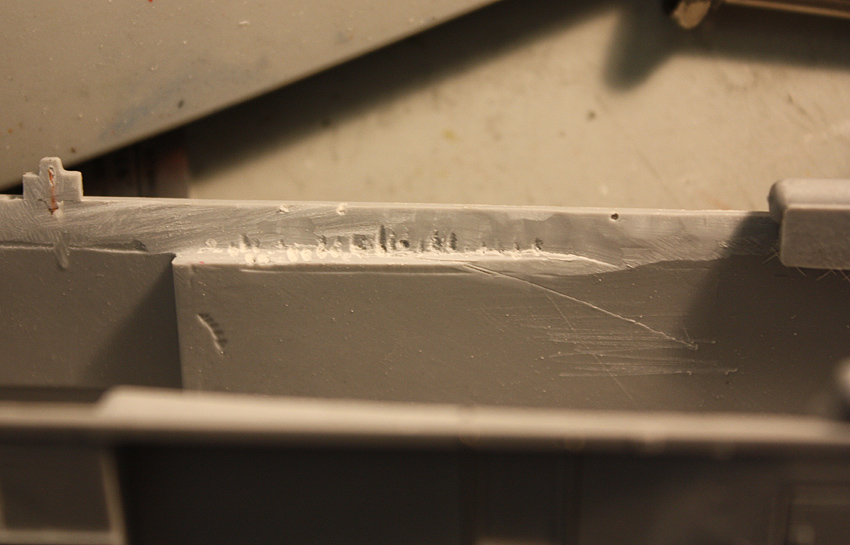 In addition, you'll probably need to cut part of the two rear mounting blocks, located on either side of the inside of the shell near the rear, to get it to fit. On the front (and rear), I filed a little bit off the inside pilot mount lip, that glues inside the shell, because it was a snug fit with the front chassis weight. I also tried to clear out the inside corners where it meets the shell sides so there's a flatter surface for it to fit down in. You can also see the two grooves I cut into the pilot mount for the ditch light wires (to be magnet wire) to run though without the shell & chassis pinching them. 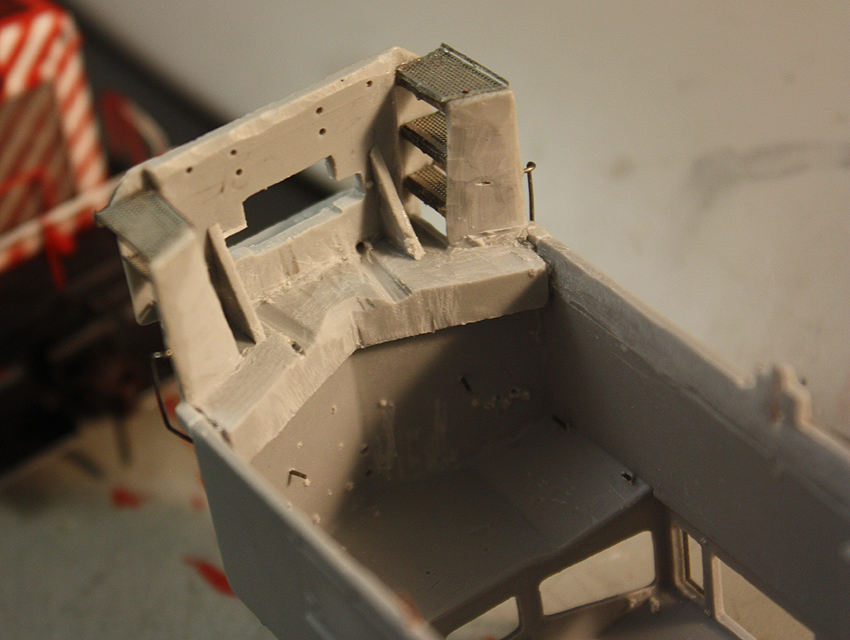 As mentioned before, I carefully filed and trimmed the insides of the shell sides slightly narrower (can be seen above) as the Genesis '45-2 chassis was a bit tighter of a fit than the SD60 was. I had also removed the original pilot mounting block the coupler boxes were supposed to screw on to, as Kaslo intended this to have body mounted couplers (frame mounted will be the order of the day here, with specially notched coupler boxes) The modified coupler boxes, same deal as the SD60F: drill out for 2-56 screws, cut the rear to avoid them hitting the truck gearbox, and make a notch at the top so they would clear the chassis, and screw in nicely. They also serve to hold the body to the frame. 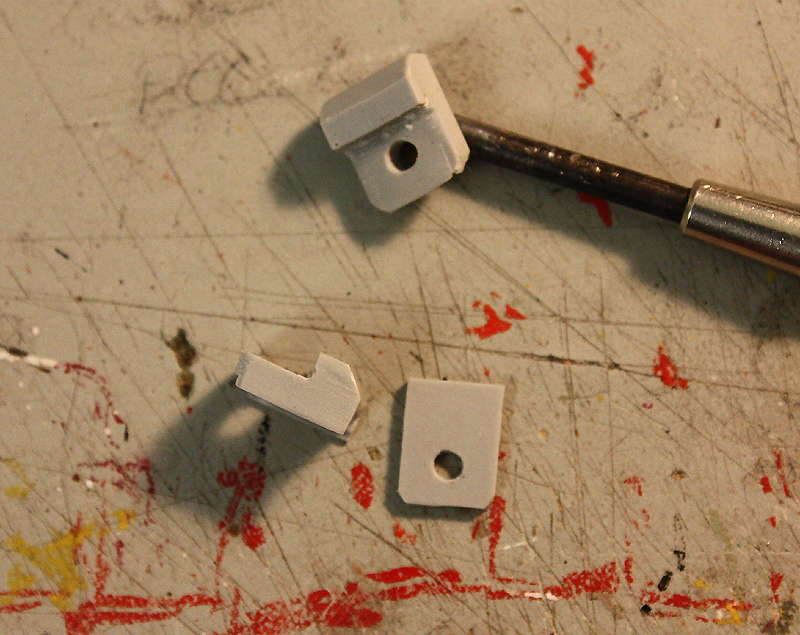 The sideframes arrived! Since the SD45-2 came with HTC's with Hyatt bearings, we will take the easy route and replace them with Smokey Valley later style HTC trucks with the exposed roller bearings, which are identical to the Athearn ones I used on the SD60F right down to the tooling holes in the back (I suspect a shared tooling arrangement). I proceeded to shave off the GM markings on the sides (checking photos the CP SD40-2F's didn't have them), and shaved a few of the square-ish bearing housings rounder to better reflect the prototype, as both types can be found on the trucks now. Install the sideframe struts on the centre axles as well. After that it's a matter of you seeing grey sideframes, and you want to paint them black, and drilling out the brake cylinders that come with the kit to install piping. Brake chain mods later. 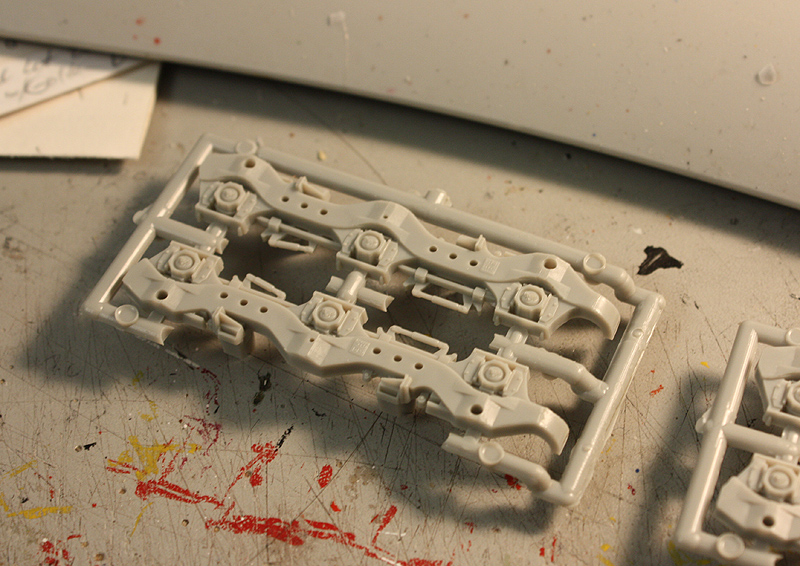 Chassis-wise, you need to file some material off the ends of the chassis to clear the stepwells (mainly at the front but a bit at the back), and file the coupler mount area a little bit shorter and narrower to clear the ribs behind the pilot. I also filed some material off the pointed tip of the weight: 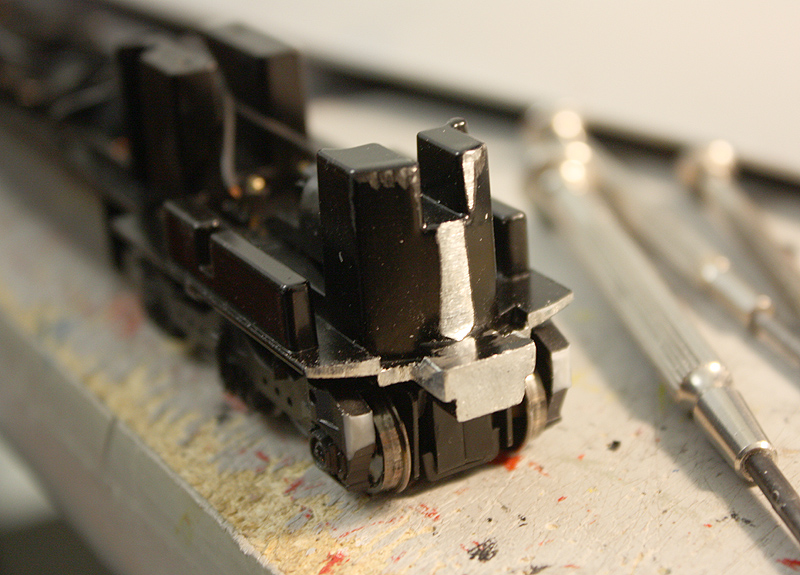 Also note, you need to trim down the ends of the sideframes by a few millimetres on both ends to clear the steps. The SD60F only required minor trimming, but this one required more as the trucks would not swing at all without hitting the stepwells. Test and trim until trucks swing freely. ---- Chassis with mods and fuel tank installed. Air tanks would be a set of Kaslo ones I have that will be mounted to the shell, but you can use the Athearn ones too (I cut mine down to match the length of them according to the hood doors). Additionally, The dusty chassis, with SV sideframes installed, modified fuel tank patched and installed, and rear weight. The weights that come with the frame just fit under the Kaslo shell, but with little to no extra room - I had to notch them out to clear lift rings, wire, and other things in that area of the shell. We'll see how that works... 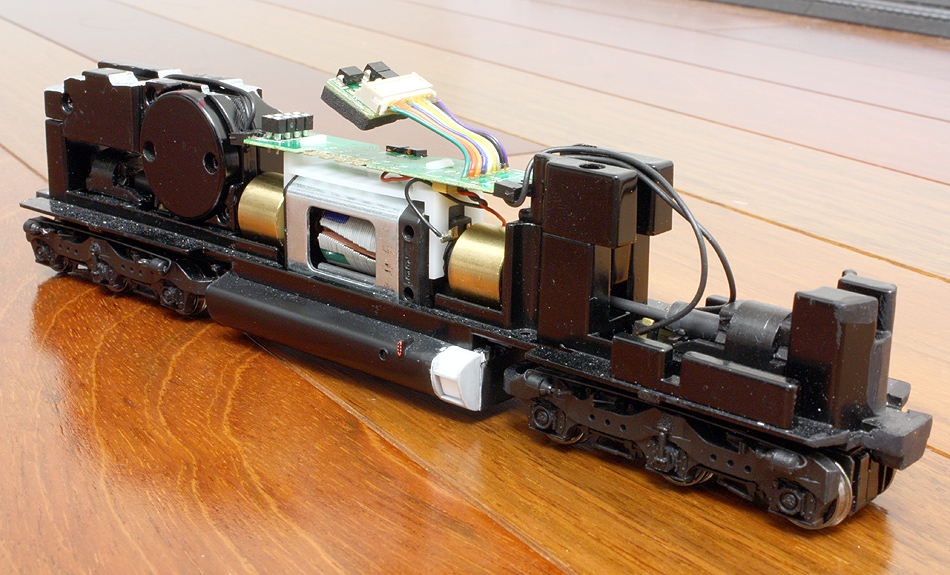 The brake cylinder piping is a simplified version without the kinked portions. When they're painted black, hard to see, and you're bending a whole bunch of them by hand and having to repeatedly test-fit, complex bending can get annoying... More to come later...I'm likely going to ditch the Athearn board and hardwire everything to a 9-pin harness for DCC, as all the board outputs are 1.5v and won't work for the 3.4-ish LED bulbs I've got in mind. I ran into this problem with the SD60F as well. |
|
|
|
Post by Nick Lorusso on Feb 27, 2014 1:45:22 GMT -5
Looking great so far. I might have to pick up one of these kits.
|
|
|
|
Post by CP_8530 on Mar 31, 2014 20:49:04 GMT -5
The weather has warmed up enough to do some painting outdoors, so...  |
|
artur
Chairman
Posts: 580
|
Post by artur on Mar 31, 2014 21:00:24 GMT -5
looking good. I see that I'm not the only one not using the Kaslo mesh on the rear of the diesel, I don't like how you can't see trough it.
|
|
|
|
Post by CP_8530 on Mar 31, 2014 21:37:31 GMT -5
looking good. I see that I'm not the only one not using the Kaslo mesh on the rear of the diesel, I don't like how you can't see trough it. Actually, that is the Kaslo mesh. But I find some are better than others: the mesh on my SD40-2F and SD60F is great, my F59PH not so much unfortunately... |
|
|
|
Post by CP_8530 on Apr 15, 2014 21:38:03 GMT -5
Mask that sucker off and spray the frame black. To save on tape I used clear plastic to cover the top of the shell to protect from any overspray. 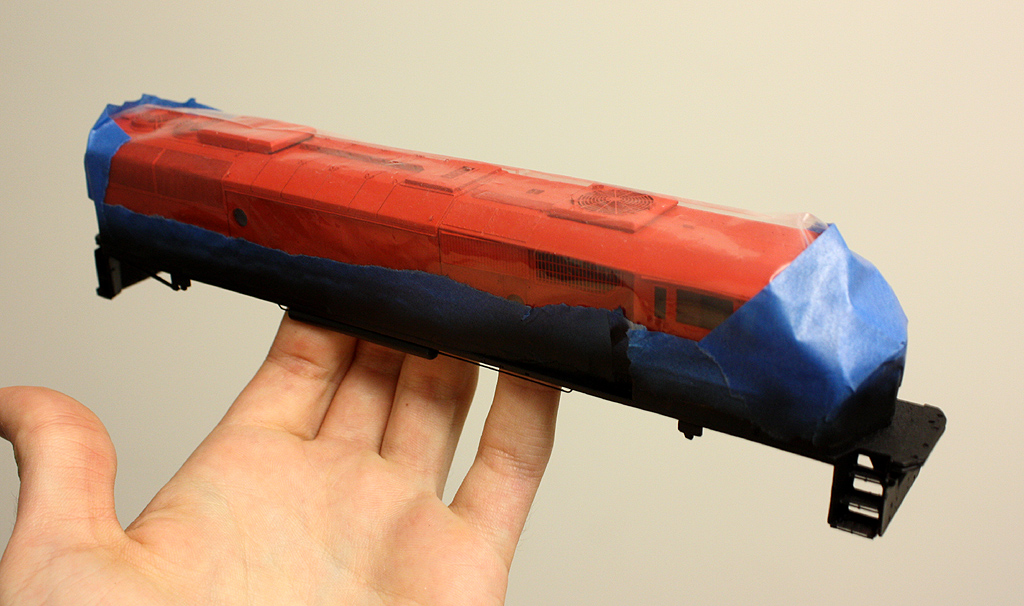 Almost time for decaling, with the CN SD60F whose shell was purchased at the same time: 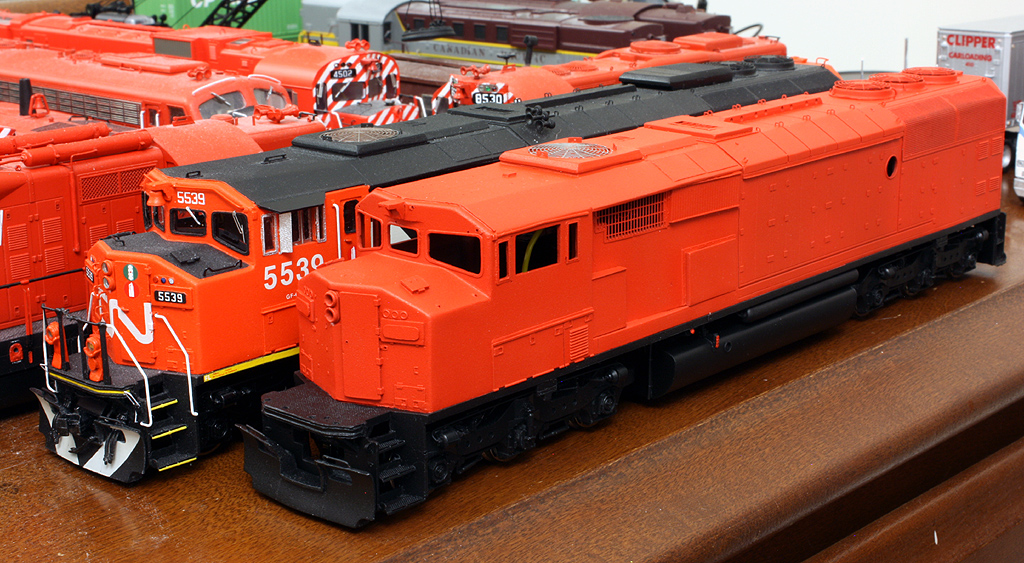 |
|
|
|
Post by stevef45 on Apr 16, 2014 0:28:59 GMT -5
are those dynamic brake intakes part of the kaslo kit?
|
|
|
|
Post by CP_8530 on Apr 17, 2014 4:31:14 GMT -5
are those dynamic brake intakes part of the kaslo kit? Yes Steve, the Kaslo kit comes with all the fan, grill and radiator etchings on a stainless steel fret. |
|
|
|
Post by stevef45 on Apr 17, 2014 23:17:04 GMT -5
wish there was a way to get them seperately. The are perfect for the SD60E's NS is making, they have that angled corner on the grills too.
|
|
|
|
Post by CP_8530 on Apr 17, 2014 23:52:28 GMT -5
wish there was a way to get them seperately. The are perfect for the SD60E's NS is making, they have that angled corner on the grills too. Contact Kaslo and see if you can order an SD60F or SD40-2F stainless steel fret with them on it (same on both), they have replacements IIRC. It might cost you $10-20 though. |
|
|
|
Post by bigjdme on Apr 18, 2014 17:45:25 GMT -5
Nice work. I picked up mine this last week at Calgary's supertrain. hope I can make nine look as good as your.
|
|
|
|
Post by greasemonkey on Apr 20, 2014 23:51:08 GMT -5
Great work, please keep the updates coming!
|
|
|
|
Post by CP_8530 on Apr 21, 2014 7:41:24 GMT -5
Thanks guys, ask and ye shall receive: Fans masked off and sprayed black (round circles cut in masking tape to spray through) except DB which received brown (supposed to be brown-ish DB equipment right under the grills), steps all brush-painted white, front grabs test-fit (including some annoying soldering), numberboards painted and decalled (they are smaller than normal account gasket boarders in them), class lights painted up (the class lights in this set, like the SD60F, are solid), hand-painted window gaskets black, window frames silver, porthole window gaskets black, anti-skid material on the nose masked off and sprayed black, exhaust interior also sprayed black, "ice skate" antenna cluster installed on the cab roof, hmm, that's about it for now. 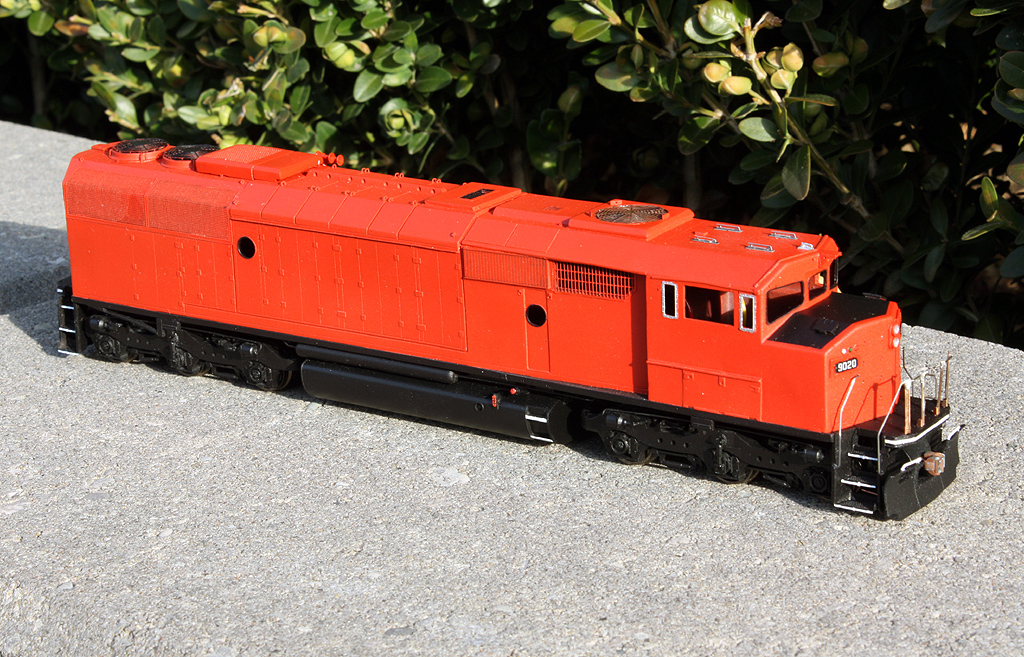 |
|
|
|
Post by tamaman on Apr 24, 2014 9:38:43 GMT -5
Looking good! Mine just showed up in the mail! They will be a great build when I get around to it.
|
|
|
|
Post by CP_8530 on Jul 9, 2014 22:48:02 GMT -5
After a bit of decalling and clear coat. Numbering's a bit blown-out due to the sunlight...  |
|
efram
Chairman
Posts: 206
|
Post by efram on Jul 10, 2014 6:28:28 GMT -5
Same number as my unit! Nice work! What made you choose this unit?
|
|
|
|
Post by CP_8530 on Jul 10, 2014 15:25:10 GMT -5
Someone wanted me to build them one as 9020  |
|