|
|
Post by riss2509 on Nov 19, 2013 20:16:03 GMT -5
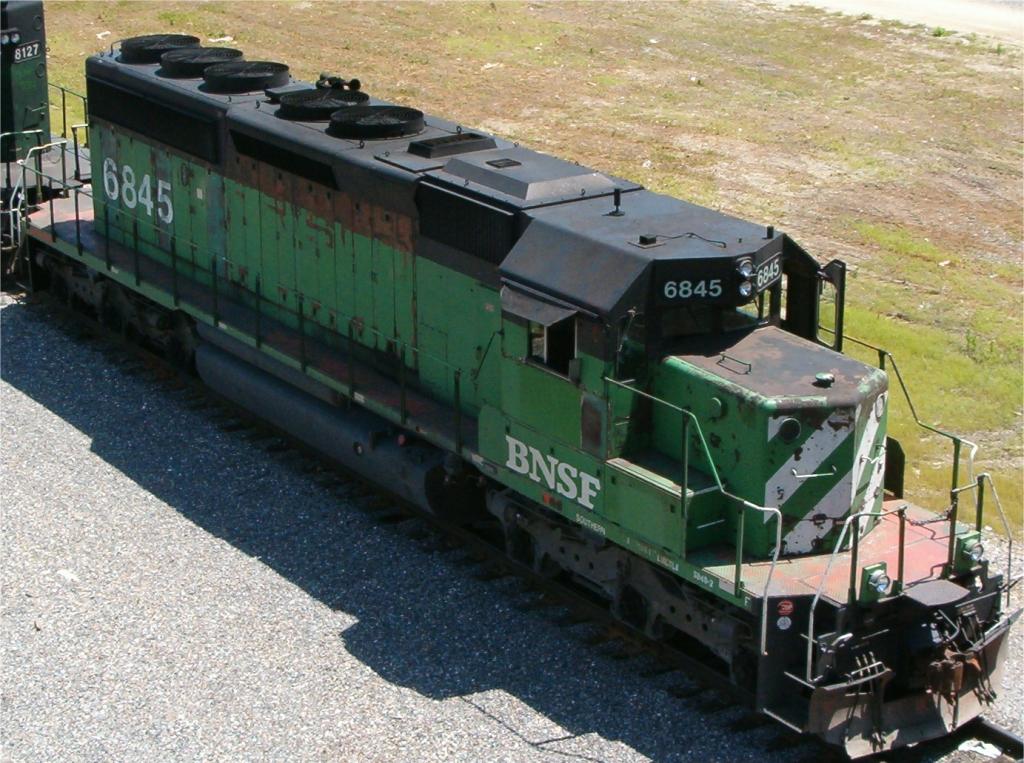
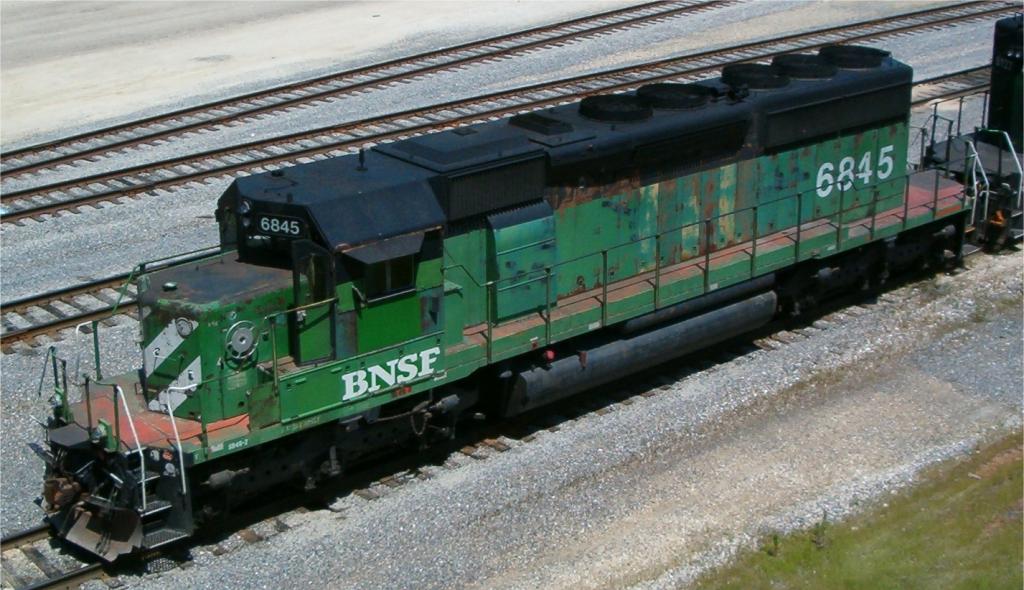
Here we got the BN SD40-2 #6841. This was 1 of the few ex Frisco units on the roster. I found the pic of the unit on Loco photos and thought it was pretty cool with the Gyralight frame. After doing some studying I found that Athearn has done this nose, the nose is donated from my GP15 project posted above. I was able to pick up this shell rather cheap, stripped. Current work completed was a new cab from Athearn, BLMA blanks for the gyralight, class lights. I retained the Grab irons, MU hoses, pin lifter, plow ( from parts box). I added DW antennas, knuckle holders, brass sunshades ( soon ). Cannon radiators to match, ECAFB box. Finishing up bodywork currently, recessed the drop steps from DA. Lastly, there will be a total of 6 MU plugs on the front/ rear pilots. Here are some pics of the real unit, and the model. Enjoy! www.locophotos.com/PhotoDetails.php?PhotoID=108382www.railpictures.net/viewphoto.php?id=176712&nseq=0  |
|
|
|
Post by riss2509 on Nov 19, 2013 20:38:58 GMT -5
|
|
|
|
Post by NS91 on Nov 19, 2013 21:36:55 GMT -5
Looks good. That's the short hood from the GP15-1 correct?
|
|
|
|
Post by riss2509 on Nov 19, 2013 22:56:12 GMT -5
You are correct sir! I had a spare cannon nose side, cut out the brake wheel and added it to the nose. It wasn't too hard, sanded the brake wheel assembly thin and placed it on.
|
|
|
|
Post by riss2509 on Nov 19, 2013 22:56:23 GMT -5
You are correct sir! I had a spare cannon nose side, cut out the brake wheel and added it to the nose. It wasn't too hard, sanded the brake wheel assembly thin and placed it on.
|
|
c415rock
Moderator
"Linking the East with the West"
Posts: 1,044
|
Post by c415rock on Nov 19, 2013 23:33:46 GMT -5
Hi Eric,
Looking good. It will look even better with a fresh coat of green and white.
Erik
|
|
|
|
Post by riss2509 on Nov 20, 2013 6:28:24 GMT -5
Exactly!
|
|
|
|
Post by riss2509 on Nov 20, 2013 6:28:49 GMT -5
Exactly!
|
|
Deleted
Deleted Member
Posts: 0
|
Post by Deleted on Nov 20, 2013 9:32:17 GMT -5
You can create the Frisco anti climber without sacrificing the durability of the model. I had the same type of anti climber on my unit 500 www.6axlepwr.com/CSR_SD40-2_500_06.html. I retained the stock Athearn front/rear mounting tabs for the hand rail stanchions. What I did was trim the deck out from around them. Will you be putting tread plate on the deck? |
|
|
|
Post by NS91 on Nov 20, 2013 9:57:37 GMT -5
You are correct sir! I had a spare cannon nose side, cut out the brake wheel and added it to the nose. It wasn't too hard, sanded the brake wheel assembly thin and placed it on. How hard was it to fill where the previous own "lighted" the class lights? |
|
|
|
Post by riss2509 on Nov 20, 2013 10:46:49 GMT -5
If ya look In the pic of the nose above, I used styrene rod, trimmed it down sanded and putty. If ya move over to my build thread of the 6841 on " what's on the bench " there is the nose! Super easy, check and recheck your work. I was very happy with.the results!
|
|
|
|
Post by riss2509 on Nov 22, 2013 21:10:40 GMT -5
Update! I reworked the handbrake and removed the original work. I grafted the new one in using a Cannon side trimmed to fit much like I did the ratchet on the EMDX SD60. Im verrry happy about this and looks a ton better!  Brian, Ive enjoyed the pics of the #500! Ive never done it before honestly. I guess you would say with all the effort Ive put into this Im a lil squemish lol! I may end up doing Cannon treadplate, reason being Ive already recessed a set of DA drop steps. Im finishing up some minor sanding work on them this evening including some additional cab work. I thought of jewelers files, but, could find an alternative to cleaning it out. Plus, im with you on myself only moving my engines and I fully agree to your every point that you made about that! But, there is times Ill leave the units at the engine house at the club and have caught them in the past moved around regardless of myself voicing my opinion on that. Thats pretty much why I decided to leave it be so to speak. BTW keep up the great work! My Grandma is from Quebec and am absolutely loving your 3 builds!! |
|
|
|
Post by riss2509 on Dec 31, 2013 10:25:18 GMT -5
I decided to revamp the pilots of the BN 6841. I check out Brian Banna's CSR #500 and formulated a plan to trim up the anitclimbers to gain the full Frisco affect! Well, hard to see but here it is! I picked up a JLC micro saw from UMM-USA. I did 2 cuts, 1 at 90 deg. and the 2nd at 45 deg. I then went in and slowly sliced out the uneeded portion, sanded with a jewelers file and sanded smooth. Great planning worked out well! Well, here are the pics! Need to add a few minor pieces but looks alot better and matches the prototype! I cant wait to see this in paint!   |
|
|
|
Post by m a y o r 79 on Dec 31, 2013 10:49:34 GMT -5
Turned out nice. Whos plow is that on the front?
|
|
Deleted
Deleted Member
Posts: 0
|
Post by Deleted on Dec 31, 2013 17:15:59 GMT -5
I would like to offer a tip. When sanding. Wet sand. You will not cut into the plastic so much and you will get a very fine finish. Also use a fine grit.
|
|
|
|
Post by riss2509 on Dec 31, 2013 21:06:34 GMT -5
The plow is from Athearn. Its what I had on hand at the time and worked out. Brian, I shouldve done alot more wet sanding. I usually do a decent amount of wet sanding but fell behind on this. Regardless im still very happy with it, thanks a bunch for the tip, can never hurt and youll only learn better technique!
|
|
|
|
Post by enginseer on Dec 31, 2013 21:53:30 GMT -5
Great work on this and it's pure inspiration to those of us procrastinators!
I too was surprised at the sanding considering the quality of your build. I'm glad you're aware of it and will take steps to prepare for paint on what I'm sure will be a gorgeous model once completed!
|
|
|
|
Post by riss2509 on Jan 1, 2014 1:37:31 GMT -5
The shell will need a good grit blast anyways. I'm hoping that will reduce the imperfections. Mistakes whether serious or minor do happen but always take a second if needed. Especially if your tired when I was moving forward on the finishing touches. But, the love for this build hasn't changed, I'm still very excited about it!
|
|
|
|
Post by oldrail on Jan 2, 2014 3:04:11 GMT -5
Who are the MU hoses made by?
Dick Haave
|
|
|
|
Post by lyled1117 on Jan 2, 2014 9:57:29 GMT -5
Eric, I may have shown you these on one of your trips into the shop, but just in case I hadn't I'll post 'em here. I don't know if these might assist you in any way, but about 12 years ago I took these images of a former FRISCO SD40-2 in Galesburg. There's some weathering that's interesting. Two things especially. The walkways have a LOT of the mandarin orange having become visible and some on the long hood sides has become visible or at least hinted at. One thing I really hope I can model someday, on the right side long hood, some of the FRISCO name is returning. Especially the "R" and the "S", and a bit of the "C" and the "O". While this is BNSF and not BN, maybe it'll give you some ideas. And if nothing else, they are some elevated (roof) shots you might not have. Lyle   |
|