|
|
Post by CP_8530 on Nov 13, 2013 2:34:53 GMT -5
Something that recently arrived in the mail, and that I've been working on for a client with a thing for full-cowl CN units. A CP SD40-2F "Red Barn" unit was also purchased for someone else I'm building one for : 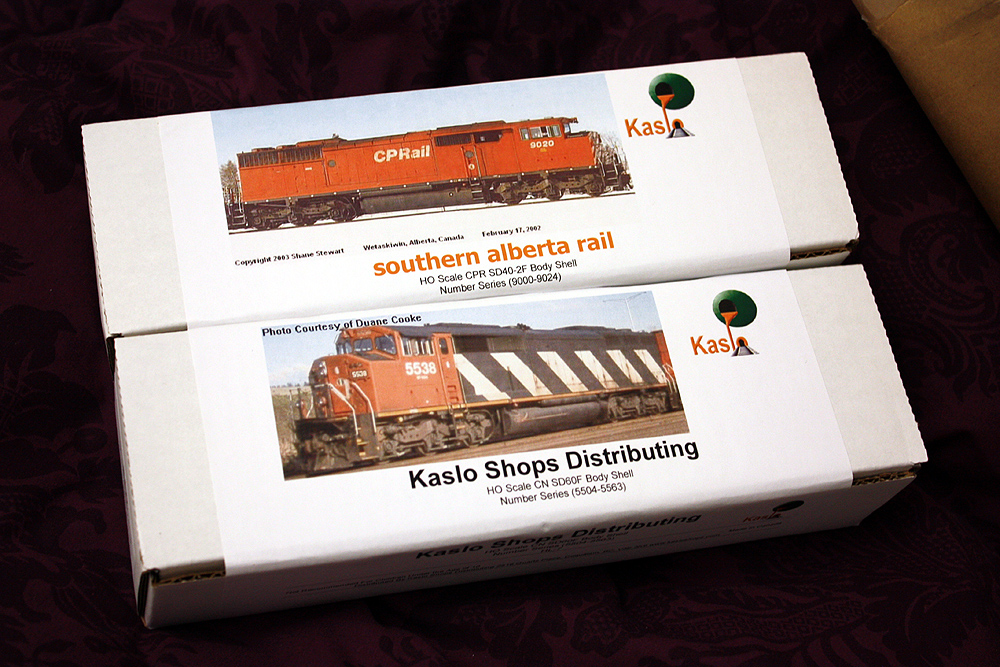 Iiiiiiiiiit's RESIN CLEANING TIME!!! 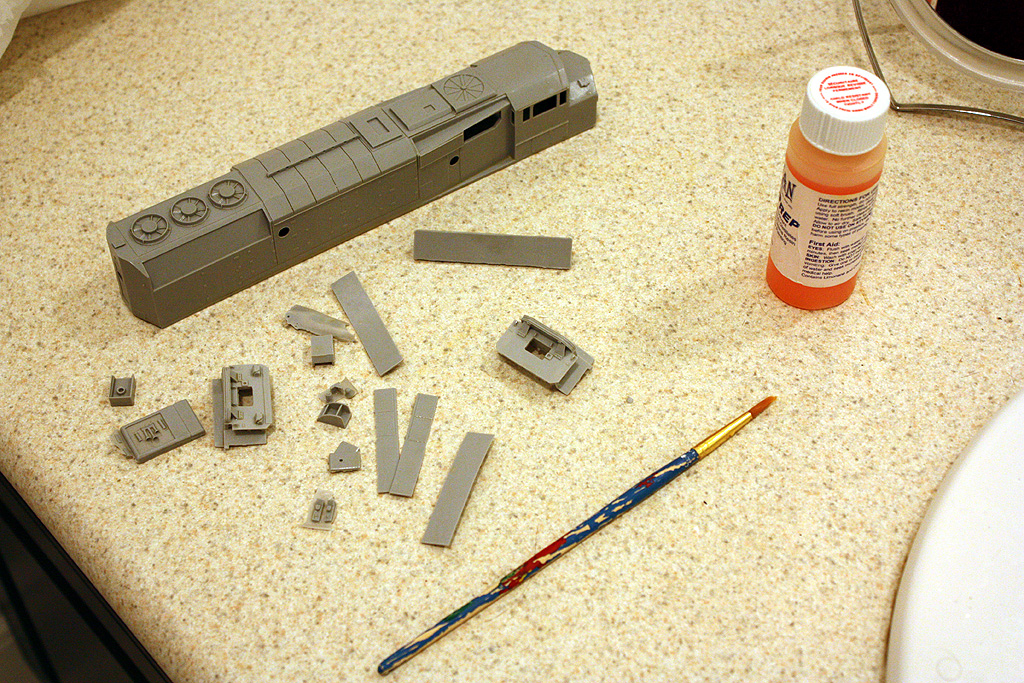 And the dreaded frame modifications. Not having a mill, it took about an hour and change with a hacksaw and a bastard mill file: 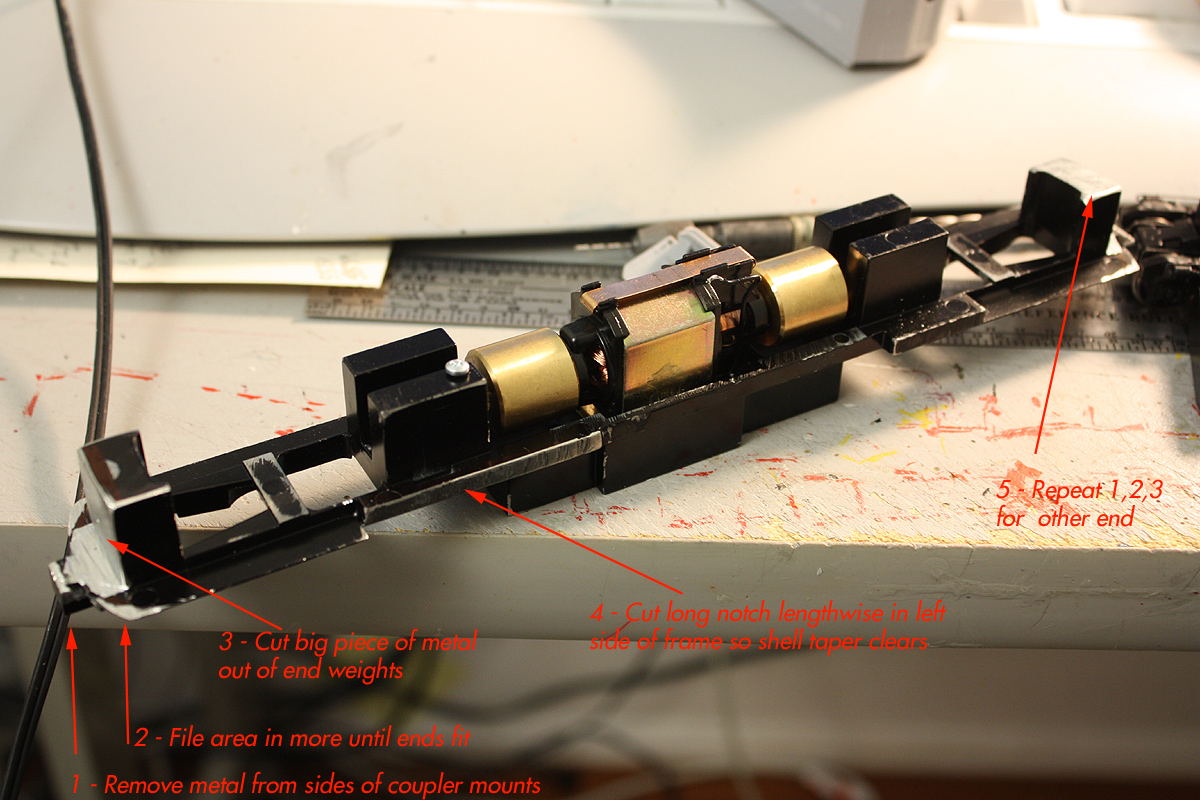 Some shell mods, the inside numberboard area was a bit big, so I carefully trimmed it down: 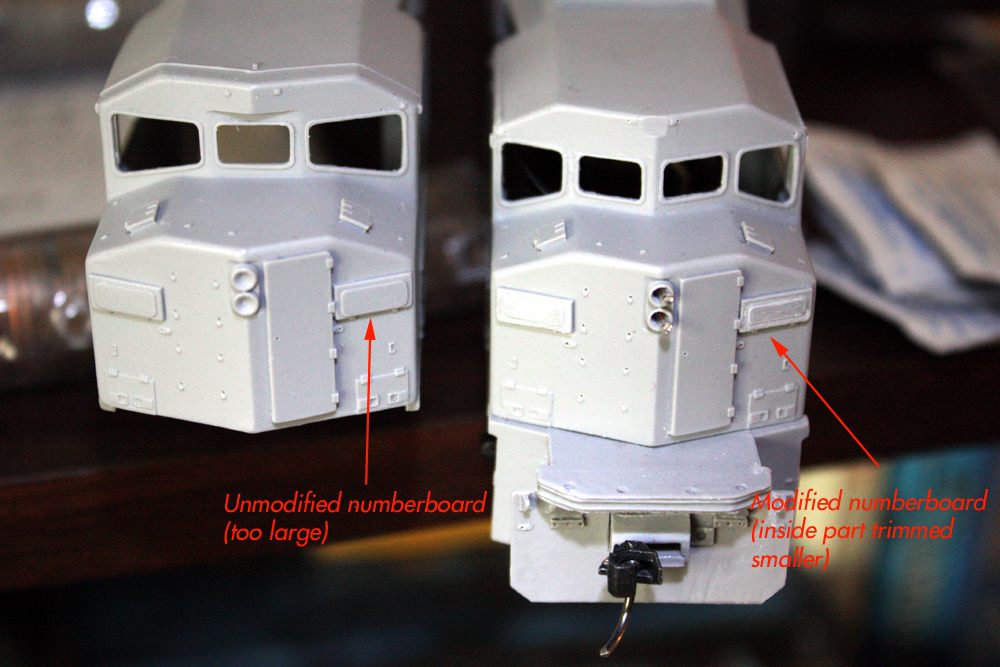 Q-fans! Those were delicate to assemble. I made a few mods of my own... 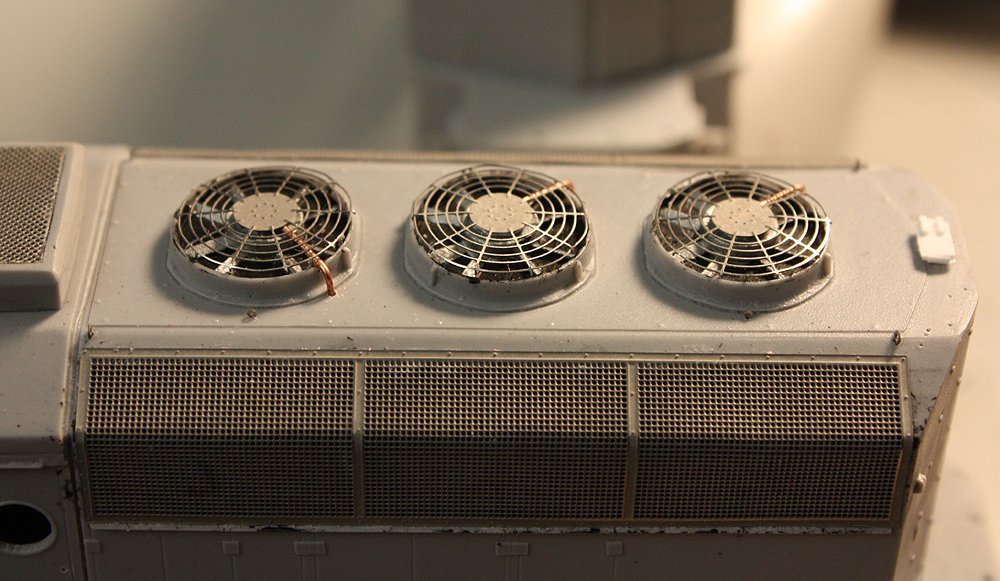 Coupler box needs to be notched to fit in the pilot and clear the Athearn frame. Also at the sides to allow for truck swing. I of course had to drill and cut out the pilot-mounted coupler mounts the Kaslo shell came with. 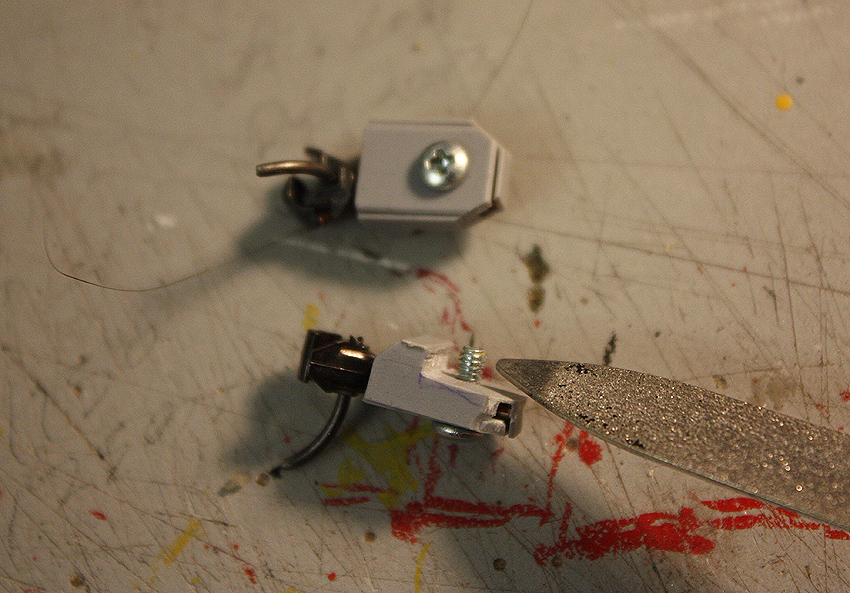 The plow was too narrow, so I widened it and fixed the profile a bit. Top is for the SD40-2F, bottom SD60F. Still need putty patching: 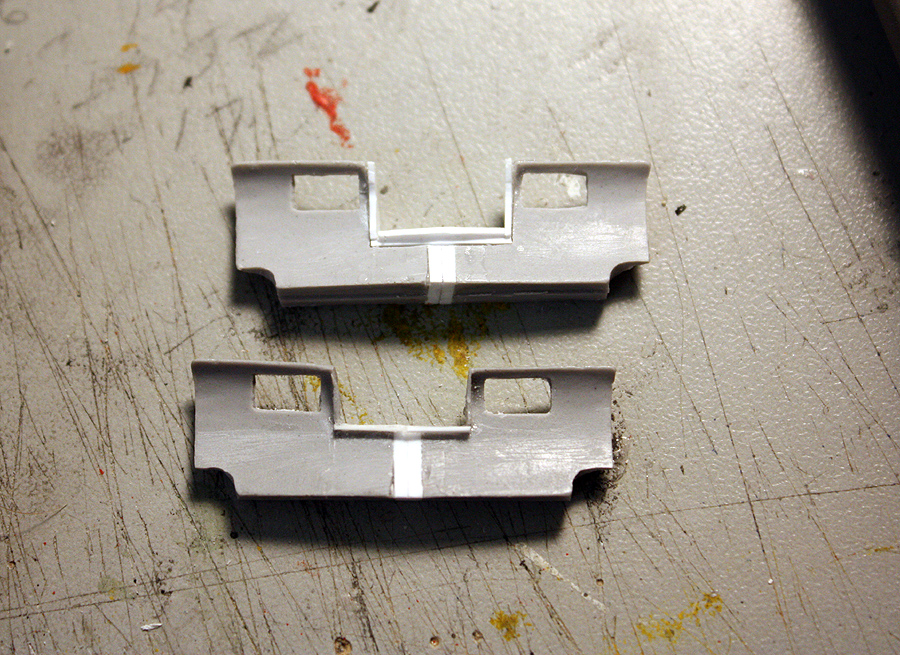 Some of the kit etchings were also installed, resin shell parts added, pilots assembled with steps and glued on. Still much work to do, but at least it mounts nicely on the chassis: 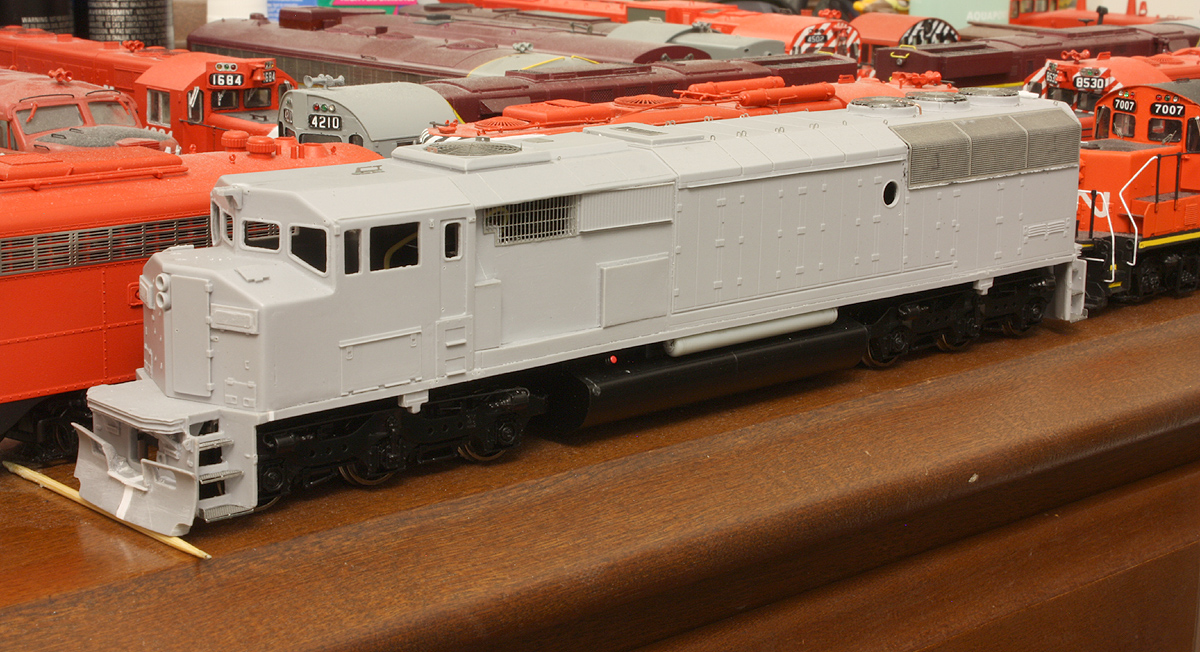 |
|
|
|
Post by Canadian Atlantic Railway on Nov 13, 2013 6:22:16 GMT -5
What frame are you using for the SD60F?
|
|
|
|
Post by spud7378 on Nov 13, 2013 10:45:29 GMT -5
In my opinion by far the best looking units in the cp and cn roster. Can't wait to see these finished! Great progress so far. That's quite the roster in the background.  |
|
|
|
Post by CP_8530 on Nov 13, 2013 12:58:51 GMT -5
What frame are you using for the SD60F? A modified Athearn SD50 chassis is what I got for it, although the SD60 would also work. This one came from a custom painted CSX SD50 with a rather questionable paint job, that was purchased on the cheap on eBay from an Eric in QC who is a trucker (kinda sounds like user m636, but the quality is far from his work...hmmm...). 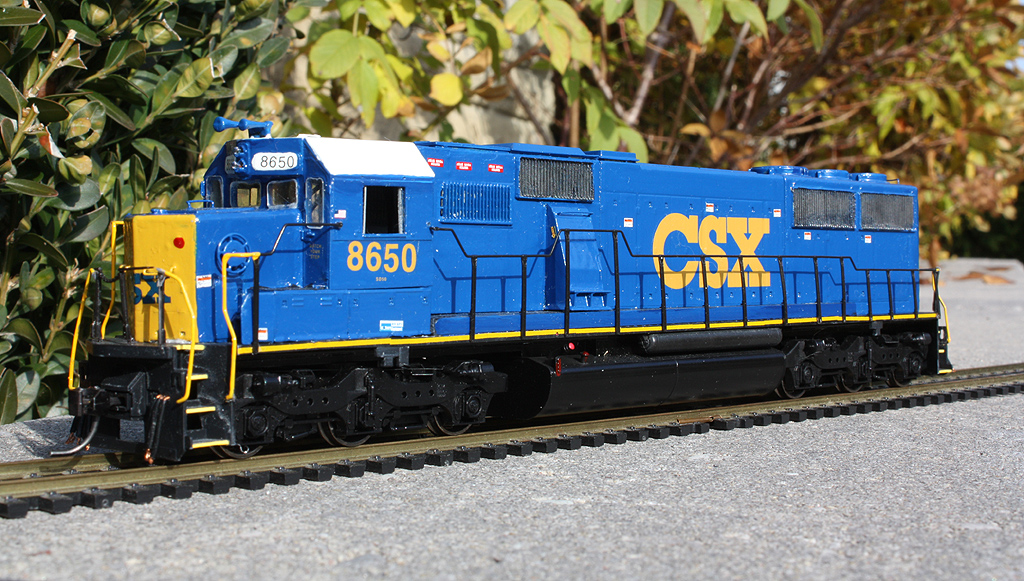 In my opinion by far the best looking units in the cp and cn roster. Can't wait to see these finished! Great progress so far. That's quite the roster in the background.  They are rather interesting looking in their own way. I'm awaiting the C40-8M and HR616 from Kaslo, although it will probably be a PITA to adapt them to the Bowser C630 chassis... |
|
|
|
Post by Canadian Atlantic Railway on Nov 13, 2013 19:09:14 GMT -5
Good to know the SD50 frames are adaptable. I have three that will get SD50F shells eventually.
|
|
|
|
Post by iomalley on Nov 13, 2013 21:34:45 GMT -5
SD60F and a GP9rm? Dude you're holding out! And no, Eric A. would never paint and decal CSX drunk...  |
|
|
|
Post by jeff323 on Nov 13, 2013 22:59:59 GMT -5
Small world, I almost made a bid on that CSX unit. Nice to see it is going for a much nicer project!
|
|
|
|
Post by CP_8530 on Nov 14, 2013 0:47:25 GMT -5
SD60F and a GP9rm? Dude you're holding out! And no, Eric A. would never paint and decal CSX drunk...  I was thinking he or whoever might have acquired it for parts or something, but decided to flip it instead with a bunch of other stuff. I'm tempted to do more CN GP9RM's, there were lots that worked the locals around my old hood. A nice 3-pack like this would be cool: www.railpictures.ca/?attachment_id=4751www.railpictures.ca/?attachment_id=2839Small world, I almost made a bid on that CSX unit. Nice to see it is going for a much nicer project! I even stripped and cleaned up the shell for a possible future reuse. The body is still in decent shape under all that thick brush-painted blue (it seems it was a KCS NAFTA unit originally, although most of the original paint was stripped before repainting), but a bit of the battery box to frame gluing left much to be desired, as did decal placement. The windows were glue-glazed beyond reuse. |
|
|
|
Post by antlorch on Nov 14, 2013 7:47:59 GMT -5
What type of glue are you using to glue the resin together? Also can you get a better picture of the resin cleaning agent you used? Thank you
|
|
|
|
Post by iomalley on Nov 14, 2013 10:42:58 GMT -5
Don't forget to correct the radius along the top of the front cab on the SD60, its too sharp a radius...
|
|
|
|
Post by CP_8530 on Nov 14, 2013 13:51:28 GMT -5
What type of glue are you using to glue the resin together? Also can you get a better picture of the resin cleaning agent you used? Thank you For the glue I'm using Cyanoacrylate Adhesive, Satellite City HOT STUFF "Super T" medium thickness. It's recommended to use CA (or, ACC as some call it) glue for resin bonding. I'm using Sylvan Scale Models resin prep. I've been told by a friend who bought some and first smelt it that it's really Zep orange cleaner, and can be obtained cheaper that way... Here's a shot of the bottle from a random search on Google: www.railroad-line.com/forum/data/Ensign/2013612319_P6015081.jpgDon't forget to correct the radius along the top of the front cab on the SD60, its too sharp a radius... Thanks for the tip, I better do that before I add the front drip strip that seems to be missing. If I only had a nickel for every little thing I've had to correct on a resin kit  |
|
|
|
Post by CP_8530 on Nov 26, 2013 0:29:00 GMT -5
A bit more progress: some more etchings installed, brake chain set up (A-line part), horn installed (Cal-scale, K3 all bells forward, not visible on this side), ditch lights drilled out and painted (will be lit with SM LED's and magnet wire), and that bad ass plow has been painted (using the new bottle of CN lettering grey #17 for the V-stripes). The wheelsets on this Athearn SD50 chassis were 40", so I had to replace them with a set of 42" ones I had on hand to match the prototype. Also done was some more sanding (including the cab front), patching, and installing the V-gutter on top of the cab. As the Kaslo SD60F shell incorrectly has the SD50F style engine room roof, I could have filled all the groves in to be smooth, but decided to do one of the two or so units that received an SD50F style roof during shopping. At the suggestion of a friend, I scribbled on its identity shop-style, for an in-progress shot: 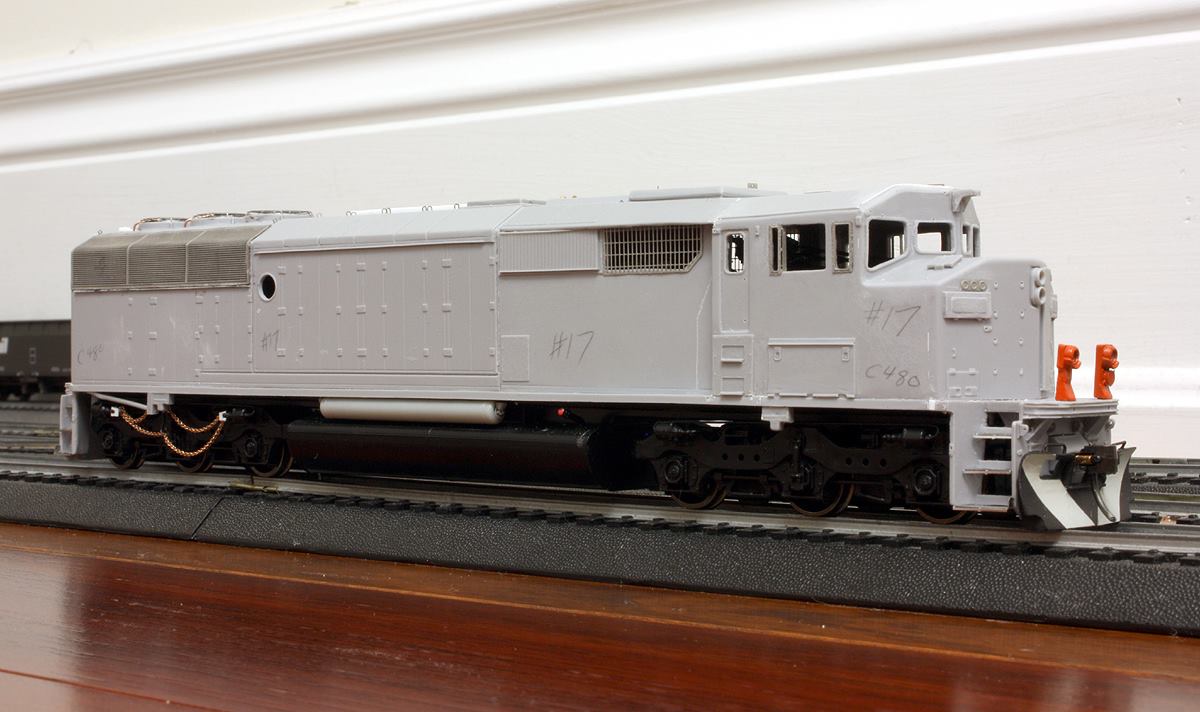 |
|
|
|
Post by tamaman on Nov 26, 2013 10:21:59 GMT -5
Nice work!
|
|
|
|
Post by CP_8530 on Dec 2, 2013 3:57:32 GMT -5
To expand on some of the details I briefly mentioned before (and adding a bunch of others): as well as file the front top cab edge smoother, I had to install the drip strip across the top front of the cab (simply done by cutting a thin strip of styrene and gluing it to the roof). The antennas were placed on the roof according to photos, as the drill dimples cast in the cab roof were a bit off. I also narrowed the bell bracket a bit by filing the sides down, and cutting it in half, cutting it narrower, and gluing it back together. A hole was drilled in the angled part of the roof near the top for a K3L from Cal-scale with all bells forward (some units have had this changed...there's one or two with an IC-style P5, among other horns). There's also a bolted square panel on the right side of the taper that needs to be removed for an SD60F, but I caught this too late in the painting process so just left it on. The person who did up the Kaslo SD60F seems to have simply just used the SD50F and made a few changes, but unfortunately there's a few details they had missed - the engine room roof being one (should be smooth on the SD60F with minimal lift rings, not ribbed like the SD50F). Luckily as I mentioned before, a few SD60F's received engine room roofs from SD50F's, so I simply picked one of those units - 5539 in this case. One could always fill and sand all the ribbed areas for a true SD60F. Another variation is the nose access hatches near the walkway: most units have the latches on top, but a few have them on the bottom (beats me why). The rear hatches should have one latch instead of two per hatch. The rear grab irons varied on the rear engineers' side of the long hood - earlier units seem to have only had one, later units 3. There's a set of 3 hinges on the last side hood doors on each side that needs to be removed. I also had to fabricate a sand hatch for the roof at the rear, as the SD60F had the single top sand hatch vs the SD50F which had cutouts in the rear of the hood for sand filling. The rear of the fan roof panel is also off - it should be straight across at the end versus mimicking the end hood profile, but I really didn't want to sand the whole panel off or modify the end with new roof bolt details or anything, so left it. A lot of these are minor details, and many I fixed, but I didn't want the scope of the project creeping to the extent that I'd be drilling out and replacing every single latch or hatch on the hood. Paint update: the paint shop's been busy this weekend. Instead of decalling the stripes on, I opted to mask and paint them instead. First after cleaning, a coat of CN Grey #17 was shot over the entire model. Then the red ends were painted. Finally, the stripes were masked off by using Tamiya tape placed at 45 degree angles (which as close as I can tell the 10mm tape appears to be just as thick as the CN stripes when placed diagonally). The tape was cut at the top at 45 degrees and wrapped around the bottom, as the frame would be masked off and painted separately next. Placement was done by photos, and CN paint diagrams included with a Microscale decal sheet actually showed the width of the black part between the stripes to be slightly wider than the width of the stripes themselves. 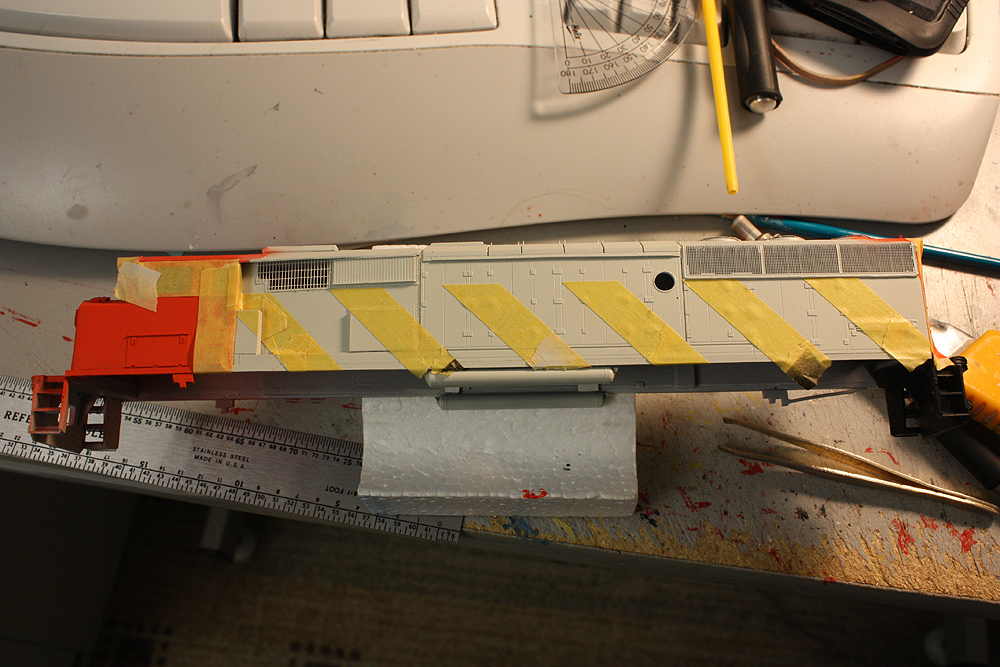 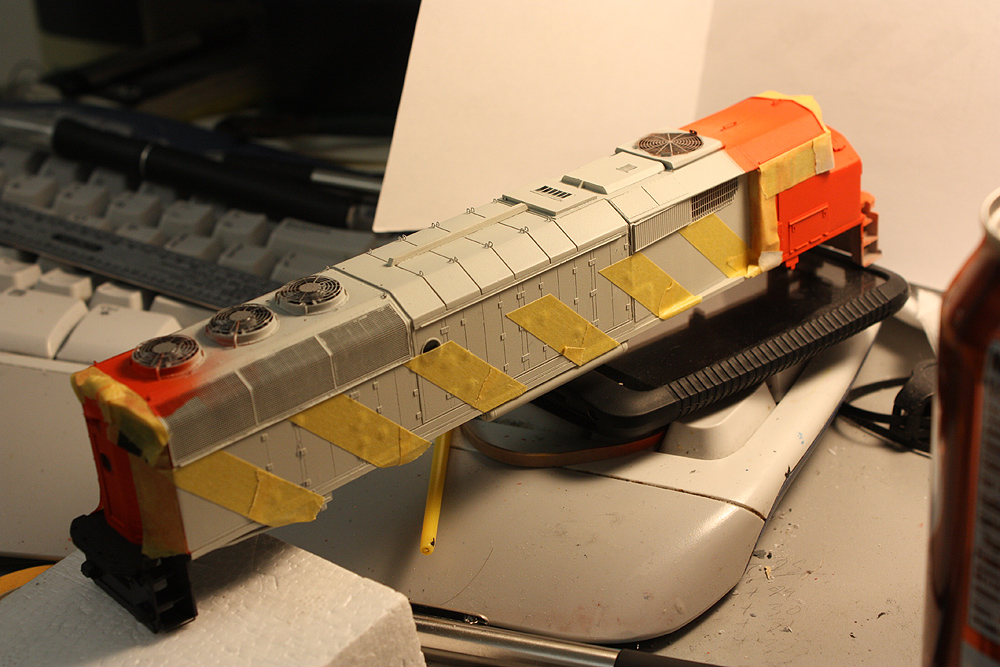 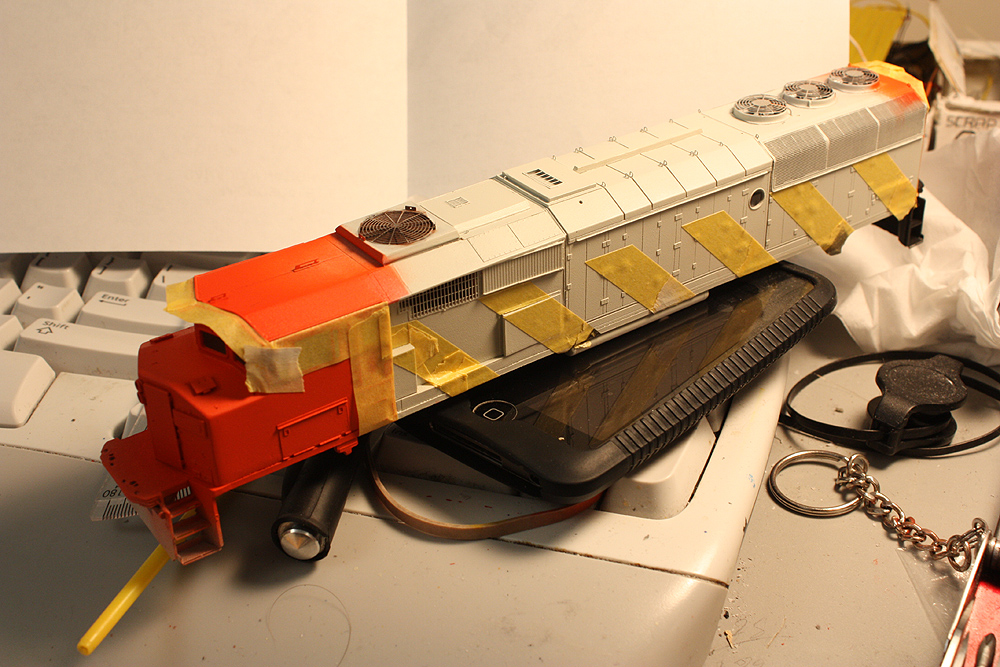 |
|
|
|
Post by ricnok on Dec 2, 2013 12:17:07 GMT -5
IIRC without digging through my reference material at home tonight, the stripes are at 45° on the modern locos (30° on the older F units). The white of the stripe is 48" long measured on the horizontal and they are 54" apart on the horizontal.
|
|
|
|
Post by iomalley on Dec 2, 2013 17:39:30 GMT -5
Well somebody should tell AThearn, cuz they blew it on their GP38-2Ws... 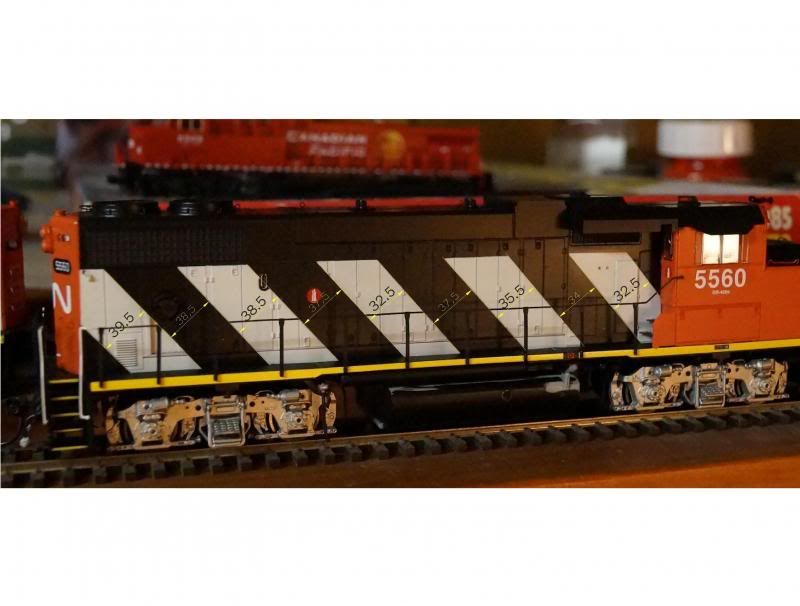 |
|
|
|
Post by ricnok on Dec 2, 2013 17:54:46 GMT -5
Measure the length along the walkway not perpendicular to the stripe.
EDIT: And also a reason why I like undecs
|
|
|
|
Post by iomalley on Dec 2, 2013 18:39:50 GMT -5
These are just comparative measurements showing how 'off' Athearn was, not prototypical lengths.
|
|
|
|
Post by ricnok on Dec 2, 2013 18:53:36 GMT -5
Holy crap that is bad. Couldn't see the measurements of the white until now
|
|
|
|
Post by iomalley on Dec 2, 2013 19:13:51 GMT -5
Yeah I'm not sure what they were looking at, or if mine isn't one of a batch of bad ones. (I did get it off my LHS for $100) so, this side's looking to get repainted. (the other side's fine)
Sorry for the hijack MrDan!
|
|