|
|
Post by analogbeatmaker on Mar 13, 2013 19:44:55 GMT -5
Hi everyone! Just wanted to start a thread on a new project underway. I'm detailing/weathering an Atlas Southern MP15 DC. I'm modeling it as it was back in tha day...so no ditch lights n stuff. Here's the model I have: 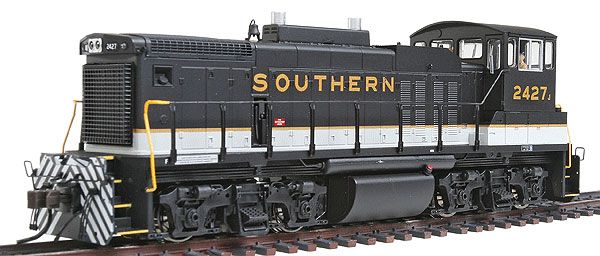 Here's what I'm attempting: 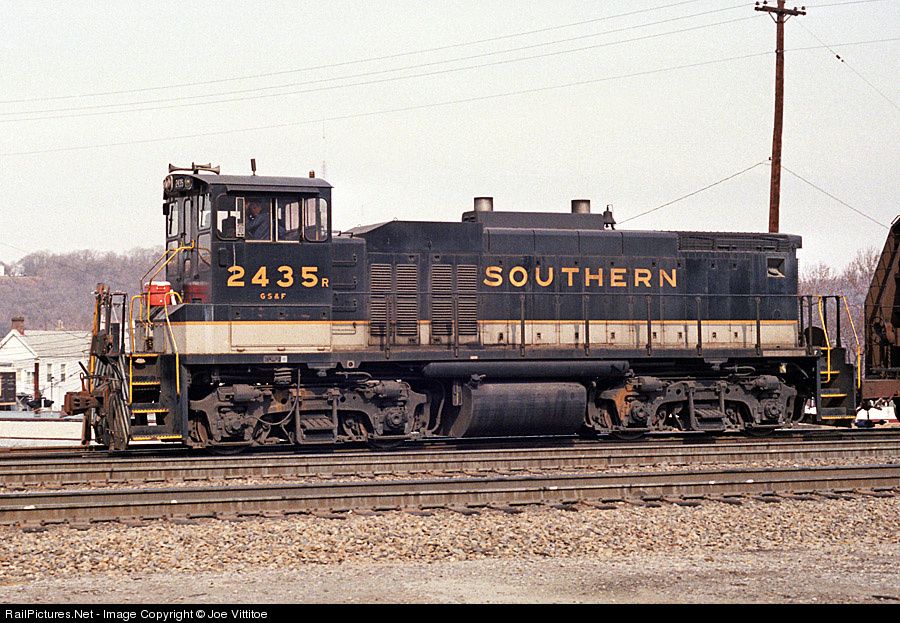 Although this model will not have ditch lights I am installing step lights (if I can figure out how) and a light I had never seen before...and couldn't find a part for anywhere. It is a small (oddly small), yellow/amber beacon in a "cage" mounted off the roof of the cab...long hood side. You can see it in the pic above a little but here's a detail proto pic: 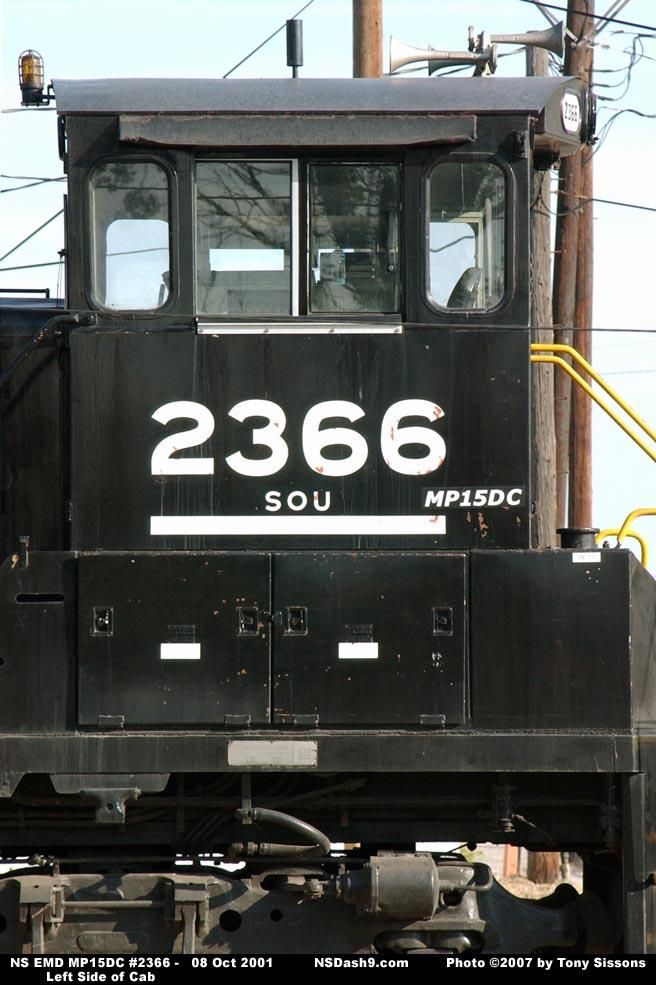 The only thing I could think of at first was using a bulb. However, it would burn out at some point and there is no way I was going to disassemble the engine so completely again to get to it. So, I figured I'd try a very small LED. Problem is it is totally the wrong shape and not having a bulb structure would not look like a bulb at all. So, I filed down the LED and the tiny PC board it is on as small as I could. Then I took a piece of fiber optic, sanded it well and shaped the tip. Then I cut the sanded portion off and used Micro Kristal Klear to adhere it to the top of the LED. Sanding the fiber optic enables the light to come out of the sides giving the appearance of a bulb when lit. Here it is at this point: 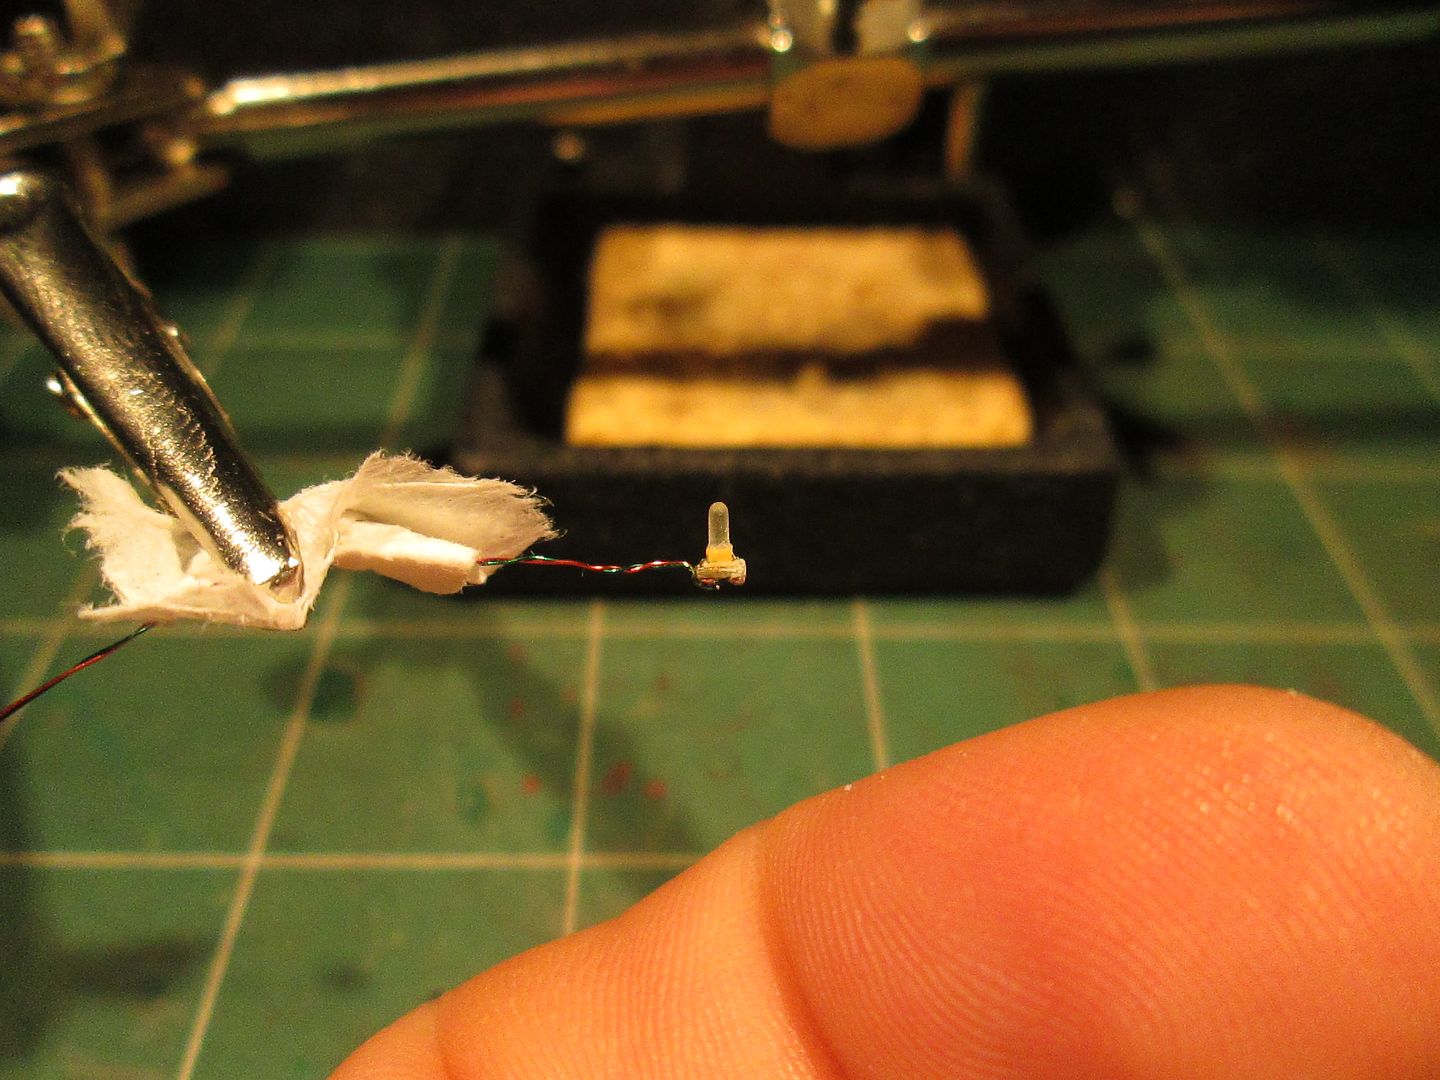 Then I cut/sanded a couple pieces of styrene and glued on the LED to represent the base of the light housing. Here that is: 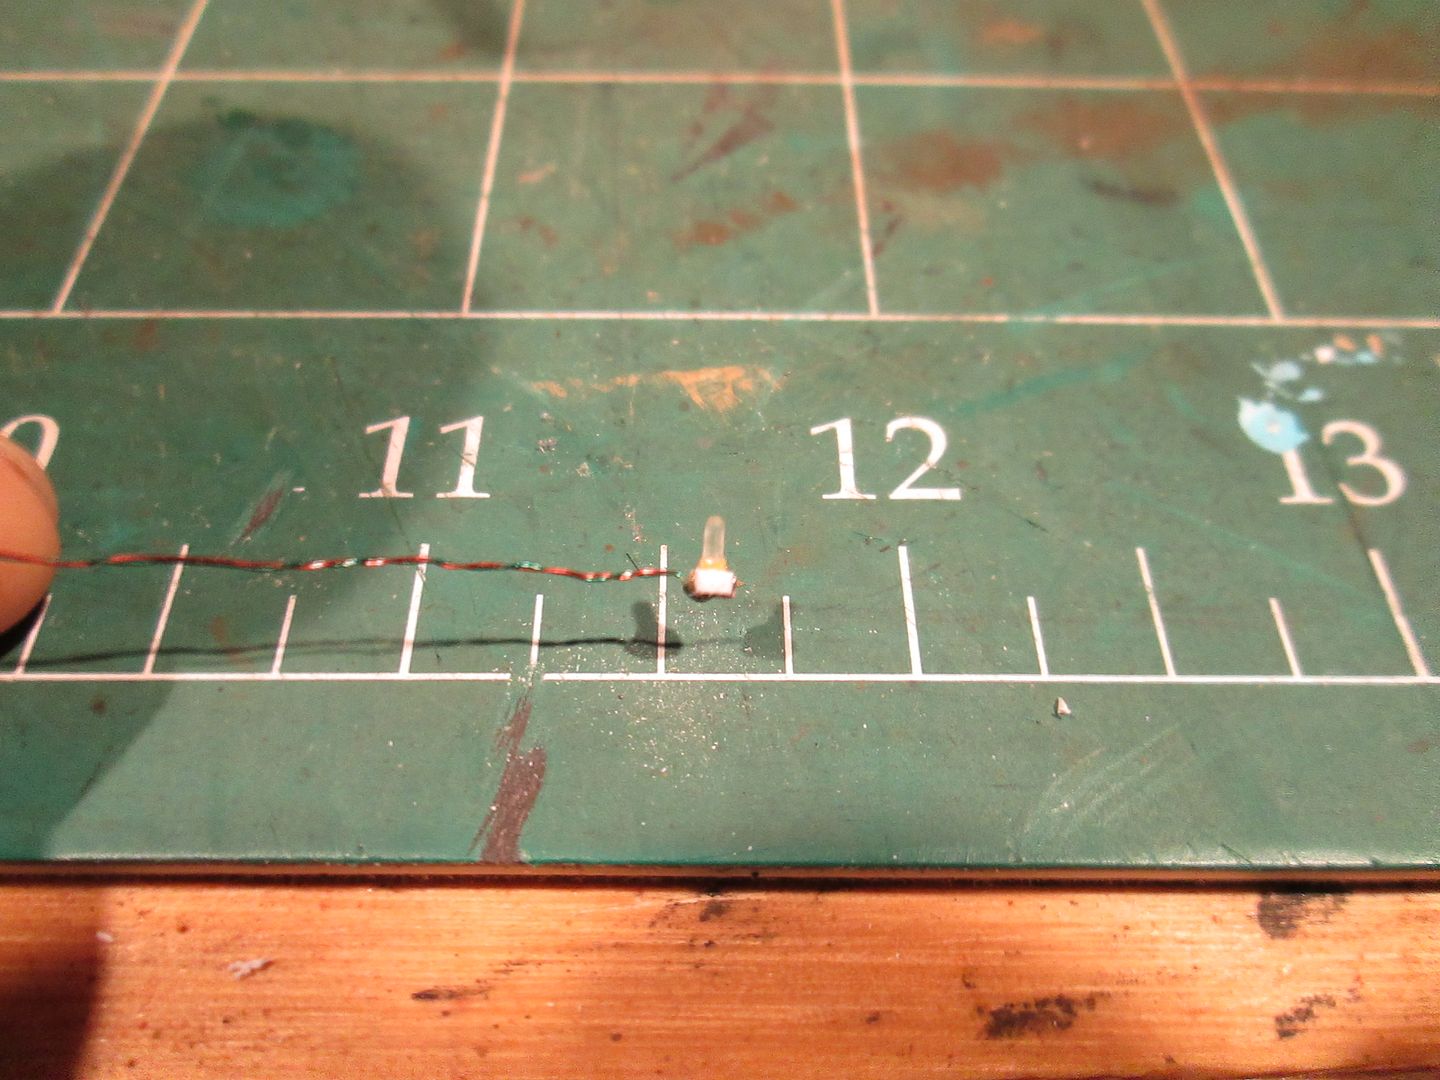 At this point I mixed a little red and yellow paint and painted the fiber optic to represent the amber color in the proto pic...sorry, no pic. Then I proceeded to try and build the "cage" around the bulb. My first effort met with disaster...but the second came out ok...I think. I used magnet wire (leftover from previously used LED's) to build the "cage". Here are a few of the pieces: 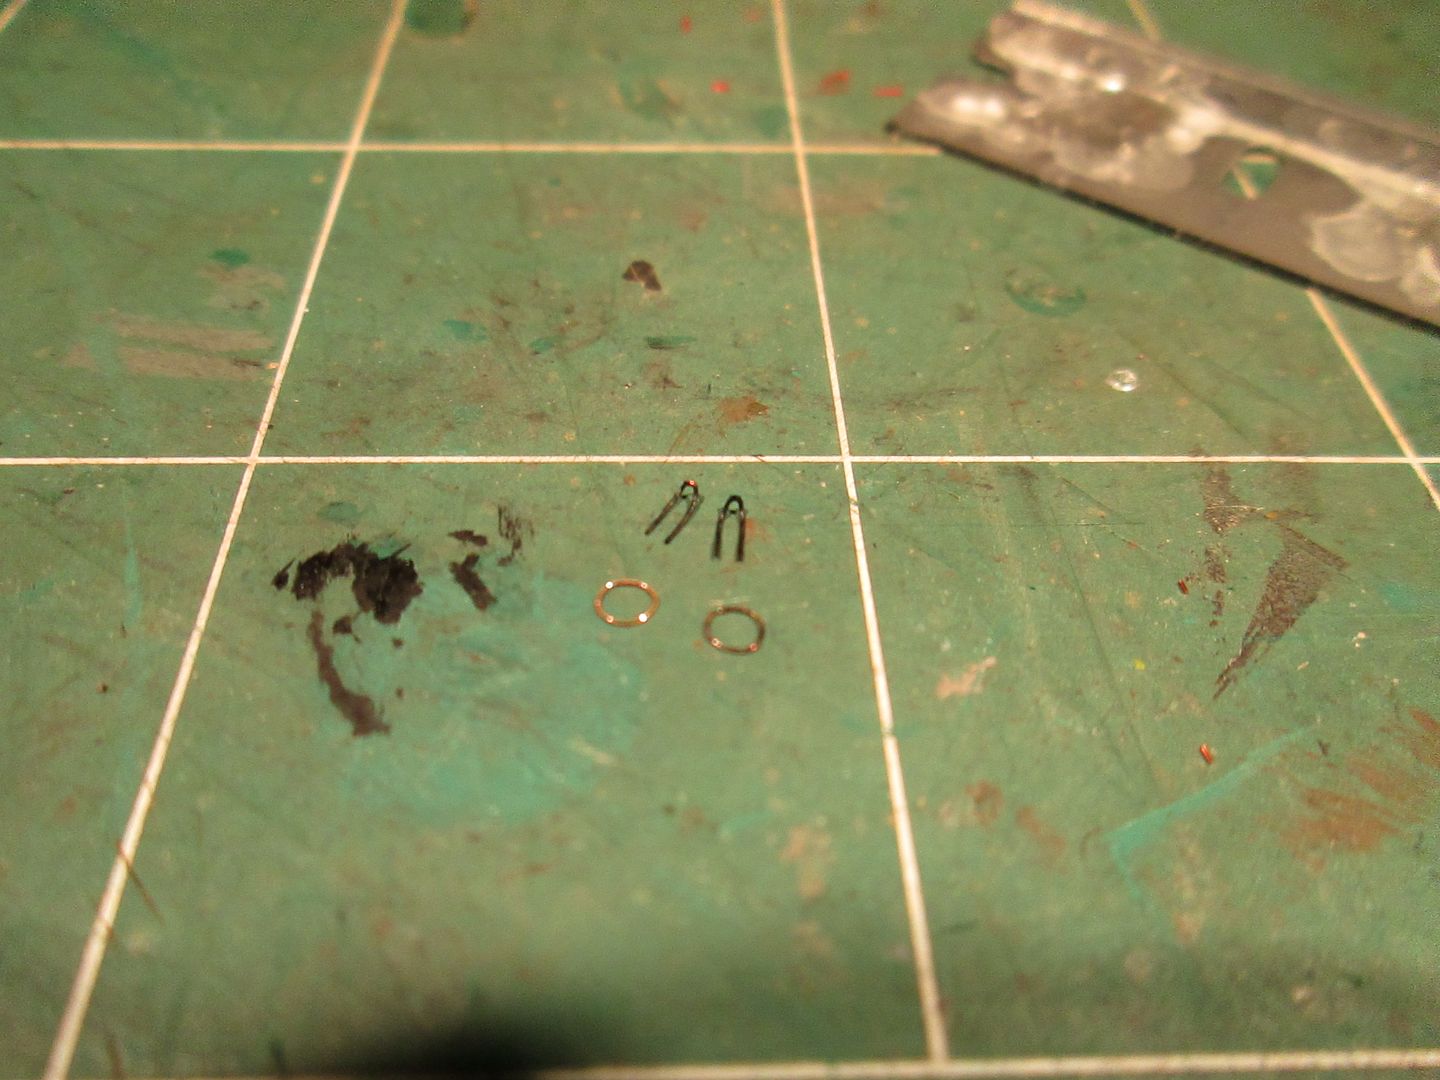 Then, I glued the magnet wire to the base of the LED enclosing the fiber optic "bulb". Here are a couple pics of the finished beacon. First, powered off: 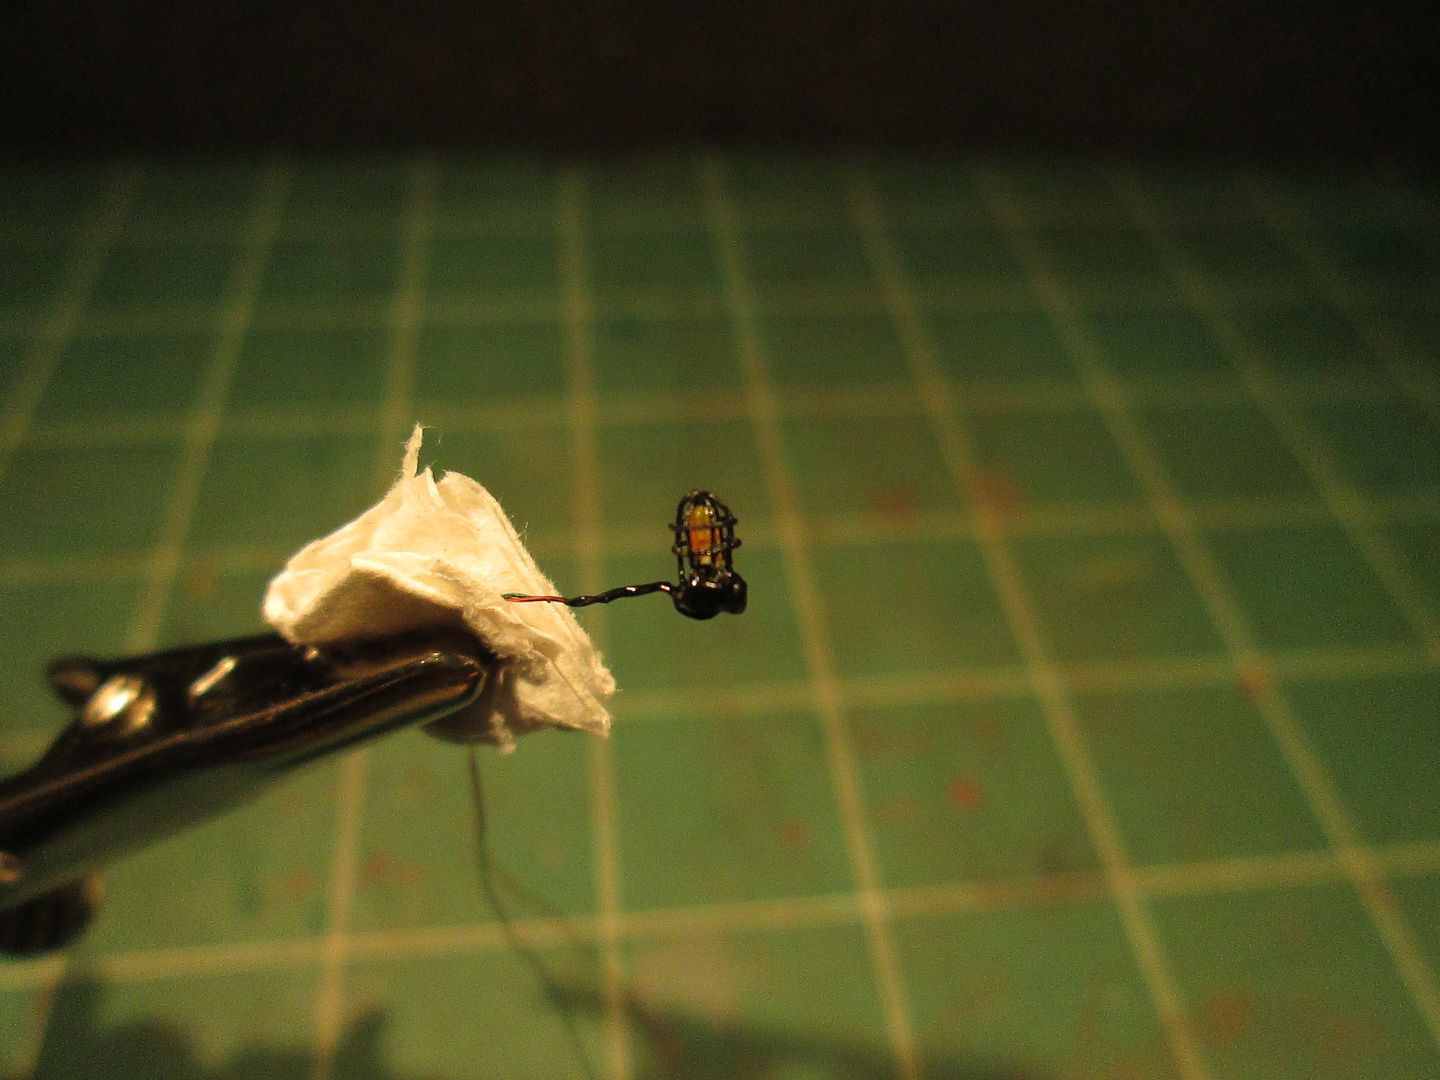 Second, powered on with a couple of AA's: 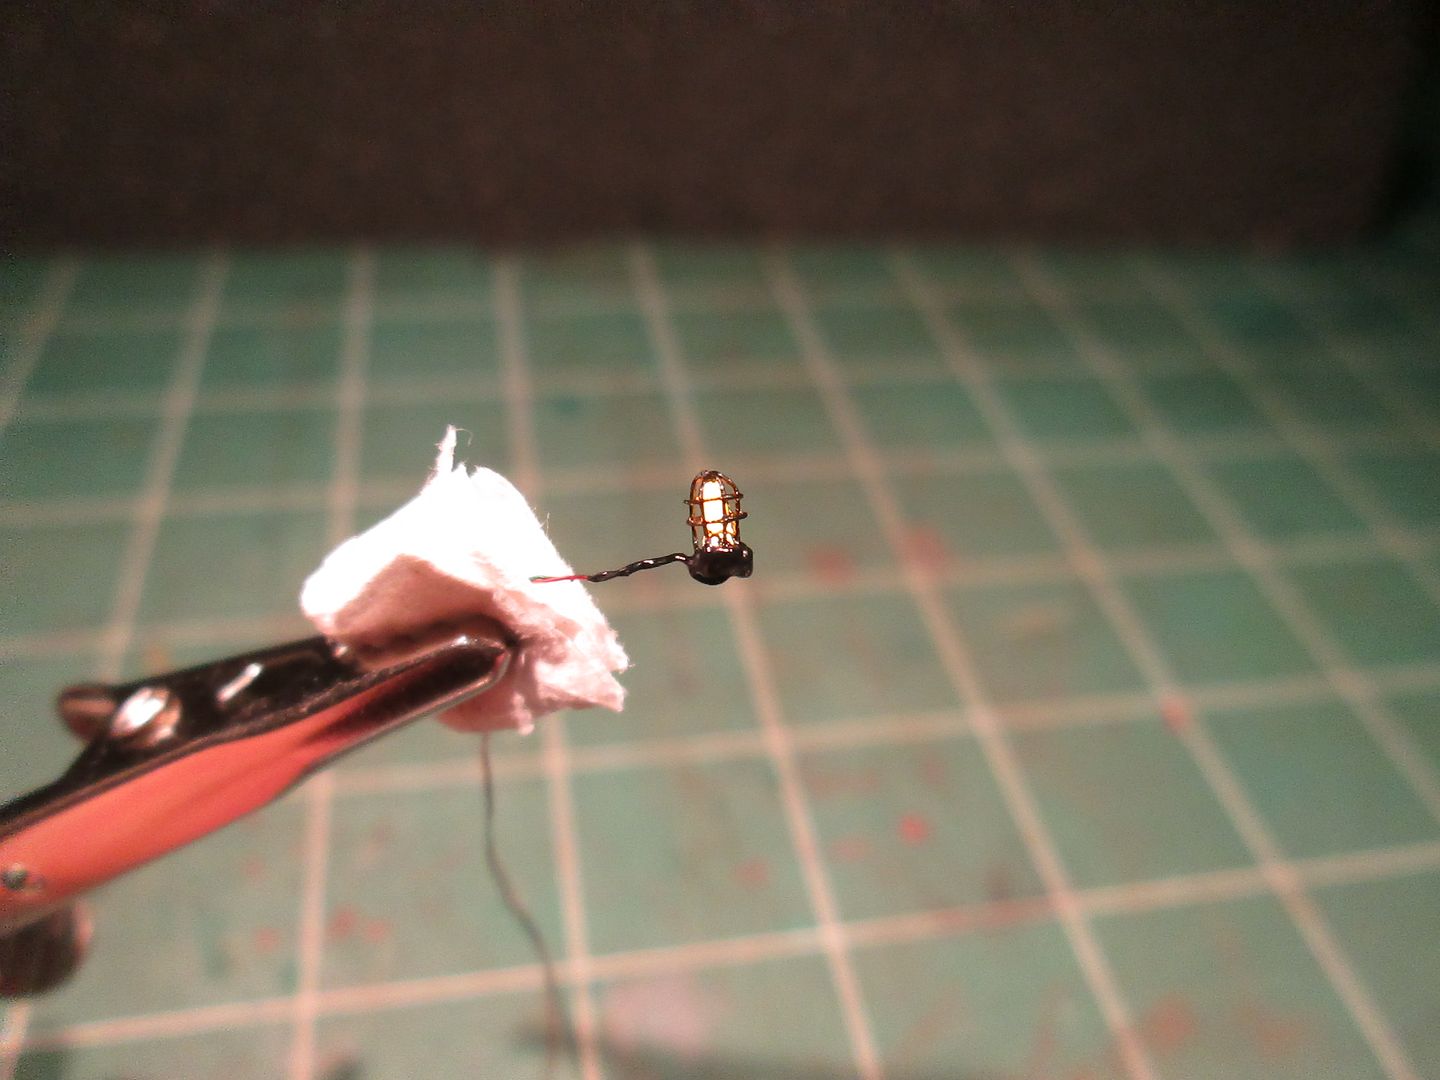 Just for giggles: 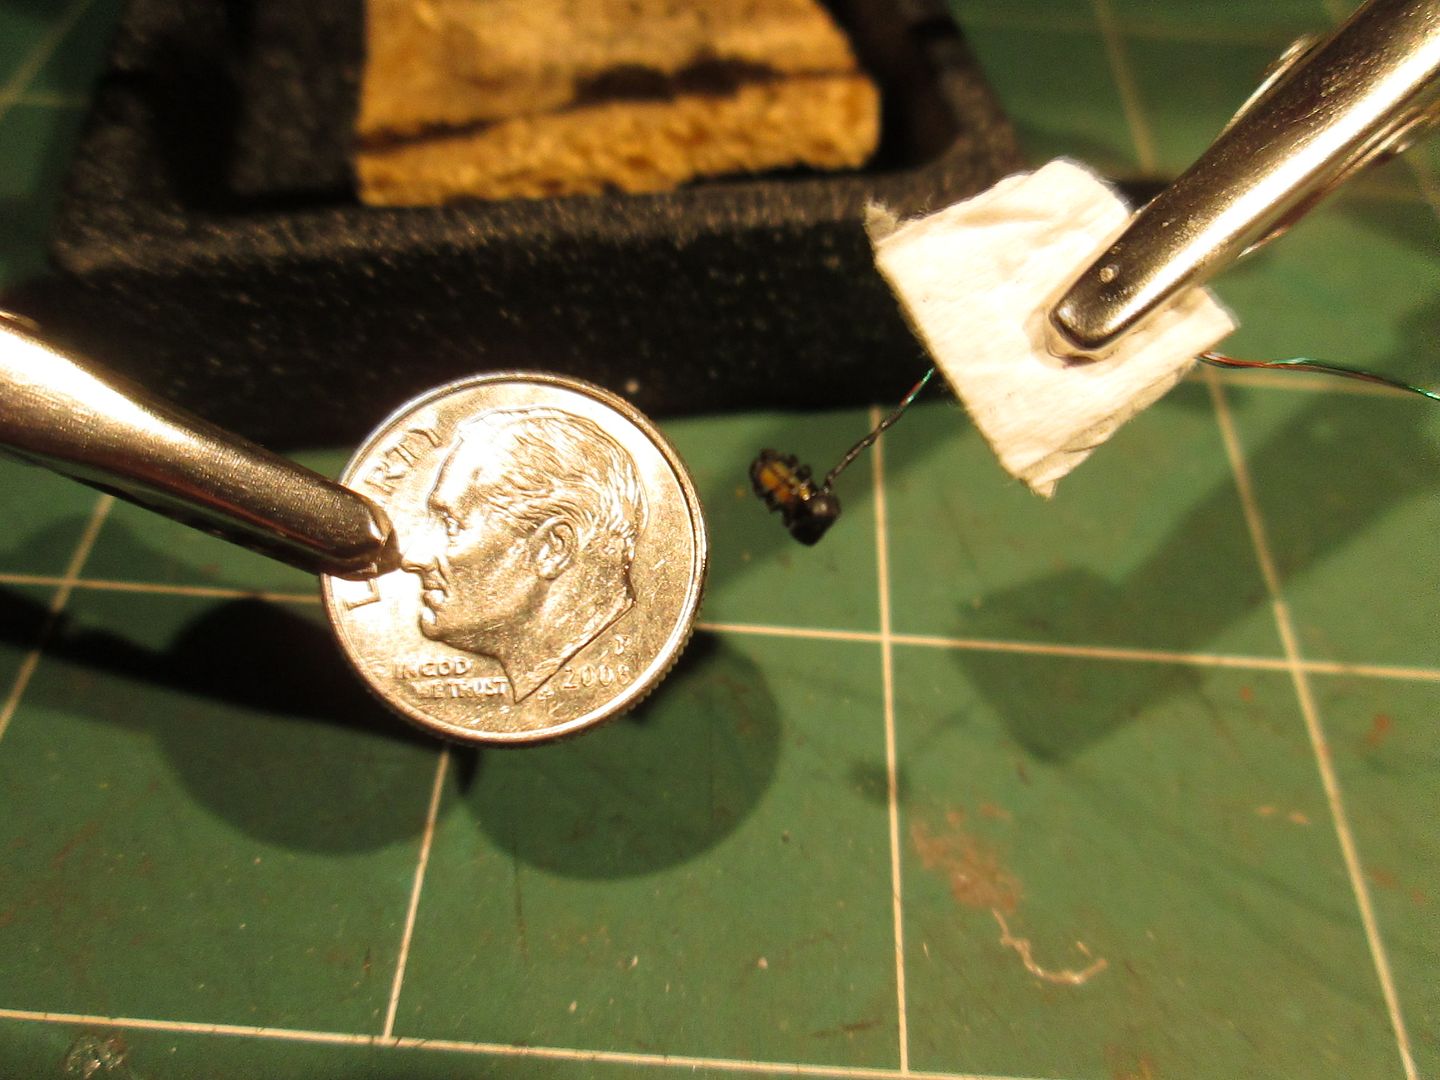 More to come! |
|
|
|
Post by antlorch on Mar 13, 2013 20:11:02 GMT -5
Holycow batman that is impressive. That is pretty smart thinking on using the fiber optic on the LED. What is really impressive is the cage around the light. Very nice work. Thanks for sharing that with us.
|
|
|
|
Post by analogbeatmaker on Mar 14, 2013 10:38:17 GMT -5
Holycow batman that is impressive. That is pretty smart thinking on using the fiber optic on the LED. What is really impressive is the cage around the light. Very nice work. Thanks for sharing that with us. Thanks antlorch! Yeah, that "cage" was quite the PITA to build...that was the third one! The first one I built (as a test just to see if it was possible) I used a very small bulb but it was still too big...gonna use it on a trackside electrical cabinet. The second one was with this LED. I didn't think I'd be able to build the cage on the LED "bulb" so I shaped a piece of sprue, coated it in a thin layer of candle wax and built the cage on that. Thinking I could melt the wax, the "cage" would slip off and I could then glue it to the "bulb". Well, the cage was too light and didn't slip off. Then the plastic (that was under the wax) melted and bubbled over the "cage". I finally burned it out or off but the cage fell apart. So, the one in the pics is the third attempt and was built right on the LED "bulb. I thought I was gonna go crazy making this thing! |
|
liengineerbob
Chairman
Sitting at my workbench trying to figure out what to do next!
Posts: 335
|
Post by liengineerbob on Mar 15, 2013 17:41:36 GMT -5
That is one fine piece of microscopic modeling you did there.......and it works too! I would have taken the easy way out and made it non functioning.
|
|
|
|
Post by icghogger on Mar 15, 2013 20:35:26 GMT -5
Freakin' AWESOME!!  |
|
|
|
Post by NS91 on Mar 17, 2013 8:08:08 GMT -5
Nice work. Southern's silver exhaust stacks are a pain the photograph and paint. They will be even more difficult with the exhaust silencer.
|
|
|
|
Post by analogbeatmaker on Mar 17, 2013 14:37:32 GMT -5
That is one fine piece of microscopic modeling you did there.......and it works too! I would have taken the easy way out and made it non functioning. Thanks liengineerbob! I definitely thought about making it non-functional and if that part with the fiber optic wouldn't have worked it would be non-functional. Freakin' AWESOME!! Thanks icghogger! Nice work. Southern's silver exhaust stacks are a pain the photograph and paint. They will be even more difficult with the exhaust silencer. Thank you ns91! I have to admit I don't fully understand your comment about the exhaust paint and silencers.? They look just silver with a slight amount of residue and I don't see any silencers. I do want to make this model look really nice so if you could expound on your comment it would be greatly appreciated.  |
|
|
|
Post by NS91 on Mar 17, 2013 15:23:00 GMT -5
Nice work. Southern's silver exhaust stacks are a pain the photograph and paint. They will be even more difficult with the exhaust silencer. Thank you ns91! I have to admit I don't fully understand your comment about the exhaust paint and silencers.? They look just silver with a slight amount of residue and I don't see any silencers. I do want to make this model look really nice so if you could expound on your comment it would be greatly appreciated. The Southern MP15DC's had a few fitted with an experimental exhaust silencer when they were delivered in 1977. I was saying that the painting of the exhaust stacks that are sticking out would be a pain to tap off the exhaust silencer. |
|
|
|
Post by analogbeatmaker on Mar 17, 2013 17:05:44 GMT -5
Thank you ns91! I have to admit I don't fully understand your comment about the exhaust paint and silencers.? They look just silver with a slight amount of residue and I don't see any silencers. I do want to make this model look really nice so if you could expound on your comment it would be greatly appreciated. The Southern MP15DC's had a few fitted with an experimental exhaust silencer when they were delivered in 1977. I was saying that the painting of the exhaust stacks that are sticking out would be a pain to tap off the exhaust silencer. Ahh...thanks. |
|
|
|
Post by NS91 on Mar 17, 2013 19:12:46 GMT -5
The Southern MP15DC's had a few fitted with an experimental exhaust silencer when they were delivered in 1977. I was saying that the painting of the exhaust stacks that are sticking out would be a pain to tap off the exhaust silencer. Ahh...thanks. Not a problem. I enjoy watching your project progress to the completed model. I can't wait to see this one finished. |
|
|
|
Post by analogbeatmaker on May 15, 2013 23:22:55 GMT -5
Finally, I have more progress pics to post! In this first pic I am showing how the class lights looked on the out-of-box model...totally wrong.  Here I've started drilling them out to accept the new frames/lenses. 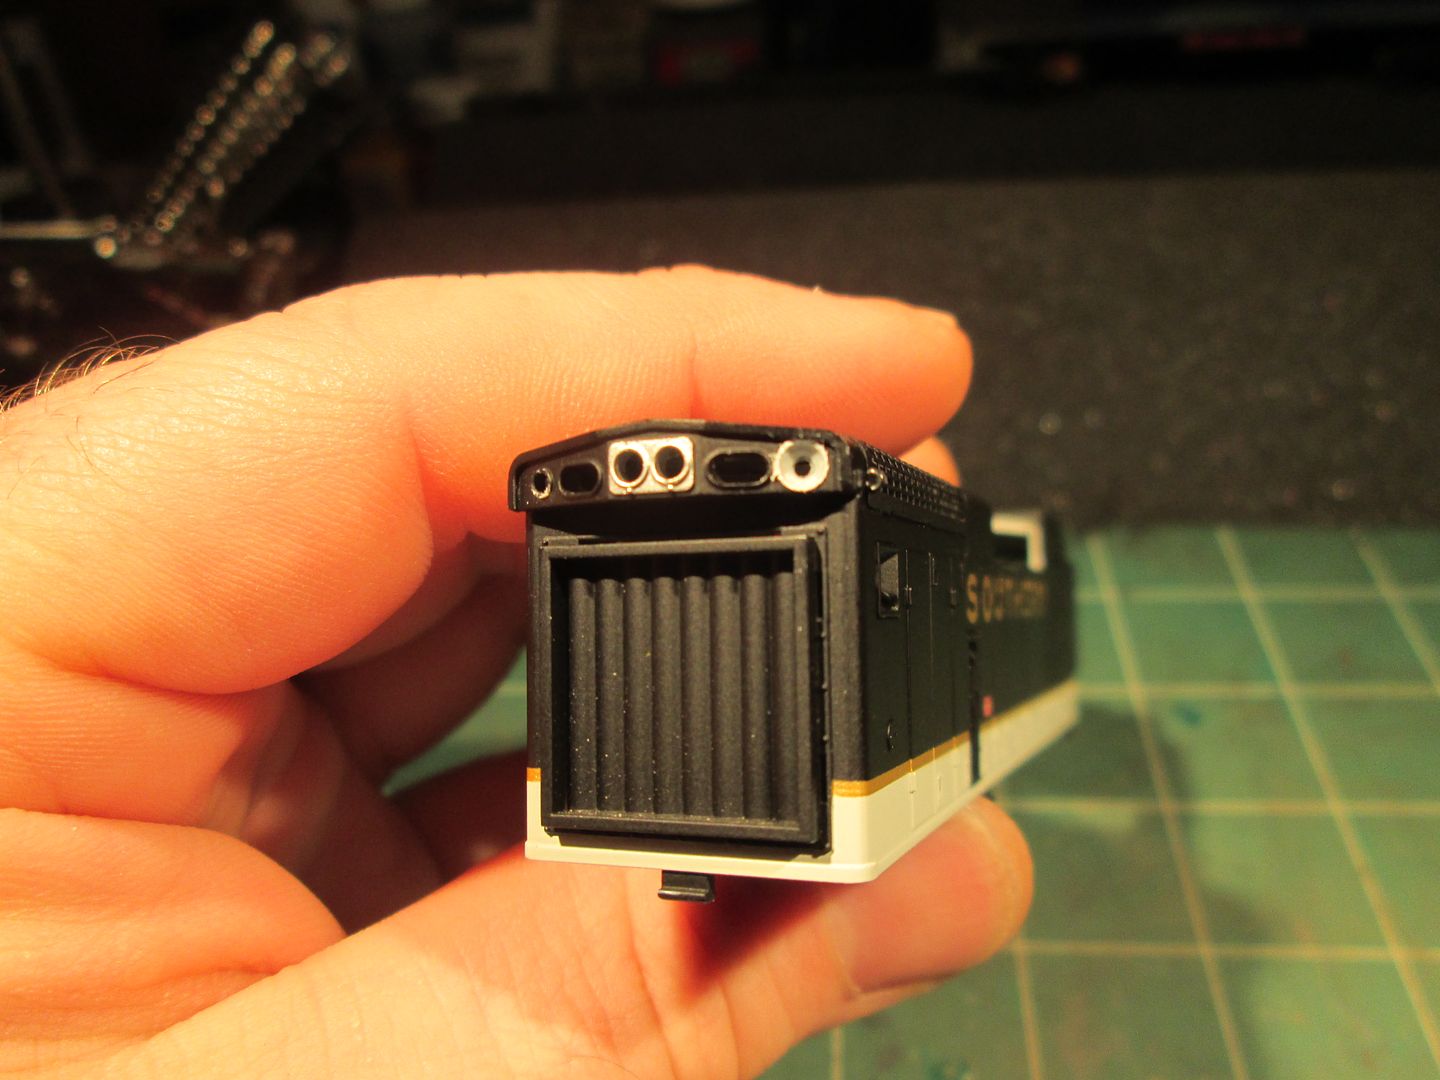 And here they are installed. 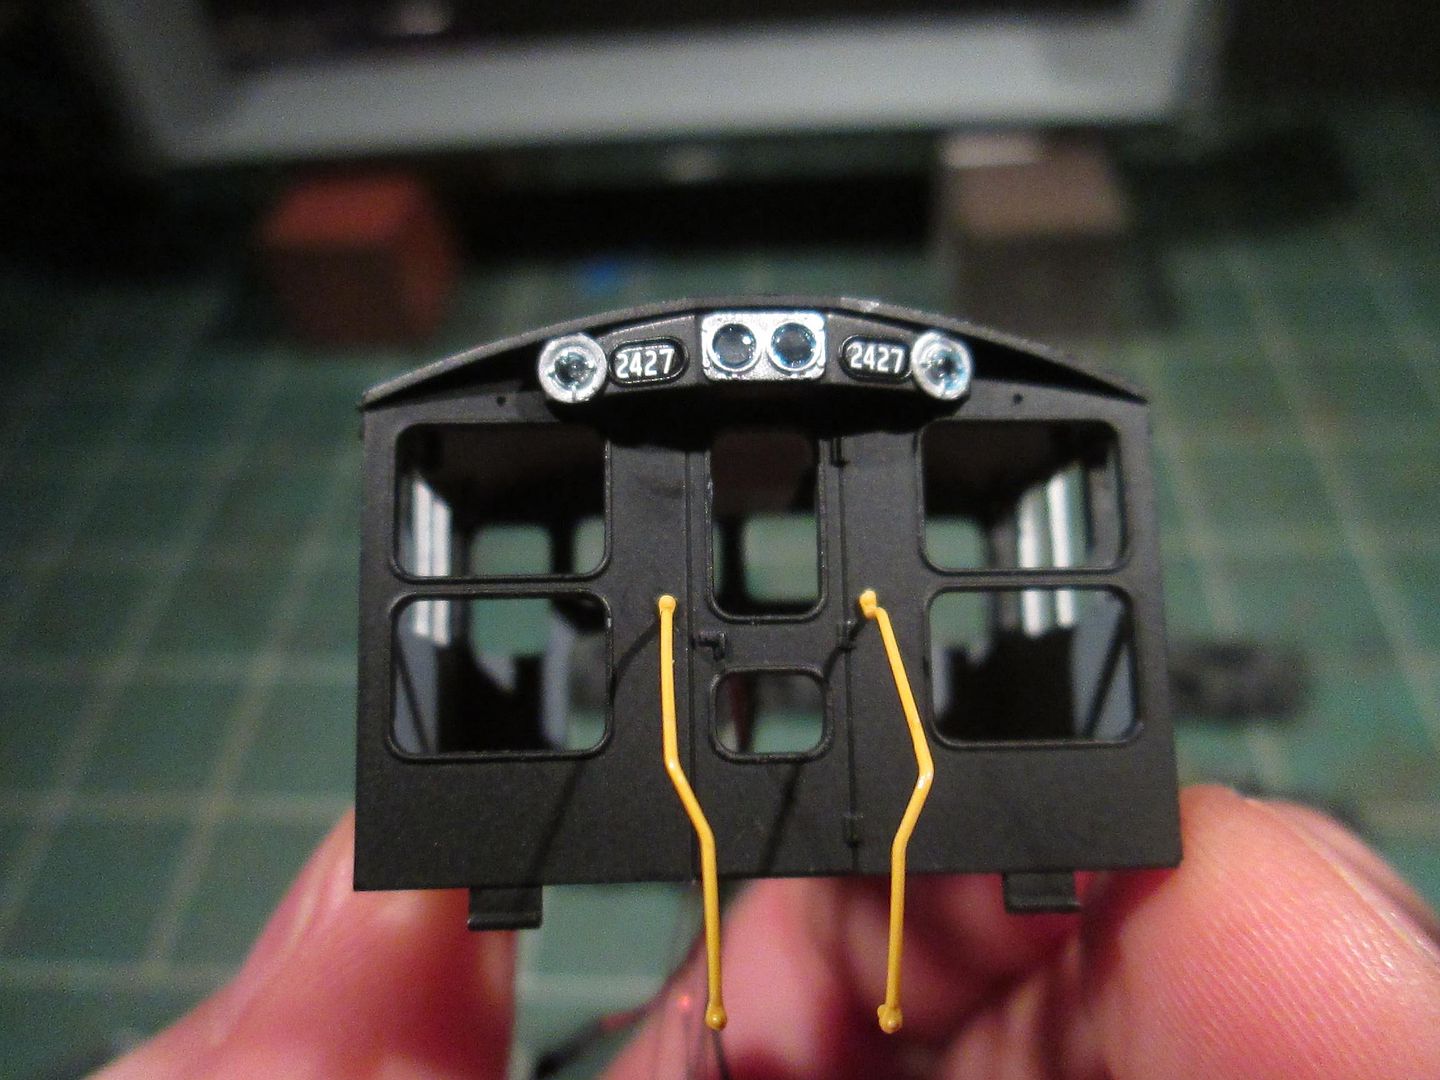 I also saw the cooling fan in a head-on shot of this engine and had to add that detail. 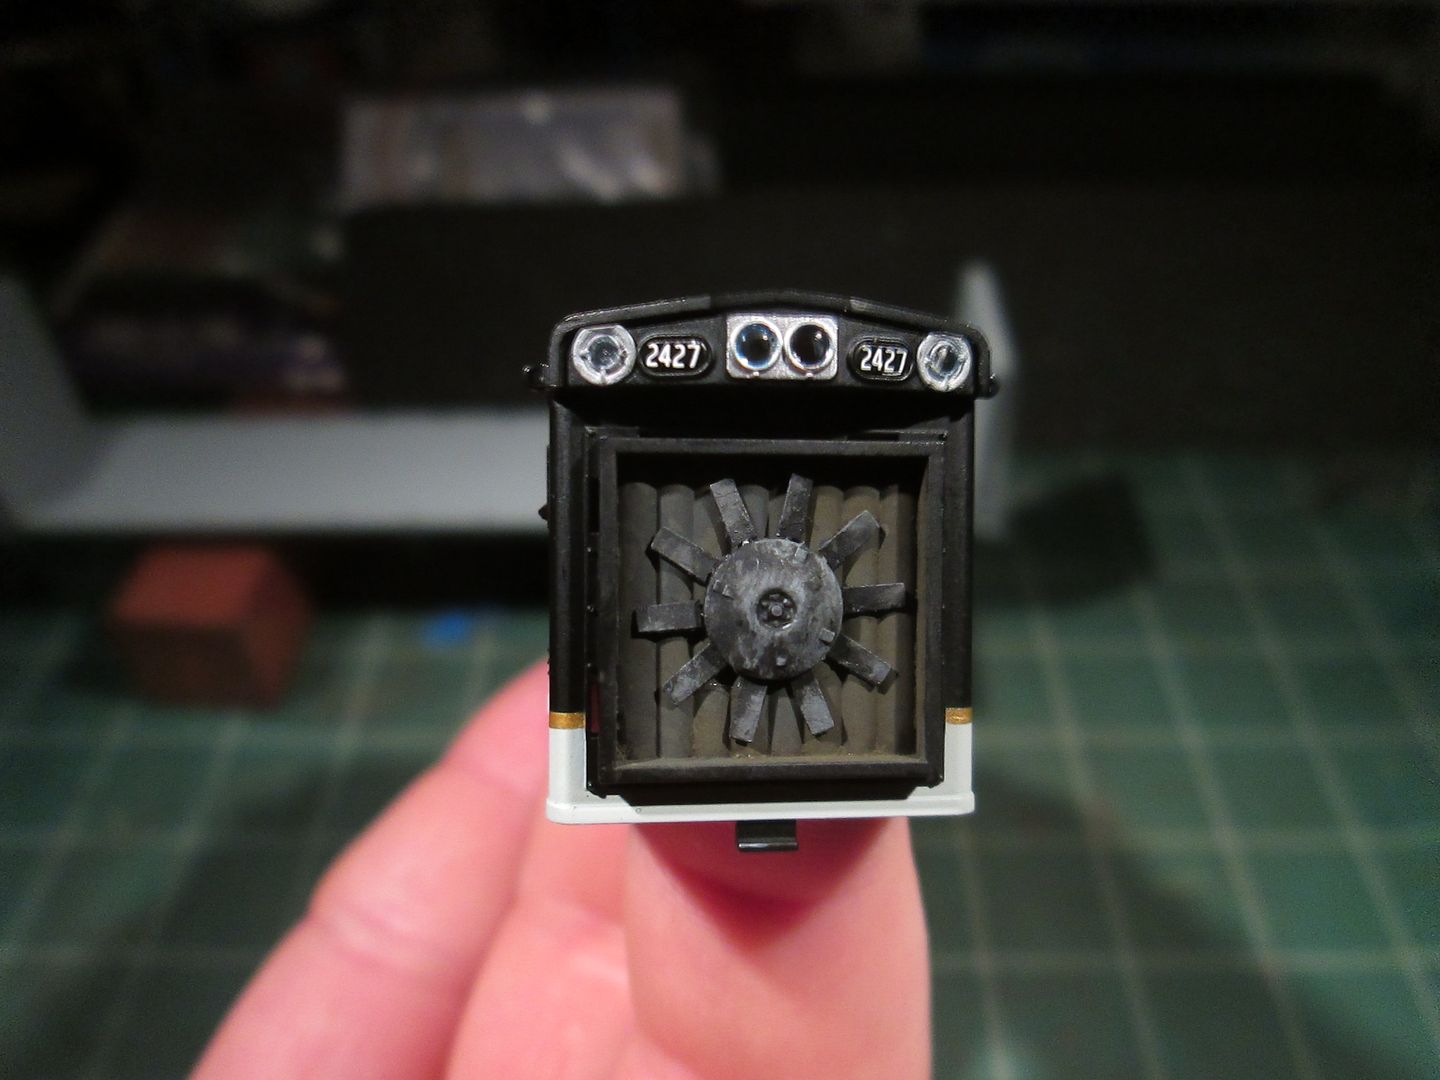 Test fitting the roof details. I kitbashed the sun shades. 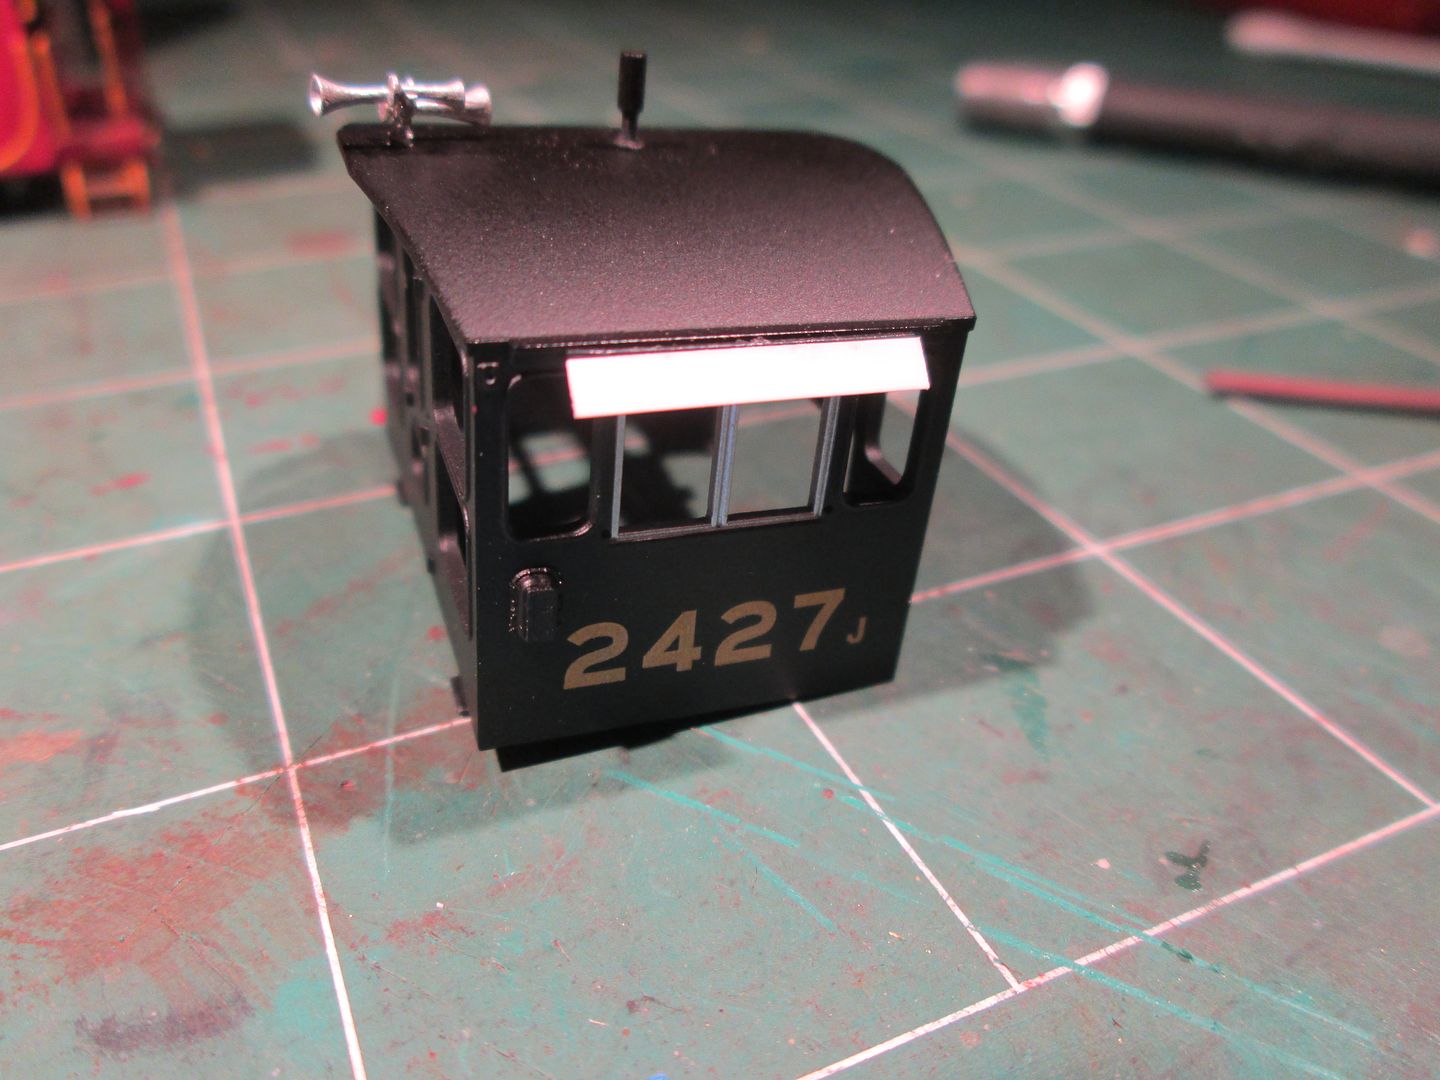 Here I've wired in the LED's for the class lights. Couldn't figure out how to make step lights work due to them being directly under the deck...oh well. 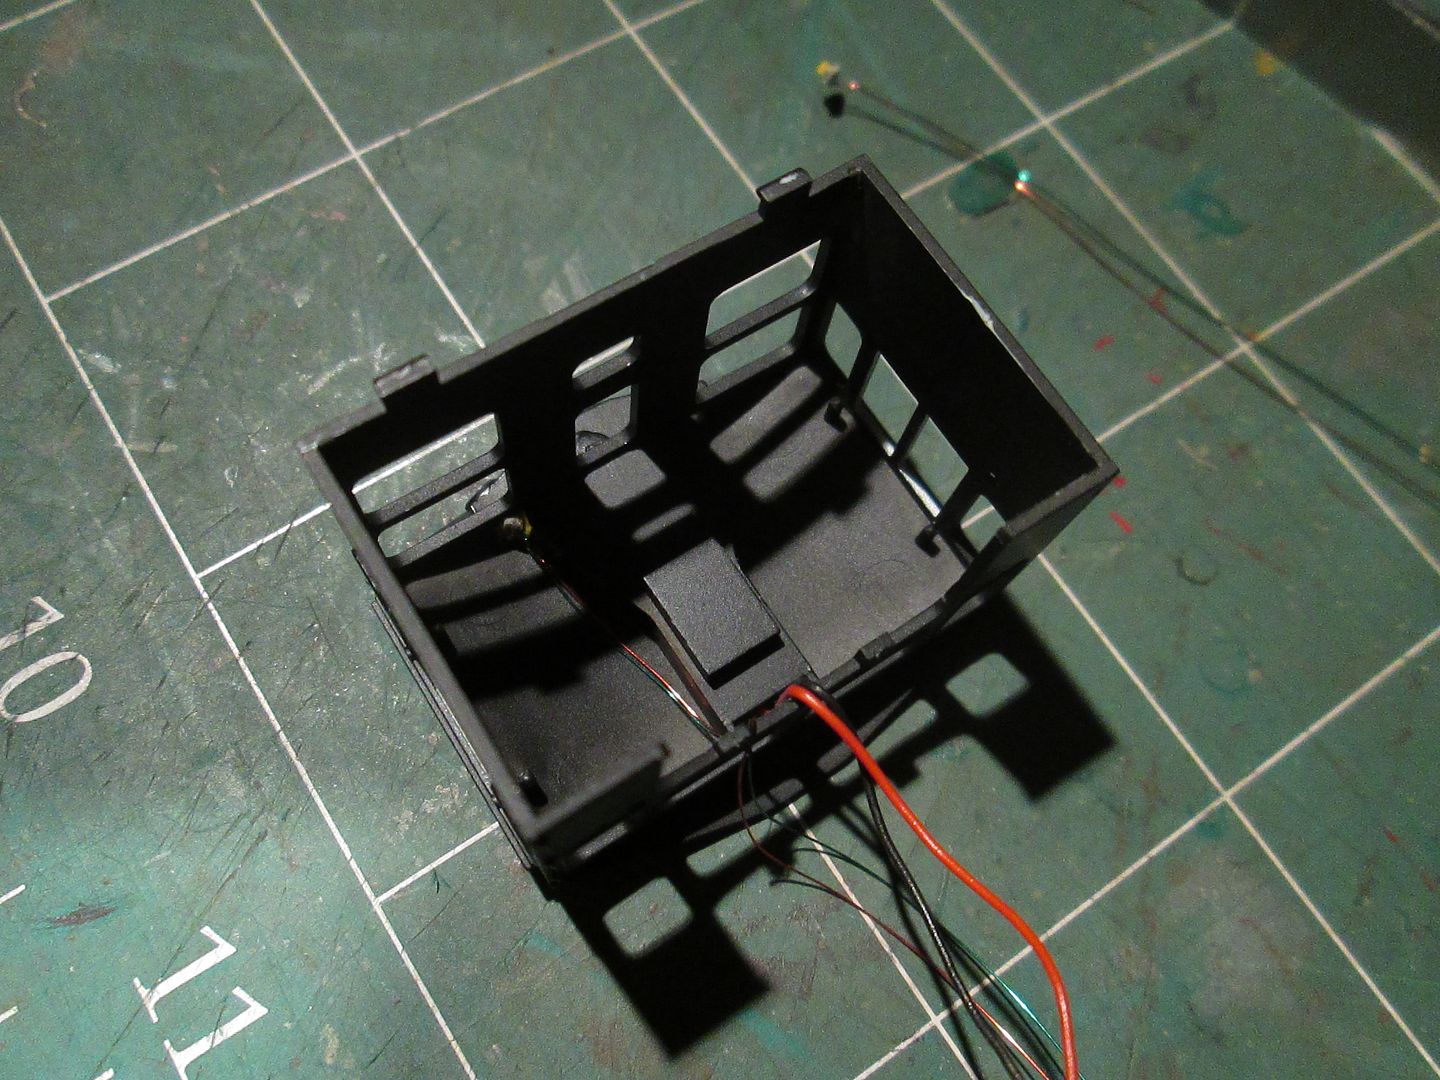   And here is that unusual beacon mounted. I actually had to file down the roof overhang on the beacon side of the cab to match the proto as well. 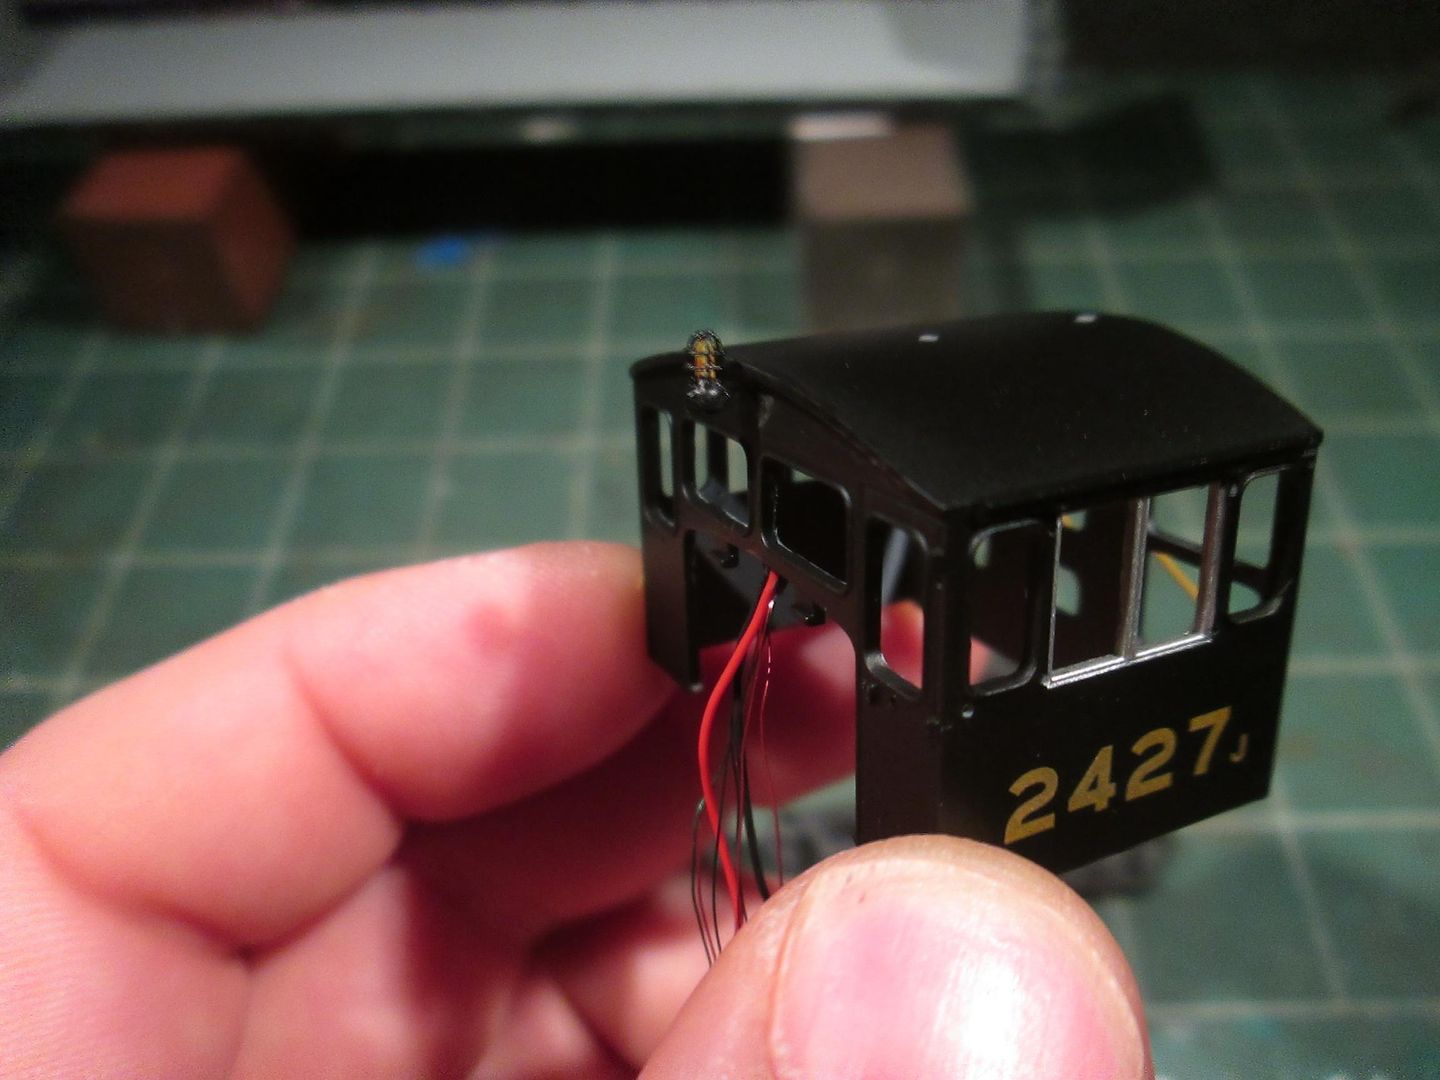 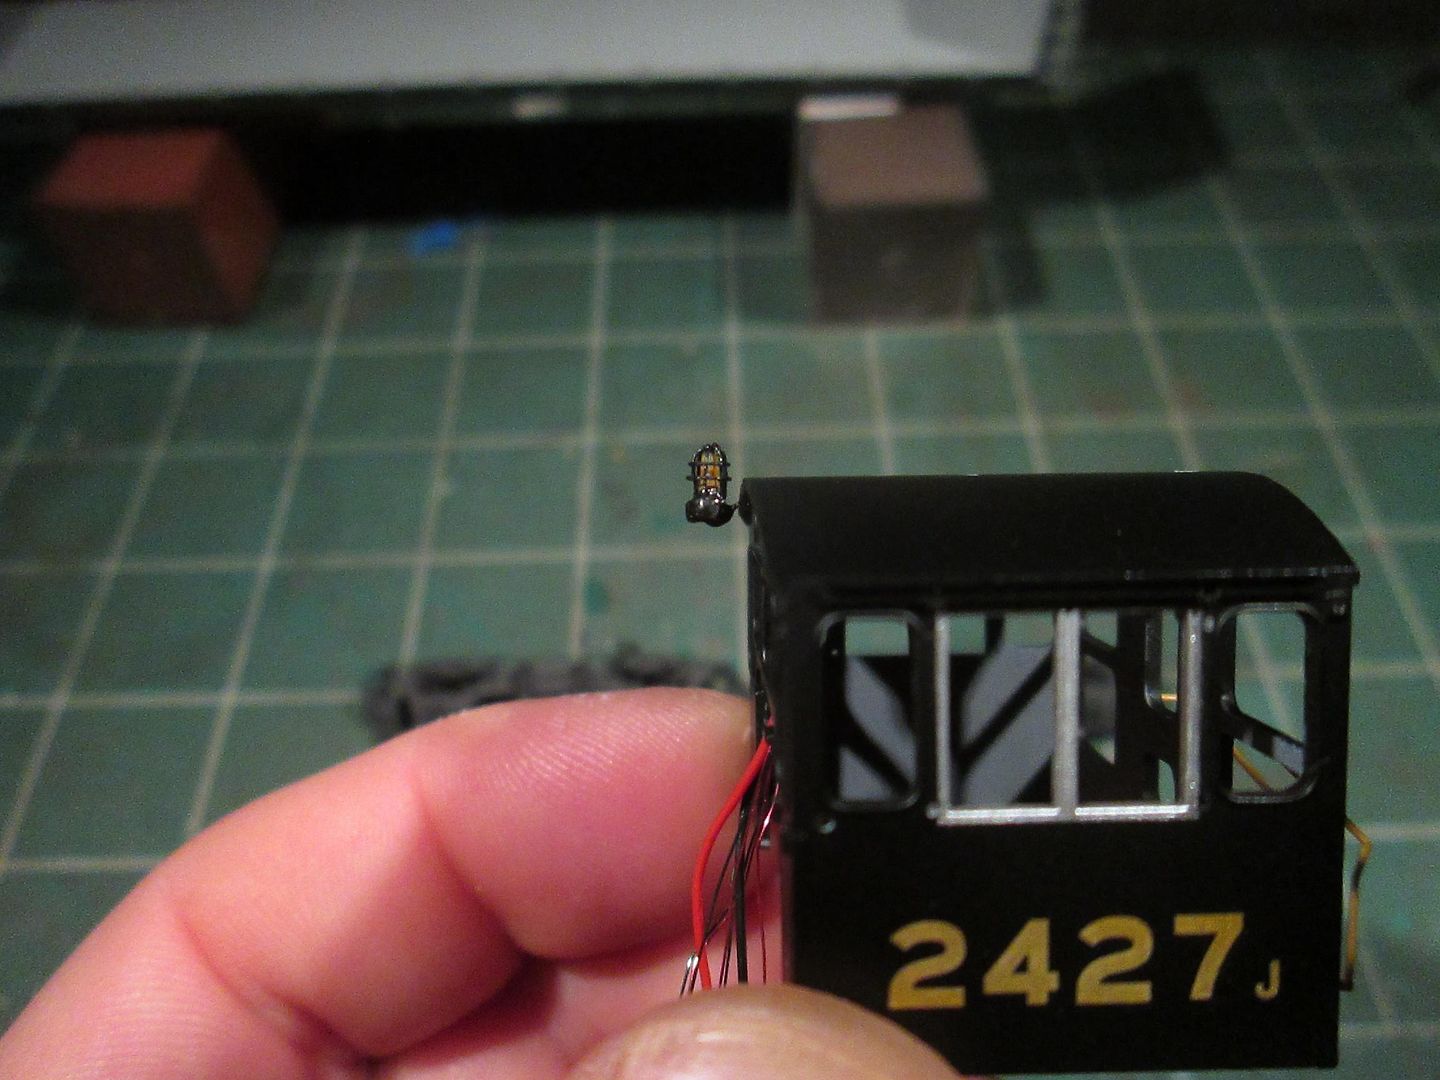 Modding the frame per proto: 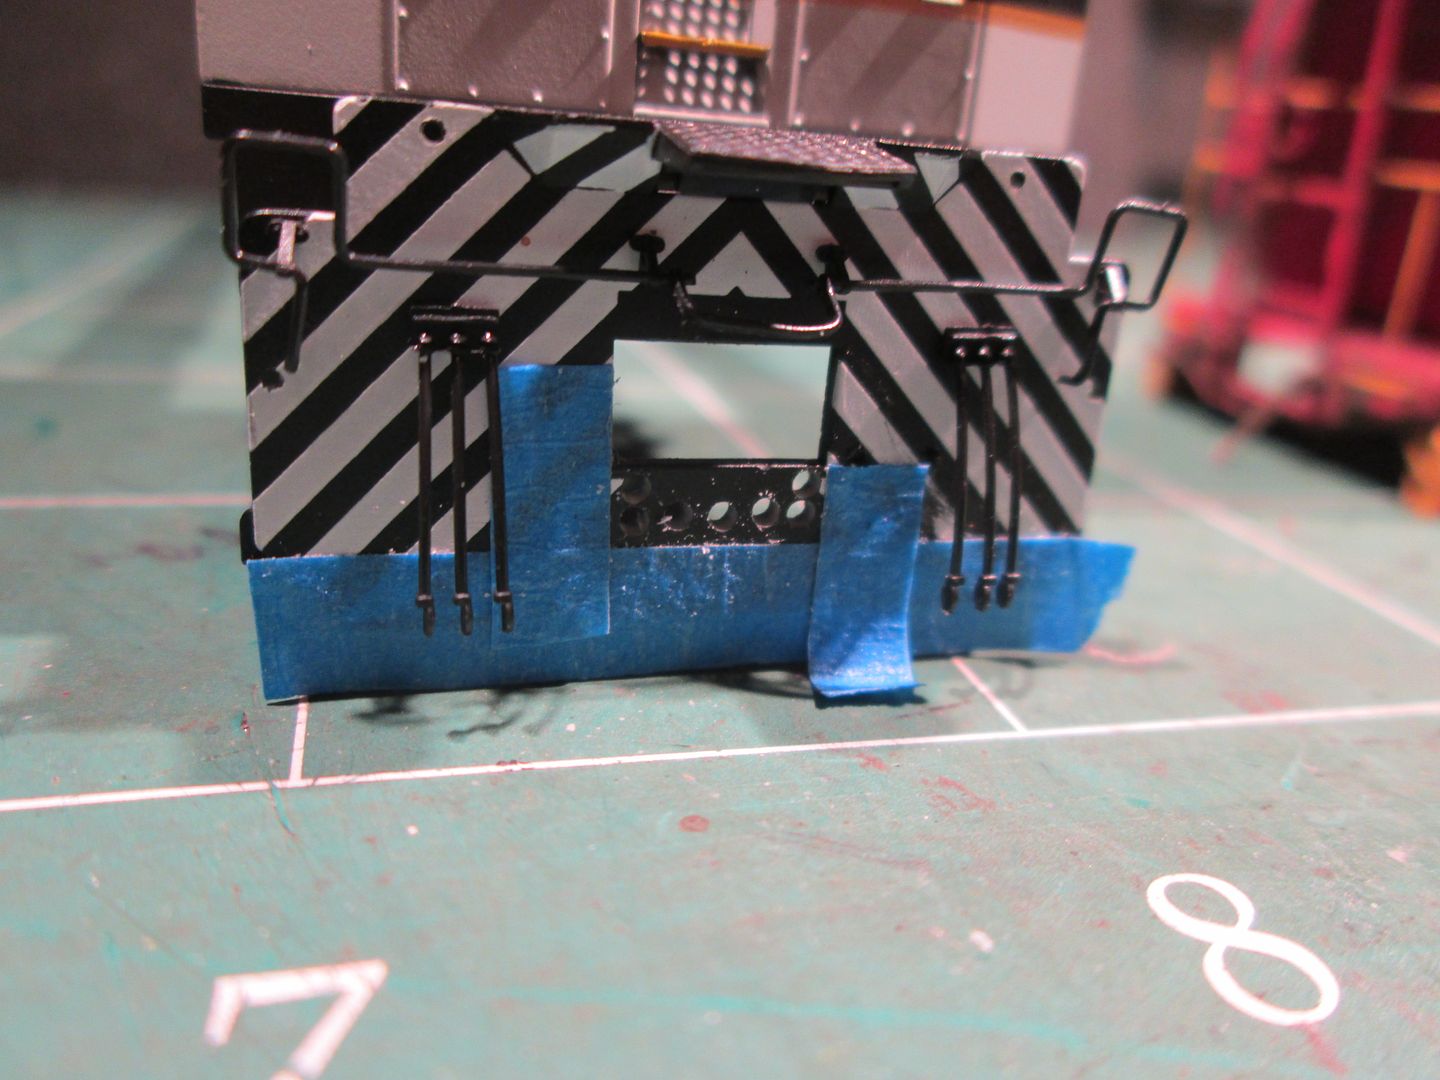 Here I scratched a "pipe" for the fuel tank. 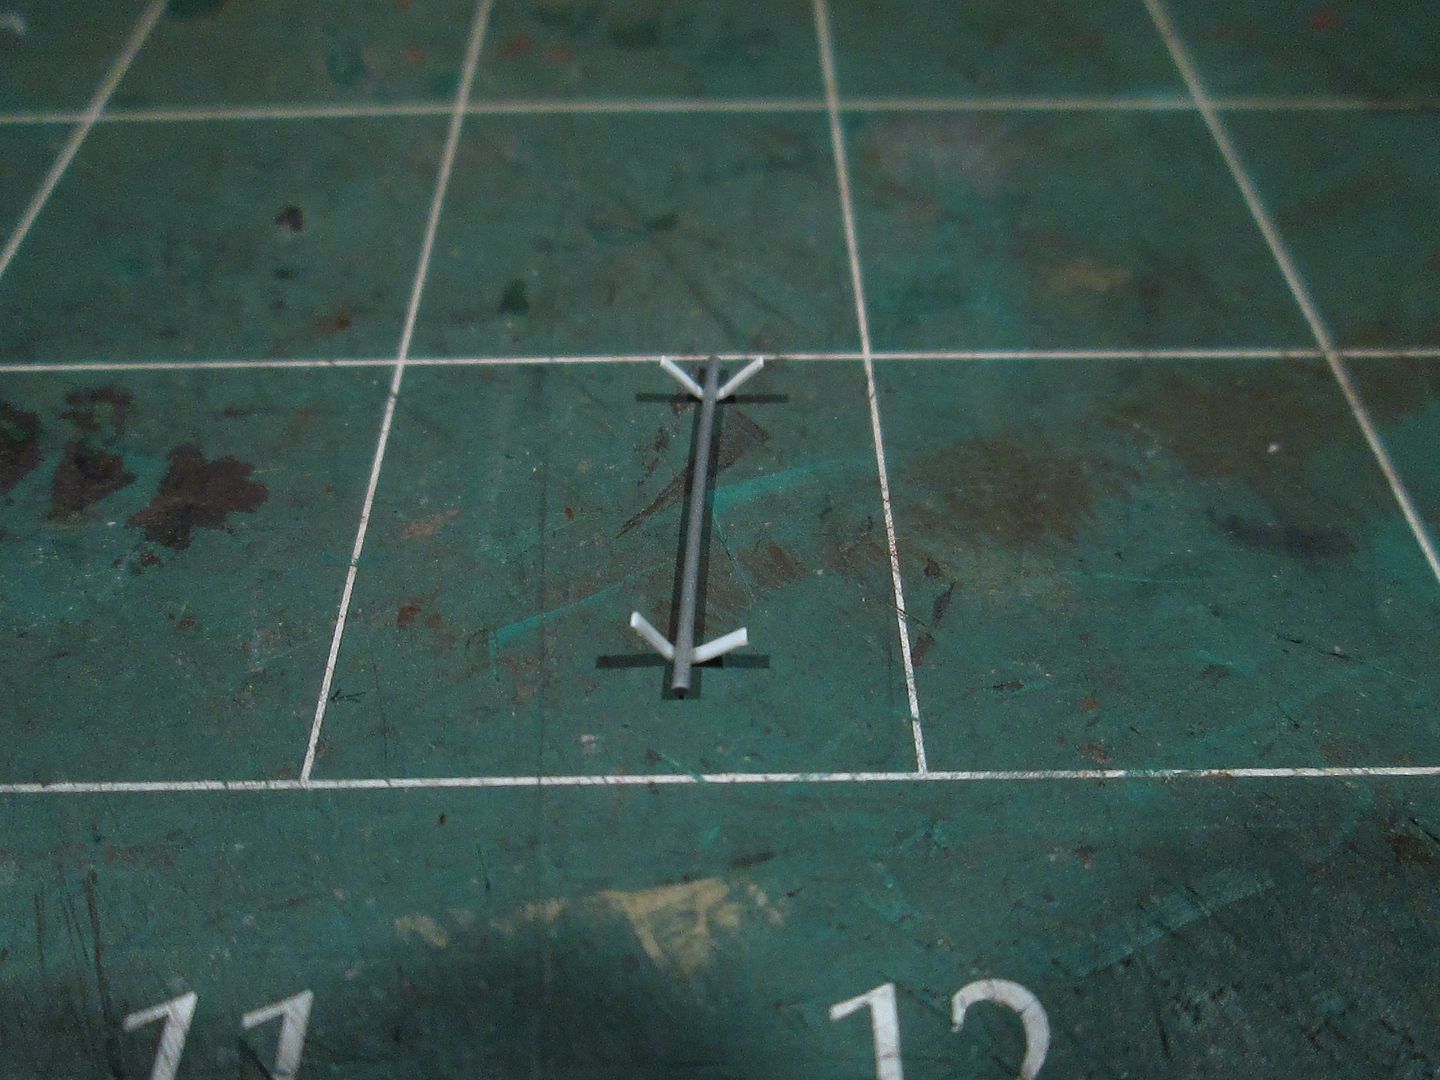 Making the expandable (to slip on and off exposing the motor screws) fuel tank non-expandable. 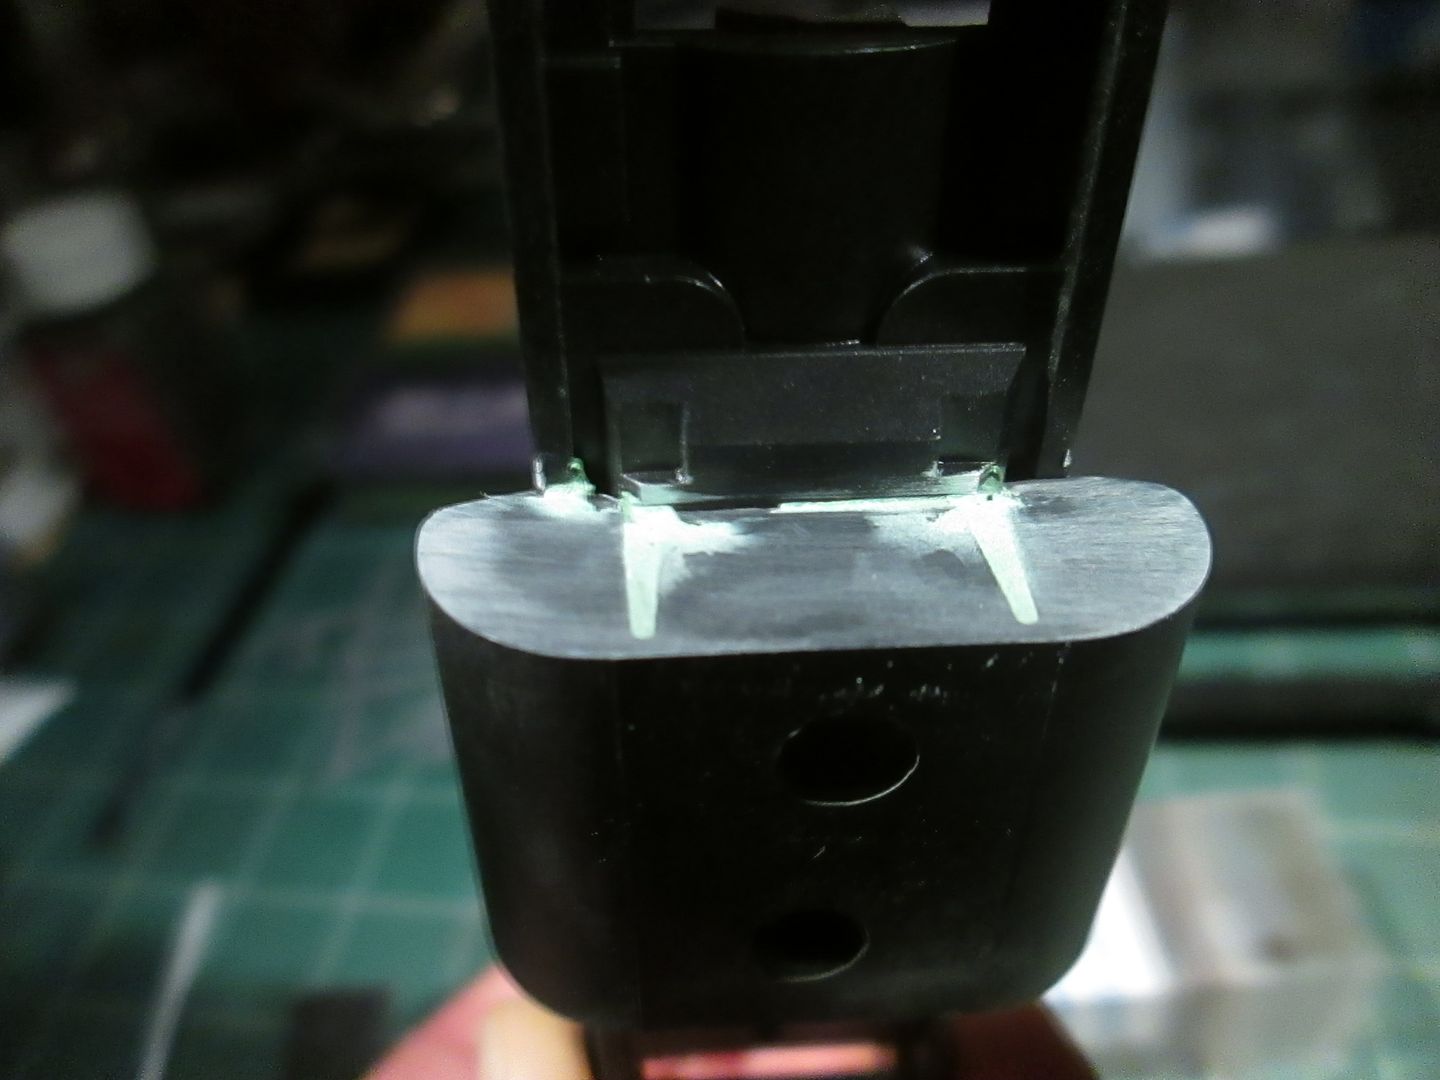 Drilled holes so I can still get to the screws holding the motor....yeah, they're sloppy.... 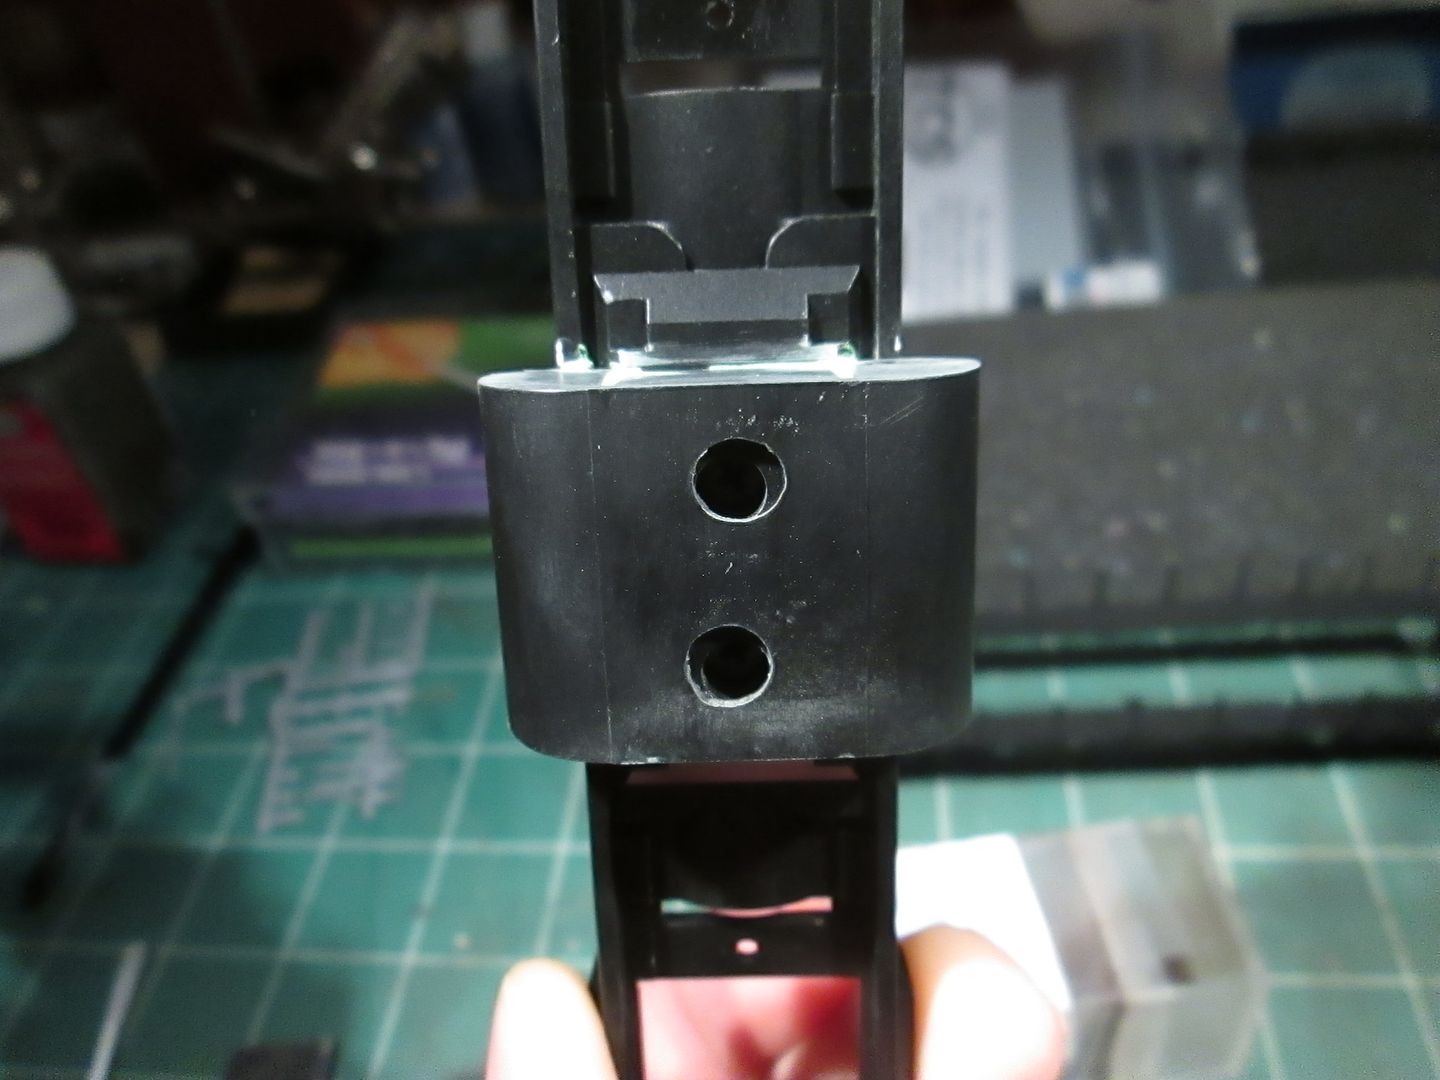 Fuel tank details. In the second pic you can see the "pipe" I scratched...it is the higher, horizontal one. 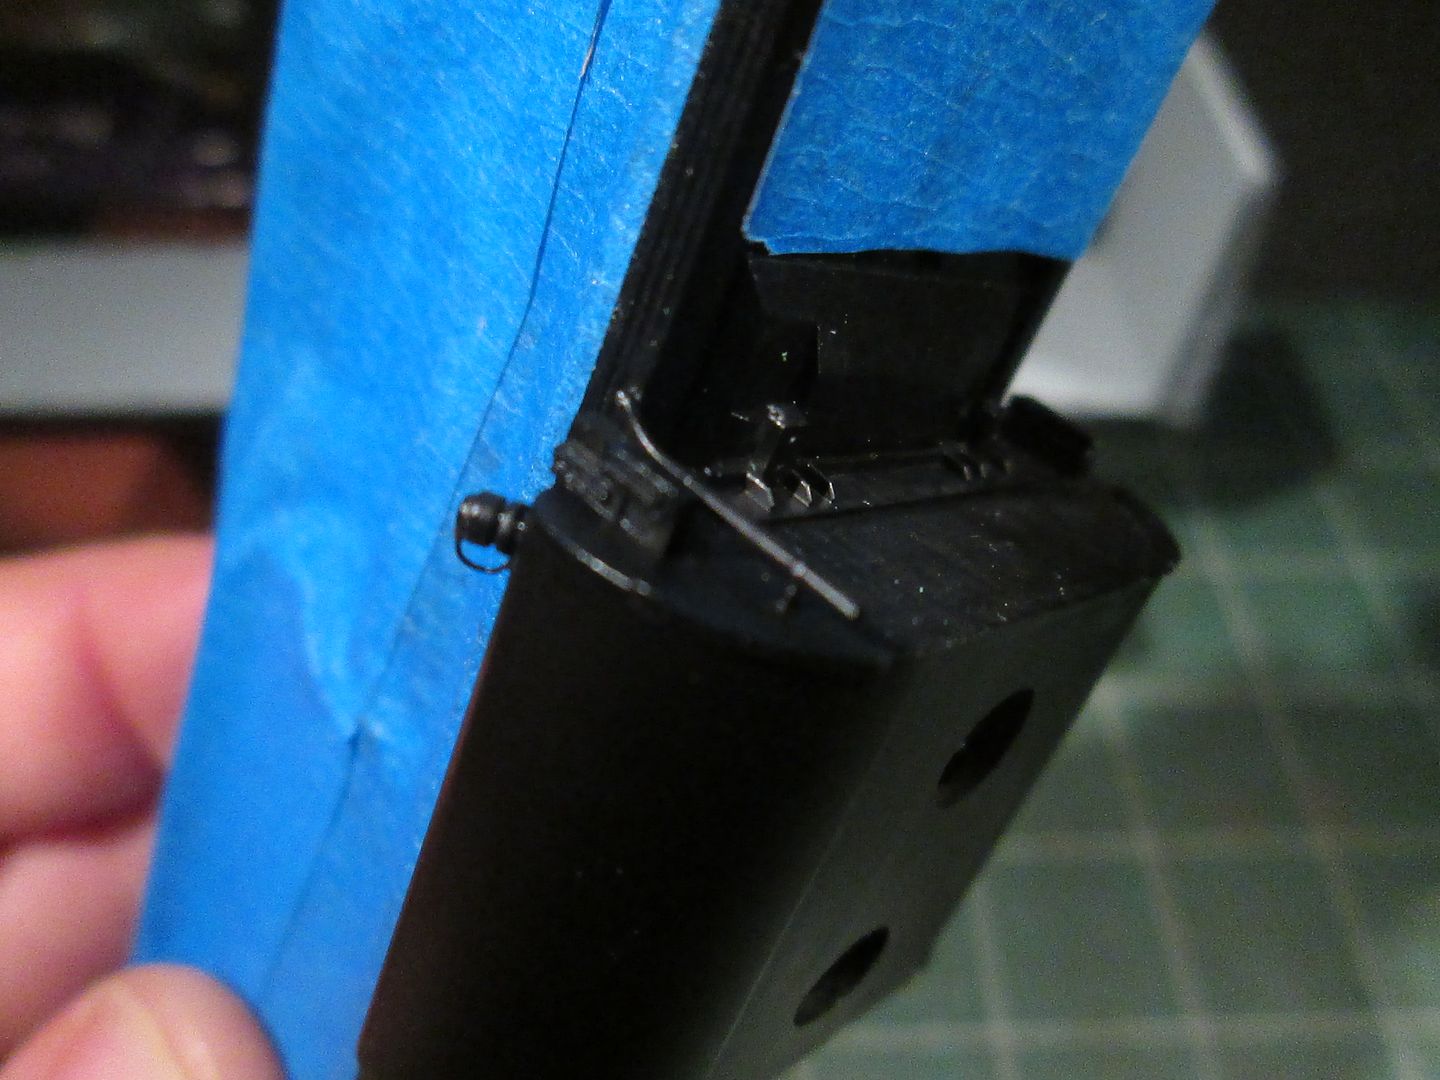 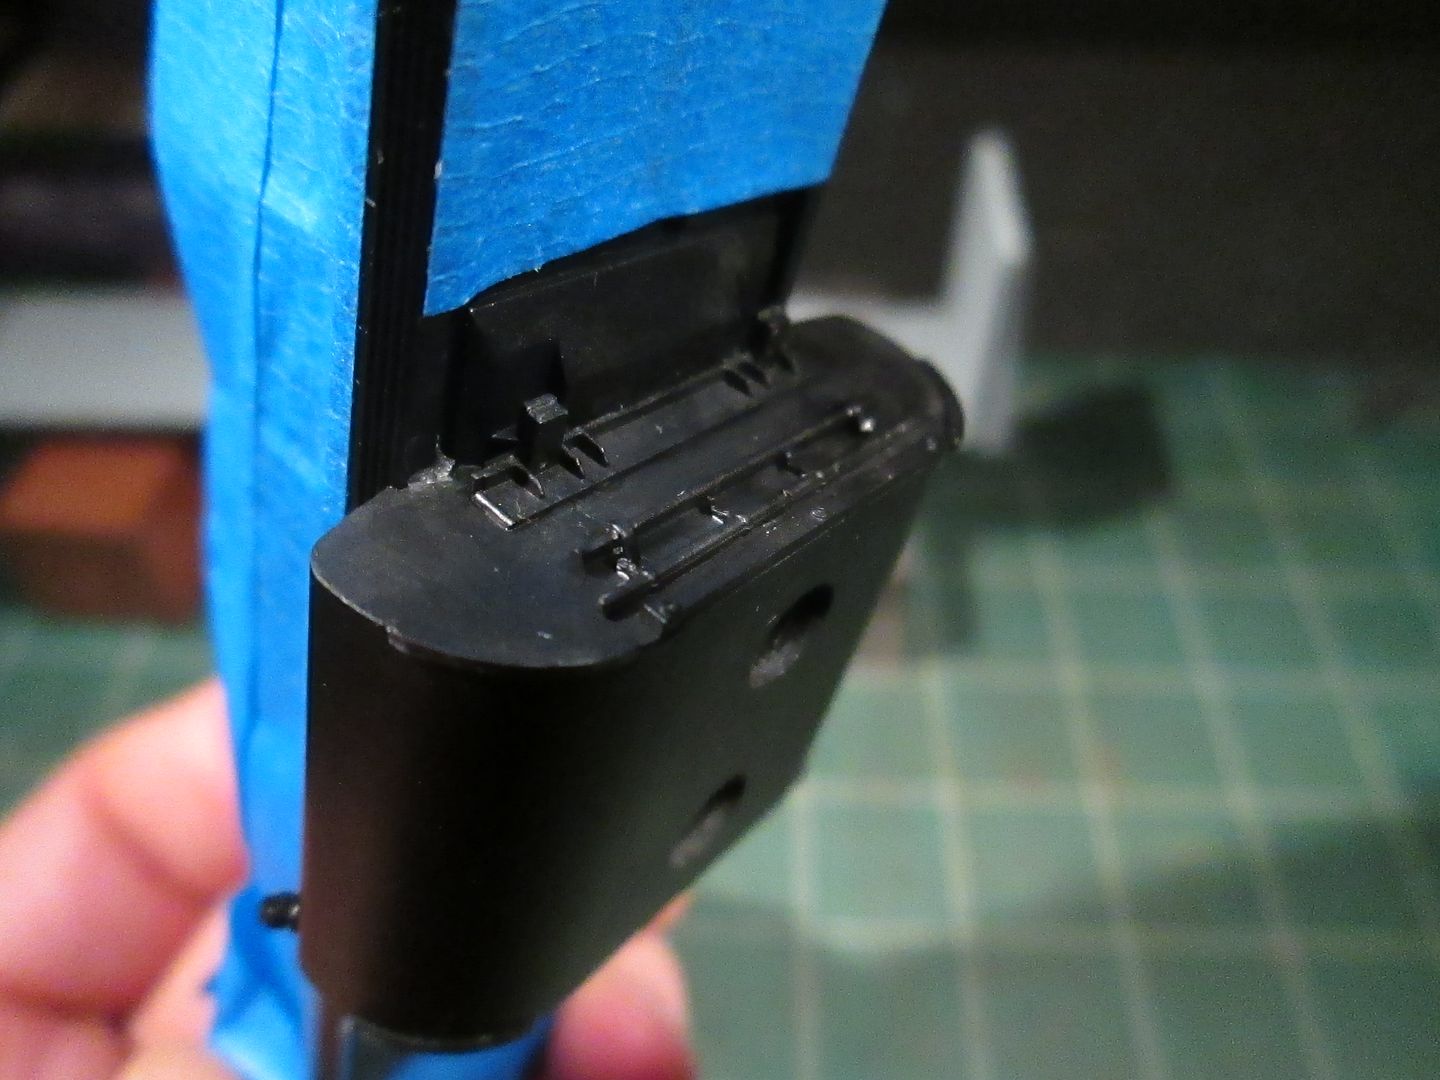 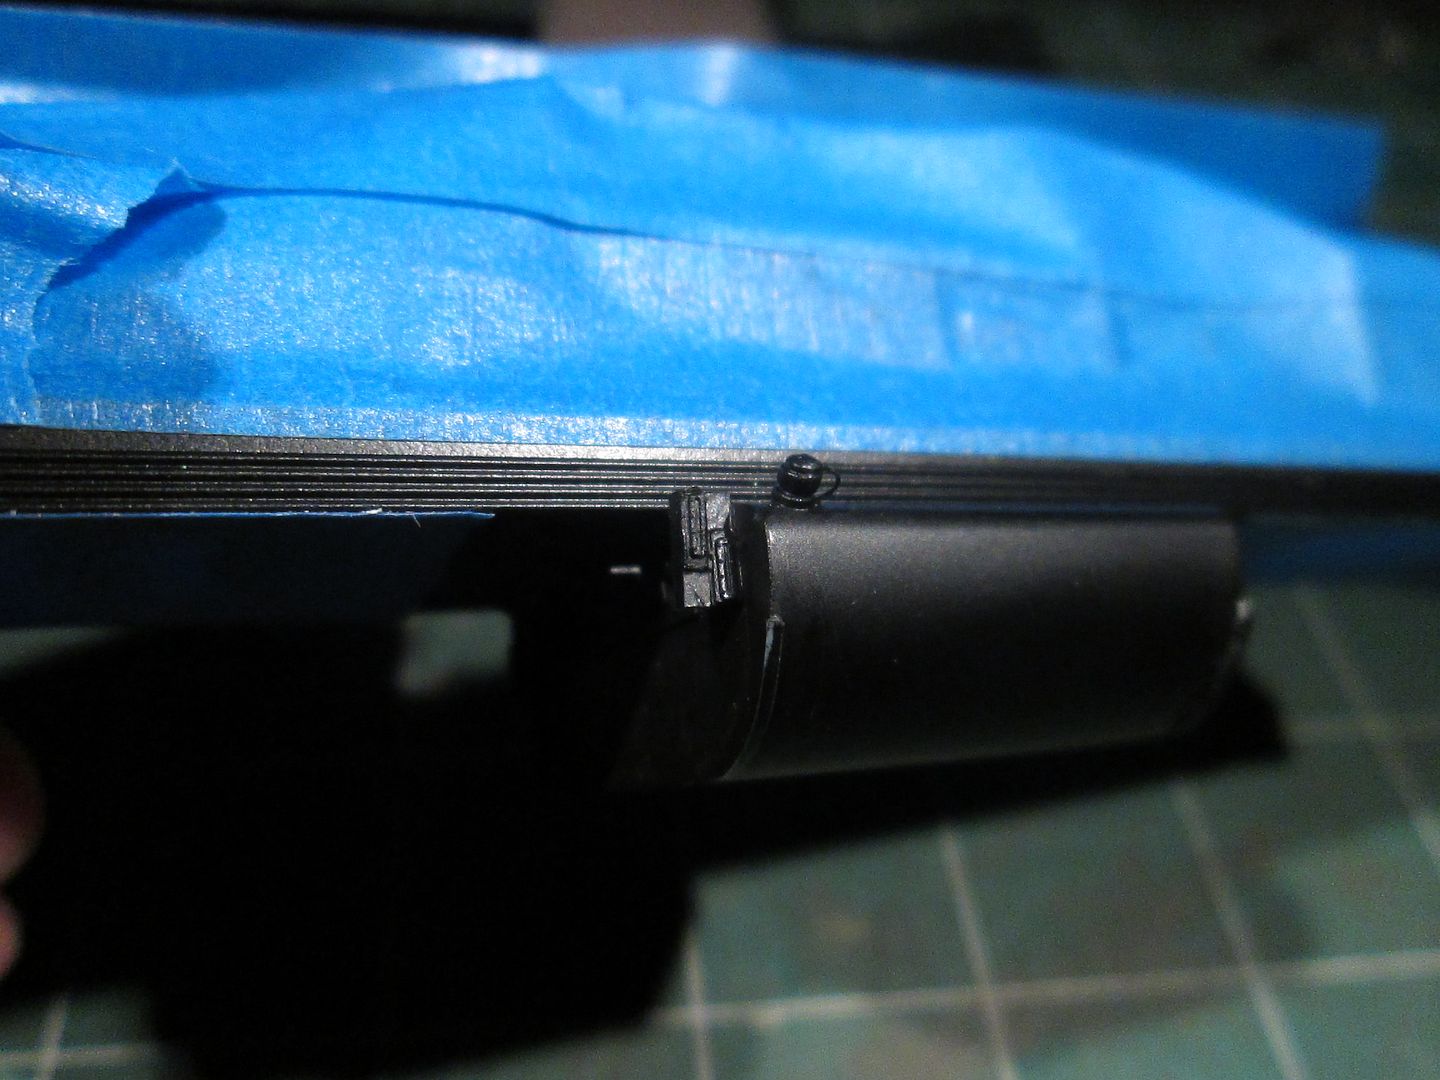 A little gray paint on the floor, black on the control stand (drybrushed with white to bring out the details) and a couple of gents about to be choked to death with Dullcote! 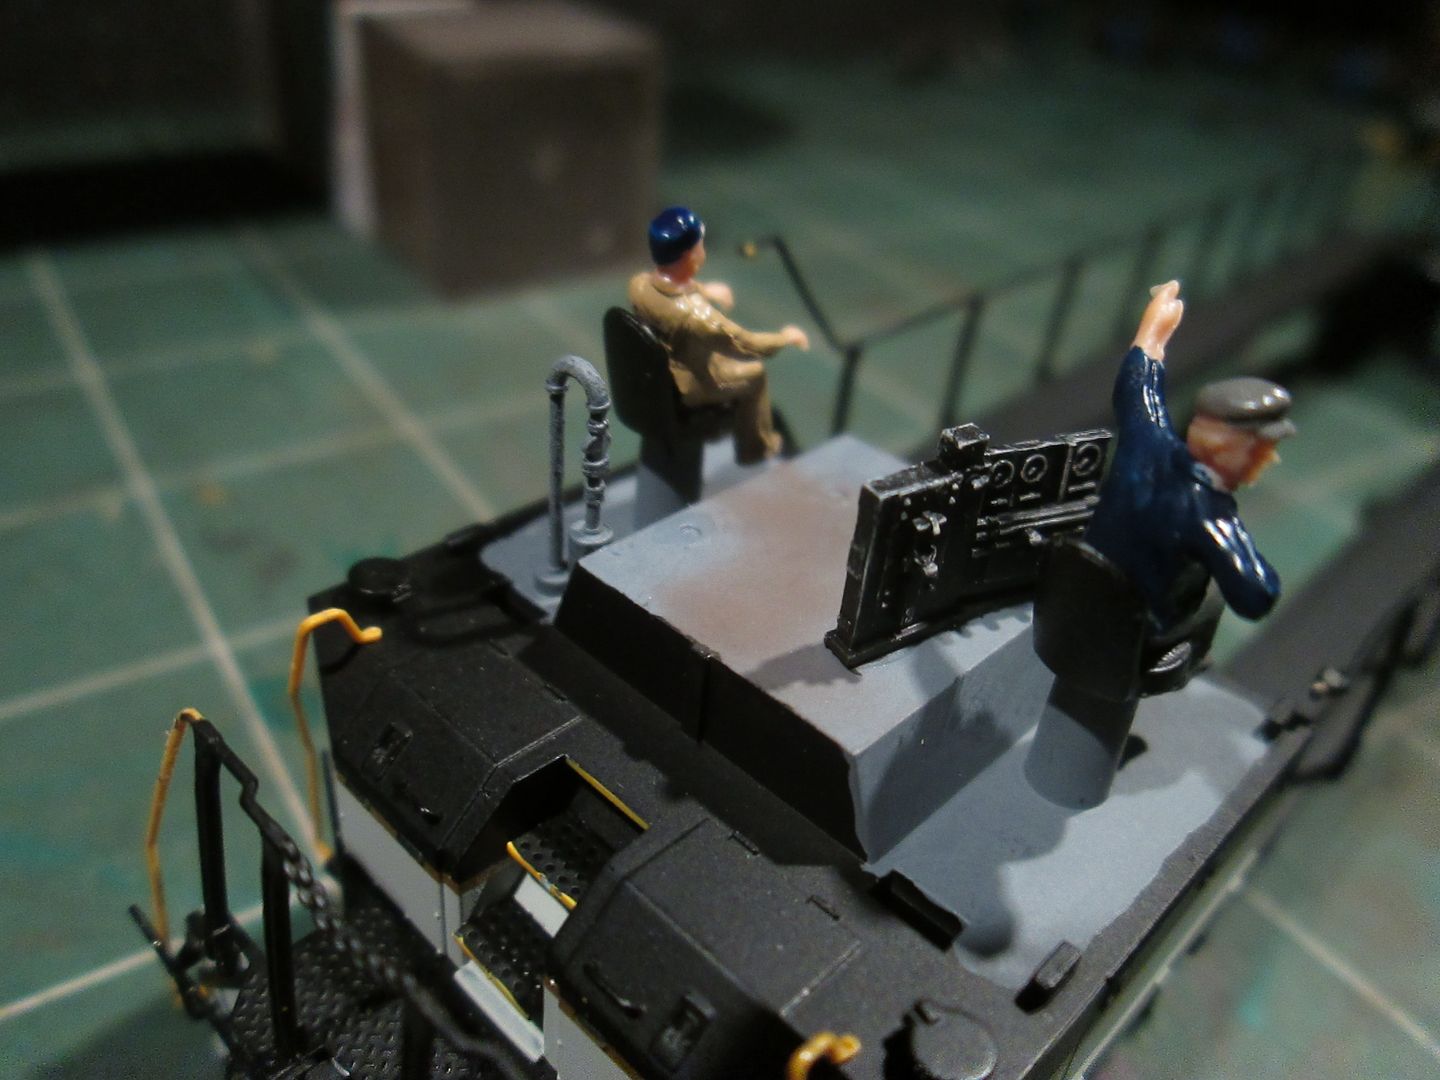 Wheels! 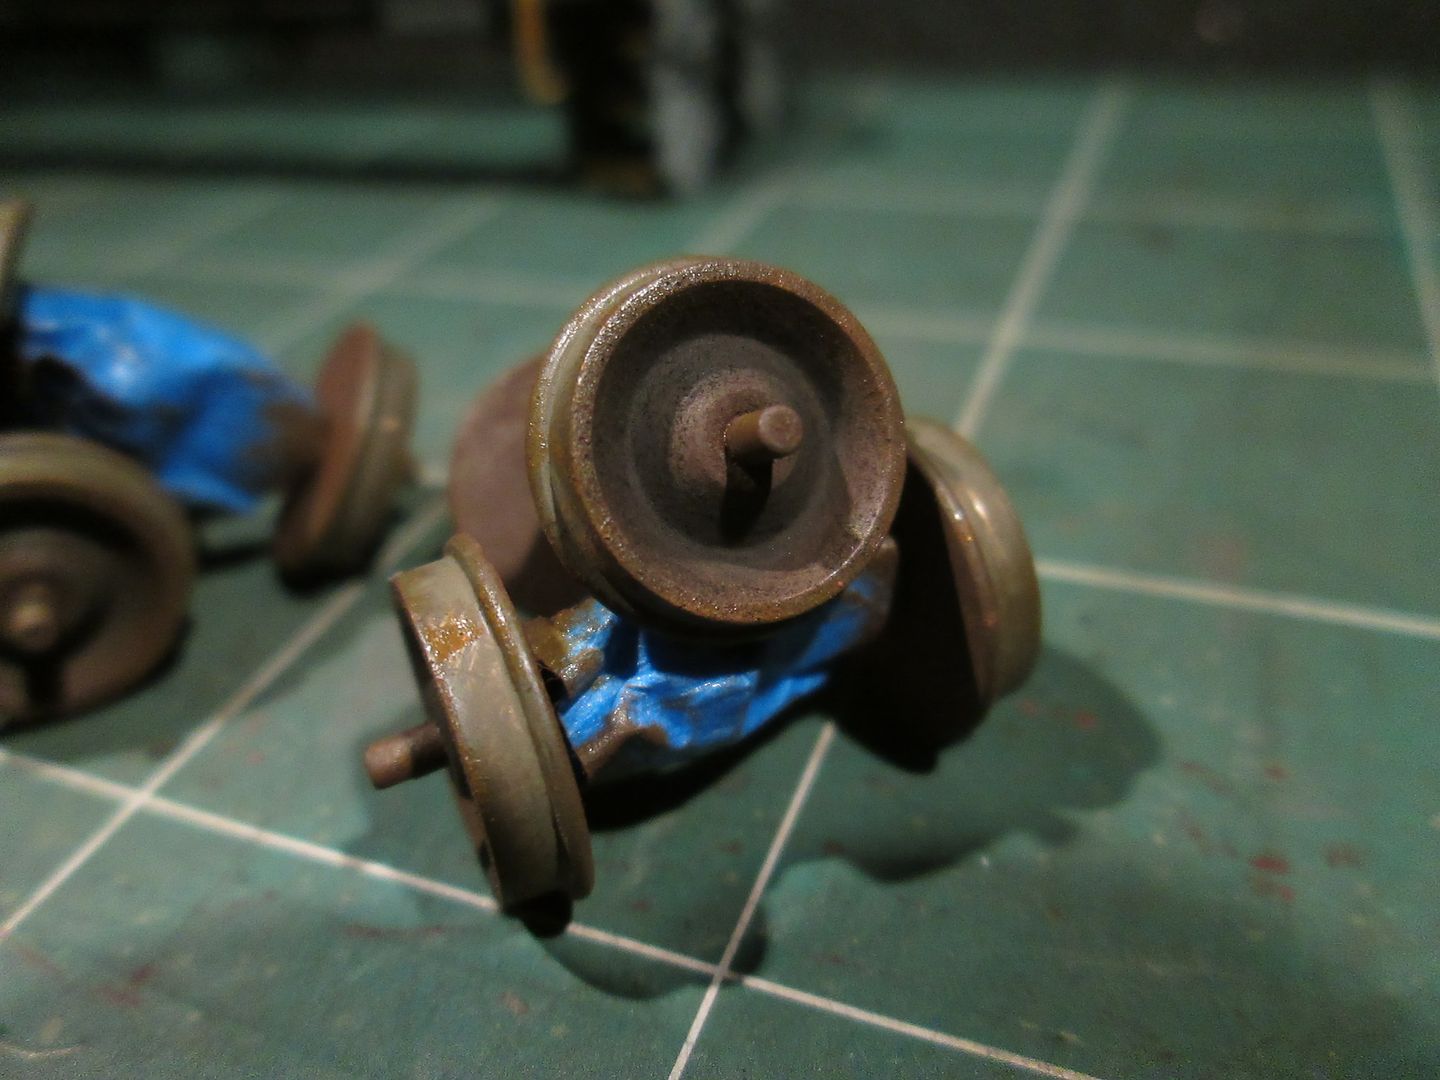 Now, there is a fair amount of unusual "piping" or "hoses" on the trucks and also a spring/chain brake tensioner on the proto. I've tried to re-create these details. Haven't hung the chain yet but here are all the parts. In this first pic is a small bracket thet the spring is connected to underneath the deck. Angle brass stock with a piece of brass rod soldered in it for mounting purposes.  In this pic is the hardware that the chain comes out of. Scratched from styrene.  Here is the bracket mounted. 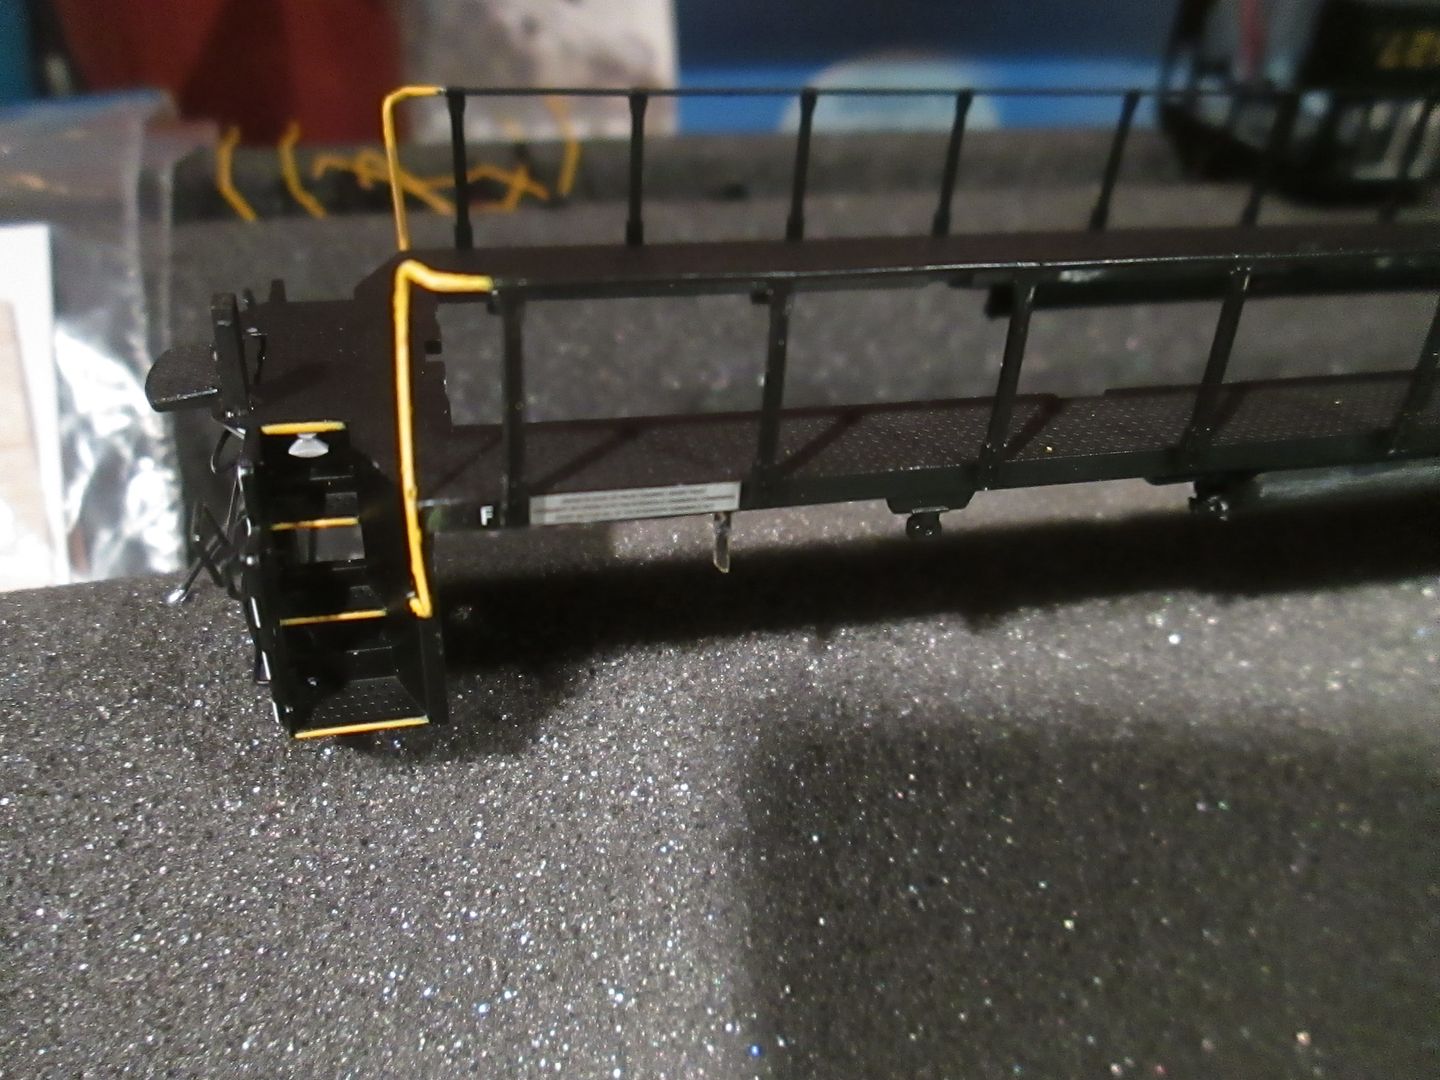 Here it is with the spring attached. You can also see (just to the right of it, under the deck) the mounted hardware piece that the chain comes out of. 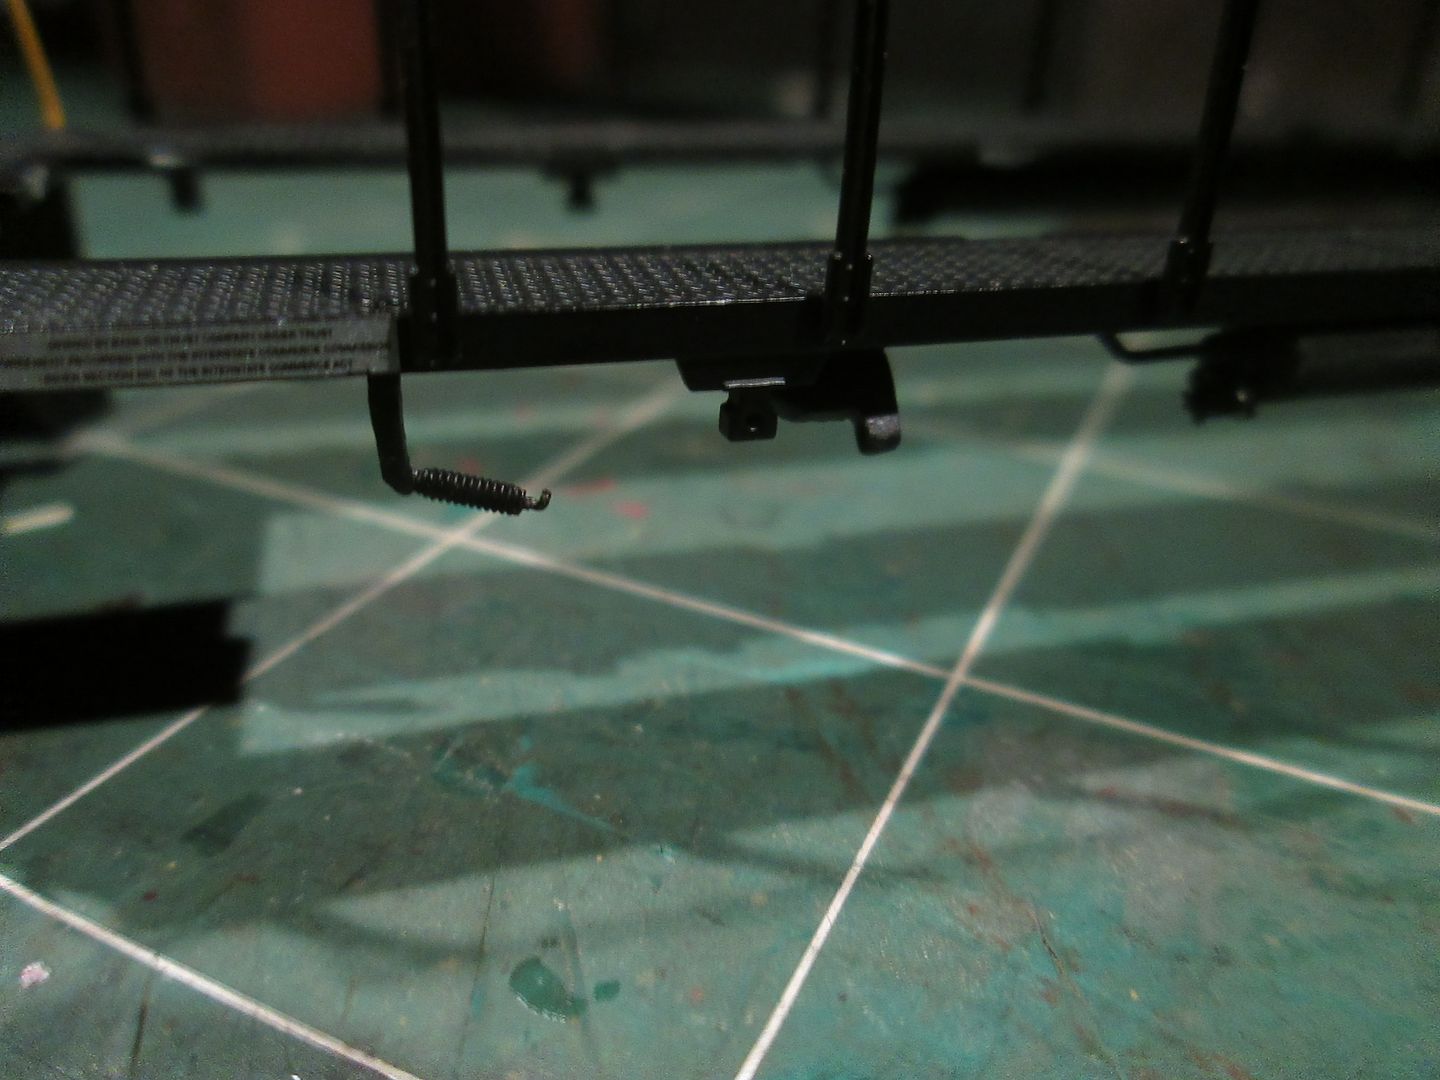 Here I've bent all the brass wire to represent the unusual "piping/hoses" on the trucks. 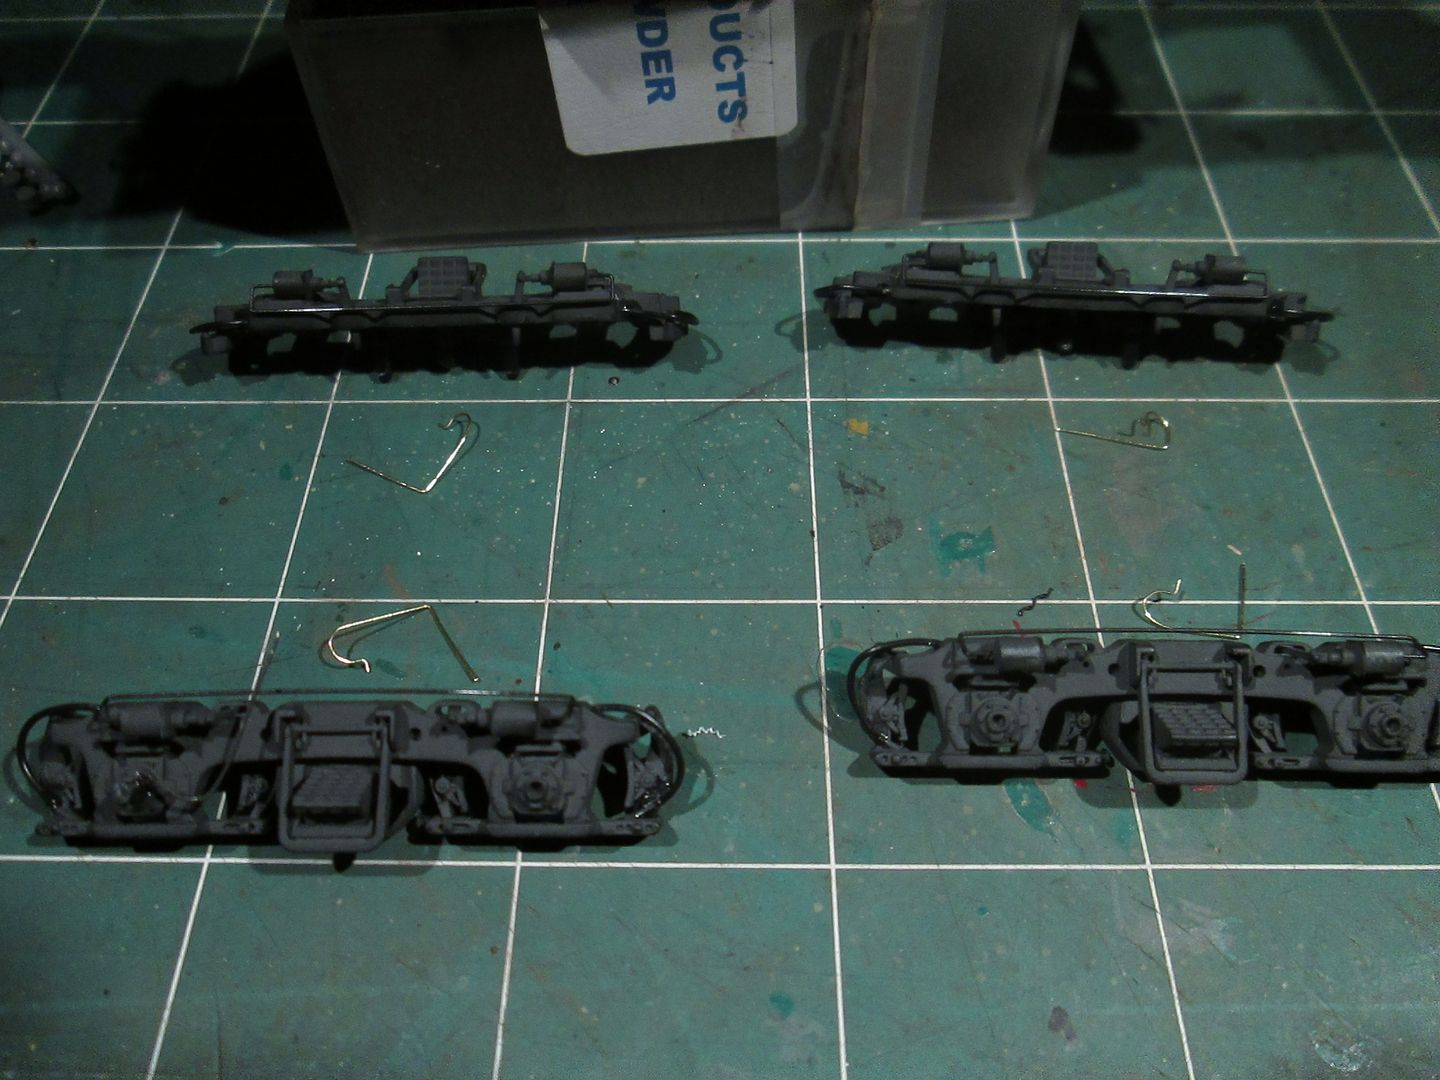 Soldering them to the air lines on the trucks. 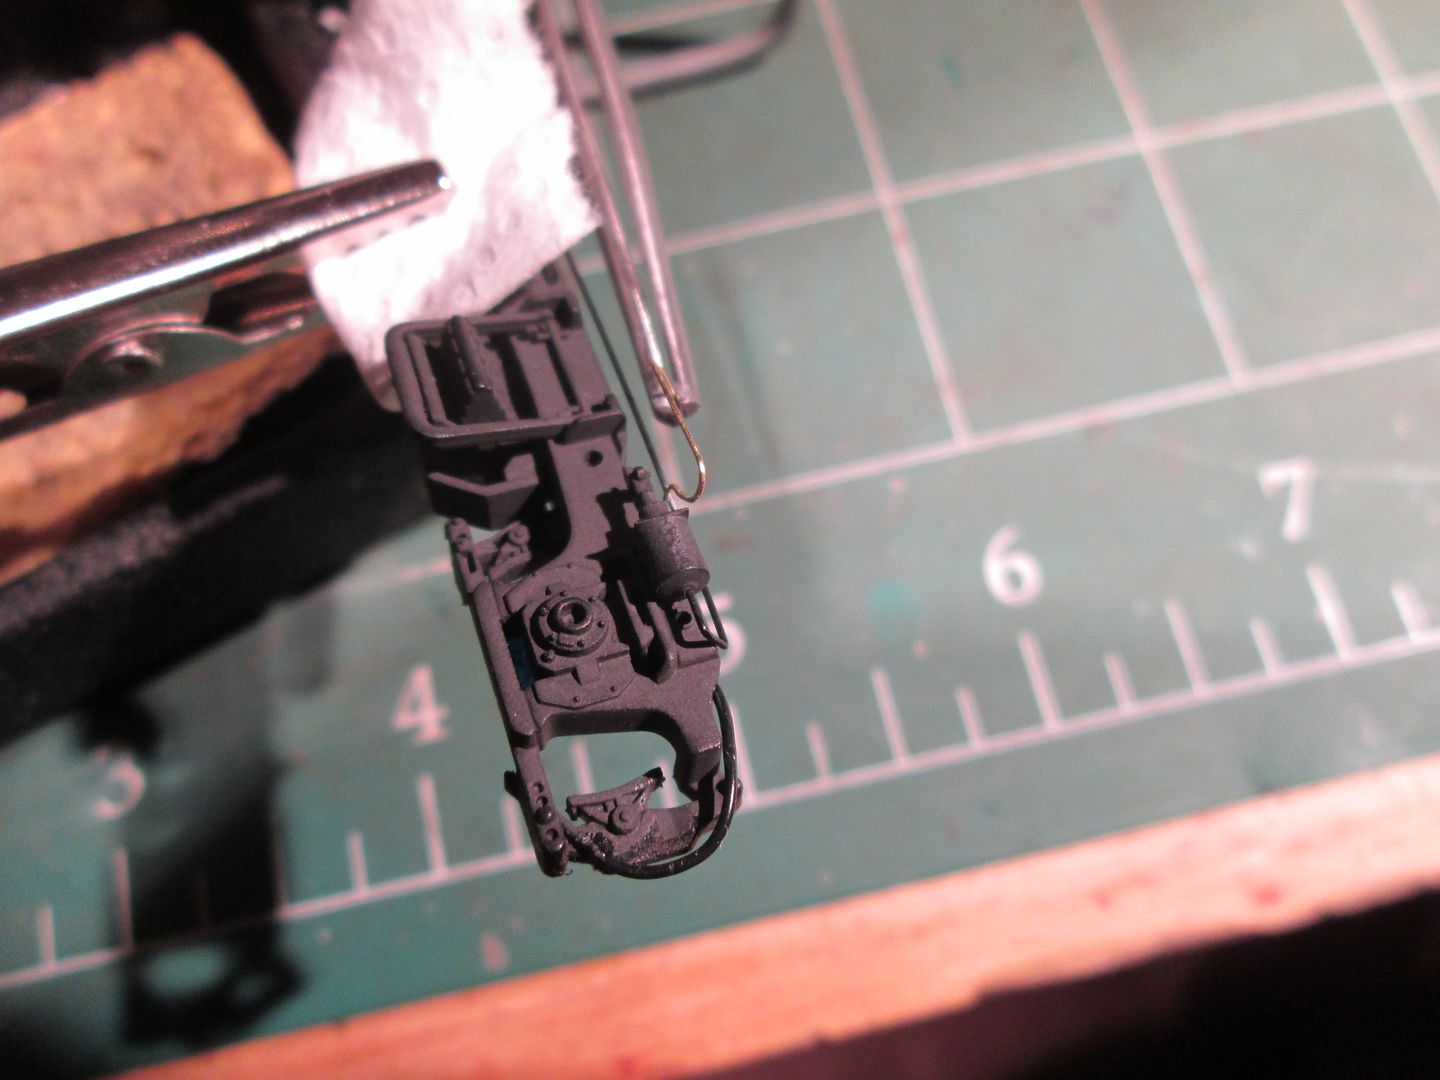 Initial result. 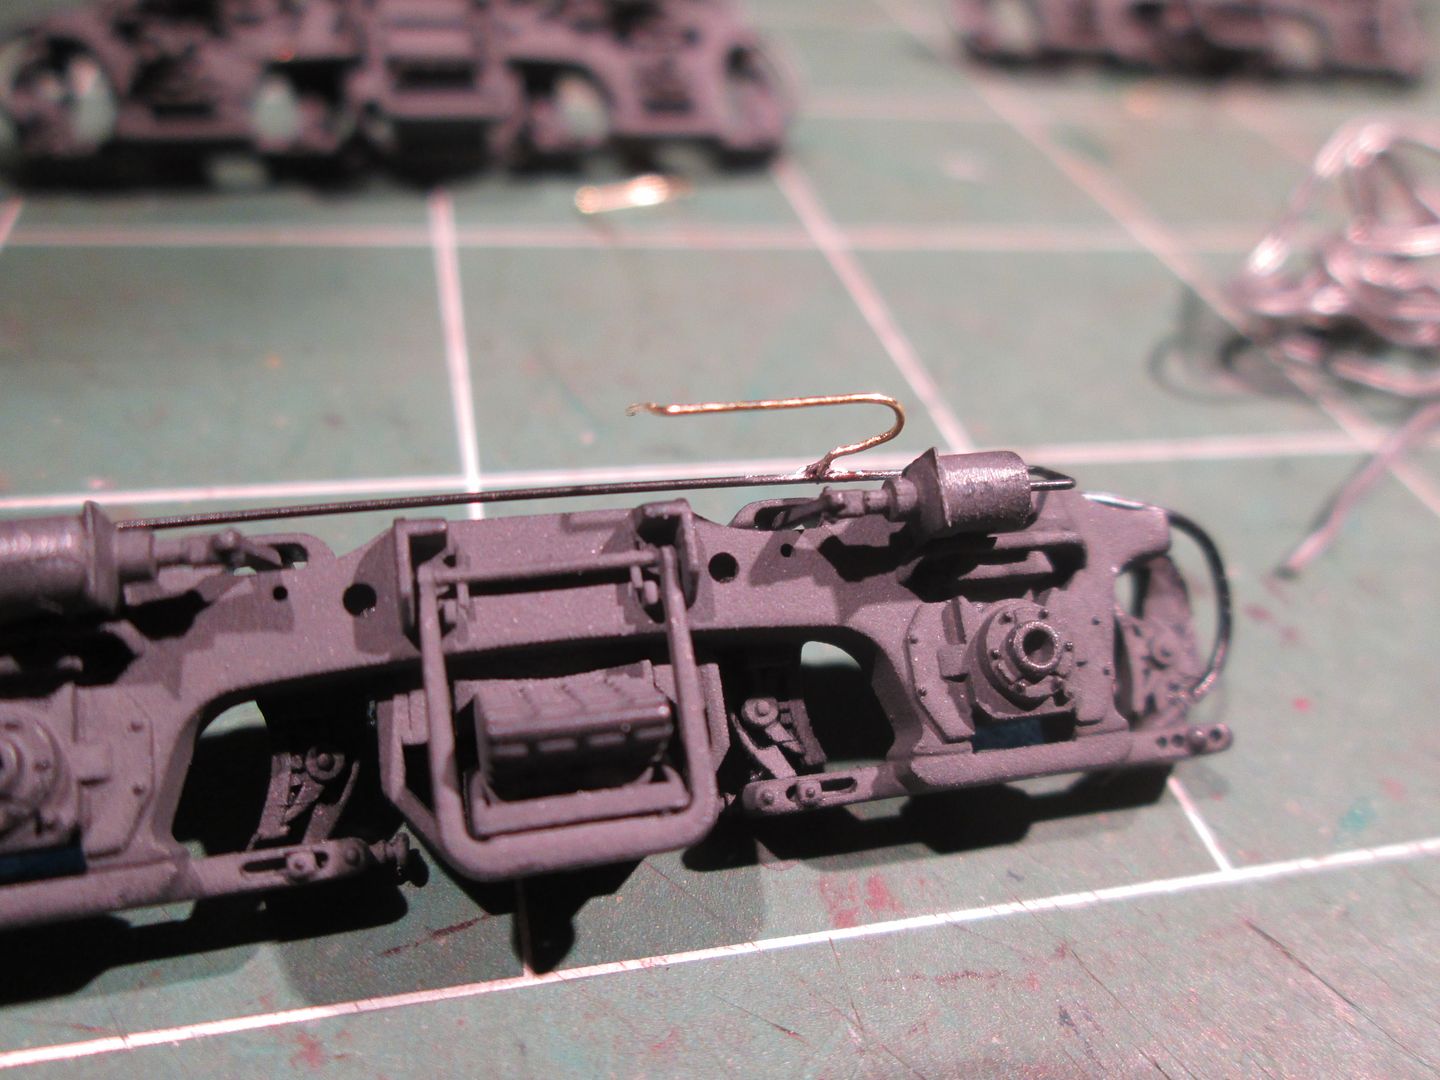 After they've had a couple of details added and painted. 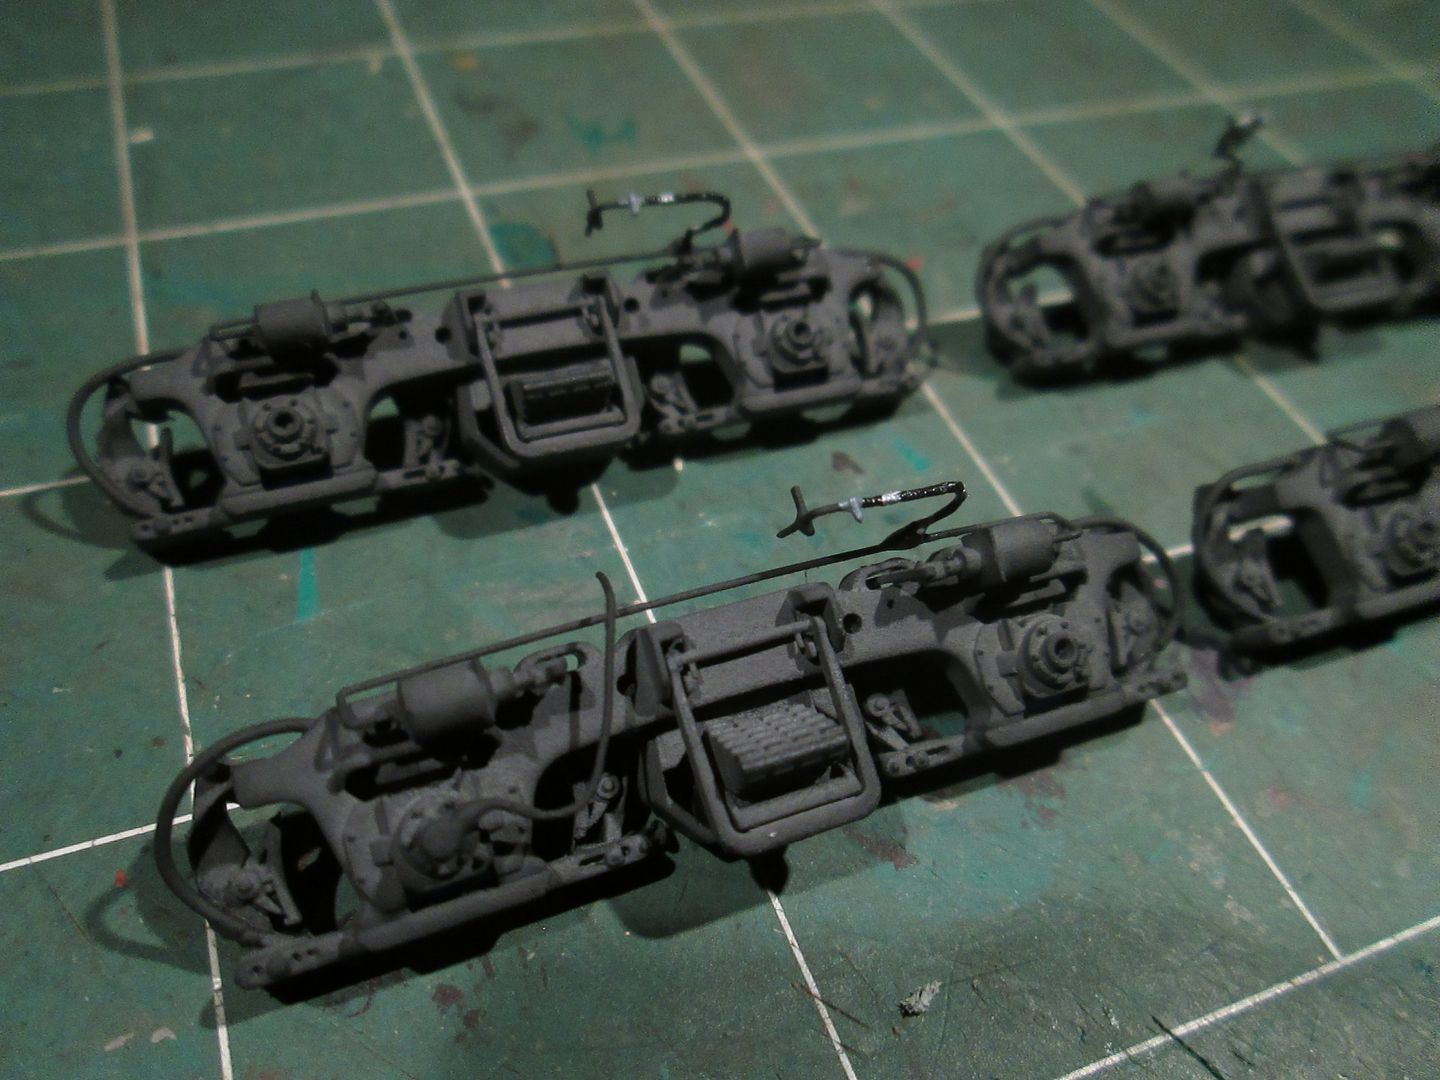 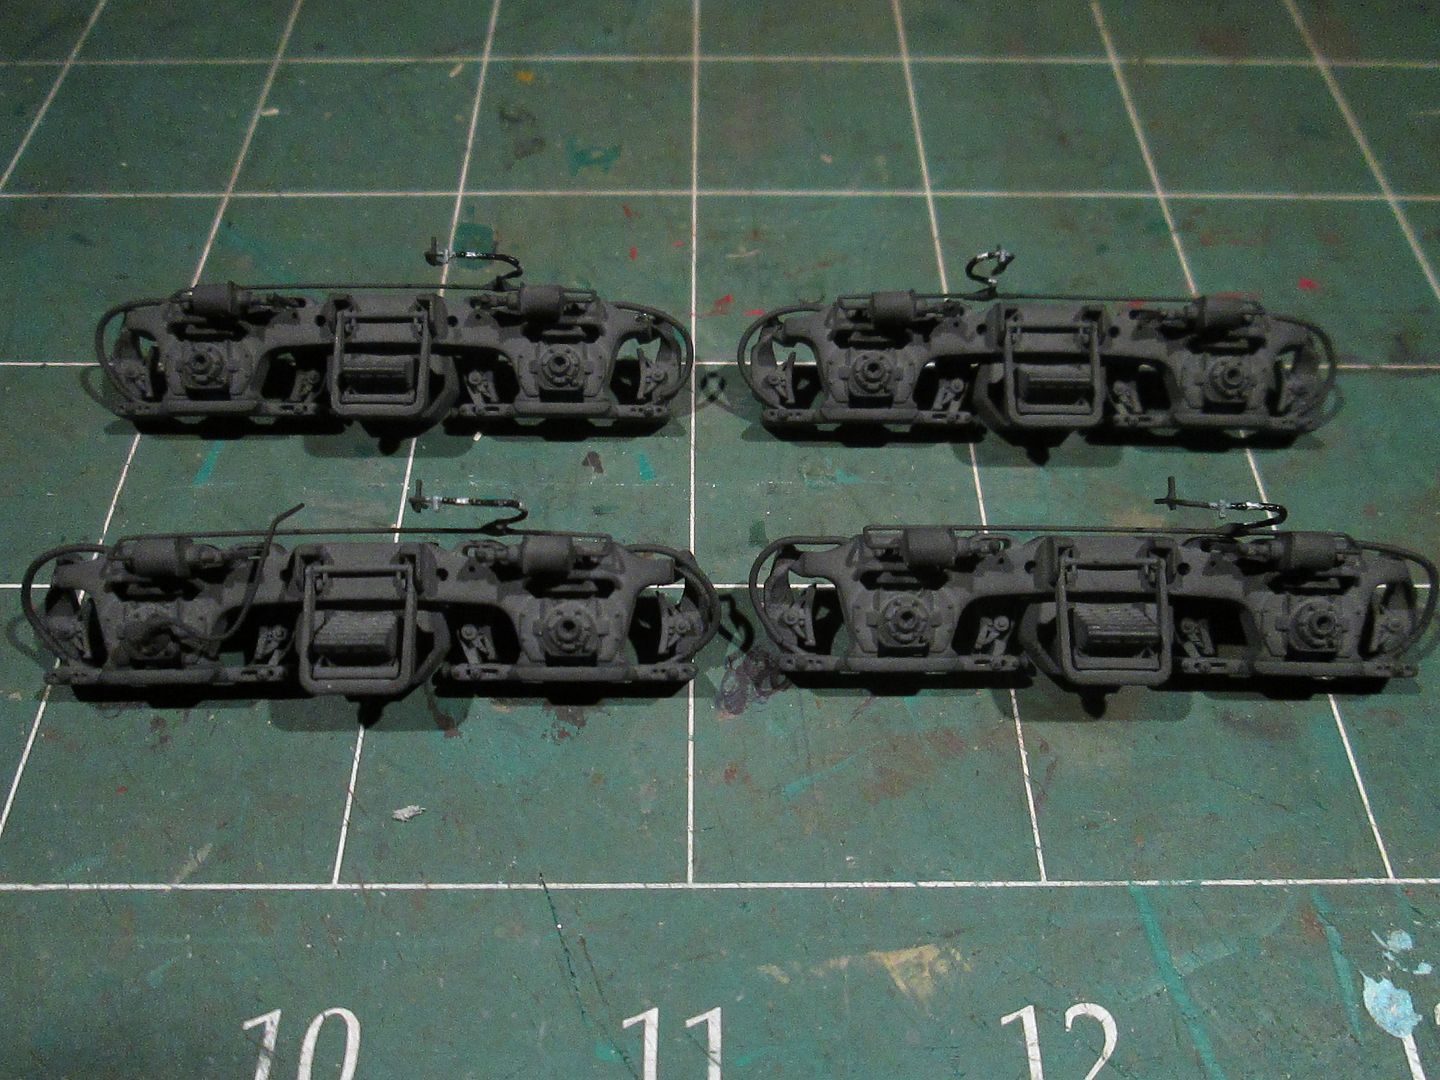 Here are a couple of shots showing the modified paint, coupler pocket area and added wires to keep the hoses in place.  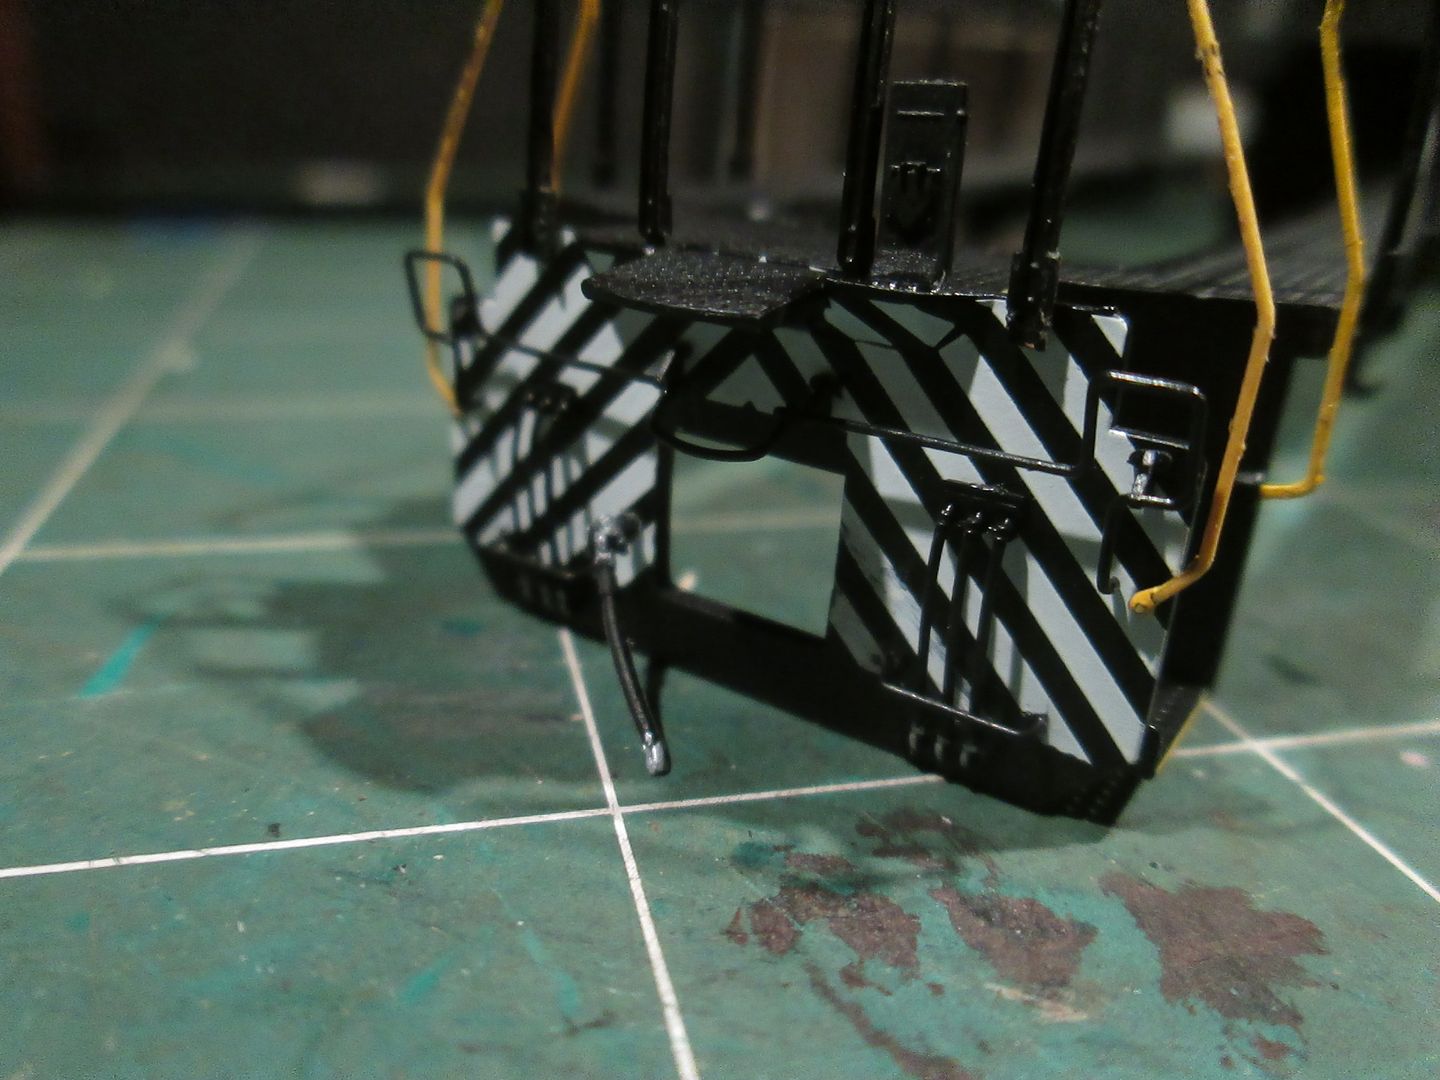 |
|
Vlad
Road Foreman
Posts: 87
|
Post by Vlad on May 16, 2013 3:09:48 GMT -5
WOW! Your work with tiny details is amazing! looking at your pics of the locos cab I just realized how much visibility the drivers have with this switcher. Its almost all glass.
|
|
|
|
Post by icghogger on May 17, 2013 14:23:27 GMT -5
Excellent progress, Nick, THAT is One Fine Build!!
|
|
|
|
Post by enginseer on May 17, 2013 18:48:14 GMT -5
That is some really nice attention to detail.
The little "cage-light" is really cool.
Nicely done.
|
|
|
|
Post by analogbeatmaker on May 26, 2013 15:30:05 GMT -5
WOW! Your work with tiny details is amazing! looking at your pics of the locos cab I just realized how much visibility the drivers have with this switcher. Its almost all glass. Thanks vlad! Yeah, there are a lot of windows on one of these units. Excellent progress, Nick, THAT is One Fine Build!! Thanks icghogger! That is some really nice attention to detail. The little "cage-light" is really cool. Nicely done. Thanks enginseer! I really like how the cage light turned out as well. It sure was a pain to build. It's very difficult to weather this thing with that fragile piece but I'm slowly doing it. |
|