|
|
Post by eriejeeper on Nov 21, 2011 11:11:19 GMT -5
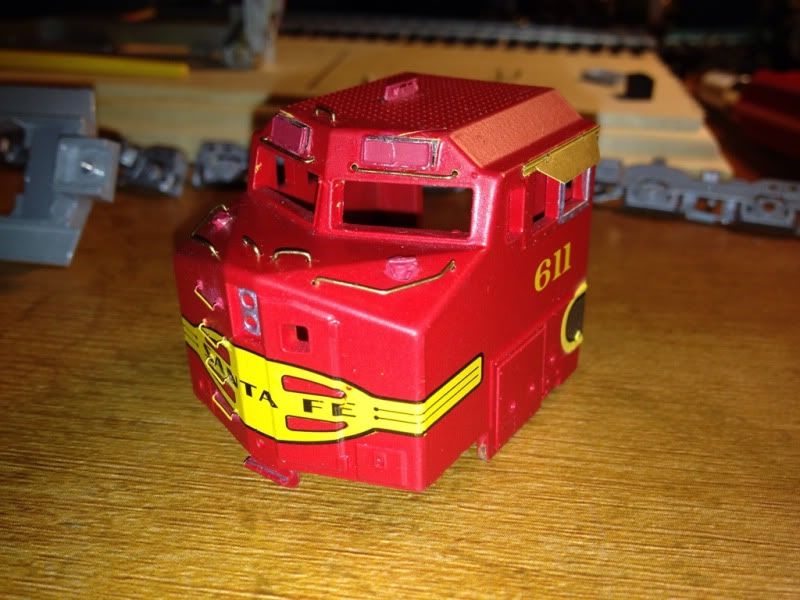
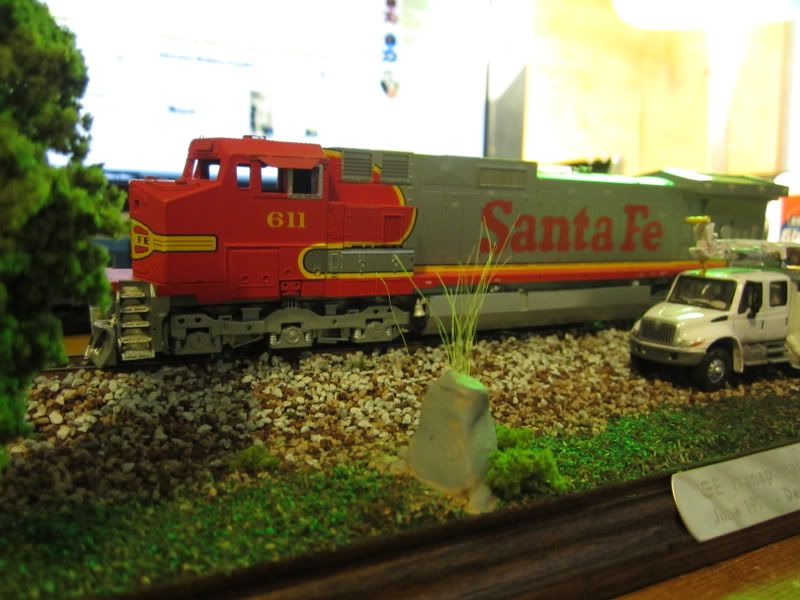
I've mostly been lurking on the boards so I figured I would post up my first build. The purpose for building this is my uncle is retiring from GE Transportation this Dec. and I wanted to give him this as a present. He has built locomotives since the mid 70s and for the last six months was in QC checking over the finished products. His favorite scheme is the warbonnet Santa Fe which is why I chose to model it. Hopefully I can make it as accurate as my skills allow. I will be weathering #611 pre-graffiti as I dont want to ruin the paint scheme. Here are some progress pictures:  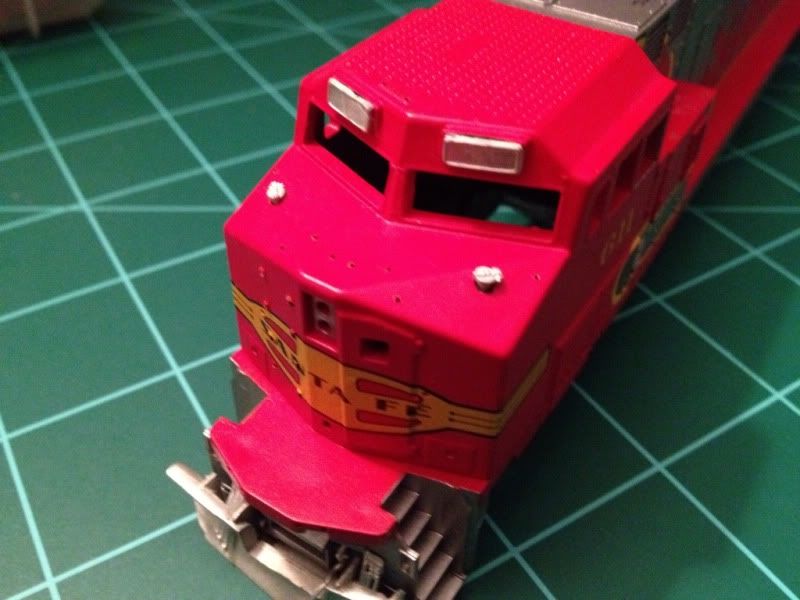 Radiator tread plate 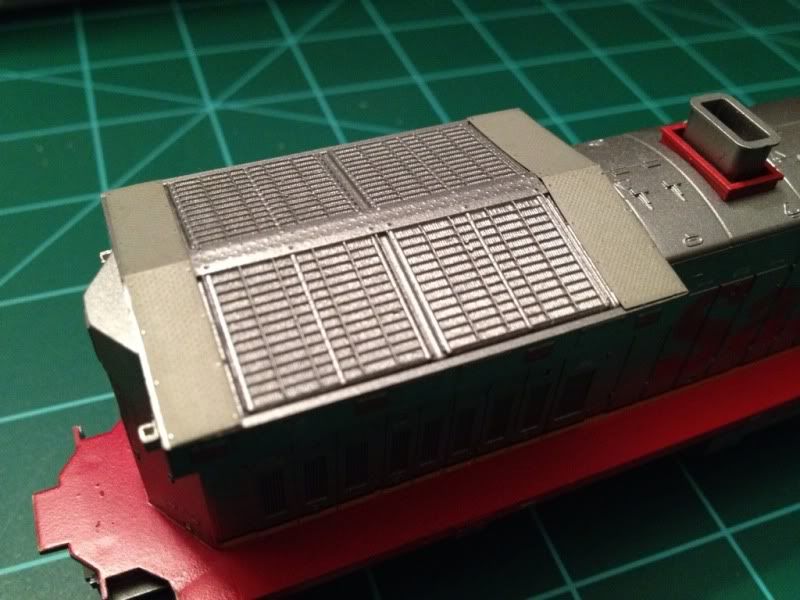 Filling in the sand filler hole 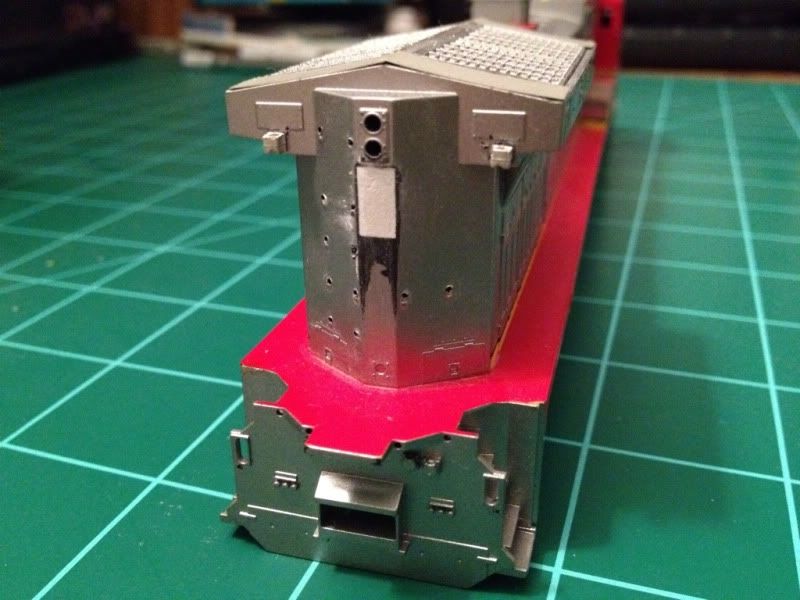  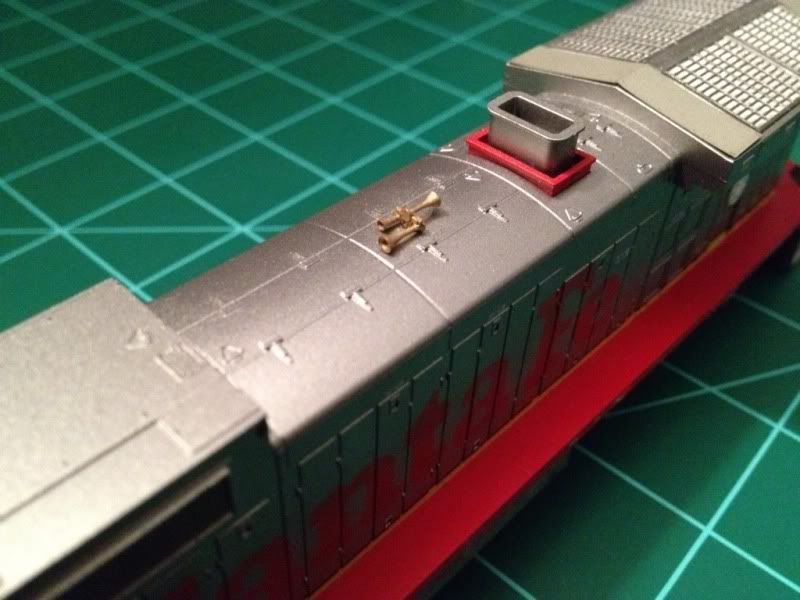 Adding the etched steps 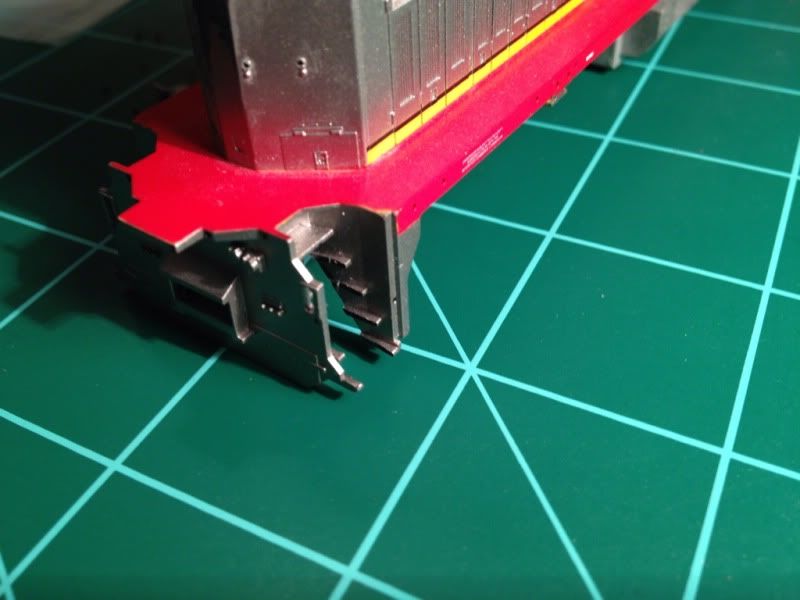 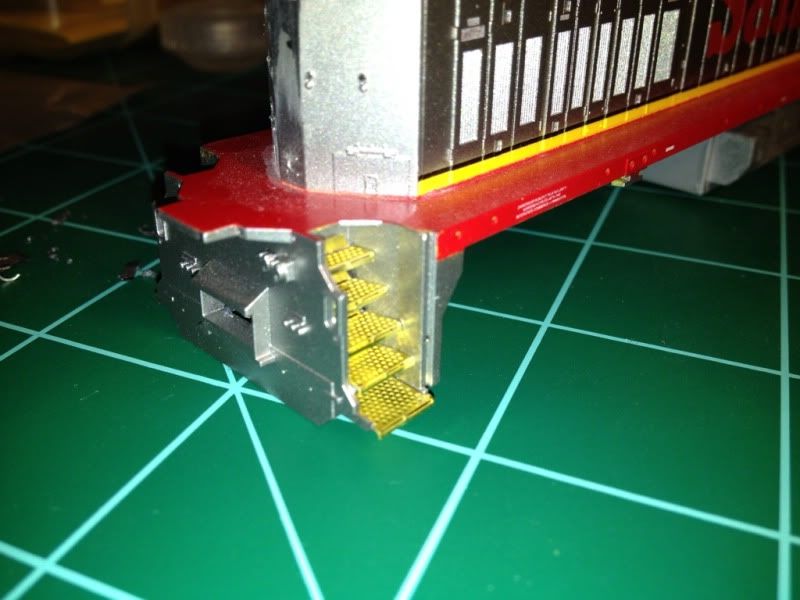 I still have a ways to go but Im hoping to have it done before his retirement party in December. Any tips and suggestions would be appreciated since this is my first real locomotive build. Anybody have any tips on installing the laser cut window kit? Ive never been good at gluing windows without it looking like I did. |
|
|
|
Post by mosteam3985 on Nov 22, 2011 0:38:07 GMT -5
Hey Jeff! This looks like an awesome start dude. The steps are done really well and they can be finicky at times. Are you using the LaserKit window set? If so no gluing is required. They have always been a snug enough fit for me for no glue. If you do glue them model master makes a glue specially made for windows. I think it's a milky white color. Keep plowing away on this man I hope you can get it done for your tight deadline!
|
|
c415rock
Moderator
"Linking the East with the West"
Posts: 1,044
|
Post by c415rock on Nov 22, 2011 1:32:17 GMT -5
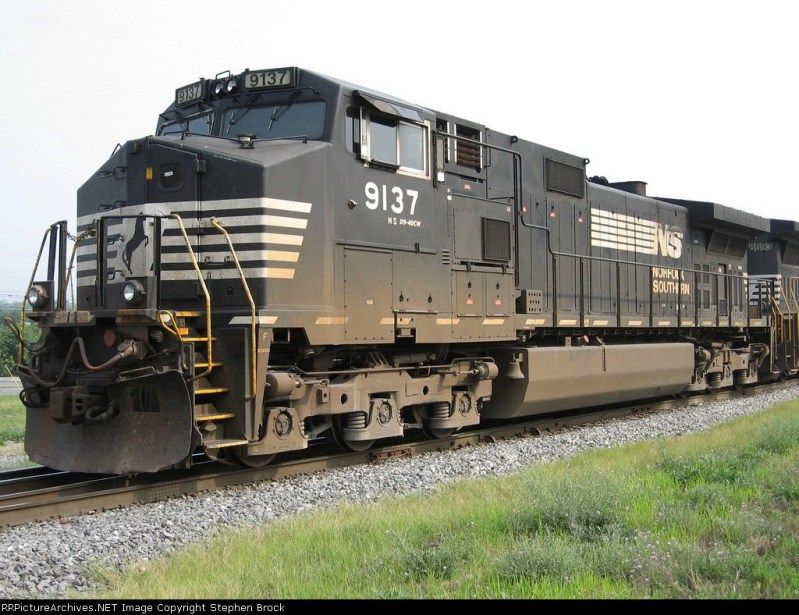
Hi Jeff, Great start, If time will allow you might want to look at adding detail associates photo etch grills for the radiator sections. P/N: 2724 Here is a link to a old post, if you look down the page and see the photo's of a EL what if unit I did. It shows what the grills look like on a unit. dieseldetailer.proboards.com/index.cgi?board=theme&action=display&thread=4939&page=2 I sure do miss the ATSF they were a very friendly RR and I my opinion had the very best paint job on a wide cab GE. Erik |
|
|
|
Post by eriejeeper on Nov 22, 2011 15:30:00 GMT -5
Thanks for the compliments! I am indeed using the LaserKit window set and thats good to know about them just press fitting in. Its going to be a static display so I don't have to worry too much about them falling out.
I just ordered some more detail parts (including a couple sets of the photo etched grills, thanks Erik!) so I should be good to go for parts now. I need to order some paint to touch up the parts I added and then I'll just plug away at it! I'm off the next few days so I will be sure to post up my progress of it. It'll be nice to finish one of many locos I keep buying but dont really finish them, lol.
|
|
|
|
Post by eriejeeper on Jan 6, 2012 14:11:18 GMT -5
|
|
drgwguy
Chairman
Modeling the DRGW in the 70s-80s!!
Posts: 528
|
Post by drgwguy on Jan 6, 2012 19:27:28 GMT -5
Sweet! Great stuff, those Athearn GE sideframes leave a lot to be desired, but it sounds like you're already thinking about the fixes.
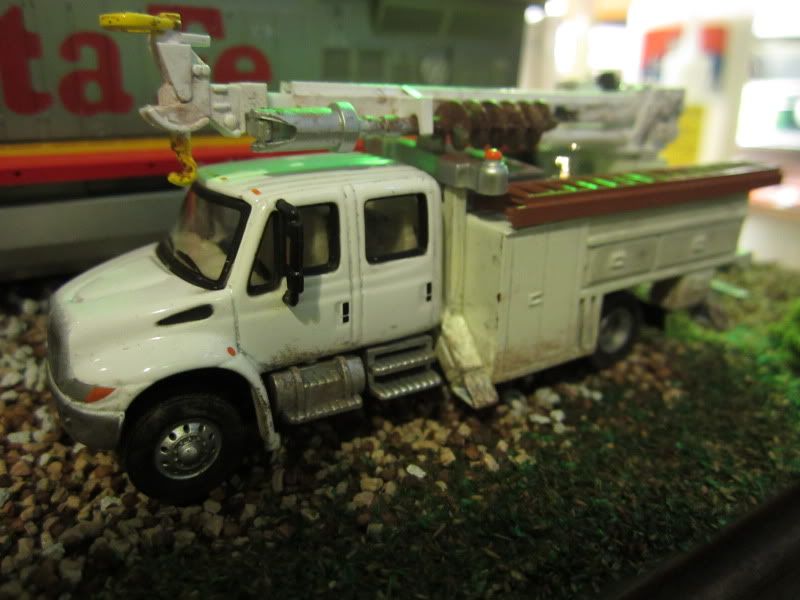
On an aside; who makes the line/boom truck on your diorama? I used to operate one of those in a past life and always wanted to model a few of them.
Thanks,
Rick
|
|
|
|
Post by icghogger on Jan 7, 2012 7:55:22 GMT -5
Lookin' Good, Jeff!!
|
|
|
|
Post by eriejeeper on Jan 7, 2012 10:30:46 GMT -5
On an aside; who makes the line/boom truck on your diorama? I used to operate one of those in a past life and always wanted to model a few of them. Thanks, Rick The truck came from Boley and was created from a combination of a crew cab International dump and a GMC utility truck. I had to lengthen the frame to fit the utility box on it. |
|
|
|
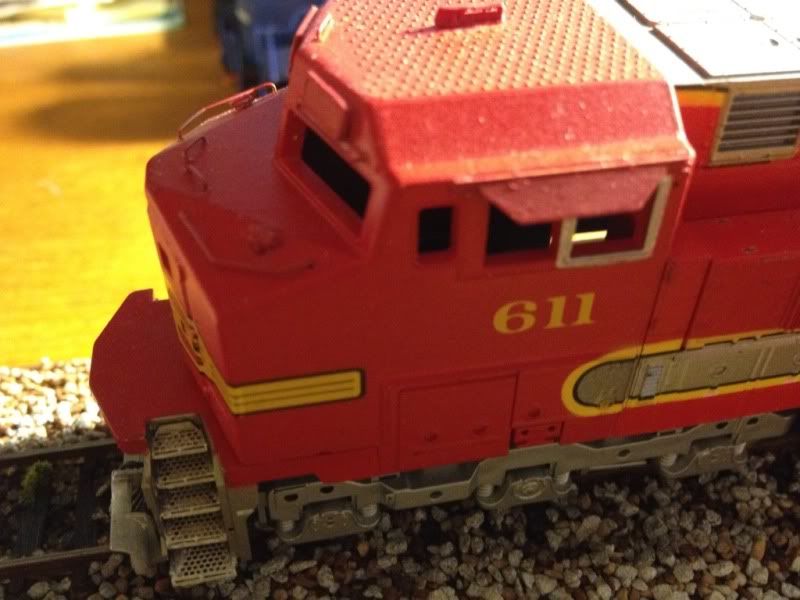
Post by eriejeeper on Sept 8, 2012 8:59:13 GMT -5
Its been a while since I've posted any updates so here are some pics of the finished product.   Didn't turn out too bad for my first super detail. The next unit I'm building is a NS C40-9W which will be a powered unit. I'll post some pics of that build as well. |
|
|
|
Post by tlbeers on Mar 24, 2013 16:39:32 GMT -5
Looks great, how did you install the radiator grills? I am working one now but it does not look right.
Tim
|
|
|
|
Post by eriejeeper on Mar 24, 2013 17:37:08 GMT -5
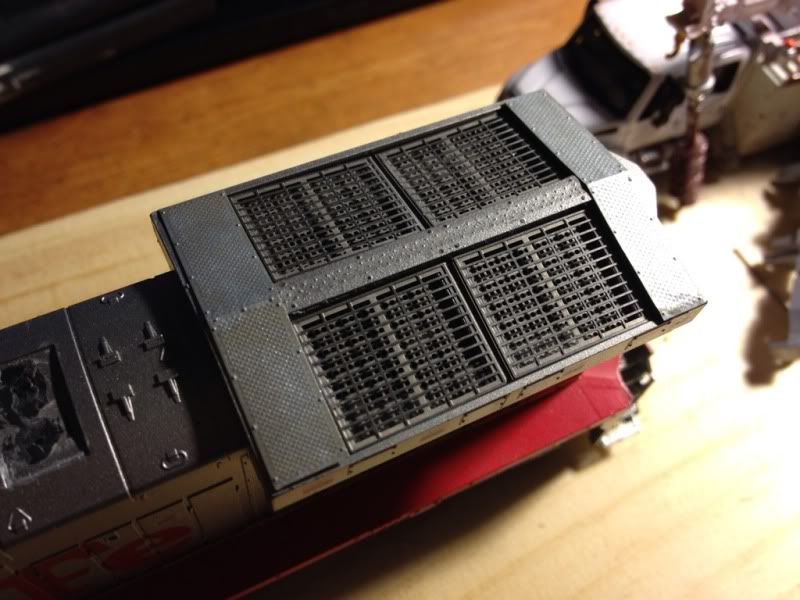
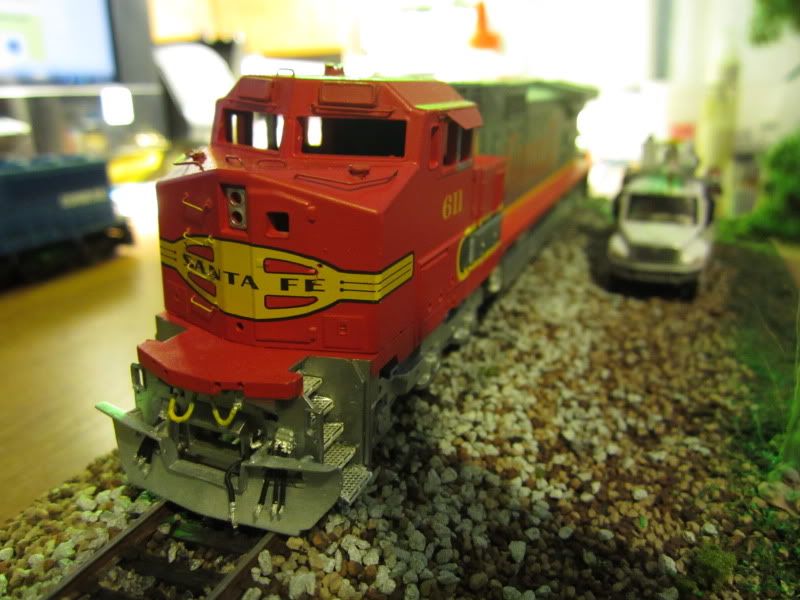
Looks great, how did you install the radiator grills? I am working one now but it does not look right. Tim I first began by cutting out the molded in grill on each side leaving only the walkway on the front, middle, and rear which is the white section shown here: 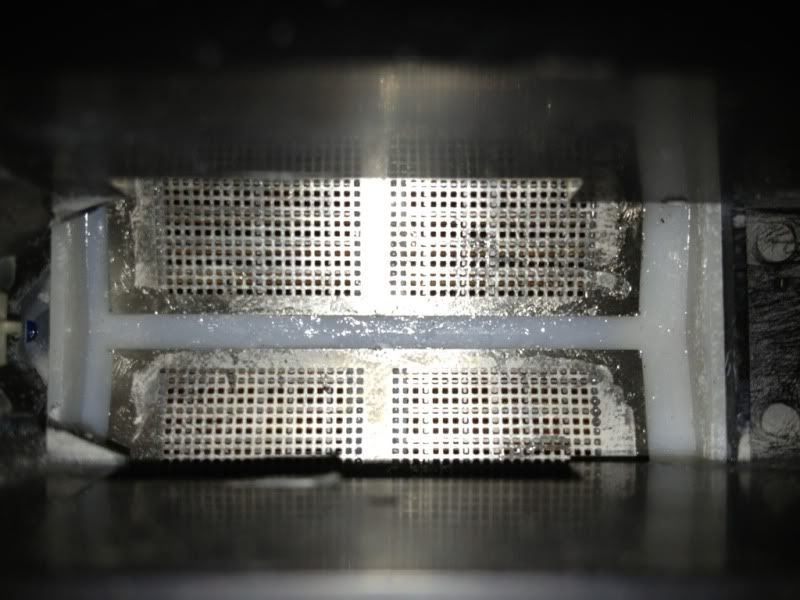 Then I CA'd the lower grills to the bottom of each side as shown above. I then used some small pieces of scrap styrene to space the upper grill sections away from the lower grill. 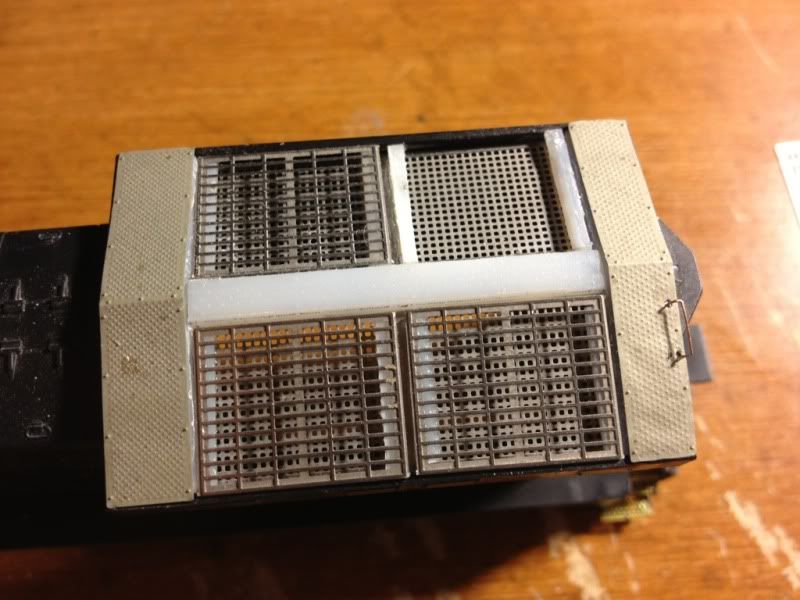 The finished product. 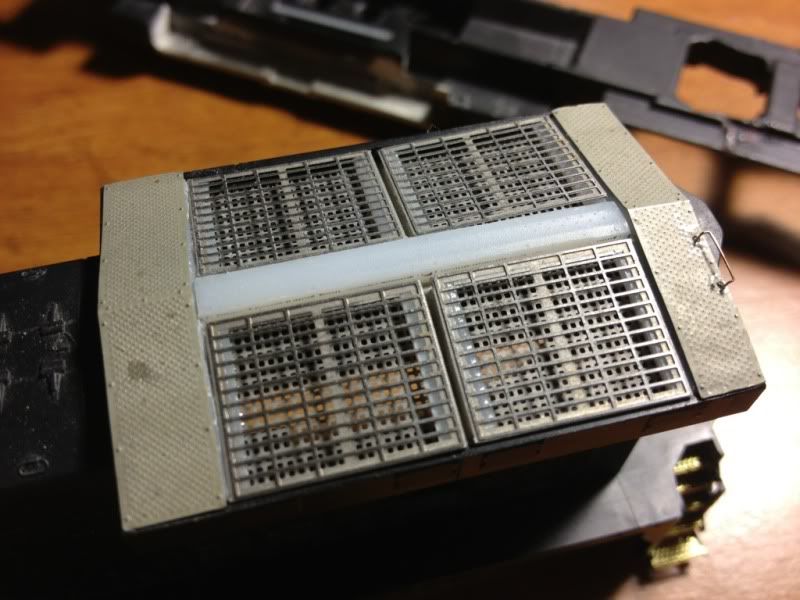 I had to fix the spacing in the last pic so I decided to snap a few pics to give you a visual of how I did it. You could go a step further and put strips on all four sides of each upper grill section but I saw it as overkill as you don't see it anyway. |
|
c415rock
Moderator
"Linking the East with the West"
Posts: 1,044
|
Post by c415rock on Mar 25, 2013 23:47:18 GMT -5
HI Jeff,
Excellent Job on this build! I am sure your NS unit will come out just as good.
Erik
|
|
c415rock
Moderator
"Linking the East with the West"
Posts: 1,044
|
Post by c415rock on Mar 25, 2013 23:47:40 GMT -5
HI Jeff,
Excellent Job on this build! I am sure your NS unit will come out just as good.
Erik
|
|
|
|
Post by tlbeers on Mar 26, 2013 16:54:16 GMT -5
Jeff, thanks for information. Now if someone would answer my post about Detail West parts.
Tim
|
|