|
|
Post by bikingmike on Sept 18, 2011 3:27:28 GMT -5
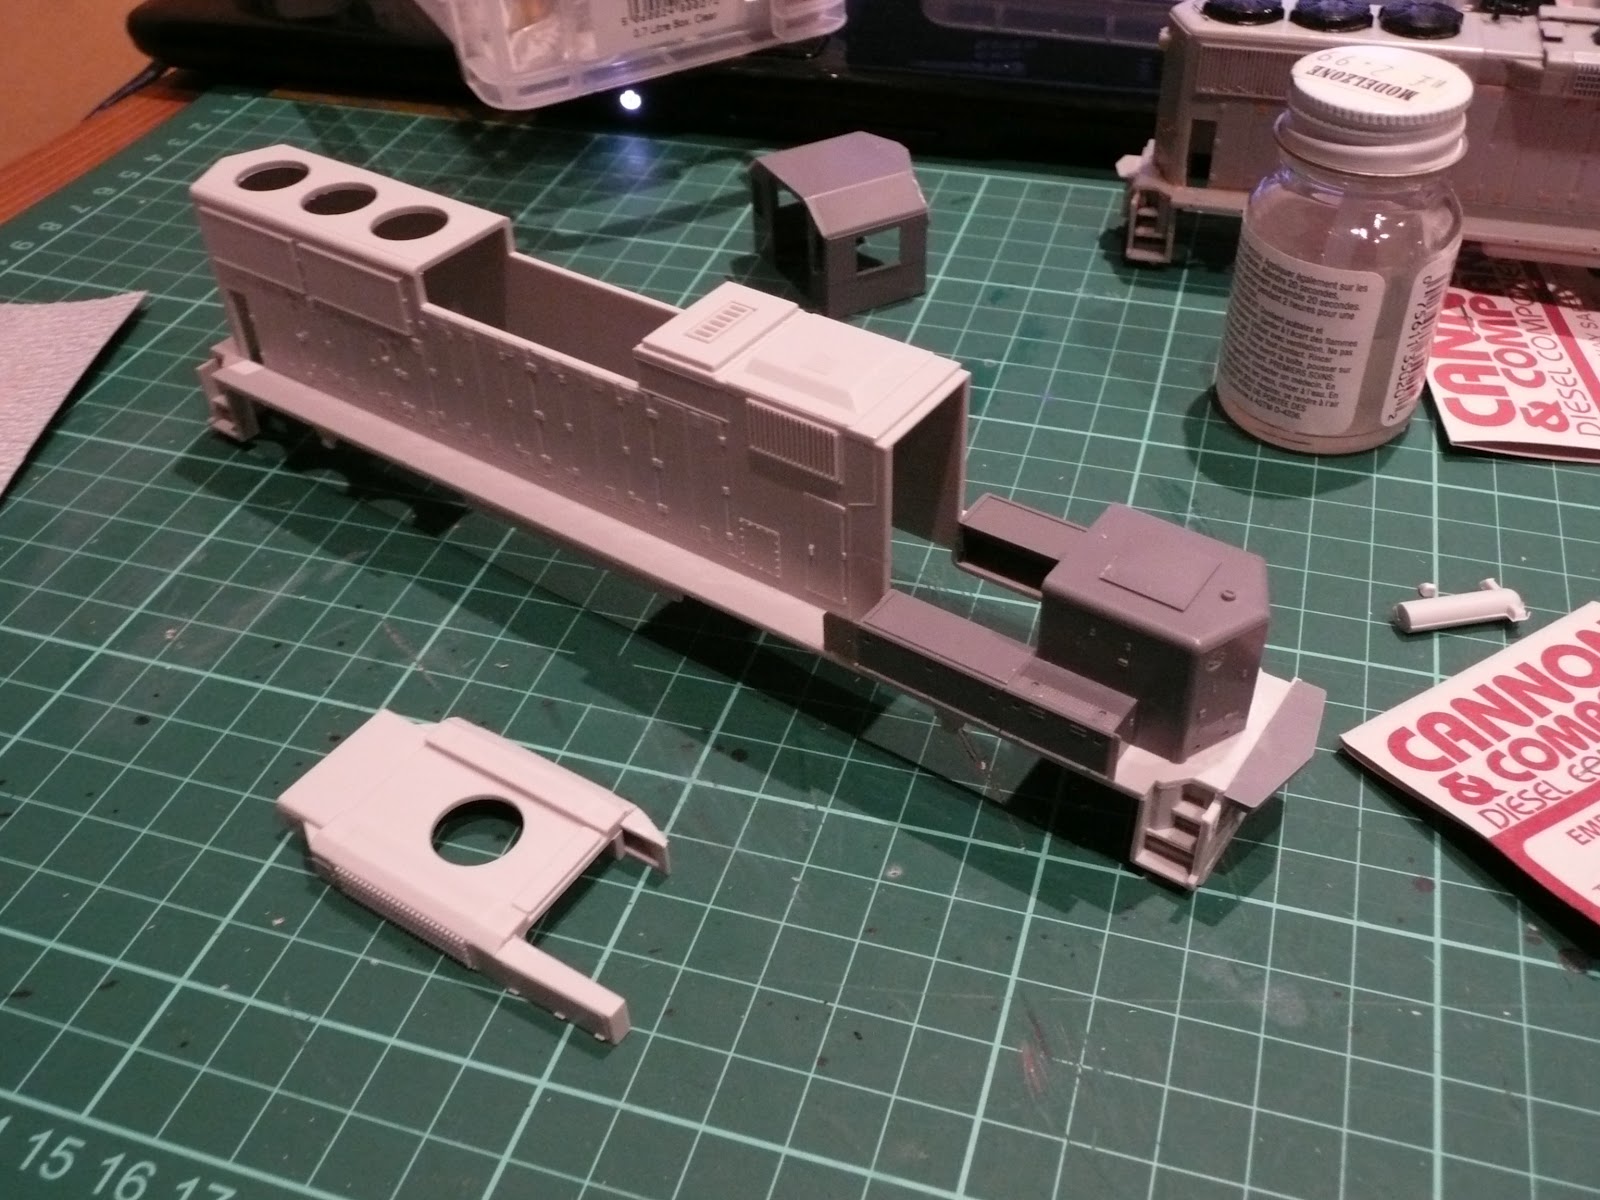
Kia Ora guys Well, I've finally managed to make start on the first of my "detailing" projects - I use the word detailing in the loosest sense, as there wont' be any fancy aftermarket bits with this - it'll strictly be confined to scratchbuilding some grabs and any other bits that take my fancy. I found some Plasticote automotive primer in a shop, when thinned it sprays through the airbrush beautifully and gives a very tough finish.  Centre marking the grab locations with some old dividers would help ensure that the drill didn't go all wibbly-wobbly 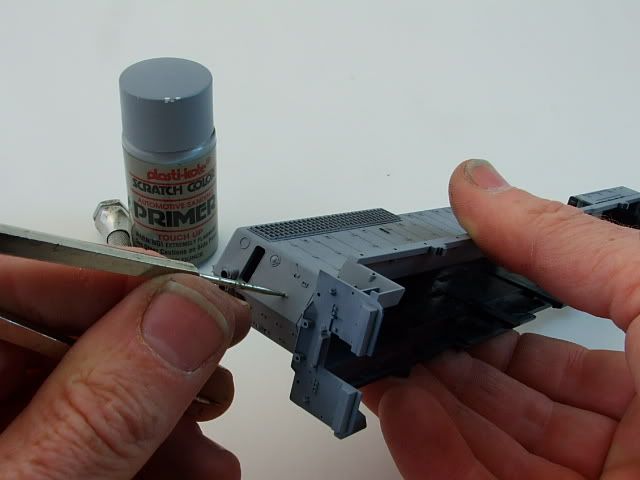 Using a 0.6mm drill, it only took a few minutes to drill out the holes. The tricky part will be making the grabs all identical!  \ Thanks for looking, stay tuned but don't hold your breath waiting for updates!  |
|
|
|
Post by spud7378 on Sept 18, 2011 9:35:47 GMT -5
if you like there is a simple jig to make, take a piece of styrene and cut it to the exact width of the grabs on the loco, then use it as a bending jig, then all your grabs are the same!
|
|
|
|
Post by wildavits on Sept 18, 2011 15:11:38 GMT -5
Secure with a piece of tape where you can drill through
|
|
EMDX6043
Chairman
Future ex-modeler
Posts: 838
|
Post by EMDX6043 on Sept 19, 2011 15:44:38 GMT -5
Is that a bottle or spray can, and what do you use as thinner? I usually use acrylics but I'm always looking for better methods. Thanks!
|
|
|
|
Post by bikingmike on Sept 19, 2011 19:55:11 GMT -5
Thanks for the great tips guys, I'll give them a try.
EMD, the Plastikote comes in a bottle with its own brush; I thinned it using lacquer thinners before spraying it through the airbrush. Privided it's thinned right it gives a very smooth hard finish.
Cheers
Mike
|
|
|
|
Post by bikingmike on Dec 22, 2011 4:54:48 GMT -5
Well howdy there again peeps I've finally made a bit more progress on this today, although some of it may have to be undone  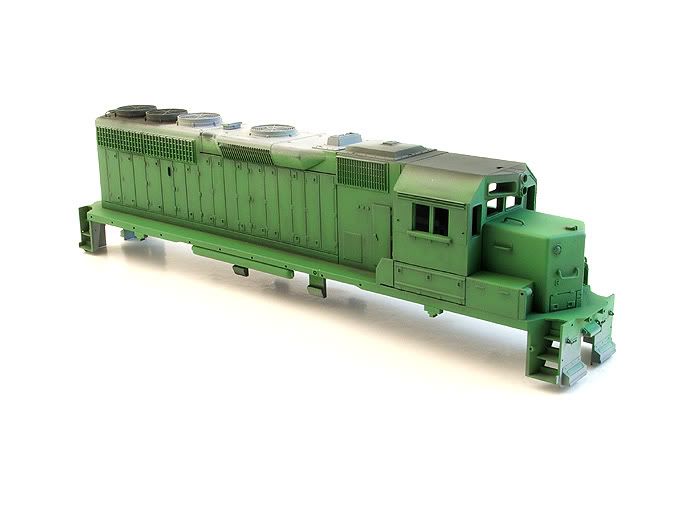 Got the BN green on but I've got a feeling it's a tad light. 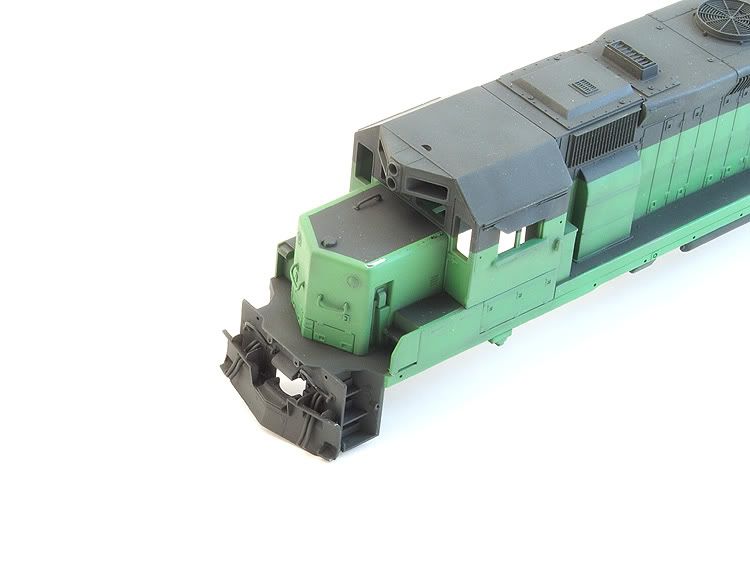 Got the black on now (I used Tamiya NATO Black which is really a very dark gray); the sunshades were made from some brass sheet and the added snow plow is a Details West one. I whipped up some rudimentary MU hoses from solder and superglued them in. I made up the uncoupler bars (I think that's what they are? I' not au fait with the finer points of locomotive anatomy!) What I didn't allow for was the fact that the couple mounts to the chassis rather than the body - might havta re-think that one... 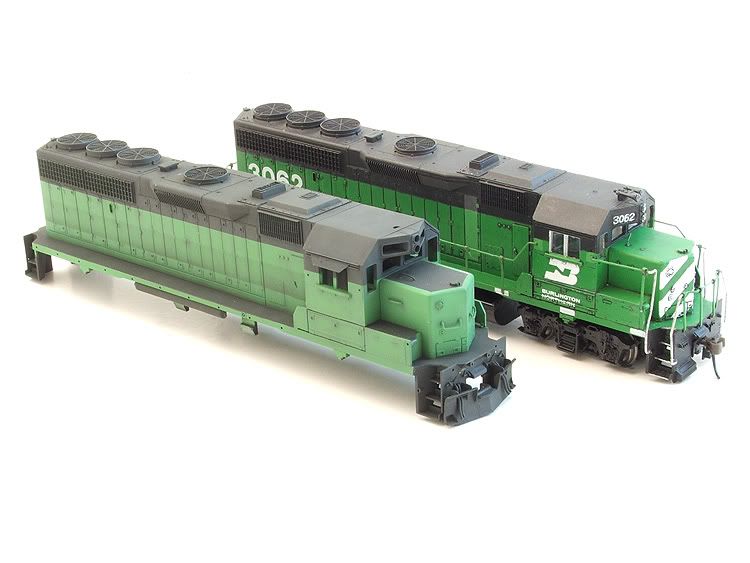 And here it is posed alongside a factory painted Athearn one that I bought a few years ago off TradeMe. You can see the difference in the two greens, undecided yet if I'll try and re-spray it to get it a close match. There's a darker swathe along the middle where I forgot to mask off the remainder of the green....  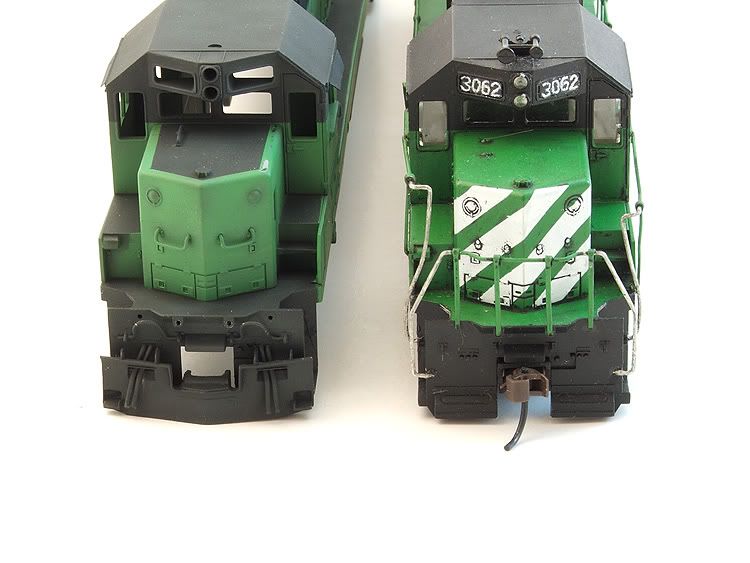 |
|
|
|
Post by danraitz on Dec 22, 2011 8:32:33 GMT -5
Who's BN green did you use?
I've found the Floquil's to be way to light.
Ones that I've found to be really close are POLLY-Scale, Accu-Flex and Scale-Coat.
I am using the Accu-Flex on my B32-8's. Yes, they do have color on them at this time.
Dan
|
|
EMDX6043
Chairman
Future ex-modeler
Posts: 838
|
Post by EMDX6043 on Dec 22, 2011 11:35:01 GMT -5
You can build up coupler mounting pads (after removing the frame mounting lugs) from styrene-just make sure they're the correct height. The color looks pretty good to me since some paints will fade over time. Decals and weathering should make it all blend together.
I would double-check the cut-levers though. The only bends are near the steps and directly above the coupler.
|
|
|
|
Post by iomalley on Dec 22, 2011 12:48:58 GMT -5
Mike you are a fantastic painter! I see the armor modelling background...  What is your wash? It looks like a concoction I made up years ago but ran out of and haven't been able to replicate. BTW, buy a bag of Tichy grab irons and save yourself alot of grief! |
|
|
|
Post by ratled on Dec 22, 2011 22:29:08 GMT -5
Mike - I'm not sure how it looks in real life compared to the picture but starting with the very first picture I really liked the shade of green. It has a nice aged look without being too old. You have to be the one satisfied though
Merry Christmas all
Steve
|
|
|
|
Post by bikingmike on Dec 23, 2011 0:27:38 GMT -5
thanks guys; Dan, it is indeed the Floquil paint I've used - albeit darkened with some Humbrol dark green. Obviously needed to be darker still! Dave, I might have a bash at building the coupler boxes and mounting them to the body - it could save a whole heap of grief when it comes time to make repairs or do maintenance. I see what you're saying about the cut bars, although I might just leave them as I'm inherently lazy Sean, thanks for the compliment - although I actually do aircraft models, not armour! The factory-painted loco with the wash arrived like that when I bought it second hand, I've no idea what they've used. I usually use an oil wash over top of a clear coat, although Flory Models do a good wash that wipes off leaving a clean line. Loco details like grabs and lights etc aren't readily available in NZ, and have to be ordered in. Postage can be a killer, and can make getting stuff uneconomic. Steve, the green looks fine by itself, it's just when alongside the other GP40 it looks a little odd. Weathering can only explain colour variations up to a point! Cheers for now Mike |
|
|
|
Post by diesel on Dec 23, 2011 12:32:27 GMT -5
Hey Mike,
This topic of the green color is pretty common for BN modelers. Yes, the Floquil does seem light to us who use it. As stated many times before, not many BN/BNSF patched locos have the same or even close to the same color green as it has a wide range of weathering appearances. But this can be used to the advantage of starting out with the faded green and then only having to do some downward streaks with a paintbrush to give the unit a heavily worn faded look without having to turn it into a rust bucket to make the point.
-thanks for the tip on the Tamiya NATO Black, I'll try that next
-thanks Dan R. I didn't realize any other paints had BN green by name.
|
|
|
|
Post by gnsteve on Dec 24, 2011 0:20:29 GMT -5
I agree with Steve (ratled). I thought you were weathering with the base colors and the lightened green was just sunbleached BN. It still looks good to me.
Steve
|
|
|
|
Post by Raeder on Dec 24, 2011 16:45:49 GMT -5
I'll agree also. The faded paint looks good and I think if you repaint anything, just do the long hood sides to cover the black overspray and you'll be fine.
As for grab irons, you may want to see about a jig, as was mentioned earlier. I know there is a grab iron bending jig available, I think you can find it in the Walthers catalog.
One other source of parts, though, does come to mind. You might contact Athearn or Atlas and see if you can get parts from their factory in China, instead of the US. Might save you some on postage, I don't know. I know both of those companies have locomotives made over there, so that means there are parts over there, also.
|
|
|
|
Post by jmlaboda on Dec 25, 2011 16:58:59 GMT -5
The faded green works really well with the black. You have a nice looking model there and I look forward to seeing it done.
Two questions... In regards to "BB" what road are you representing??? And what number will the engine wear???
|
|
sgoti
Chairman
Posts: 459 
|
Post by sgoti on Dec 25, 2011 21:19:46 GMT -5
In regards to "BB" what road are you representing??? I think in this case "BB" means "Blue Box", the nickname for Athearn's pre-Ready-To-Roll non-Genesis line. |
|
|
|
Post by stewarttrains98 on Dec 26, 2011 9:27:06 GMT -5
Well I am in favor of keeping the current version of the green and black that you painted. I like the look as it already has the faded and weathered look to it. I also think that if you are modeling the unit as a number of years after it was painted then you are right on. Also as mentioned, once you add all the decals then do a little more weathering to the model, I think that it will be fantastic one of a kind model.
|
|
|
|
Post by m a y o r 79 on Dec 27, 2011 11:45:13 GMT -5
I know color variations always come up with Milwaukee Road modelers as well, that orange seems impossible to match correctly. I usually don't worry about, or even try to, match colors perfectly from one loco to the next. Everything weathers and ages differently, especially depending on where the loco has spent time. I've collected pictures (Milwaukee in my case) of different locos together in the same picture that have what appears to be different variations on the colors. Some paints just hold up better for whatever reason.
Now in my modeling I'm to the point that I really dont want everything to be a spot on match because of this. If things are just a little off I consider it part of modeling the prototype (as long as the colors are fairly close together....)
Nice work on the model by the way, it turned out really nice.
|
|
|
|
Post by jmlaboda on Dec 28, 2011 12:51:18 GMT -5
Thanks... I feel funny about asking that but I figured it out yesterday. Guess that you can tell that I am not an HO modeler.
|
|
|
|
Post by John on Dec 29, 2011 16:14:18 GMT -5
I'd agree with the previous posters, the green you have looks great as a faded in-service unit. Why not go with it as-is? For the couplers you can mount them directly to the shell by hacksawing off the frame coupler clips and then building up mounting pads from plasticard directly on the shell, shim it to the right height, drill a pilot hole and then mount a kadee draft box directly on the shell. I did that with my recent Athearn GP38 build:  |
|