|
|
Post by nsgevo on Feb 19, 2011 1:48:46 GMT -5
Ive always wondered what it would look like if you could have a decal that is a picture of a real car that coveres an entire side of the model. As long as you could get it to work this I think this could be a pretty accurate way of weathering... if you can even call this weathering?? Since this technique really only works with smooth(ish) sided cars, Ill be trying it out on a covered hopper. Any thoughts? Heres the car ill start with. 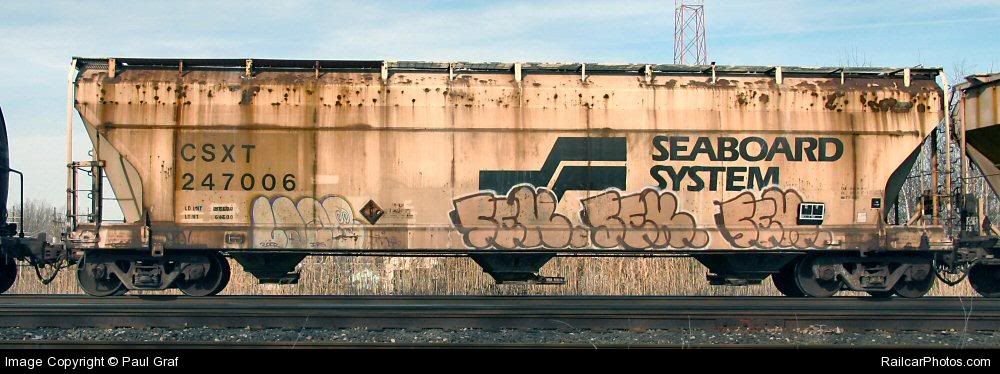 After some editing and tests this is what Ive got so far. Ive also got some extra graffiti I took of pictures of real cars so both sides wont be exactly the same. 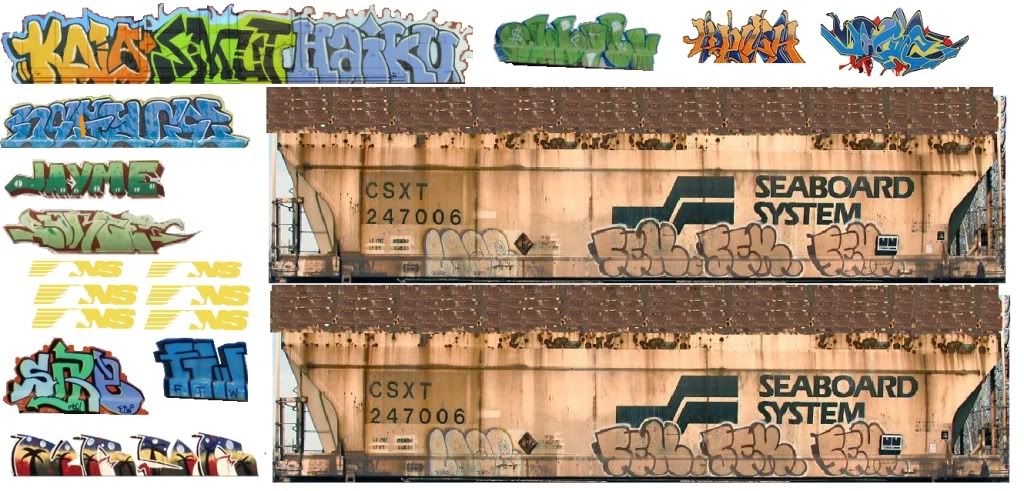 Dont mind the gold NS logos... Theyre for a different project. |
|
sgoti
Chairman
Posts: 459 
|
Post by sgoti on Feb 19, 2011 2:30:54 GMT -5
This should work, as long as you can get the setting solution completely under the decals, all air bubbles out, etc.
I once did a custom job on an Athearn Auto-Max. The model was an undec, and all those little vent holes are printed on the decorated models. I also had a ton of logos to put on the sides.
Since I did not relish trying to apply all those vent decals plus the logos (and since I was under a major time crunch), I did each side as one big decal.
That's when I developed my special under-water method of applying decals, but that's a story for another time...
What scale is this? Keep us posted!
|
|
dekon
Staff Member
Posts: 634
|
Post by dekon on Feb 19, 2011 8:31:29 GMT -5
One trick is to use Solvaset and a hair drier. It really gets the decals to snuggle down into the tricky spots.
|
|
|
|
Post by nsgevo on Feb 19, 2011 18:47:56 GMT -5
Whenever you have time, ide love to hear of your "under-water method" of applying decals. Im still new to this whole process and am open to anything. Anyways I printed off the decal sheet this afternoon... This is just a test model, so ive already learned a few things from it. 1. Make sure you use a high quality printer. Although it did say the type of printer I use at home would work, I'll take it to kinkos next time to try a different type of printer that will hopefully work better. As you can see in the picture, the ink pooled up a little bit. 2. Paint the car white before you apply the decal. That way it will look the same as it does in the picture since the printer usually prints onto a white backrounds. (paper) I made the mistake of painting it a light brown, trying to simulate rust, and it came out a little darker than I hoped. Ill get some pictures up after I get a few more coats of microsol on it...  |
|
|
|
Post by Raeder on Feb 24, 2011 0:14:57 GMT -5
The idea of decaling the whole side of a car was covered in N Scale Railroading magazine a few years back. I think the guy did some woodchip hoppers that way, worked pretty good from the looks of things. As long as you have a straight-on side shot of the car and can adjust the photo somewhat to compensate for distortion of the lens(if you notice any distortion, that is), you should be fine.
|
|
|
|
Post by m a y o r 79 on Mar 10, 2011 13:35:47 GMT -5
If you take the decal shets to kinkos make sure they are full size, they wont print on the half size shets. At least the ones out by me wont. One other tip, make sure that you spray the decals with gloss coat before applying them. If you dont excess handling will cause the ink to chip and flake off while your handling the decals.
|
|
|
|
Post by cudak888 on Jul 29, 2013 10:58:58 GMT -5
Whenever you have time, ide love to hear of your "under-water method" of applying decals. Im still new to this whole process and am open to anything. Anyways I printed off the decal sheet this afternoon... This is just a test model, so ive already learned a few things from it. 1. Make sure you use a high quality printer. Although it did say the type of printer I use at home would work, I'll take it to kinkos next time to try a different type of printer that will hopefully work better. As you can see in the picture, the ink pooled up a little bit. 2. Paint the car white before you apply the decal. That way it will look the same as it does in the picture since the printer usually prints onto a white backrounds. (paper) I made the mistake of painting it a light brown, trying to simulate rust, and it came out a little darker than I hoped. Ill get some pictures up after I get a few more coats of microsol on it... This may be an old thread, but the advice bears repeating: Set your printer to print at its best color settings, and choose glossy photo paper as the medium. Instant decal perfection. -Kurt |
|
|
|
Post by grandtrunkfan on Aug 15, 2013 6:58:06 GMT -5
This is one thing Id kill to be able to do myself is make my own decals!! Kinkos has the lazer jet printers that allow you to make decals?
This reminds me back when I was big into Microsoft Train Simulator and Id photo-skin virtual models. I thought that it would be cool to do that with real models.
|
|
|
|
Post by cudak888 on Aug 15, 2013 9:52:11 GMT -5
This is one thing Id kill to be able to do myself is make my own decals!! Kinkos has the lazer jet printers that allow you to make decals? This reminds me back when I was big into Microsoft Train Simulator and Id photo-skin virtual models. I thought that it would be cool to do that with real models. You do not need a laser jet to print decals. I printed these from an Epson Workforce 545 inkjet: 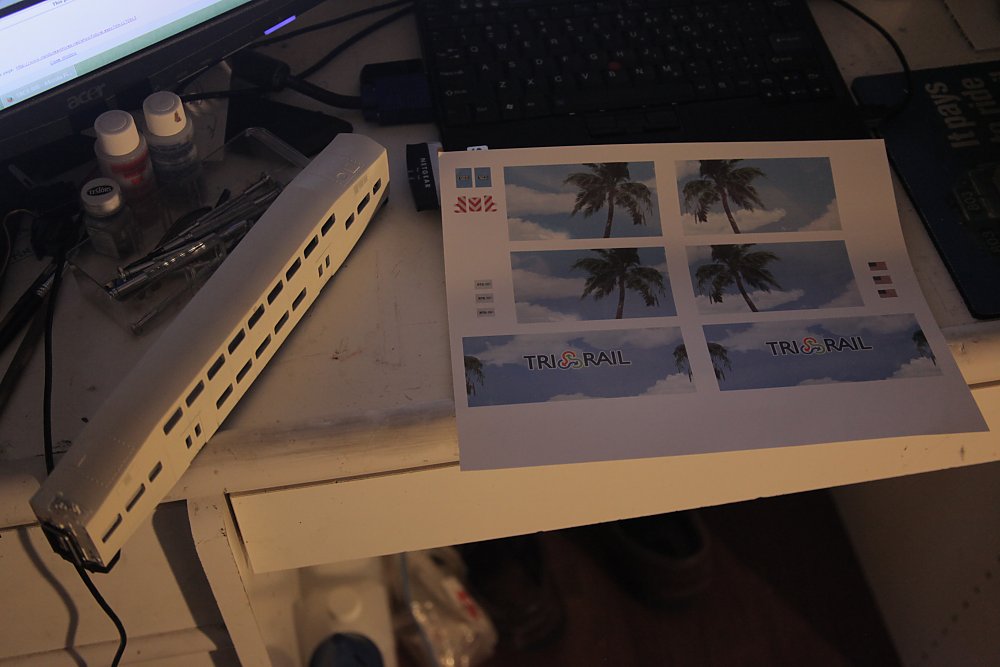 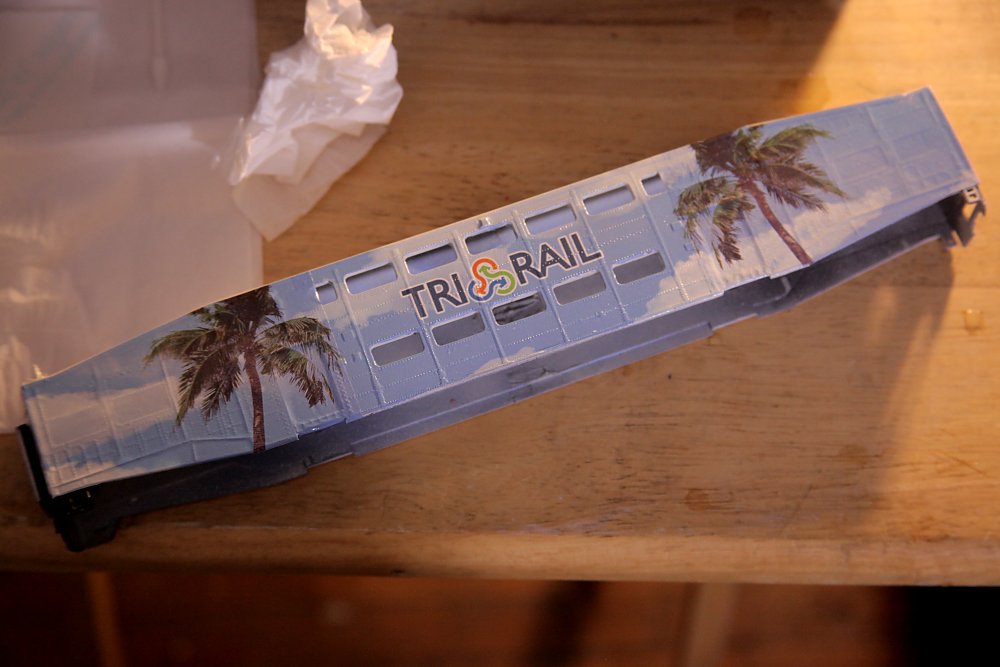 The printer settings I used are covered in this semi-related video: -Kurt |
|
|
|
Post by iomalley on Aug 15, 2013 16:42:15 GMT -5
That's a great idea nsgevo! then you can blend in with handpainting where the decal misses the model or gets ripped. It would definately get ooohs and aaahs for sure.
You'd have to blend in the roof yourself tho.
|
|
|
|
Post by ironstef70 on Jan 19, 2015 21:29:39 GMT -5
That decals tread is interresting...
I've been doing my own decals for almost two years, mostly on die cast construction models, but now on HO scale cars and locos for a couple of months.
From my own experience, here are a few tricks:
I get my water slide paper from ebay. I used Pavilio and now some that I order from UK. Anyways, that paper itself is not a problem if you use a decent laser printer and make sure you have a color reference to match. I have my sheets printed at a commercial print shop like some found near big schools and colleges, so make sure to always use the same machine, that the printer settings are the same, and check for color variations which sometimes depends on the ink cartridge level or it a technician has changed the usual settings.
Once you got your decals, make sure to spray a gloss coating so the ink does not wash away wit the water or once you touch the media. I use Tremclad oil based clear coat and it works fine for me as I am not much of an acrylic fan (all my colors are oil based and I mix my owns from solid base colors; I even airbrush oil based clear coat).
Then, use warm water and let the decal delaminate in a way that you can slide it under water. If the media or film is not totally detached from the backing, it will likely stretch and wrinkle and will do no good, especially when doing large decals.
Then for better results, I put micro set solution on the dry surface on which the decal will be applied. Then use eiter wet Q-tips cotton swabs or the tip of a needle (like for doing those hazardous materials placards on HO cars: about 2x2mm) to slide them on. I then use eiter very soft paper tissue or q-tips to remove the water bubbles, and finish the job using a air dryer. I'll leave it rest for 2 hours and apply decal setting solution OVER the decal again using a Q-tip. Leave it dry overnight and then clear coat the following day. Some oil based clear coat can delaminate the decal and paint underneath if the paint (oil, remember) has not dryed sufficiently (5 days minimum). I now achieve better results using an airbrush to do so as the atomization makes for a thinner layer of clear coat.
Hope that helps for those getting started.
I felt like trying to help as doing decals I believe is a great way of enjoying that hobby as a modeler since it opens so many possibilities as pictured at the beginning of this post.
Stephane
|
|