|
|
Post by diesel on Sept 27, 2010 21:19:36 GMT -5
Hey there everyone, So, here's where I'm at so far. The only thing I can do from here is to finish the dynamic brake blister, because as usual, I need parts. I'm looking into that though. I really only need fans, spare knuckle holders and ditch lights to finish this, so I'm filling a cart on Highball Graphics. I make the small square thing & stand (GPS?) behind ACs on the roof of the cab, the electronic bell and the fan plate from styrene. I'm gonna try the new style handbrake ratchet as well, but I'm not quite as optimistic about that... we'll see! Sorry the images are kinda blurry, but at least this is the early stage, I'll do better once the paint ect. goes on. 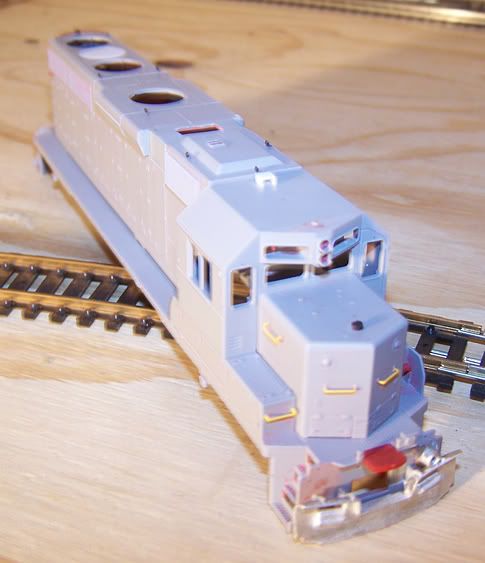 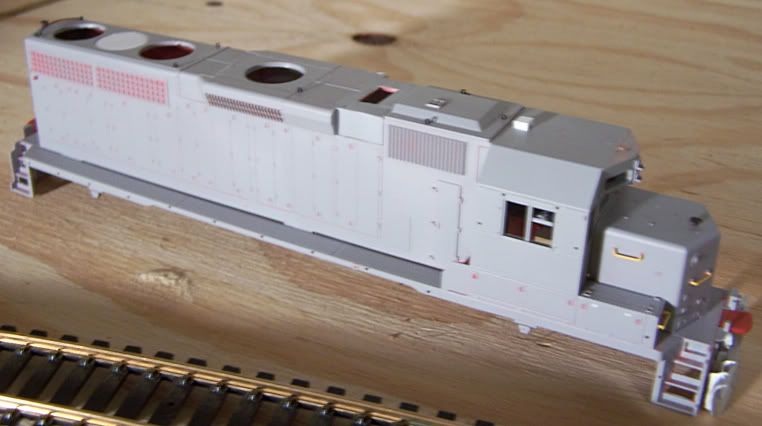 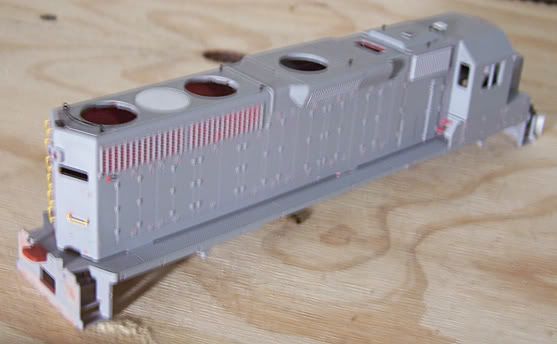 |
|
kcs1967
Chairman
SWLA-SETX PINE SCENTED
Posts: 1,726
|
Post by kcs1967 on Sept 27, 2010 22:01:37 GMT -5
Looking good
|
|
|
|
Post by diesel on Sept 28, 2010 22:54:07 GMT -5
thanks Justin! comments mean a lot.  The fan cover plate came out pretty nice for doing it by hand, but it's not perfectly round. I'm gonna use the plano hatch cover. |
|
drgwguy
Chairman
Modeling the DRGW in the 70s-80s!!
Posts: 528
|
Post by drgwguy on Sept 29, 2010 11:22:27 GMT -5
So is the shell an Atlas GP40? Looks like you're having fun so far.
Keep us posted!
Rick
|
|
|
|
Post by diesel on Sept 29, 2010 11:50:13 GMT -5
Thanks Rick! Yes, I started with the Atlas GP40, the non -2 version. I got the very last one Trainworld had, -so they tell me.
|
|
|
|
Post by diesel on Nov 4, 2010 23:52:54 GMT -5
So here is the latest on this one. There isn't much more to do to the shell. I do have to make the air filter box neat with thinned putty, and put in lift rings and grabs, but that's it. I did start on the frame stuff, air tanks are together; DW and I'm thinking of using a P2k fuel tank on this. -any thoughts on that? It fits, and there is about a 1/16 more space to accomadate the waste tank. But I'm not sure if that's supposed to be like that or what. I haven't measured it out. The mu hose & air hose are just on there for the pic, I like to glue them in after the paint. I went with the plano hatch as the plastic one I did wasn't perfectly round... no idea why I thought I'd be able to pull that off, & the new FARR air filter box for SD9-3 rebuilds from DW worked nicely to finish off the hood. PICS: 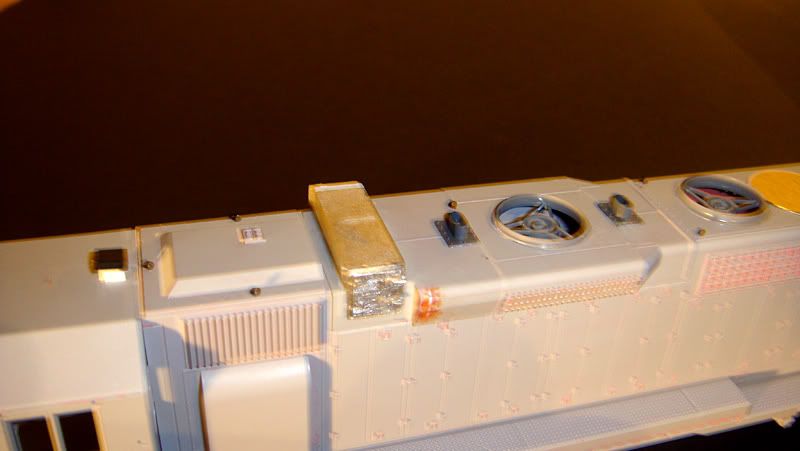 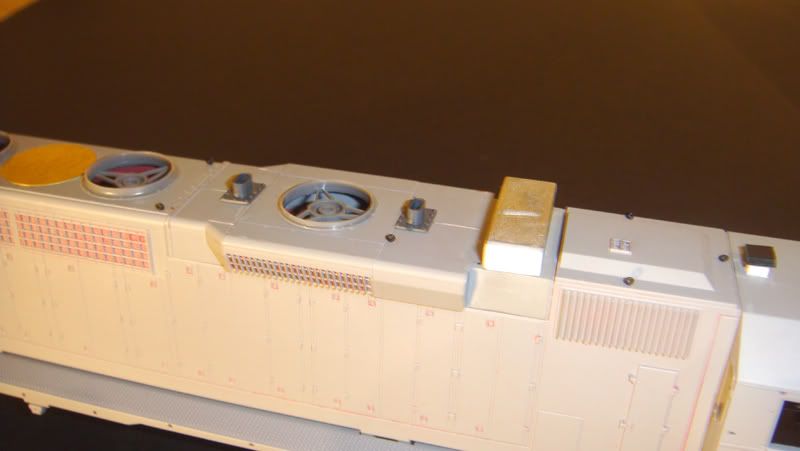 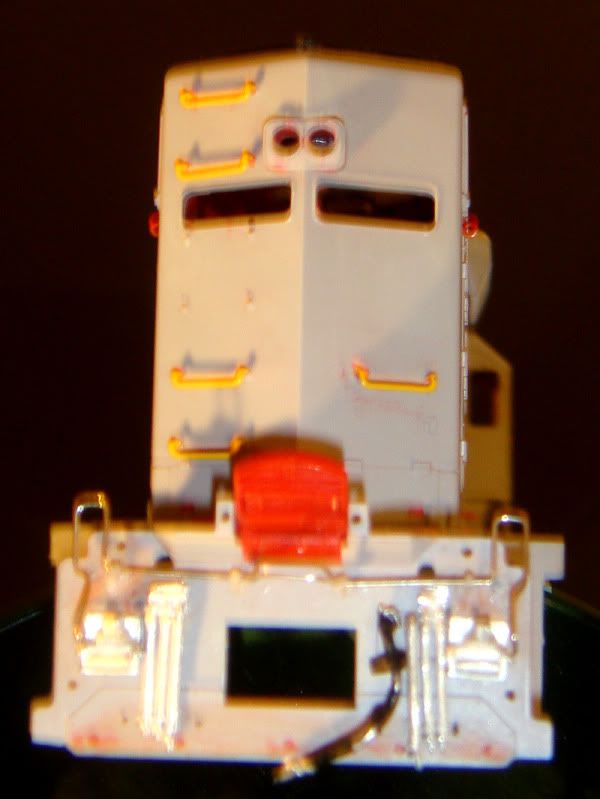 |
|
|
|
Post by icghogger on Nov 5, 2010 18:33:37 GMT -5
Very Impressive Work, Dan!! Who makes that cab vent??
|
|
|
|
Post by diesel on Nov 6, 2010 1:45:41 GMT -5
thanks Robert, the vent is by Detail Associates. I made the stand it sits on from bits of styrene. Could that be new? I've never seen it before, but then this is only the 2nd time I've ordered from high ball graphics; my new parts supplier for sure!
|
|
|
|
Post by diesel on Dec 14, 2010 0:32:42 GMT -5
Today I finished the dynamic brake section. I was all ready to mask for black when I noticed that I completely had the walkway section reversed in color. All I needed to paint orange on that was the tip of the sub-base, which of course is the only area that didn't really get paint. Also there are some spots on the long hood & cab where paint is thin. -I think I'm gonna use primer from now on. So an another thin mist of orange & more dry time are in order here. But I think this came out good, what do you think? Thanks for lookin!  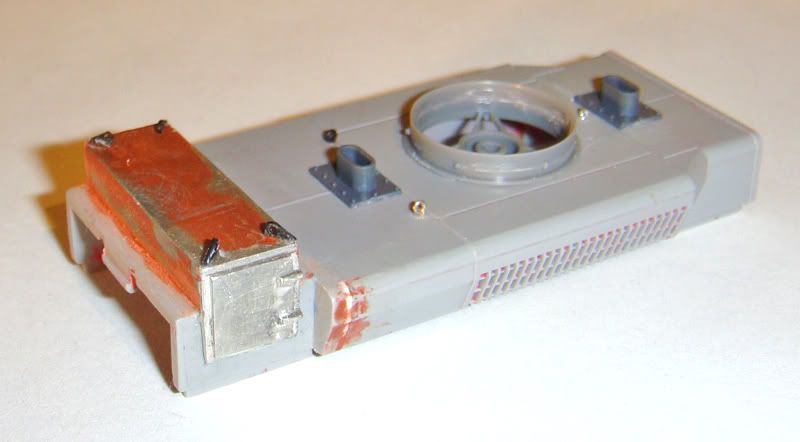 |
|
|
|
Post by icghogger on Dec 14, 2010 9:50:49 GMT -5
Very Nice Work, Dan!
|
|
deez
Chairman
Midland Belt Railway
Posts: 949
|
Post by deez on Dec 15, 2010 2:27:59 GMT -5
Nice job on the DB hatch Dan!
|
|
|
|
Post by diesel on Dec 16, 2010 9:52:48 GMT -5
thanks guys! I have to be pretty careful with that, I knocked off 2 during the whole process just from handling it while putting the others on. I won't be leaving this out when I'm not around at the club!
|
|
|
|
Post by diesel on Apr 9, 2011 11:59:32 GMT -5
Here's a progress shot: 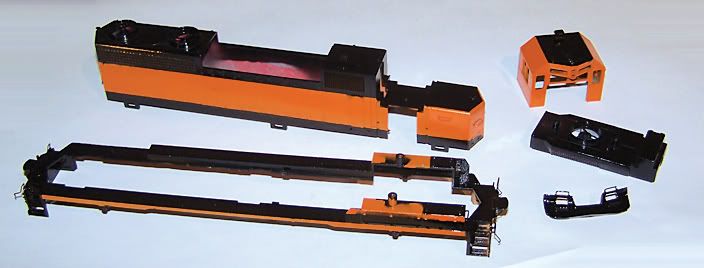 |
|
drgwguy
Chairman
Modeling the DRGW in the 70s-80s!!
Posts: 528
|
Post by drgwguy on Jul 15, 2011 19:01:25 GMT -5
Dan-
It looks great! You've gotten a lot farther than I have! I'm hoping to have some progress shots soon.
Rick F.
|
|
|
|
Post by diesel on Jul 16, 2011 16:10:44 GMT -5
rick thanks! Well I was a bit bummed out when I got it home and realized I didn't have the black paint come up high enough on the bottom of the long hood & body. So, I did what most of us would do; set it aside until my nerves calm down and went to work on the SD40-2! BNSF 1781, I should take pics of that it's almost done!
|
|
kcs1967
Chairman
SWLA-SETX PINE SCENTED
Posts: 1,726
|
Post by kcs1967 on Jul 16, 2011 18:09:23 GMT -5
I like it, Nerves shot and all, lol
|
|
|
|
Post by diesel on Nov 23, 2011 13:40:53 GMT -5
progress shot, the headlight is masked so I can paint it silver/metalic 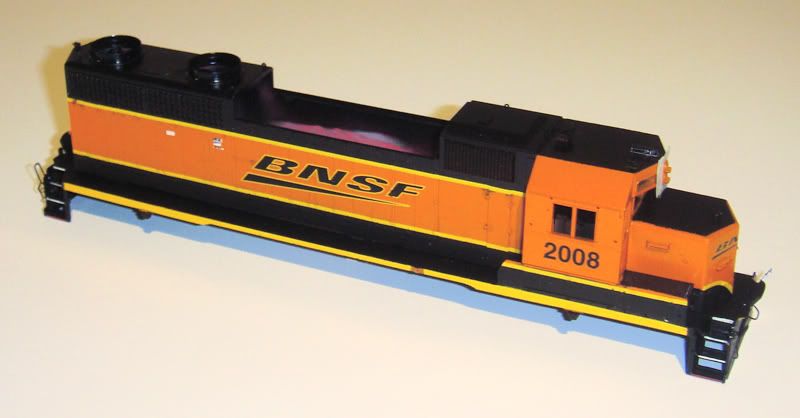 |
|
|
|
Post by antlorch on Nov 23, 2011 19:25:26 GMT -5
I dont know how I have missed this whole build but it is looking really good. Though not a BNSF fan it is when they are nice and clean they look great.To bad they have to get dirty..
|
|
kpack
Road Foreman
Posts: 77 
|
Post by kpack on Dec 27, 2011 9:26:50 GMT -5
Dan-
I'm loving what you've done so far. I'm very interested in this build as I have one that I'm about to be starting on. I'll be modeling #2037, and am starting with a GP35 shell.
I have a few questions if you don't mind:
-What did you use to build the DB blister?
-do you have specific measurements for that part or are you eyeballing? (just wondering if I'll have to eyeball too)
-What part and manufacturer did you use for the lift rings on the DB blister and also the door?
-Did you scratchbuild the cover over the middle fan or is there a part for that?
Thanks for taking the time to answer these! Your model looks killer so far...any updates?
-Kevin
|
|
|
|
Post by diesel on Dec 29, 2011 12:47:54 GMT -5
Hey Kevin, Thanks for the comments! SO, 2037 looks like fun, I'm torn on making one of my 35s into that in lieu of making them both 39Ms, but time will tell. -Measurements? I eyeball almost everything. I know as a member of this forum I should learn to use an HO scale rule more often, but if I can just line up with something, that's what I do... : / -I kept the blister the GP40 came with, I cut the front to look like the pic, eyeballing again. Then for the filter box I used the new SD9 part from Details West: AF-370 FARR AIR FILTER FOR GP9, SD9. This part comes with an X panel on the hatch. I used a file, several sandpapers and some swear words to get it flat like on these units while trying to retain the hinges. - I used Plano liftrings #14651 on the blister. I stole a door from a Cannon nose kit and then cut it down. I bet it's a little big, but I'm too impatient to wait until I order parts again, which won't be for a while. Cannon does make nice doors etched in brass for that though. -At first I tried scratching a cover for the plated over fan, but I couldn't get it perfectly round. I don't know why I thought I'd be able to do that. I used Plano part #11854. BUT, that's for a 48" fan. You'll need for the center fan, 36" right? I don't know if anyone makes that. IF you DO find a part for this, the trick to getting it to look flat is to tapper the fan opening and the bottom of the plate so the plate fits in like how an ice cream cone would go into a fitted hole, just to give you a visual of how it would work. I had mine glued on before that occured to me and I was dissapointed it didn't look like the picture. I checked to see if maybe you could just use styrene and then putty it smooth, but as this pic of 2039 shows, there is the round outline of a welded plate. Can't wait to see yours get started! K, one last edit, on top of the filter box I used lift rings/lugs from a Details Associates kit for switchers (plastic) and cut them down into the teardrop shape. These are easily knocked off because I think it's delron glued onto pewter. I just did it like that to keep some uniformity of each lug. But maybe styrene would stick better with the CA. I can't remeber the number of the part, but if you scroll down the DA detail parts list on a page like Highball Graphics you should see it. www.rrpicturearchives.net/showPicture.aspx?id=1621128 |
|