Post by HotBox on Apr 16, 2010 19:29:30 GMT -5
Hello everyone!
My name is Mike and I've been lurking around here for a little while, looking at some of the great modeling skills that you guys have. I've been interested in trains for many years but have never had the time or inclination to start modeling until recently.
Finding the cheap build forum made me think about it again. So I decided to build an engine using scraps and bits and rattle cans and brushes and see if I could come up with something that would have a more "prototypical" appearance without breaking the bank. I am not an expert and I'm sure that many of you will spot plenty of errors in what I have done. This is definitely under $100 - way under. Maybe $25 to $30.
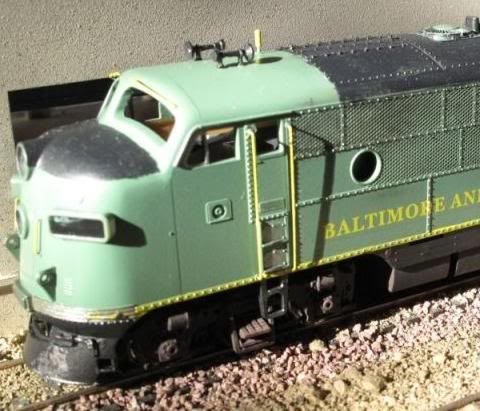
I started with an old Model Power Alco RS-11 painted in Chessie System colors. I can't even remember where I got it - all I remember is that I paid next-to-nothing for it. My research showed that C&O never had any RS-11s in their motive power roster.


After dis-assembly and looking at the body, I see that the molding has a few problems that I noticed from all the RS-11 pictures that I've seen. First is the front hood access doors are set too far forward and second, there are two strange "appendages" on the top of the hood.

I removed the side section that included the doors back to the cab and removed the two stacks from the top of the hood.

Test fit with the doors swapped with the section from next to the cab.

Here's the carcass before the "dip" to remove the paint. You can see where I tried to use nail polish remover to take off the lettering.

Primer's on the body and you can see I still need to do some cleanup on the new doors.


Also, I noticed that this model had angled sides on the fuel tank making it somewhat wider than the usual style tank. In my pictures of RS-11s, I noticed that the top of the angle was extended up on both ends of the tank. I tried to replicate that with some pieces of scrap.

A rattle can paint job was next and after that, I did splurge and spent $7.00 for a set of grab irons. I've seen you guys detail with these before so I thought I'd try my hand too. They look pretty rough - had a hard time lining them up straight but, I figured now's a good time to practice on a cheap build! Keeping with the cheap build theme, I cranked up the computer and ink jet printer and made my own decals. Only problem was that I had white background decal paper, not clear but I went ahead with it anyway.


Since this is a cheap build project, I'll be keeping the stock trucks. The stock trucks had the couplers mounted right in the trucks themselves so there is a LARGE gap in the front and rear frames so the trucks can pivot. I just made a "skirt" out of some scrap styrene - not prototypical but still looks better than without.


I finished up with printing out number boards that I white glued in place and did some paint detailing with brushes and spray cans, no air brush.


I think my (really) cheap build turned out pretty well. Hope my post wasn't too long!
Mike ;D
My name is Mike and I've been lurking around here for a little while, looking at some of the great modeling skills that you guys have. I've been interested in trains for many years but have never had the time or inclination to start modeling until recently.
Finding the cheap build forum made me think about it again. So I decided to build an engine using scraps and bits and rattle cans and brushes and see if I could come up with something that would have a more "prototypical" appearance without breaking the bank. I am not an expert and I'm sure that many of you will spot plenty of errors in what I have done. This is definitely under $100 - way under. Maybe $25 to $30.

I started with an old Model Power Alco RS-11 painted in Chessie System colors. I can't even remember where I got it - all I remember is that I paid next-to-nothing for it. My research showed that C&O never had any RS-11s in their motive power roster.
After dis-assembly and looking at the body, I see that the molding has a few problems that I noticed from all the RS-11 pictures that I've seen. First is the front hood access doors are set too far forward and second, there are two strange "appendages" on the top of the hood.
I removed the side section that included the doors back to the cab and removed the two stacks from the top of the hood.
Test fit with the doors swapped with the section from next to the cab.
Here's the carcass before the "dip" to remove the paint. You can see where I tried to use nail polish remover to take off the lettering.
Primer's on the body and you can see I still need to do some cleanup on the new doors.
Also, I noticed that this model had angled sides on the fuel tank making it somewhat wider than the usual style tank. In my pictures of RS-11s, I noticed that the top of the angle was extended up on both ends of the tank. I tried to replicate that with some pieces of scrap.
A rattle can paint job was next and after that, I did splurge and spent $7.00 for a set of grab irons. I've seen you guys detail with these before so I thought I'd try my hand too. They look pretty rough - had a hard time lining them up straight but, I figured now's a good time to practice on a cheap build! Keeping with the cheap build theme, I cranked up the computer and ink jet printer and made my own decals. Only problem was that I had white background decal paper, not clear but I went ahead with it anyway.
Since this is a cheap build project, I'll be keeping the stock trucks. The stock trucks had the couplers mounted right in the trucks themselves so there is a LARGE gap in the front and rear frames so the trucks can pivot. I just made a "skirt" out of some scrap styrene - not prototypical but still looks better than without.
I finished up with printing out number boards that I white glued in place and did some paint detailing with brushes and spray cans, no air brush.
I think my (really) cheap build turned out pretty well.
Hope my post wasn't too long! 
Mike ;D


 My eyes have never been that good and the older I get, the worse they get.