|
|
Post by firstout on Apr 30, 2018 10:34:06 GMT -5
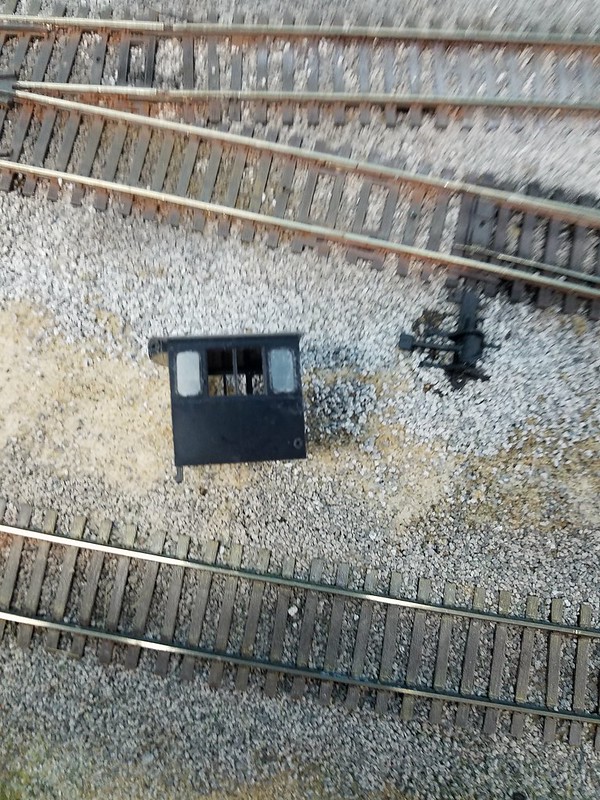
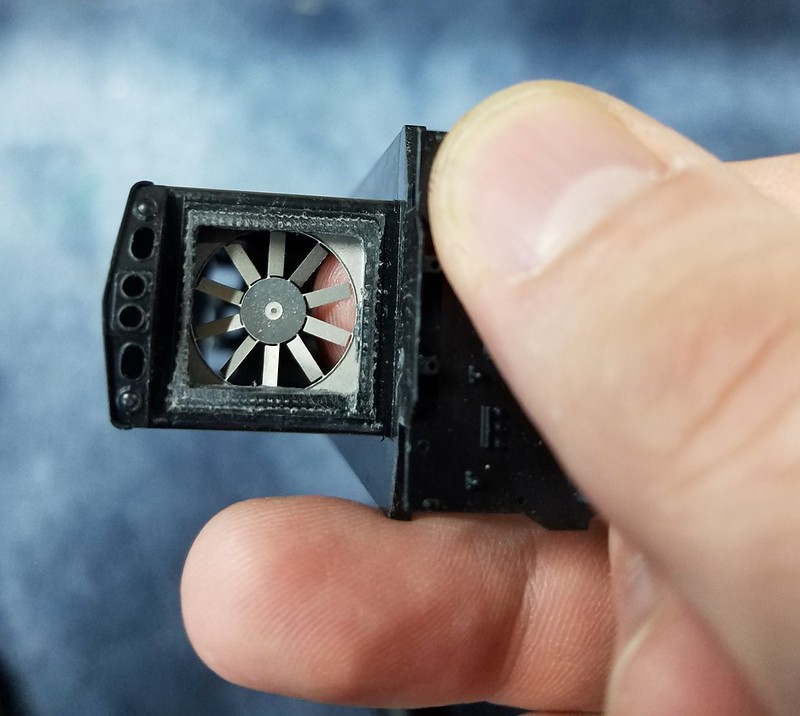
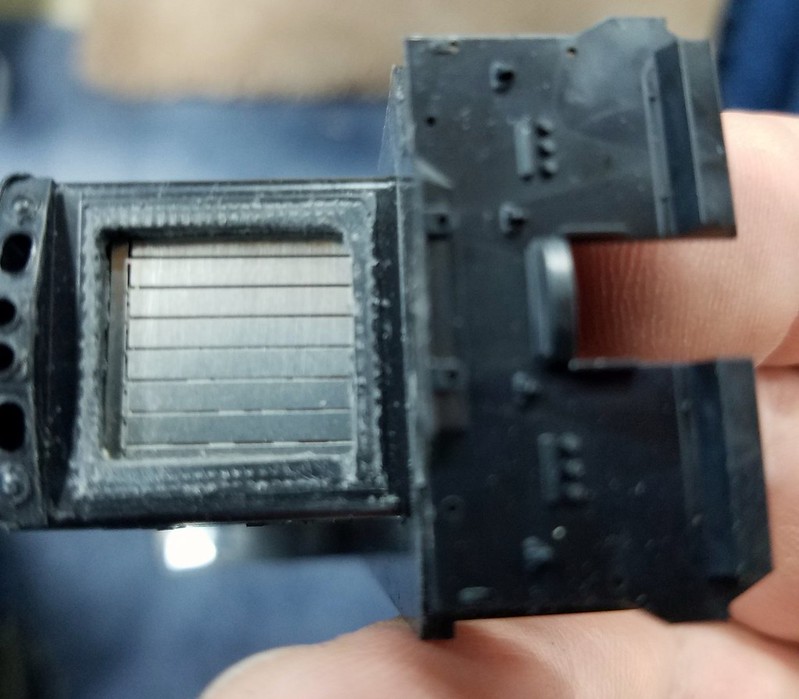
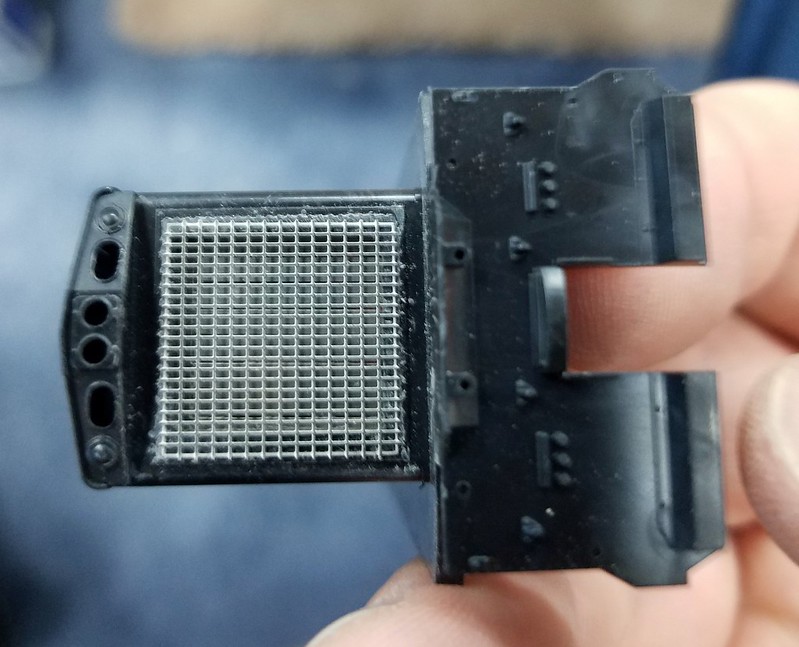
Hi All, Started a build on a BN SW1500. It will be on of the former GN units with Flexicoil trucks. So far I have added the radiator fan and shutters to the front of the unit. Blanked out the side windows on the cab. So far this is what has been accomplished on this build. Thanks for checking it out. Matthew  2018-04-30_11-07-18 2018-04-30_11-07-18 by M B, on Flickr  2018-04-30_11-07-05 2018-04-30_11-07-05 by M B, on Flickr  2018-04-30_11-06-50 2018-04-30_11-06-50 by M B, on Flickr  2018-04-30_11-06-31 2018-04-30_11-06-31 by M B, on Flickr |
|
iandrewmartin
Engineer
Last mile, first mile, where the real railroading happens
Posts: 35 
|
Post by iandrewmartin on May 1, 2018 2:21:46 GMT -5
Matthew - what are you starting with? Athearn BB? Something else?
|
|
|
|
Post by kfallsbn on May 1, 2018 8:27:50 GMT -5
Nice!
Which unit number do you plan on using??
|
|
|
|
Post by firstout on May 2, 2018 21:23:36 GMT -5
Matthew - what are you starting with? Athearn BB? Something else? I am starting with a Athearn BB. |
|
|
|
Post by firstout on May 2, 2018 21:25:19 GMT -5
Nice! Which unit number do you plan on using?? It will be either 303 or 305 still haven't decided which one yet. Before I get further on the details I will pick a number. |
|
iandrewmartin
Engineer
Last mile, first mile, where the real railroading happens
Posts: 35 
|
Post by iandrewmartin on May 3, 2018 3:16:37 GMT -5
Matthew - what are you starting with? Athearn BB? Something else? I am starting with a Athearn BB. Matthew; I'm looking forward to seeing this build as it rolls on. I have a few of Athearn BB units that I'd like to up-rate. Would you mind providing a parts list when you can? I love the radiator screen and the fans. They look outstanding. |
|
|
|
Post by firstout on May 5, 2018 17:28:29 GMT -5
I am starting with a Athearn BB. Matthew; I'm looking forward to seeing this build as it rolls on. I have a few of Athearn BB units that I'd like to up-rate. Would you mind providing a parts list when you can? I love the radiator screen and the fans. They look outstanding. I sure can provide you with parts list. The radiator fan, shutters, screen and window blank outs are from kvmodels.com. Part number kv-113h. They are excellent etched metal parts. I used some .020 styrene to fill in the window openings before applying the metal blank outs. Hope this helps. |
|
iandrewmartin
Engineer
Last mile, first mile, where the real railroading happens
Posts: 35 
|
Post by iandrewmartin on May 6, 2018 17:30:26 GMT -5
I sure can provide you with parts list. The radiator fan, shutters, screen and window blank outs are from kvmodels.com. Part number kv-113h. They are excellent etched metal parts. I used some .020 styrene to fill in the window openings before applying the metal blank outs. Hope this helps. I just took a look at the details - there are some really nice PE there. Very nice and the prices are very nice too! Thanks for the information. |
|
|
|
Post by wildecoupe on May 7, 2018 9:40:05 GMT -5
Thanks for sharing! Going to get some things to detail my EL Baldwin S12. Agreed, prices are nice as well as the details.
|
|
|
|
Post by detlef10 on May 8, 2018 12:44:29 GMT -5
Nice work! Inspiring. Also thanks for the link to KV Models! Lots of cool stuff there, some of which I have been looking for and have had trouble finding.
|
|
|
|
Post by m a y o r 79 on Jun 26, 2018 20:28:03 GMT -5
Matthew; I'm looking forward to seeing this build as it rolls on. I have a few of Athearn BB units that I'd like to up-rate. Would you mind providing a parts list when you can? I love the radiator screen and the fans. They look outstanding. I sure can provide you with parts list. The radiator fan, shutters, screen and window blank outs are from kvmodels.com. Part number kv-113h. They are excellent etched metal parts. I used some .020 styrene to fill in the window openings before applying the metal blank outs. Hope this helps. Nice, someone else doing radiator fans. Turned out great. Ever consider modeling the shirts open so you can see the fan? |
|
|
|
Post by firstout on Jul 16, 2018 10:33:50 GMT -5
When I paint and decal the BN Strips on the shutters I will model them open. Did not want to bend the shutters yet until I got the decal stripes on the shutters.
|
|
|
|
Post by firstout on Jul 16, 2018 10:41:03 GMT -5
|
|
Deleted
Deleted Member
Posts: 0
|
Post by Deleted on Jul 16, 2018 18:21:44 GMT -5
Very nice looking details
Can't wait to follow more of this one.
|
|
iandrewmartin
Engineer
Last mile, first mile, where the real railroading happens
Posts: 35 
|
Post by iandrewmartin on Dec 1, 2018 5:37:40 GMT -5
Well I have decided it will be BN 300. I have it detailed out and ready for primer. Matthew; Any update on this project. I bought a bunch of etches from KV Models - a pleasure to deal with and fast shipping to Australia too. Did you do the radiator on your model? From what I can see you need to leave the central part in (down the long axis of the loco) and then apply the PE over it. I've decided to scratchbuild the radiators. Wondering if anyone has a photo of the things somewhere so I can bash a fairly (easy) realistic version of it? Seems I remember someone posting this somewhere on the forum but for the life of me I can't find it. |
|
|
|
Post by big train james on Dec 2, 2018 17:18:22 GMT -5
Andrew,
I'm doing the same sort of thing to an Atlas O scale model. I've found lots of proto photos for the radiator fan area. If you like, I'll load them up to a Dropbox folder and supply the link. None of the photos is absolutely definitive, but when taken together they can provide a decent idea of what is going on.
Jim
|
|
iandrewmartin
Engineer
Last mile, first mile, where the real railroading happens
Posts: 35 
|
Post by iandrewmartin on Dec 7, 2018 4:20:53 GMT -5
Andrew, I'm doing the same sort of thing to an Atlas O scale model. I've found lots of proto photos for the radiator fan area. If you like, I'll load them up to a Dropbox folder and supply the link. None of the photos is absolutely definitive, but when taken together they can provide a decent idea of what is going on. Jim That would be awesome Jim. I have a couple of other small projects to finish prior to beginning this project on my five SW1500s. (Yes nothing by half in the Martin household.) Talk to you later on. |
|
|
|
Post by big train james on Dec 7, 2018 18:39:19 GMT -5
Andrew, Do you know which radiator arrangement you want to implement? There is quite a bit of variety to choose from, both with respect to the combinations of various core lengths, and also some of the more specific detailing. There are three different core lengths, which can result in three different combinations (per side, not accounting for orientation). You can have one full length core by itself, three short length cores together, or one short and one medium length core combined together. In addition, the cores on the left and right sides of any given loco may match or be of different styles. And in the case of the one short/one medium combo, the cores can be combined with the short core forward and the medium behind, or reversed. I would submit that the most common arrangement is to have both left and right side cores symmetrical, but it's certainly not an absolute. I'm guessing that most locomotives started out that way, with variations coming into existence during shoppings. Detail differences can include core housing styles, bars/no bars spanning across the width of the core above and below the screens, length and number of stiffener ribs along core sides, and style of short vertically oriented channels at various locations along the length of the radiator section, which I presume are for positioning. Some things that seem to always be the same without regard to core size include flanges, screen appearance, and headers (exposed to the rear, inside the boxy housing at the front). One other truism, in my experience: short cores never have bars spanning from side to side, medium cores may or may not, long cores always do Here are some links to websites with relevant pictures. From Don Strack's Utah Rails siteSwitcher short length core: donstrack.smugmug.com/UtahRails/Locomotive-Details/Locomotive-Details/i-ZPrBBdx/AUnderside shot of cores from an sd40t-2 (they all look essentially the same, just differ in length). Yes, it's the bottom side, but the top looks the same, it does a good job of illustrating how the cores butt together, and also shows the bars spanning from side to side: donstrack.smugmug.com/UtahRails/Locomotive-Details/SD40T-2s/i-Fkp2jHPFrom Rob Sarberenyi
Two different galleries, showing examples of all three core arrangements, plus various details mentioned above: espee.railfan.net/picindex/sw1500_walkaround/gr000000.htmlwww.pbase.com/espeef5/sw1500AthearnThis a photo of one of their undecorated models, without the etched metal screen obscuring the view. You can see that they represent a model with one full length core on the right side, and a short/medium combo on the left side. www.athearn.com/Products/Default.aspx?ProdID=ATH95841I think these pictures will go a long way toward showing what the cores can look like. I've linked the above photos to respect their copyrights. Simpler that way. Any other photos I've downloaded along the way essentially duplicate the info found in those links. I do have some pretty solid 3d cad done for the radiators, and I can get screen captures of any part of that work, but that probably won't happen til at least tomorrow. When I get those images organized, I'll load them to a dropbox folder and post that link here. Good luck, Jim |
|
|
|
Post by big train james on Dec 11, 2018 12:06:55 GMT -5
Here's a link to a dropbox folder with various screen captures from my cad for the radiator cores. Also included are some shots of the 3d printed version, done in Shapeways FXD resin. And lastly, a couple of shots showing the 3d print with a piece of Plano HO walkway etch inserted to represent the radiator core itself, to test for fit and whether it successfully hides the speaker below. One thing of note about the cores is that there are two versions of the short style represented. The difference in detail is subtle, mostly amounting to the housing on the sides of the core, between end flanges. It's a minor thing unless you have a disorder, like me    . In HO, I don't think it's probably worth worrying about. A very important thing to remember about these 3d print photos is that I'm doing this work on an O scale model. I've been able to attain a decent amount of detail like the nuts and bolts, because of the scale. A lot of these things probably won't render successfully in HO, via a readily accessible 3d printing source like Shapeways. The Athearn model seems to have captured some of the extra "texture" like the nut and bolt heads, and core surface, but that is done by injection mold. Another thing to consider is exactly how much of the radiator core form or detail will be visible through the etched metal screen, especially on darker colored models. I will be getting a custom etch screen done for my model, and I'm hoping for the thinnest possible size for the welded bars that comprise the screen, with the largest percentage opening possible. Again, an HO version may not yield the same mileage. I would suggest testing what you can see through the KV screen and decide after that how far you should go with the detail. The last caveat is that my version is a hollow volume, with some sort of perforated etched metal piece to represent the surface of the core, so that the sound from the upward facing speaker that sits below the core can exits the shell. A model with a speaker mounted in any other way wouldn't require this condition, which would make things simpler. I hope this info helps give you an idea what the cores look like. I used the dropbox folder because I don't have a photo host for the pictures. If somebody wants to discuss something in particular about what they see, and wants to host a photo and post it back to the thread for that purpose, I'm all for it. Jim
|
|
iandrewmartin
Engineer
Last mile, first mile, where the real railroading happens
Posts: 35 
|
Post by iandrewmartin on Dec 12, 2018 6:18:00 GMT -5
Jim;
I think I have everything I need now to scratchbuild the radiators. YOur CAD drawings and the photos are perfect. I can fudge what I need for HO scale. And as you suggest I'll test to see what I can see through the KV screen. I have all the punch and die sets I need to make the nut heads for this so that might be the extent to which I'll 'detail' the cores. Your idea of making it hollow is a good one though. I am looking to add sound to these as the next step when I add DCC.
Thanks for your help. They are a little further down the way in the project list but now I can begin working on the cores and see where I end up. Once I'm happy Im inclined to get one perfect and then cast the remaining ones.
Thanks again.
Andrew
|
|