|
|
Post by train1922 on Jul 23, 2017 20:49:43 GMT -5
Hello everyone, As this is not my first custom model, it is the first that I know what im really doing so I figured I would post the progress. 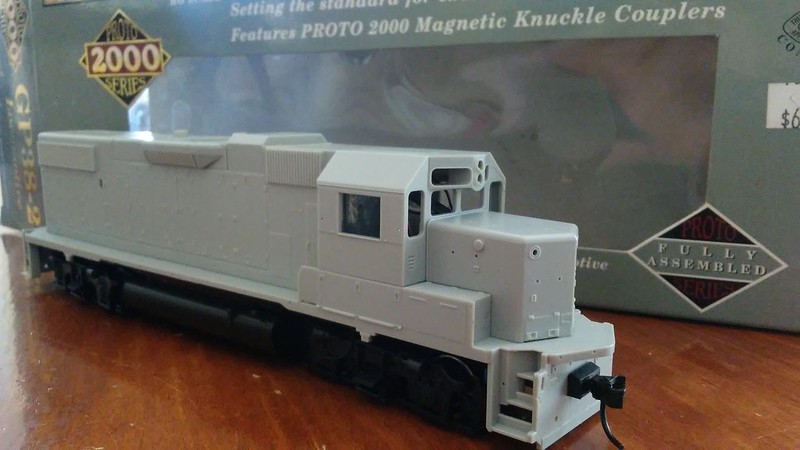 This is a proto 2000 GP38-2 (great model) that I picked up at a show in Sacramento back in January. I didn't really have any ideas for a paint scheme so I went with the Sonoma Marin Area Rail Trainsit Agency's (SMART) scheme. The new northern California commuter railroad applied a green, silver, black, and gold scheme (based off old NWP steam locomotives) to its 14 Nippon Sharyo DMU sets. 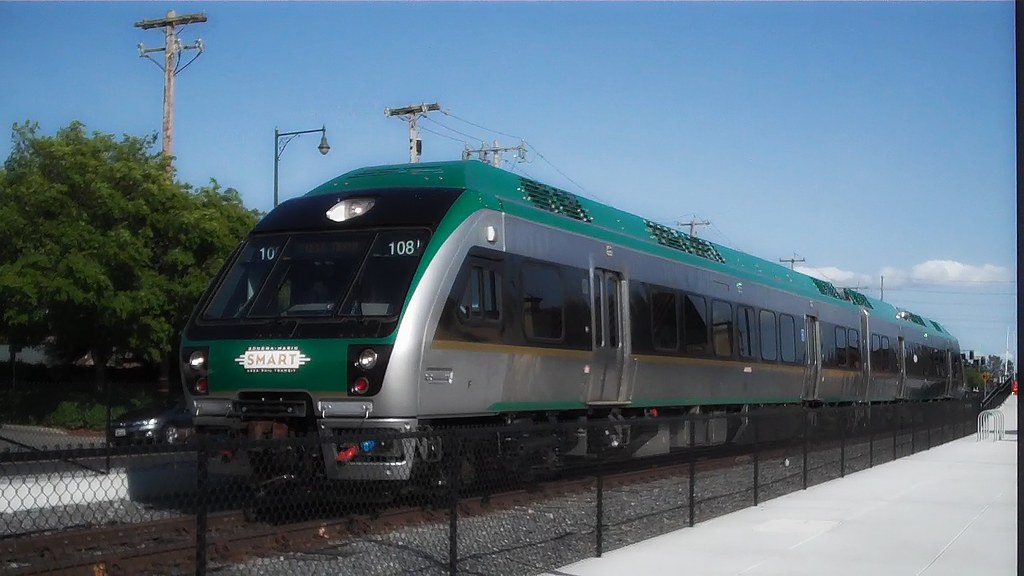 I heard ideas being thrown around that SMART could use a locomotive to handle the DMUs in case of a break down on the main so I thought a SMART GP38-2 would be a good fictional locomotive and at the same time not to unrealistic. I did my best to fit these colors onto the EMD unit. I utilized a game called Garry's Mod to help me get a 3D visual of what it would look like and this is what I came up with. 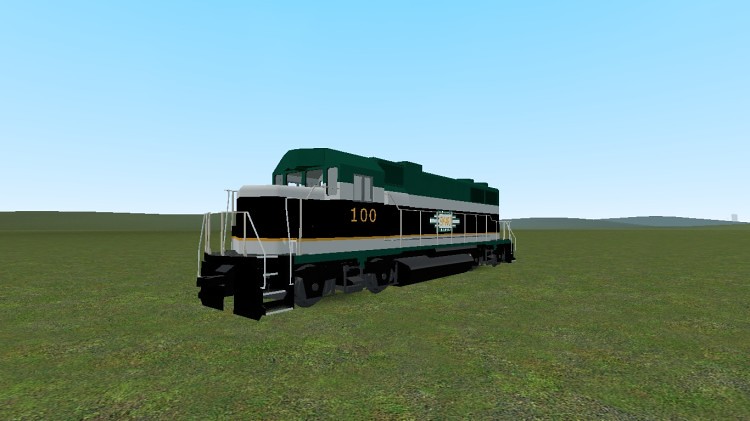 Im happy with it and this is what I will go off to paint the model. I have purchased Testors mystic emerald, gloss black, and gold for paints. I am also using Model Master chrome for the silver. I plan on installing ESU LokSound with dual sugar cube speakers and LED lighting. I will also place red maker lights in place of the class lights (lit of course). As I progress, please feel free to make suggestions or recomendations to further help my modeling skills. More to come! ~Nico |
|
iandrewmartin
Engineer
Last mile, first mile, where the real railroading happens
Posts: 35 
|
Post by iandrewmartin on Jul 23, 2017 20:54:21 GMT -5
Nico
I like that scheme. Smart in more ways than one. Looking forward to the photos of the unit in paint.
|
|
Deleted
Deleted Member
Posts: 0
|
Post by Deleted on Jul 31, 2017 18:25:40 GMT -5
nice looking brain storm
|
|
|
|
Post by train1922 on Aug 8, 2017 19:54:55 GMT -5
UPDATE AUG. 8 Since the last post, I've done some light work to begin the painting process. I cut two pieces out of the metal weight for the speakers and drilled holes in the shell for the ditch lights. Today I primed some of the bigger parts and I'm currently letting them dry for paint tomorrow. 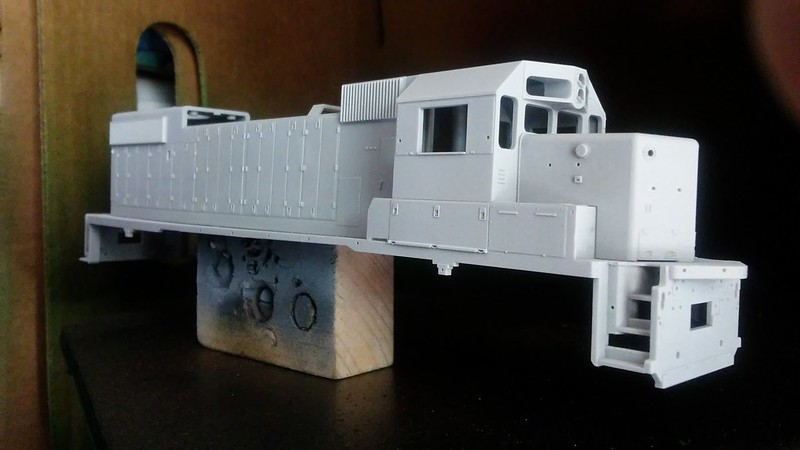 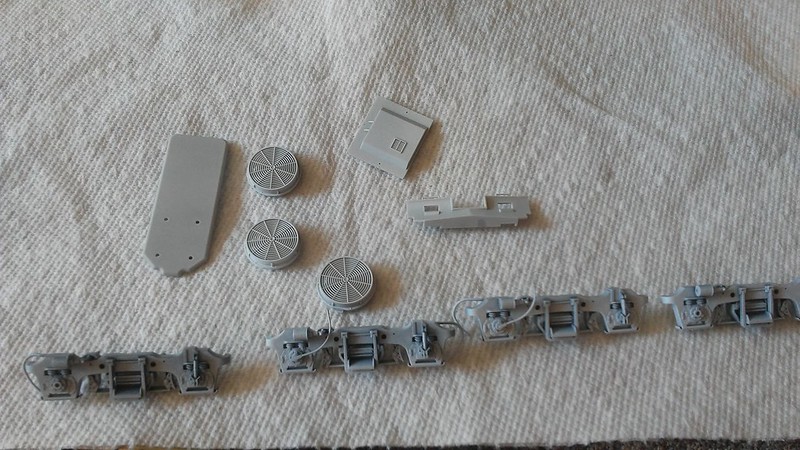 Didn't prime the fuel tank though, Im afraid of damaging it. Anyone know how to remove it on a P2K model? Also I'm open to suggestions on truck color. Take a look at the previous post's pics and tell me silver or black. Ill update again once I've painted some more. Hope to hear your feedback! ~Nico |
|
Deleted
Deleted Member
Posts: 0
|
Post by Deleted on Aug 8, 2017 20:39:55 GMT -5
Would be nice to see the build pics as the photobucket ones have been blocked by photobucket.
|
|
|
|
Post by train1922 on Aug 30, 2017 8:49:19 GMT -5
Would be nice to see the build pics as the photobucket ones have been blocked by photobucket. Just tried Flicker. Do they work now? |
|
|
|
Post by jmlaboda on Aug 30, 2017 15:39:35 GMT -5
I see pictures now...
|
|
Deleted
Deleted Member
Posts: 0
|
Post by Deleted on Aug 31, 2017 0:56:48 GMT -5
See them now thanks following along
|
|
Deleted
Deleted Member
Posts: 0
|
Post by Deleted on Nov 7, 2017 0:56:16 GMT -5
Any further updates on this unit.
|
|
|
|
Post by train1922 on Nov 7, 2017 23:15:42 GMT -5
Any further updates on this unit. Made an error while painting two small sections so im waiting until I can get some lacquer thinner to remove it. All thats really left on the shell is the black and some minor touch up. I'm also aiming to purchase the LokSound decoder in the near future. |
|
EMDX6043
Chairman
Future ex-modeler
Posts: 837
|
Post by EMDX6043 on Nov 8, 2017 6:44:12 GMT -5
Uh oh...are the parts metal? You might not want to use lacquer thinner on plastic. What kind of paint are you using?
The progress looks good though. The fuel tanks are held on by double-sided tape I think...at least they were on every P2K model I've worked on. They can be a pain to remove. You might be better off just masking everything off and spraying it in place on the frame. Black for the trucks is my vote too.
|
|
|
|
Post by train1922 on Nov 8, 2017 22:38:05 GMT -5
Uh oh...are the parts metal? You might not want to use lacquer thinner on plastic. What kind of paint are you using? The progress looks good though. The fuel tanks are held on by double-sided tape I think...at least they were on every P2K model I've worked on. They can be a pain to remove. You might be better off just masking everything off and spraying it in place on the frame. Black for the trucks is my vote too. The parts are plastic. Thanks for the warning! I'm using Testors "one-coat" lacquer spray paint. I've tried using regular paint thinner but its having a hard time taking the paint off. Would my best bet be just slowly continuing with that? Also, thanks for the the help with the fuel tank but how does one take the side frames off the trucks? Vote for black trucks taken. ~Nico. |
|
Deleted
Deleted Member
Posts: 0
|
Post by Deleted on Nov 9, 2017 1:10:12 GMT -5
Uh oh...are the parts metal? You might not want to use lacquer thinner on plastic. What kind of paint are you using? The progress looks good though. The fuel tanks are held on by double-sided tape I think...at least they were on every P2K model I've worked on. They can be a pain to remove. You might be better off just masking everything off and spraying it in place on the frame. Black for the trucks is my vote too. The parts are plastic. Thanks for the warning! I'm using Testors "one-coat" lacquer spray paint. I've tried using regular paint thinner but its having a hard time taking the paint off. Would my best bet be just slowly continuing with that? Also, thanks for the the help with the fuel tank but how does one take the side frames off the trucks? Vote for black trucks taken. ~Nico. Nico I use super clean in the purple jug I get mine at waldo world aka Wal-Mart. Works pretty good at stripping haven't had any bad reactions yet |
|
EMDX6043
Chairman
Future ex-modeler
Posts: 837
|
Post by EMDX6043 on Nov 9, 2017 15:49:22 GMT -5
Uh oh...are the parts metal? You might not want to use lacquer thinner on plastic. What kind of paint are you using? The progress looks good though. The fuel tanks are held on by double-sided tape I think...at least they were on every P2K model I've worked on. They can be a pain to remove. You might be better off just masking everything off and spraying it in place on the frame. Black for the trucks is my vote too. The parts are plastic. Thanks for the warning! I'm using Testors "one-coat" lacquer spray paint. I've tried using regular paint thinner but its having a hard time taking the paint off. Would my best bet be just slowly continuing with that? Also, thanks for the the help with the fuel tank but how does one take the side frames off the trucks? Vote for black trucks taken. ~Nico. I've read that 91% alcohol should do it, but it might take a little while. I've never personally had to strip their spray lacquers, but I have left models in 91% for a week (I forgot...) and there was no negative impact on the plastic. |
|
artur
Chairman
Posts: 580
|
Post by artur on Nov 9, 2017 17:38:11 GMT -5
Heavy duty oven cleaner also work well and quick stripping paint.
|
|
|
|
Post by train1922 on Nov 12, 2017 19:42:43 GMT -5
Thanks for the help everyone! After looking at all of your recomendations and doing some research of my own, I found that Tamiya Lacquer thinner is plastic safe. Bought some today and it took care of the paint. I'm just waiting for it to dry a little to make it easier to clean the residue. Now that things are fixed for now, I should be able to get a lot done over Thanksgiving week as well as this week. Pics will come soon.
~Nico
|
|
|
|
Post by train1922 on Dec 8, 2017 20:35:14 GMT -5
After stripping the paint, I discovered that the masking tape had left some residue. I thought instead of doing touch up, I'd use this chance to redo the silver with a paint with no metalic flakes (which is what I had). Dispite a few bugs in the plastic and spots of the orange peele effect, it looks just as good.  I'm still having a problem with the masking tape though. When I pull off the tape, it pulls some of the paint off with it. I have some clear coat so is the solution just to hit the places being masked with that? This next picture shows my paint and clear coat.  I believe the Krylon paint is enamel and I'm not quite sure what the Tamiya clear coat is. Looking forward to getting some more work done on this model and the ESU decoder should be ordered soon (once the YouTube ad revenue rolls in  ). As always, all help is appreciated. Thanks! ~Nico |
|
EMDX6043
Chairman
Future ex-modeler
Posts: 837
|
Post by EMDX6043 on Dec 9, 2017 8:03:04 GMT -5
What kind of masking tape are you using? If you aren't already, I've had good results using the blue 3M Painter's tape. I put a fresh edge on it with a razor blade while it's on a piece of glass, which also helps to remove a bit of the tackiness. Then just be sure to burnish all your edges with a toothpick or equivalent. When I use acrylics, I go for the green Frog Tape since it actually seals the edge through a reaction with the paint.
Surface prep is also key to avoid peeling the paint off, and only handling it with gloves between the wash and paint/decal job. I'm not exactly sure what those paints are composed of either, and I don't suggest using the clear coat to cover up the residue...probably get off as much of it as you can, and let the paints dry thoroughly in between each color (maybe days). There's also a chance that there's going to be a reaction between the Tamiya and Krylon too, but again, I've never mixed and matched those before.
|
|
|
|
Post by train1922 on Dec 23, 2017 13:30:12 GMT -5
Finished the green on the body (sucks on camera). If you can see, under the green is a line where the tape has ripped the silver off. Since im using spray paint, I think I'll just spray some in a cup or piece of plastic and paint it on with a small brush.  Today the plan is to paint the trucks, fuel tank and wheels. Also, the LokSound decoder and some wire are on their way. Need to order some white LEDs too... Basically, all thats left besided the rest of the body is the small details, handrails and decals. The model will be done eventually, haha! ~Nico |
|
|
|
Post by coaldog on Dec 25, 2017 15:53:58 GMT -5
How long did you let the silver set before painting the green.
Also did you pull the tape back at around a 45 degree angle.
Did you wash the shell before painting on the colors.
Just touching on a few bases.
|
|


 ). As always, all help is appreciated.