|
|
Post by CP_8530 on Jun 18, 2015 0:20:47 GMT -5
This is one of two LLPX Geeps leased by the Ottawa Valley Railway, LLPX GP38 2221. The other is 2241, an ex-LIRR GP38-2 (modeled here: dieseldetailer.proboards.com/thread/14187/llpx-2241-lease-unit-gp38 ). Both were wrecked by in 2009 (and later rebuilt), after they hit a washout caused by three beaver dams failing. Cheap beaver build quality was the likely culprit. The GEXR had a pair of near idential units on lease too (2210 and 2236). A NIB Santa Fe Atlas Master Series GP38 was procured from teh internetz via a seller in Fergus ON, stripped and modified (it was a PITA since Atlas made a lot of the shell plastic the same colour as the shell paint). Being a relatively stock GP38 with origins of Detroit, Toledo and Ironton, there's no fancy LIRR class light cutouts like the 2241, but a few things needed work: the nose had its front class lights sanded clean, and the rear ones were drilled out for new Cannon & Co punchouts. A new Details West plow with shaped corners was added, an MbyE K3 horn, ditch lights added at the front and rear, new firecracker antenna, new larger electrical cabinet air filter box (larger than the stock one), stiffener ribs added on the blower duct, extra jacking pads by the frame corners, more grab irons on the nose top around the sand filler and a toilet air vent. Stuff left off for now include modified cut levers (to be applied later, but the pilot corners have already been notched), smaller 2600 gal fuel tank, cab interior and glazings, and some other minor details. Work has already started on the frame to fit a speaker for the sound decoder. Starting point: 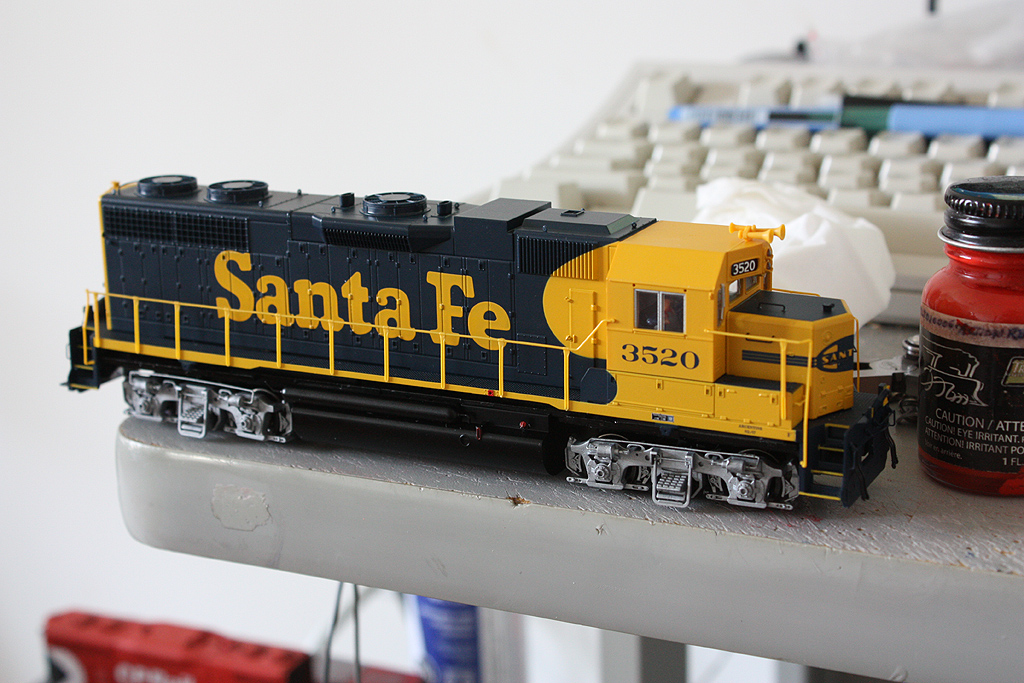 After some work, staring down the paint shop: 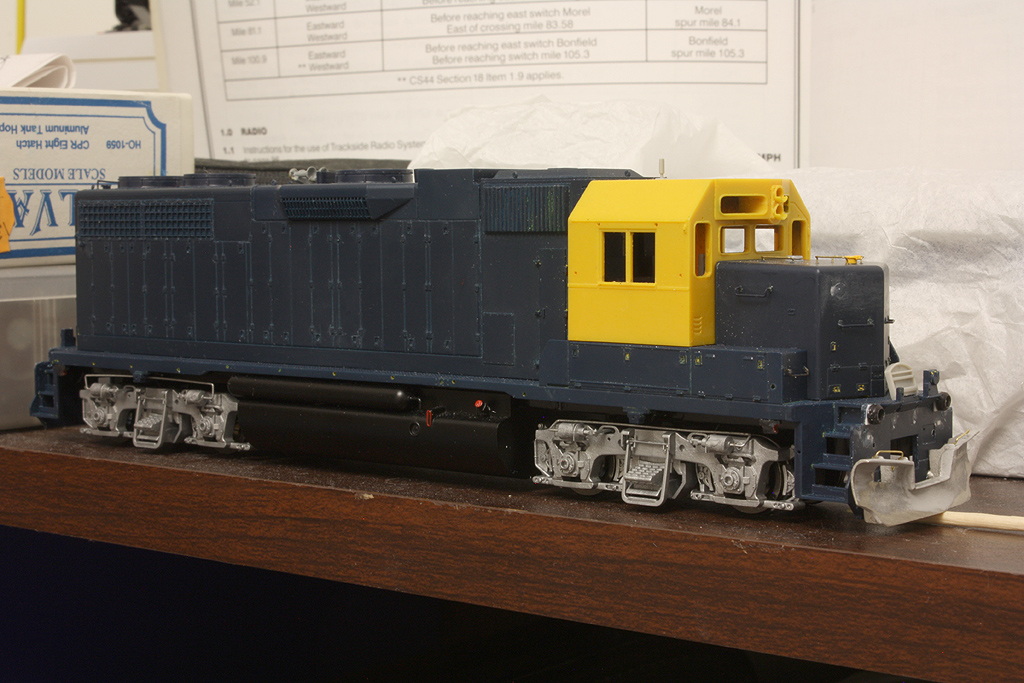 Hmm, gotta push that electrical cabinet air filter box down more after I paint it all. 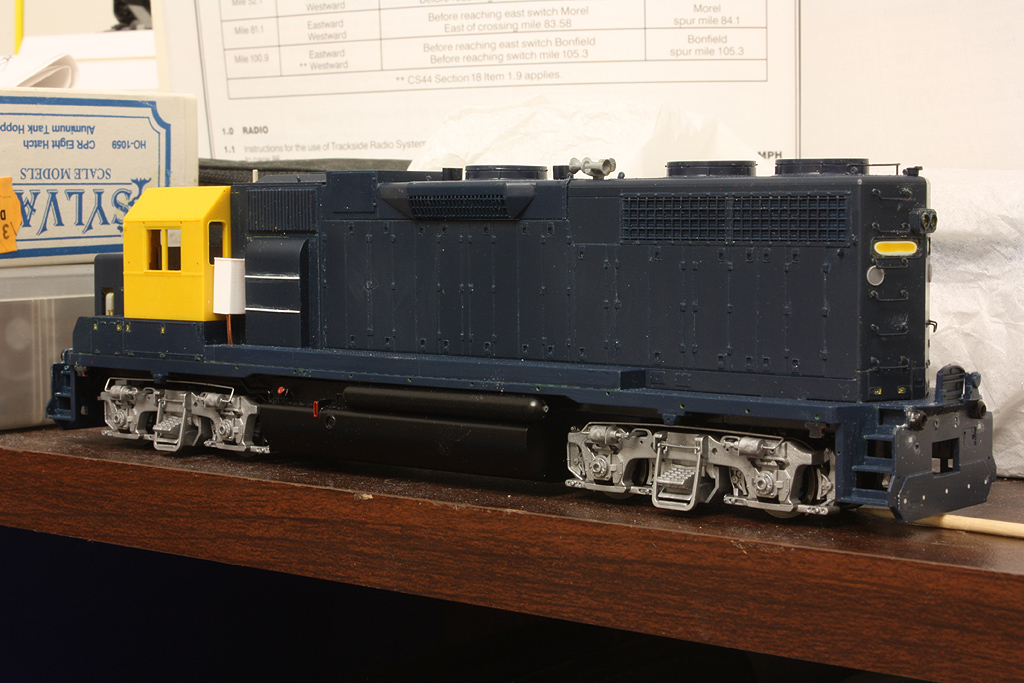 Pooper vent on the nose and extra grabs. 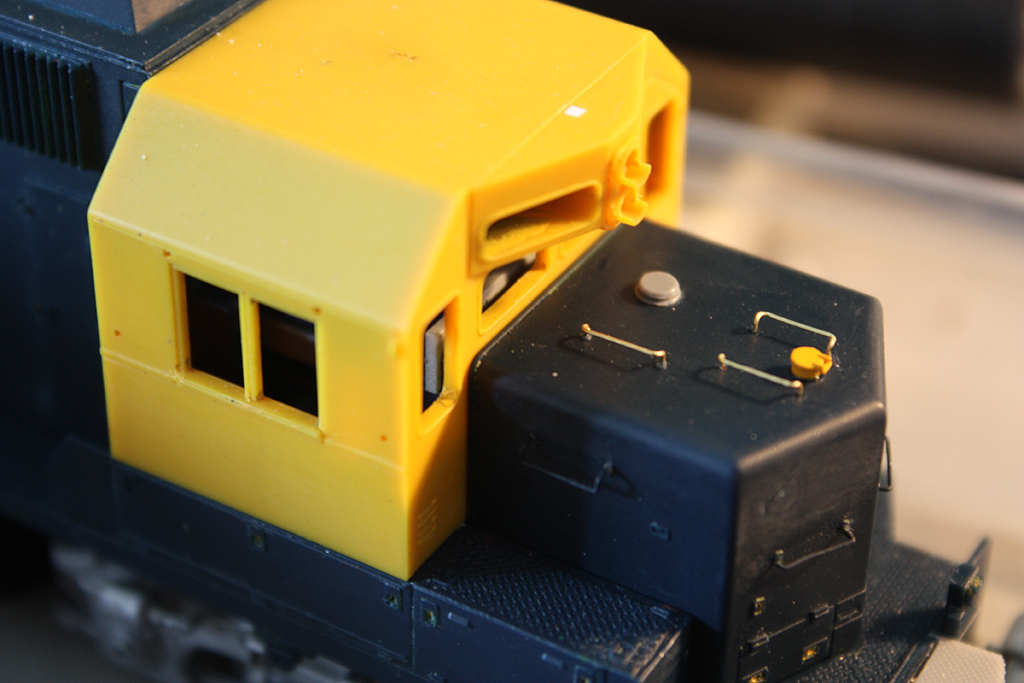 Front: 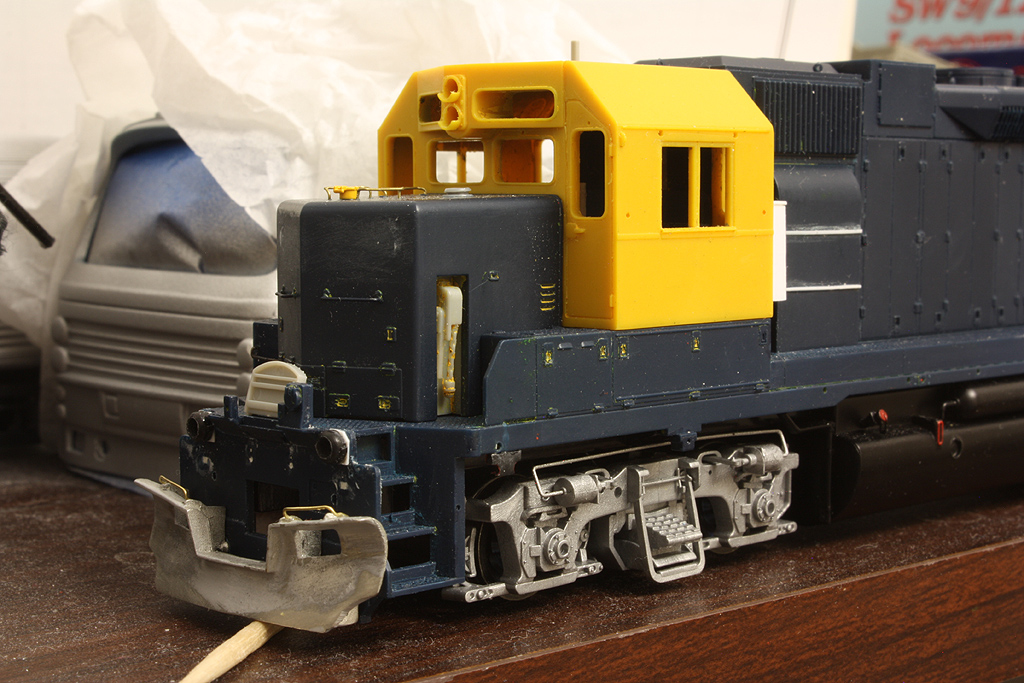 |
|
Deleted
Deleted Member
Posts: 0
|
Post by Deleted on Jun 18, 2015 1:27:30 GMT -5
nice start
|
|
|
|
Post by iomalley on Jun 18, 2015 12:20:00 GMT -5
Glad you picked up on the DT&I double grabs on the nose, most people miss them... I was just saying to myself, "Hmmm, its been a while since a new unit has hit Dan's backshop..."  |
|
|
|
Post by CP_8530 on Jun 21, 2015 12:08:47 GMT -5
Glad you picked up on the DT&I double grabs on the nose, most people miss them... I was just saying to myself, "Hmmm, its been a while since a new unit has hit Dan's backshop..." There's about 9 different Geeps sitting around this backshop in various states of disrepair. I just need to finish some ! I ran out of Tamiya FSP, so some CN #11 white-grey was used instead: 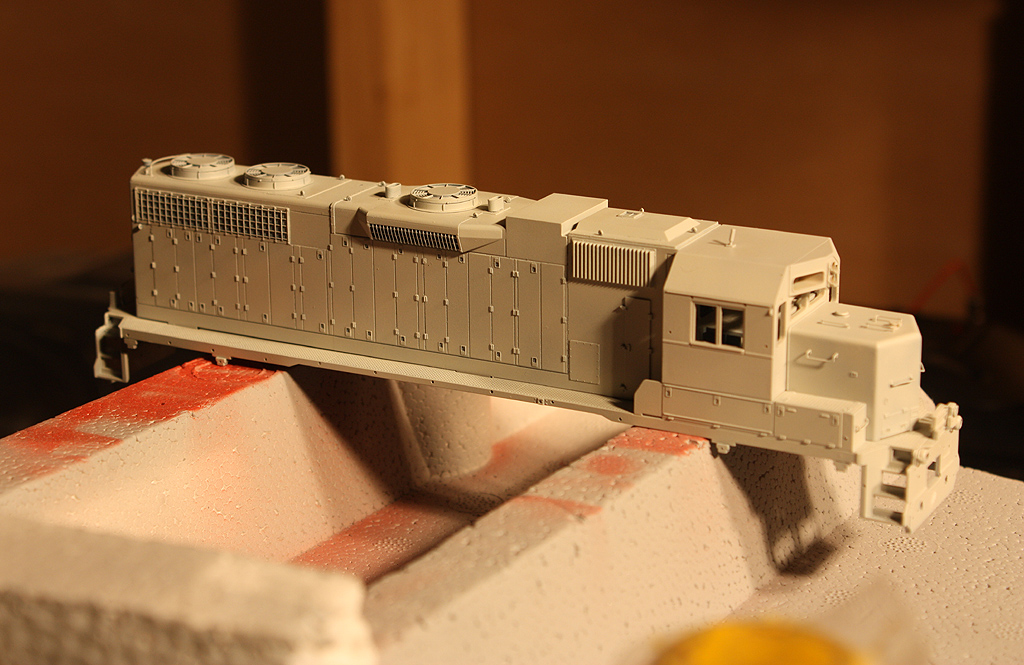 Like I mentioned when I did up 2241, CP diesel yellow (from the maroon & grey daze) makes a good non-faded bright yellow. The UP Polyscale I had bought was better-suited for a 20-year old desert-yellowed unit (and it smelled like peanut butter). 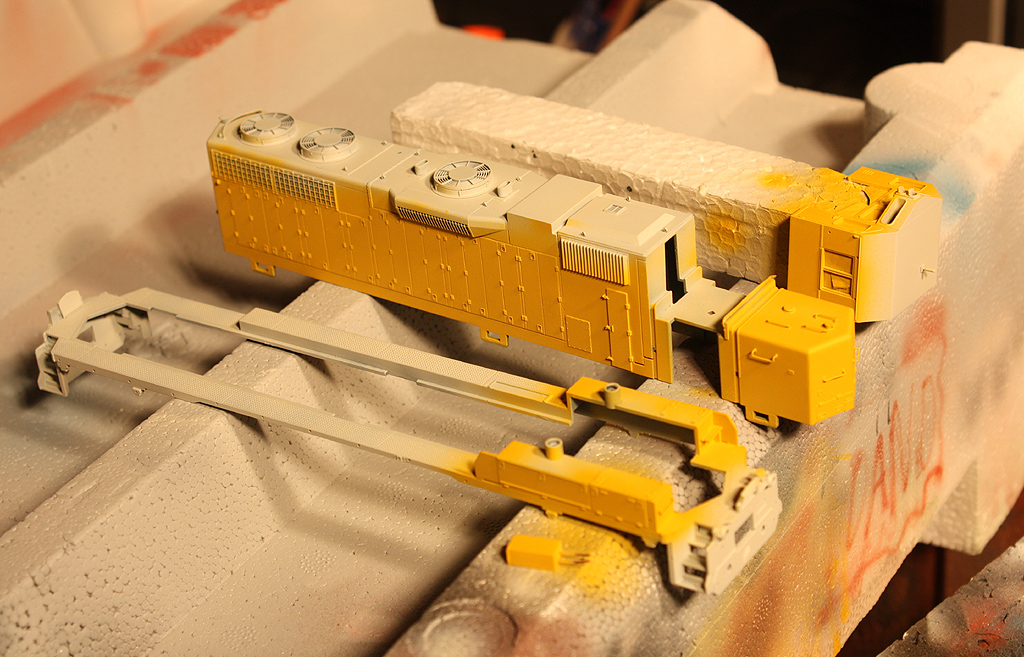 |
|
|
|
Post by CP_8530 on Jul 10, 2015 5:02:57 GMT -5
Slow progression: the main body components including the cab and hoods are getting masked off for the upper coat of grey. Mini-Sinclair and firecracker antenna visible. Hard to see it, but I added a few more "rain gutter" tracks under the single gutter the model had using some thin styrene strip. The sunshades will cover the middle area: 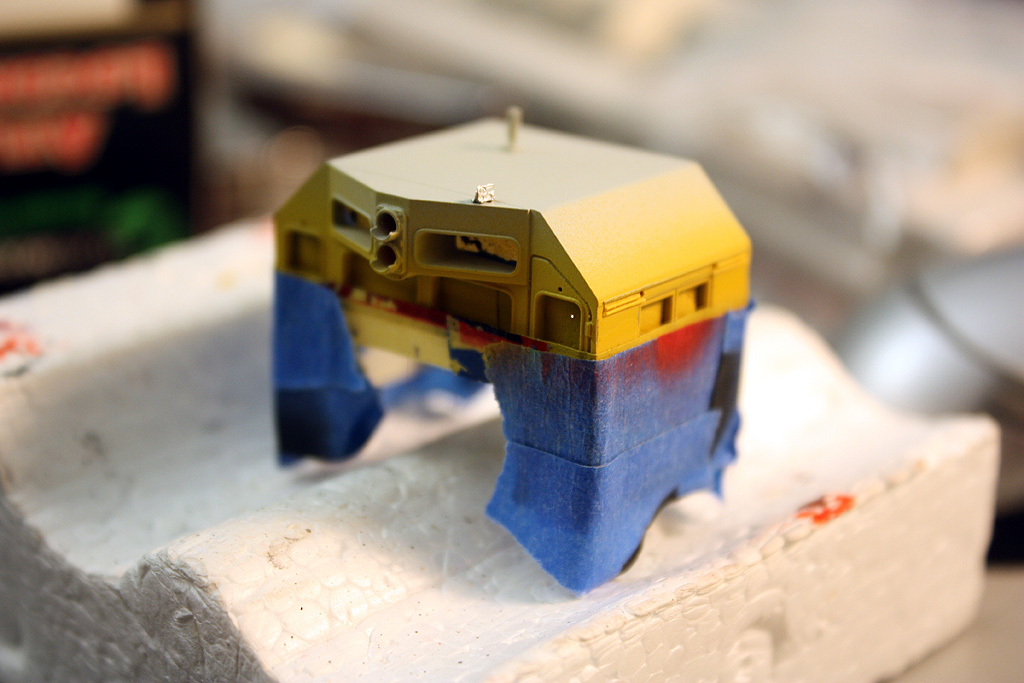 And the new smaller 2600 gallon fuel tank has arrived, replacing the 3600 gallon one the model came with. It was smooth, so I lightly sanded it with 400 then 800 grit automotive sandpaper to help the paint stick better (being handled by the fuel tank often, custom painted models frequently start chipping paint here if the surface is too smooth). Air tanks were pried off, sanded and repiped. I had also modified the rear weight before to give more room, as this unit's getting a speaker there for an ESU sound decoder in the future (that Atlas light board/basic decoder will get removed in the future). Sideframes also removed for the paint shop. A pair of wild GEXR Geeps await some frame sill mods and other things in the background. 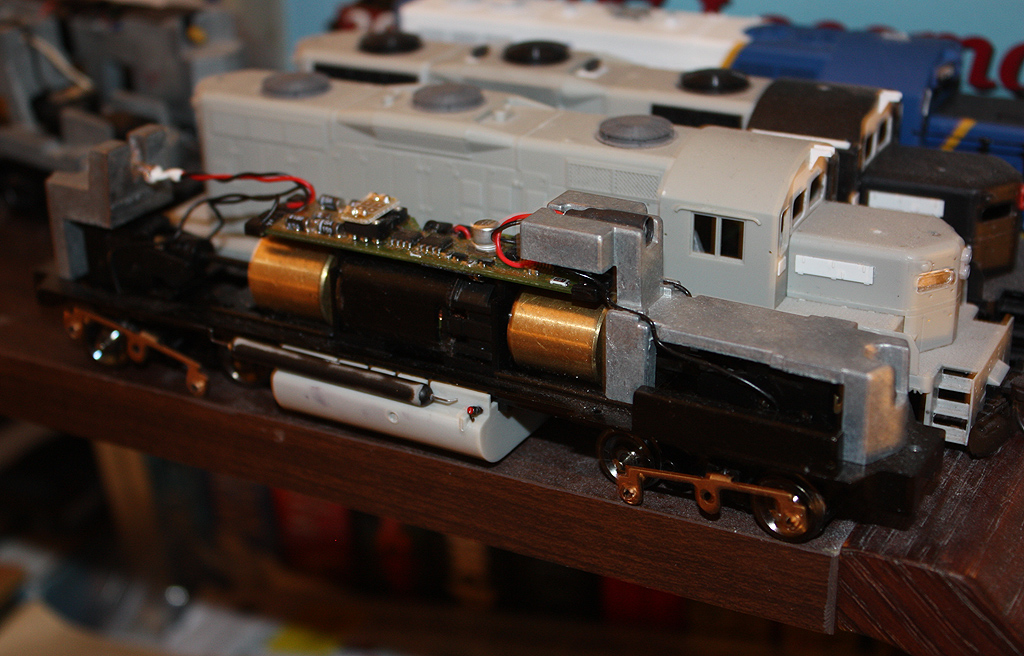 |
|
|
|
Post by CP_8530 on Jul 29, 2015 22:34:20 GMT -5
The frame was stripped and I gave the smooth black paint a rough finish via sandpaper, then painted the Pollyscale UP HMGrey on. As mentioned before, some weight milling was needed, and a bit of milling here and there to be able to clear a few things added and the planned ditchlight wiring. The painted truck sideframes were also installed, although I'm not found of the smooth plastic Atlas uses for them, and they're difficult to sand to give a rougher finish. The ESU Loksound decoder (a blank one to be programed and loaded with the 16-645E sounds at a later date and speaker arrived. But silly me had forgotten ESU switched from 100ohm to 8ohm speakers on their latest decoders, so I had ordered the wrong one. A Railmaster bass pro reflex speaker I was saving for something else tight had to be used. I built up a little speaker mount at the rear with styrene and screwed it to the frame. The usual PITA wiring was needed. 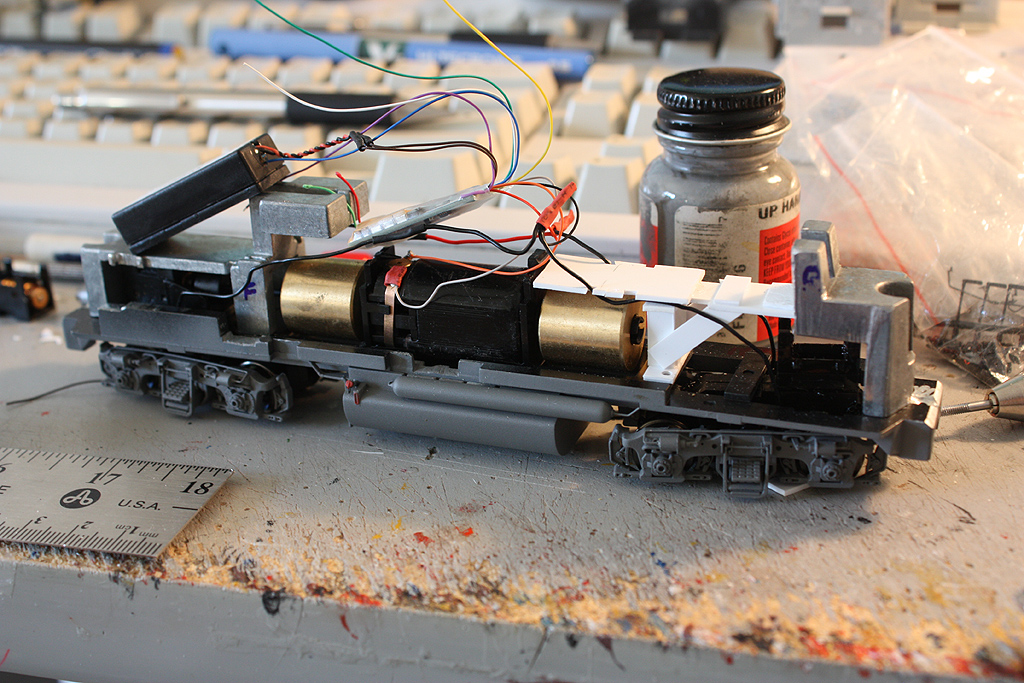 With mount and speaker installed, still needs the LED lighting added and wired up (those GEXR GP9's are really gathering dust): 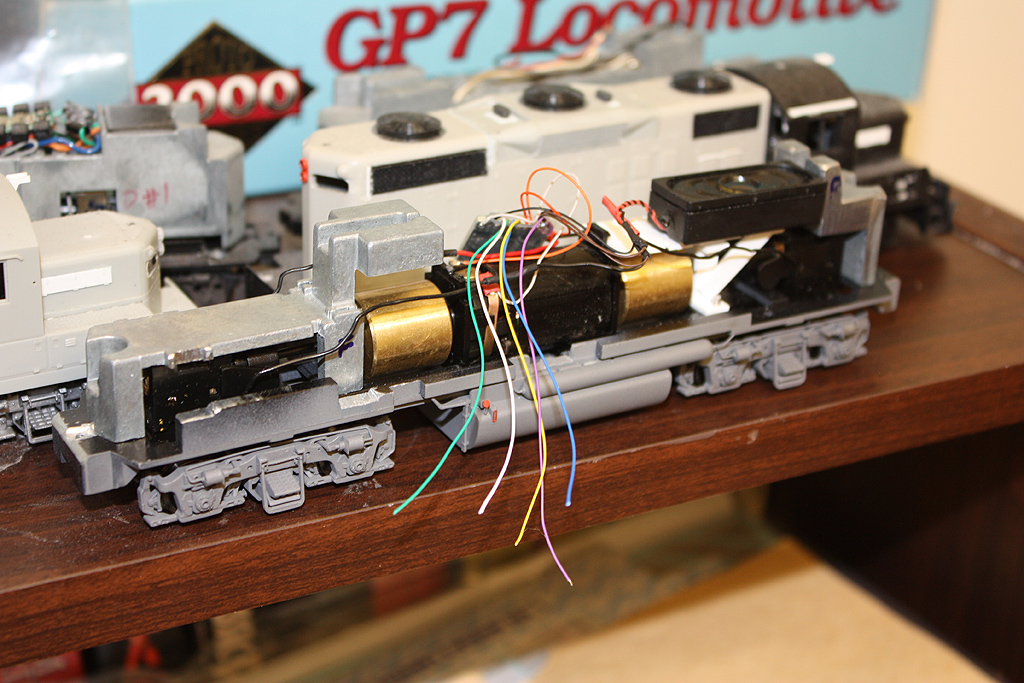 The cab interior was prepped at this time. Rather than just gluing the figures to the seats like they come from Atlas, I drilled holes in the figures and seats and ran steel piano wire to keep them in place. It was, erm, rather uncomfortable for the crew... 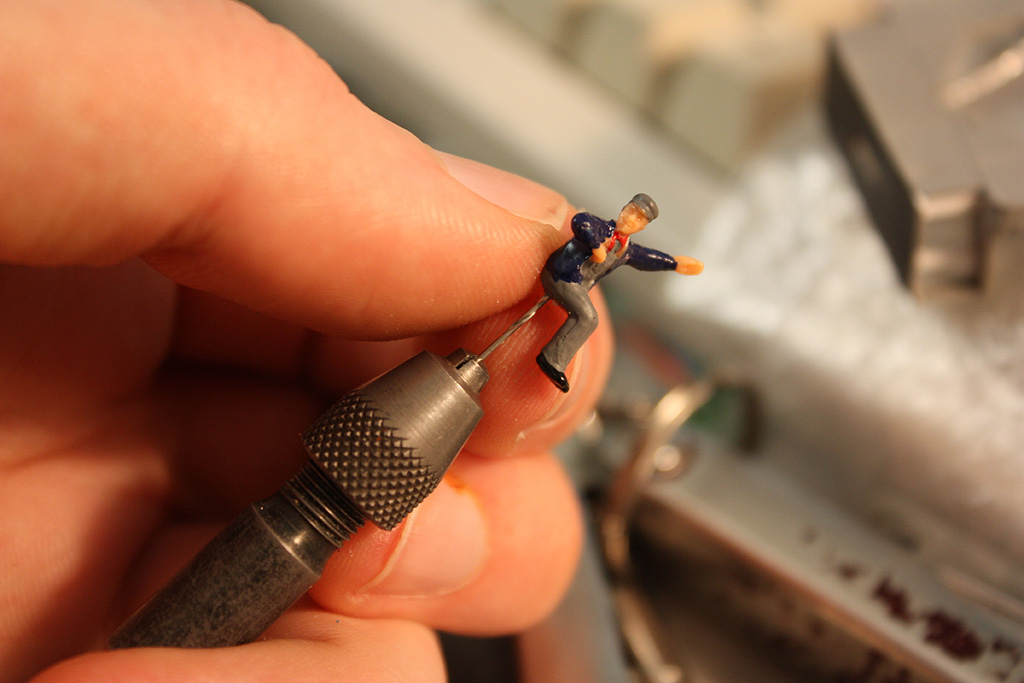 Then decalling began. Here's a quicke shot of the cab with the custom LLPX numerals that Sean made (the Microscale set is too undersized) and some Microscale numberboard decals added. 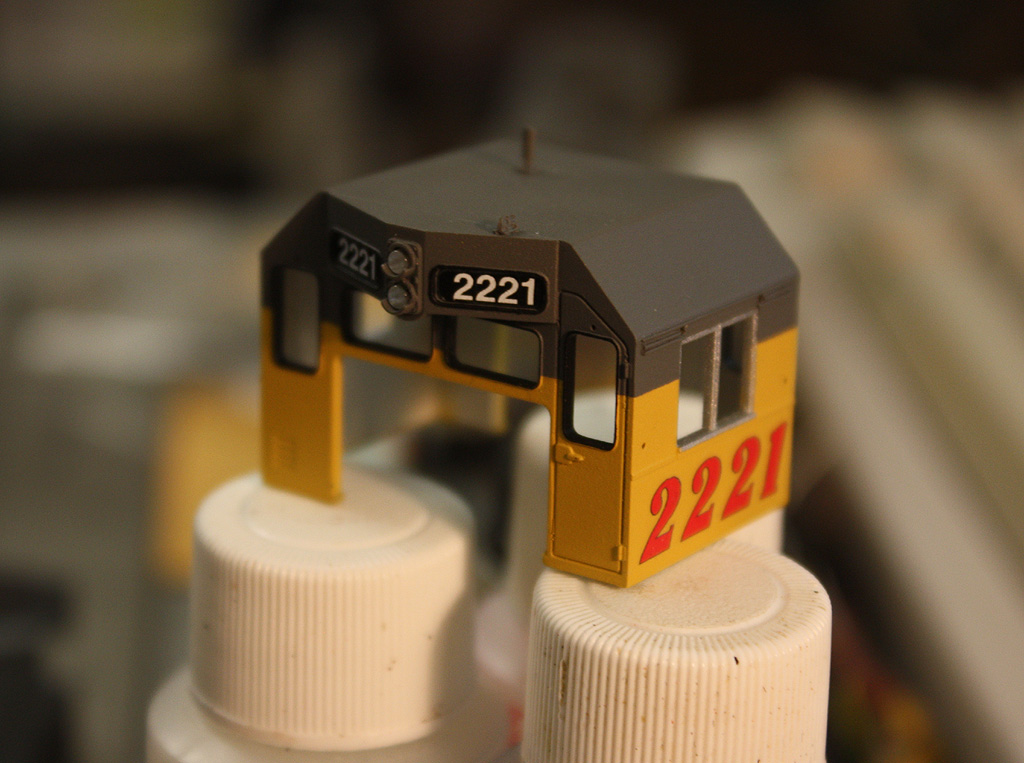 |
|
|
|
Post by PVRR 2647 on Jul 30, 2015 22:35:55 GMT -5
MrDan!~
Nice build. Things seem to be coming together nicely, those Atlas' can be a real PITA for sure. I learned the hard way doing my Gp40-2 and Rd Slug combo. Keep us updated on your progress when get the chance.
Sincerely,
PVRR2647
|
|
|
|
Post by CP_8530 on Jul 31, 2015 4:28:19 GMT -5
MrDan!~ Nice build. Things seem to be coming together nicely, those Atlas' can be a real PITA for sure. I learned the hard way doing my Gp40-2 and Rd Slug combo. Keep us updated on your progress when get the chance. Sincerely, PVRR2647 The thing I hate most about them is everything (body, frame, chassis, weights) fits together so tightly there's hardly any room to run wiring for ditch lights, without milling things down and grinding wiring channels. |
|
|
|
Post by PVRR 2647 on Jul 31, 2015 22:08:26 GMT -5
Mr.Dan!~
Tell me about it! I have the detailing mostly finished and the DSD installed in the mother unit, but I am still trying to figure out how to power the slug from the mother. I going to run the motor power wires between the units, and then run the pickup wires from the slug back to the mother unit. Looks like major surgery is going to be required to route the wires to their proper locations.
Sincerely,
PVRR2647
|
|
|
|
Post by CP_8530 on Aug 6, 2015 4:07:26 GMT -5
Time for a bit of progress: Seasonal allergies are a PITA when they pop up (stupid pollen) so in between tissues it was time to pre-wire the ditch lights. I bought a few strips of SMD LED's and rolls of magnet wire cheap from China (since the LHS was charging an arm and a leg for just a pair of pre-wired ones). Once you get the hang of it, it's not too hard to wire them up: 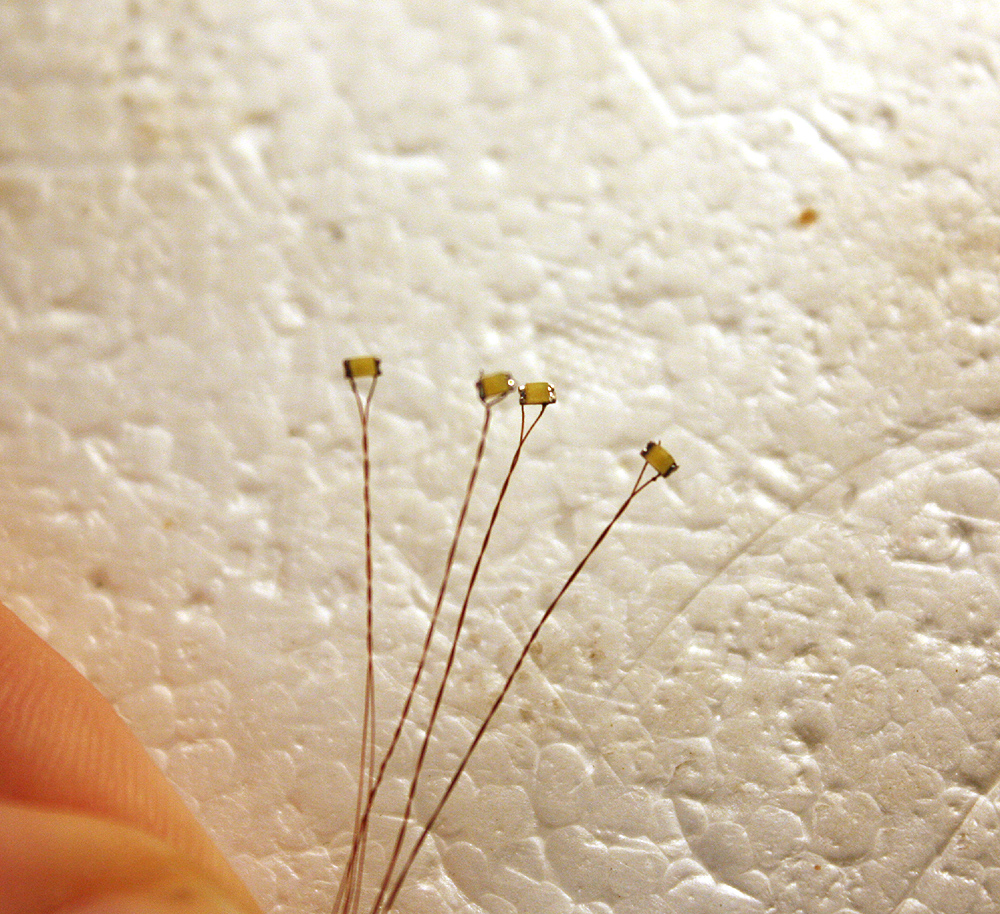 Front ditch lights ready to receive them at a later date, with the cut levers being built up out of 0.015" brass wire. Naturally the bends were different so I couldn't use the stock ones, but cut off the brackets and drilled #78 holes in them for the new wire. Numberboards already decalled and installed. The DW plow looks nicer now that I ground off the cast-on open MU hatches with a Dremel and filled and sanded any imperfections. 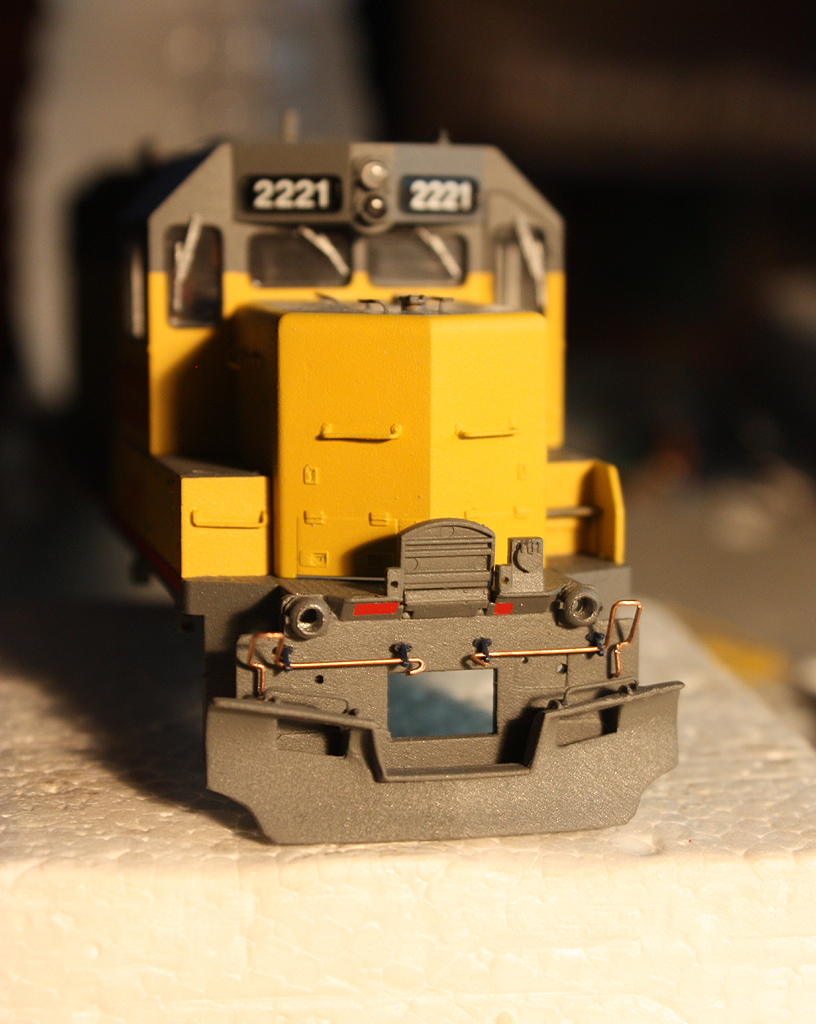 Now, burning the midnight oil, a few parts were scratchbuilt and painted up for final install once the model is ready. First is the waste oil/fuel retention tank behind the fuel tank. You can't really see much of it in most photos, so I just scratchbuilt it out of styrene like I usually do, with a wire for the drain plug: 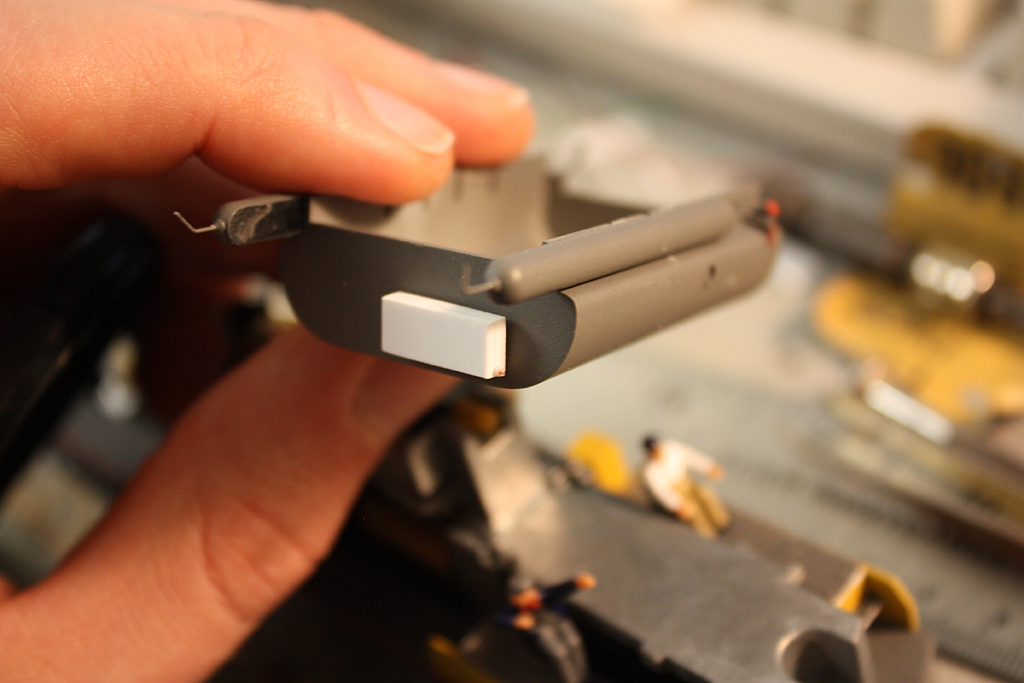 The plastic Atlas sunshades are a little flimsy (and the pins broke on one already!) so some P2K sunshades from a GP9 were used, with brass wire CA'ed behind to allow them to bend if rough-handled: 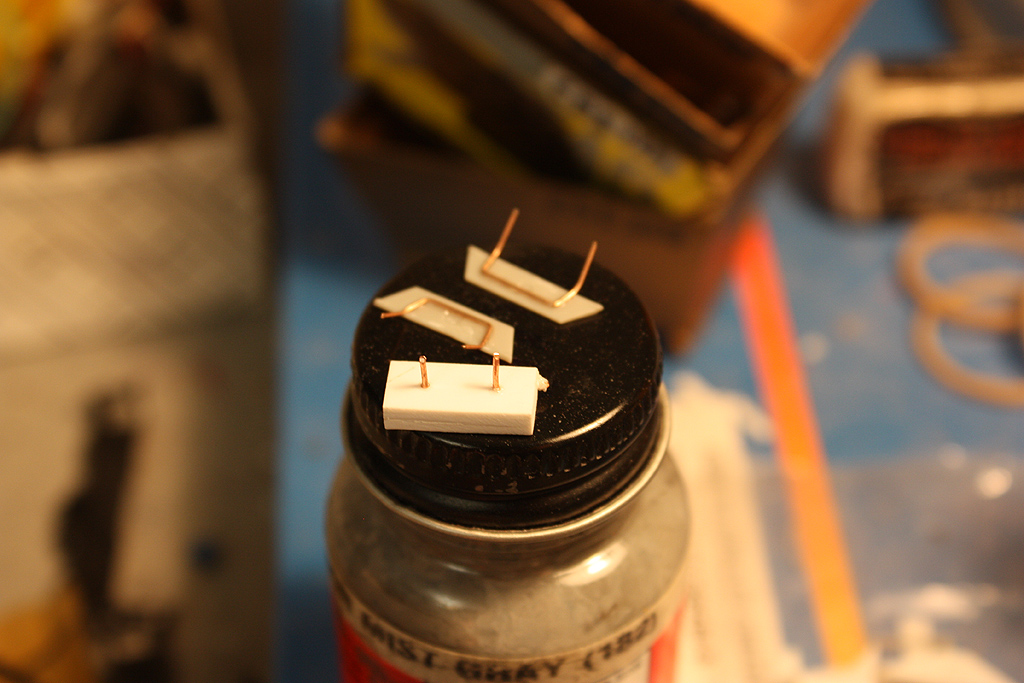 Some of the stanchions on the end handrails required modifications due to the ditch lights going where they would normally insert on the pilot ends. I cut them off to length, and used a piece of styrene with a 0.010" brass wire in it to hold them on (I sanded both mating surfaces of the styrene and plastic stanchion to rough them up for better CA glue adhesion). Holes was drilled on the pilot step edges of the frame so the wire could go through. 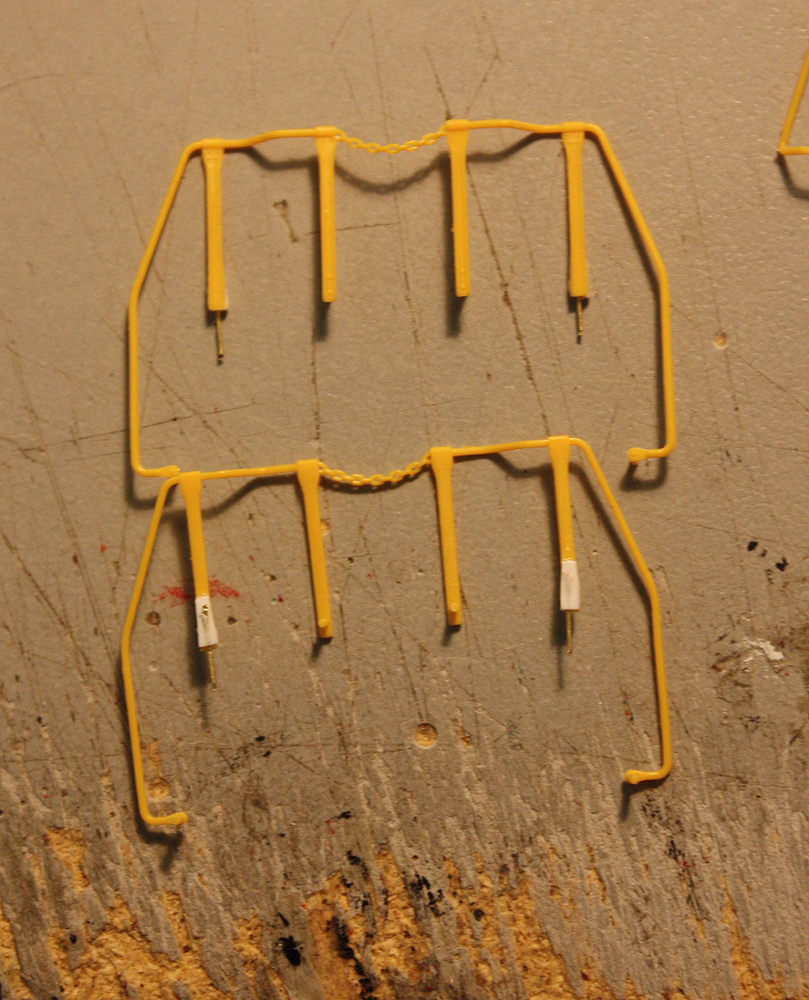 Time to paint: All the handrails and msc parts went in for a good spray of grey. The white handrail ends were hand-painted on. Then everything received a clear coat. Probably won't fully stop the paint from flicking off the handrails over time, but I find it helps. 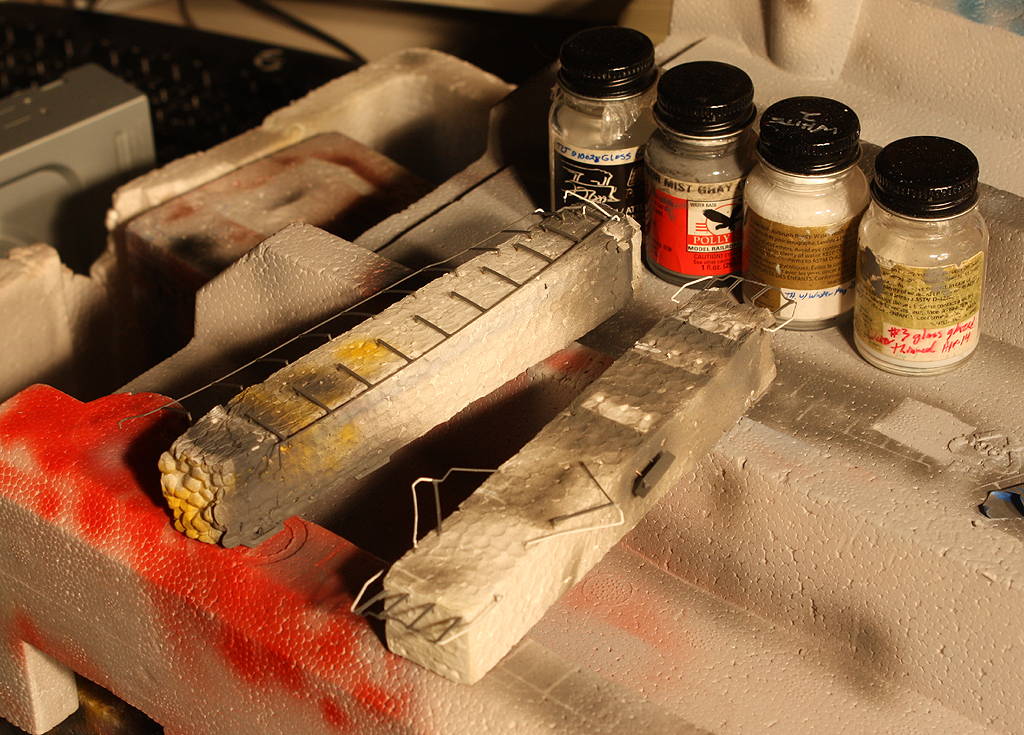 The usual stick 'em all on Styrofoam or tape and paint method was used. 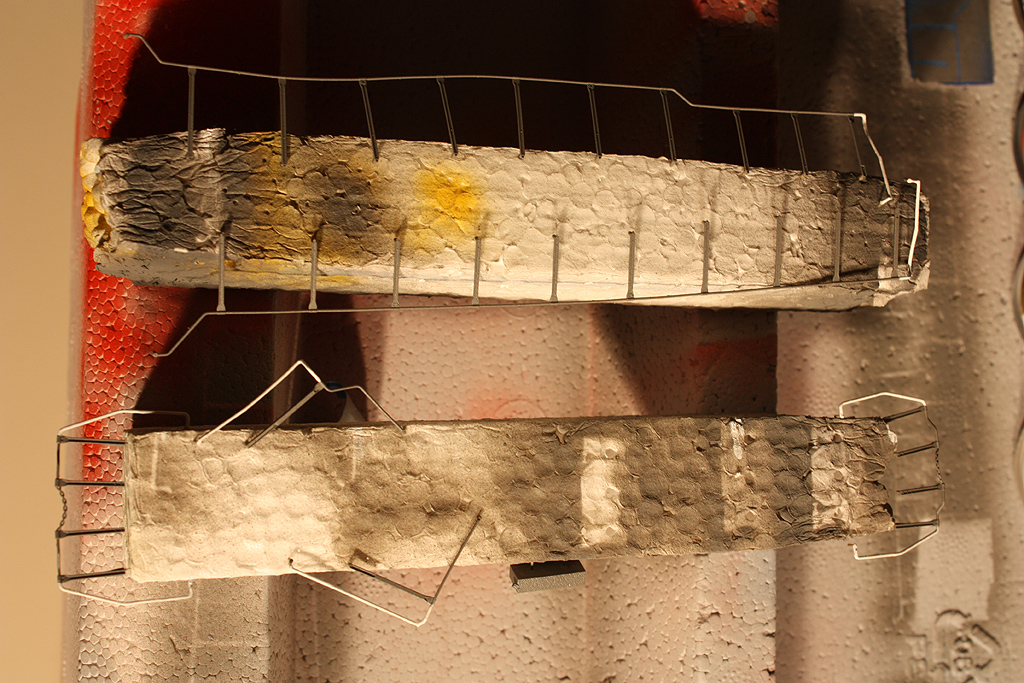 All for *yawn* tonight (or this morning I should say). |
|
|
|
Post by PVRR 2647 on Aug 6, 2015 19:58:57 GMT -5
MrDan!~
I really like your method for holding the handrails for painting. I used to try to stick them to tape on a paint stirring stick with, with disastrous results. Your block of foam method is brilliant!
Sincerely,
PVRR2647
|
|
|
|
Post by CP_8530 on Aug 27, 2015 22:14:44 GMT -5
To finish this one off: Chassis all wired up with the Loksound Select 73400 hardwired in, and a Railmaster Hobbies speaker installed. Ditch lights are ran with some magnet wire to SMD LED's wired in series, with about 570 ohms of resistors at each lead at the SIP plug. I think I calculated around 530 ohms for the 3mm headlight LEDs. 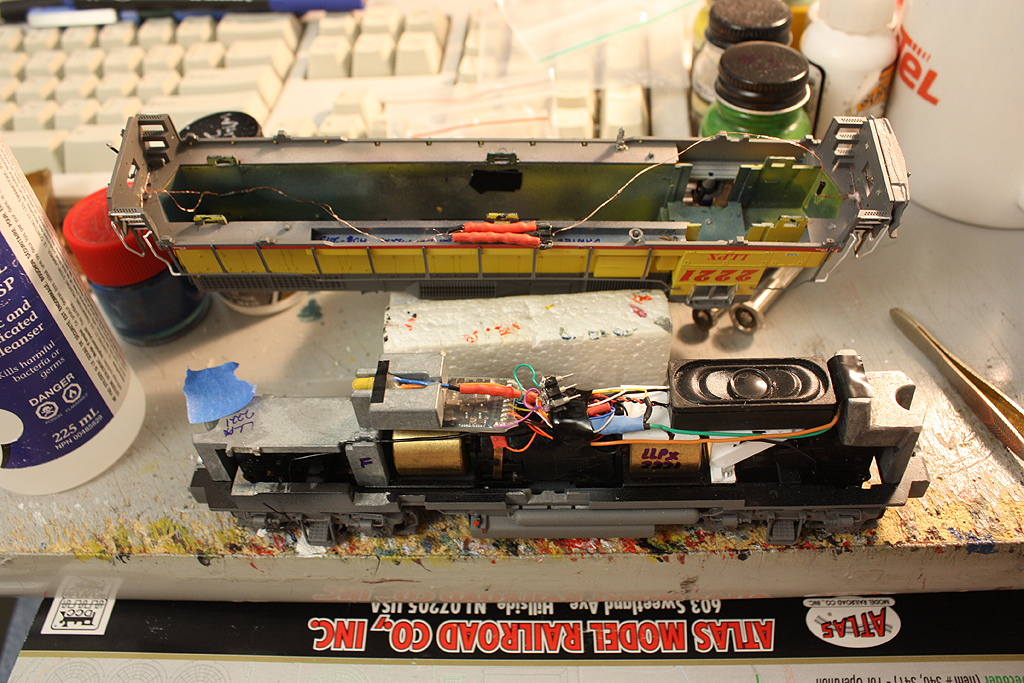 One modification I did was to fasten the loose Atlas plastic sill/frame to the body. I did this by drilling about 6 sets of holes in the sill where the shell clips line up, drilling holes there too, and inserting steel pins bent from 0.015" wire. A bit of glue on the inside of the shell where they are makes sure they stay in place but allow the sill/frame to move. 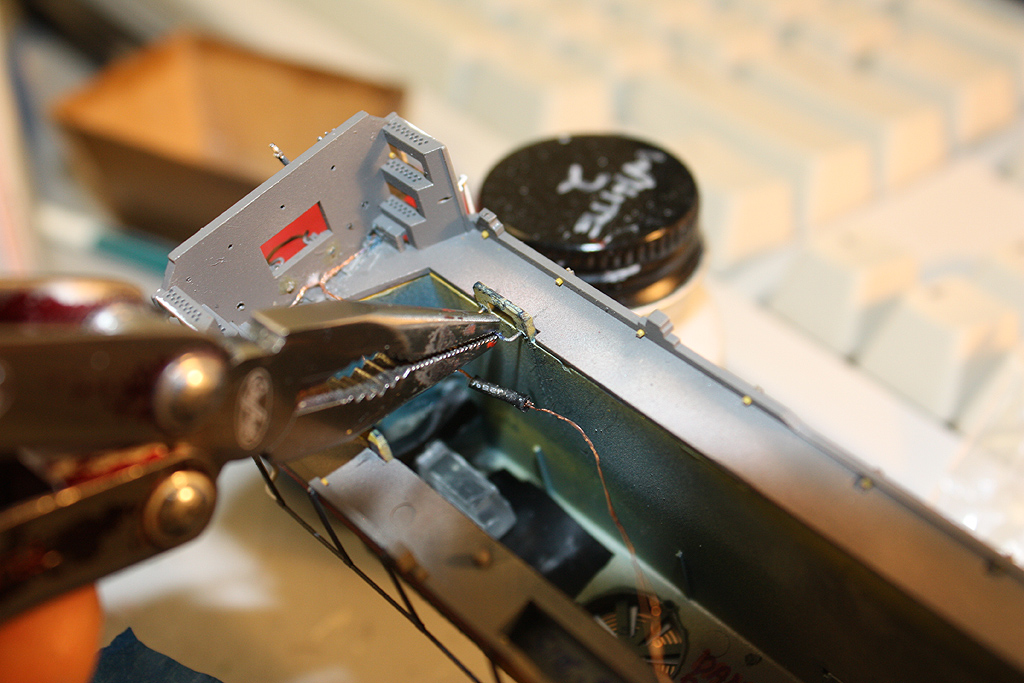 Closer view of the bird's nest of wiring: 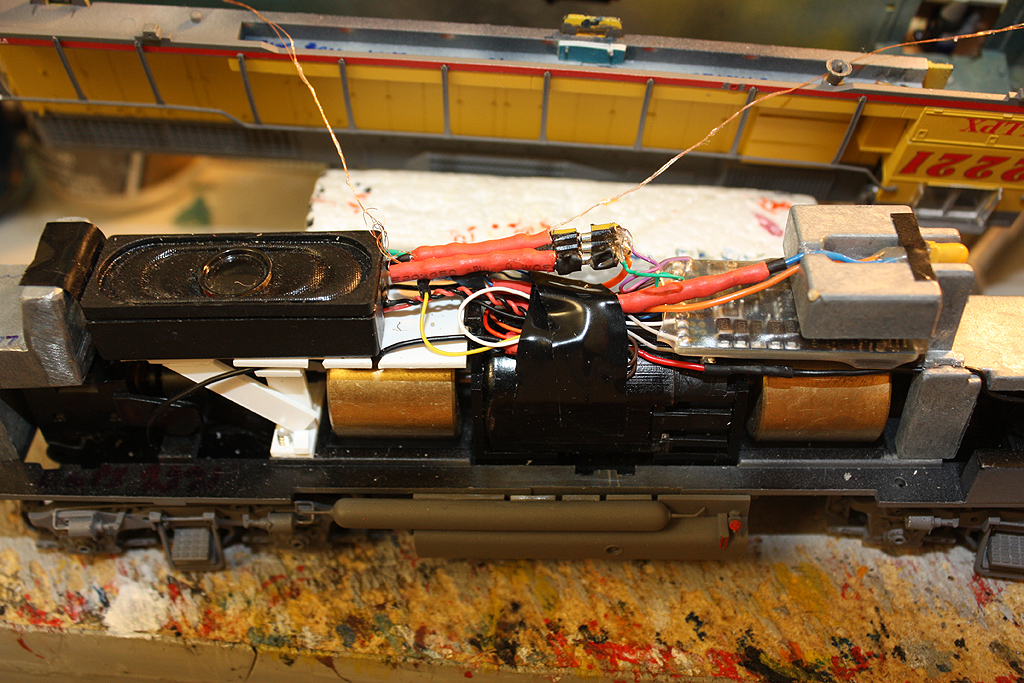 Fin! 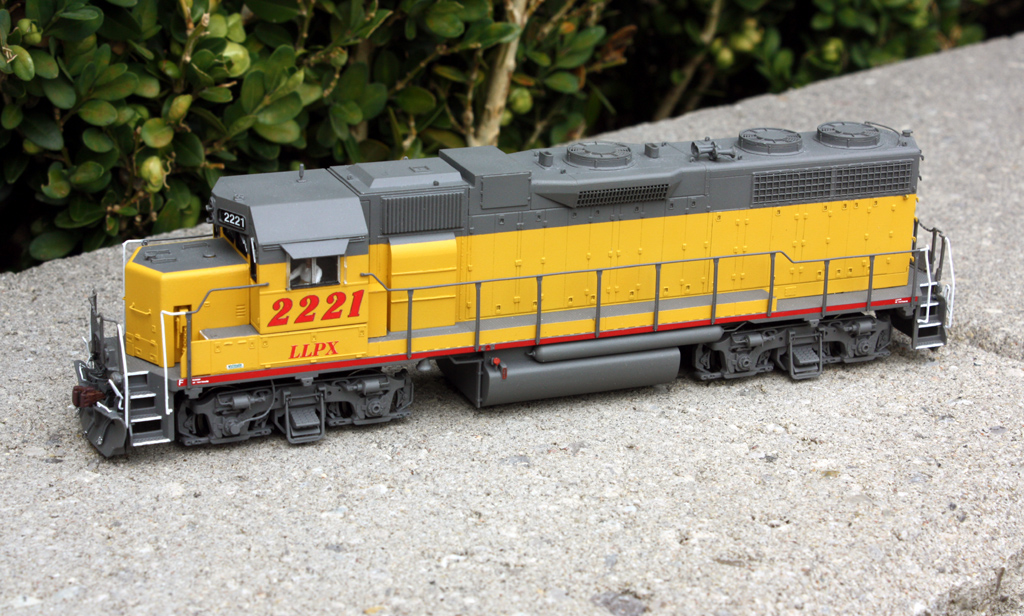 Forgot to paint the firecracker antenna blue, so: 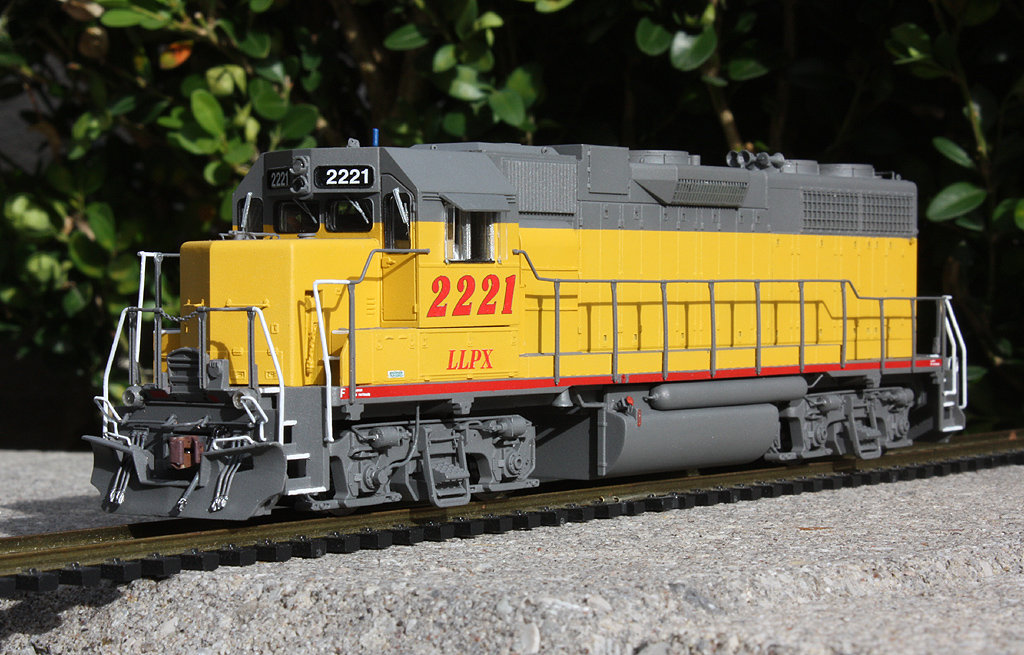 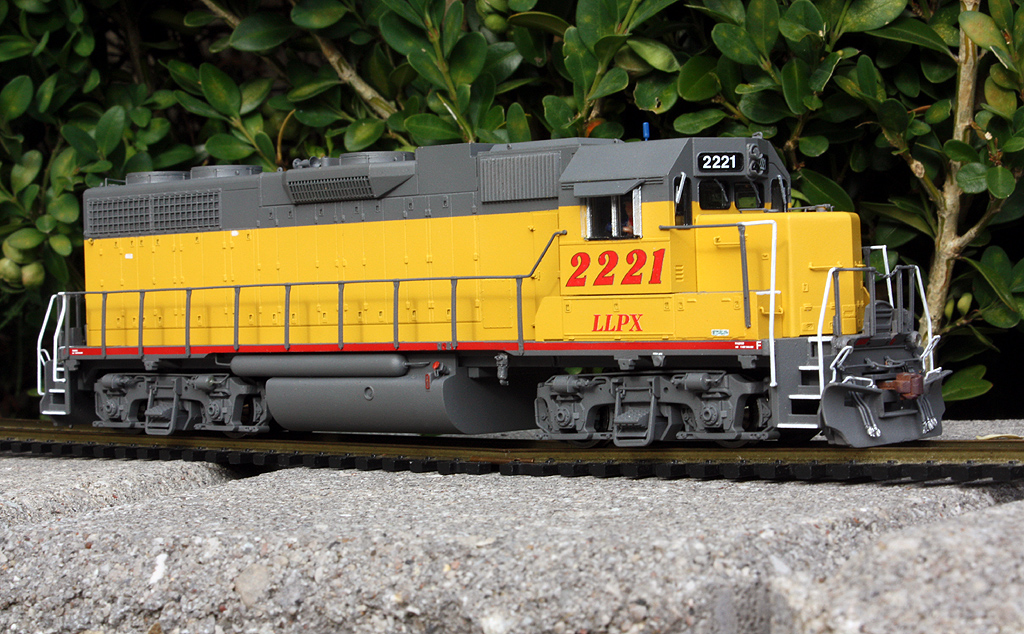 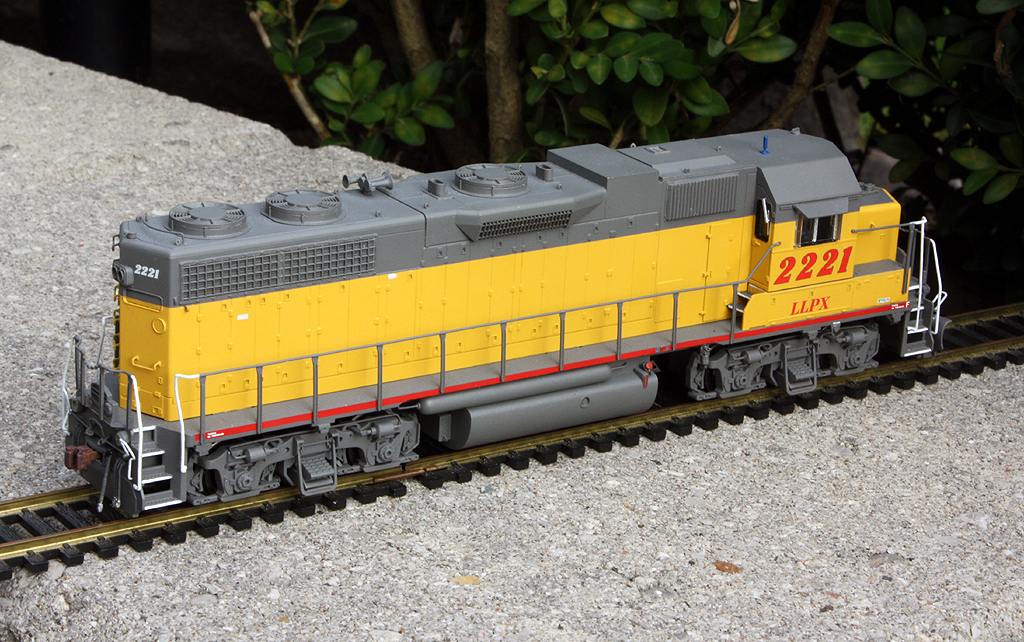 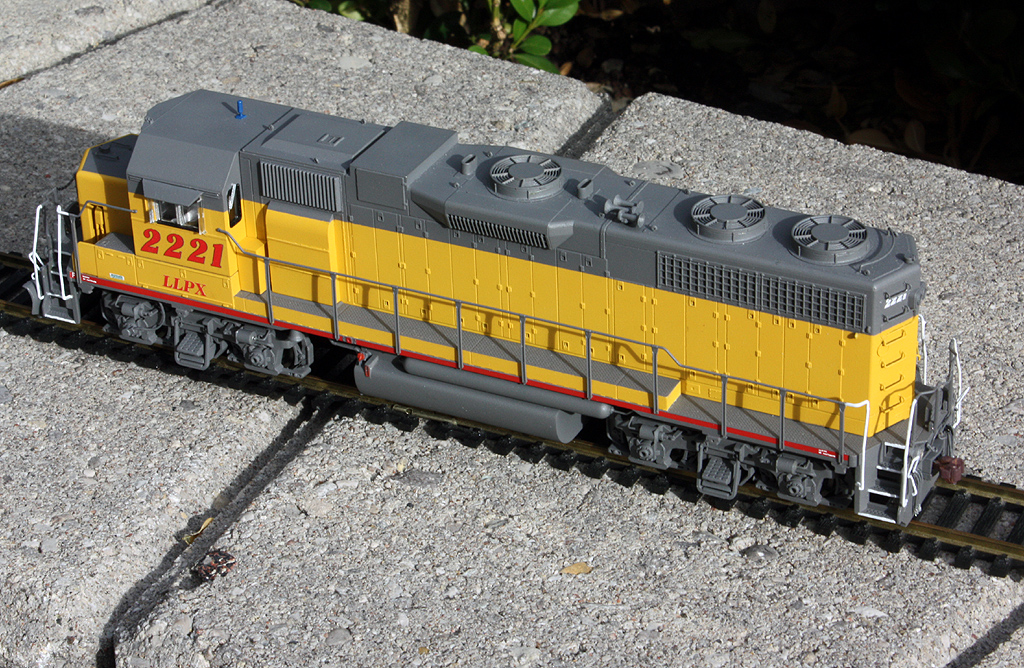 |
|
|
|
Post by CanadianRails43 on Aug 28, 2015 1:00:08 GMT -5
Snazzy Geep there MrDan!! Superb work!!
|
|
|
|
Post by analogbeatmaker on Aug 28, 2015 8:41:54 GMT -5
Nice modeling Dan! Are you gonna keep it fresh or weather it up a bit?
|
|
|
|
Post by CP_8530 on Aug 28, 2015 21:01:58 GMT -5
Nice modeling Dan! Are you gonna keep it fresh or weather it up a bit? It'll be fresh to match the other one I did up (LLPX 2241). |
|
|
|
Post by cpcnguy on Aug 28, 2015 21:21:34 GMT -5
Awesome Dan!
|
|
|
|
Post by simulatortrain on Sept 1, 2015 8:51:53 GMT -5
Very nice work!
|
|


