|
|
Post by cyeargin on Feb 15, 2009 14:49:31 GMT -5
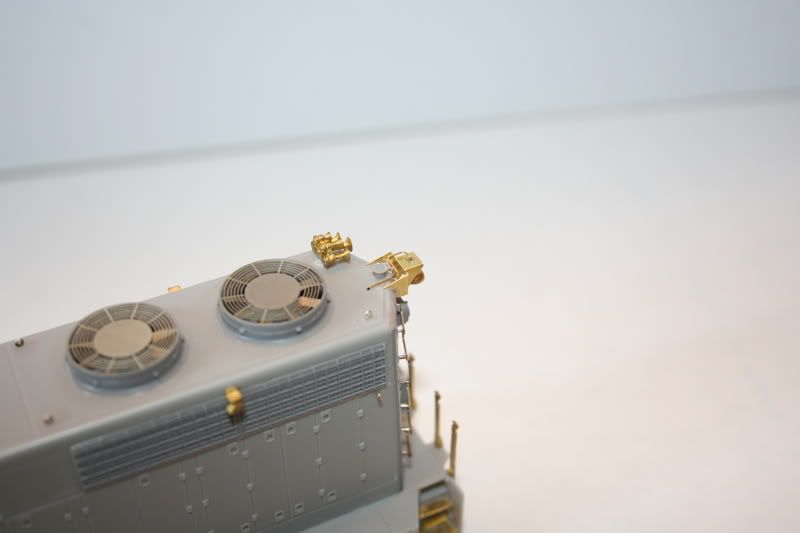
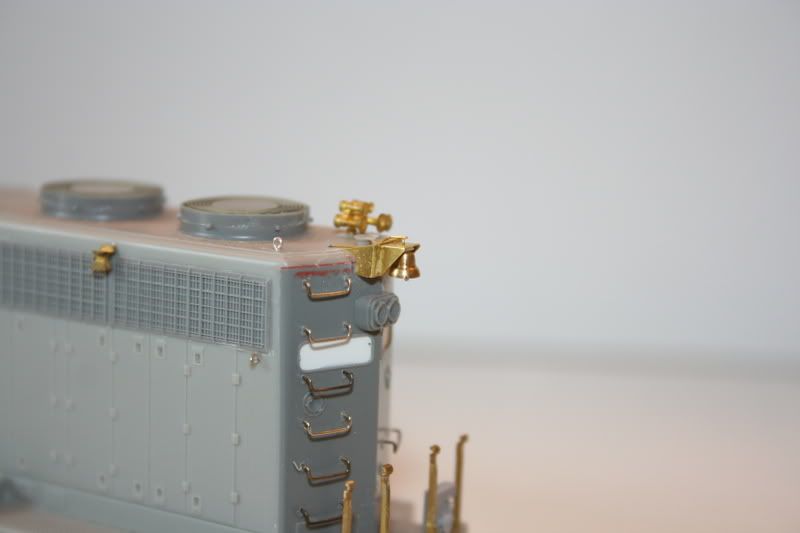
I have posted pictures of Railflyer's new hood-end bell for Southern /NS diesels installed on my Atlas GP-38 I'm doing for Southern...they are posted on Railflyer's page on this site under the "SOU/NS Bell" thread.
Chuck Yeargin
|
|
|
|
Post by Randy Earle on Feb 15, 2009 15:53:50 GMT -5
I have posted pictures of Railflyer's new hood-end bell for Southern /NS diesels installed on my Atlas GP-38 I'm doing for Southern...they are posted on Railflyer's page on this site under the "SOU/NS Bell" thread. Chuck Yeargin Well can you post one here also? |
|
|
|
Post by cyeargin on Feb 15, 2009 17:59:31 GMT -5
I have posted pictures of Railflyer's new hood-end bell for Southern /NS diesels installed on my Atlas GP-38 I'm doing for Southern...they are posted on Railflyer's page on this site under the "SOU/NS Bell" thread. Chuck Yeargin Well can you post one here also? You betcha, Randy, be glad to:    |
|
|
|
Post by cyeargin on Feb 15, 2009 18:57:26 GMT -5
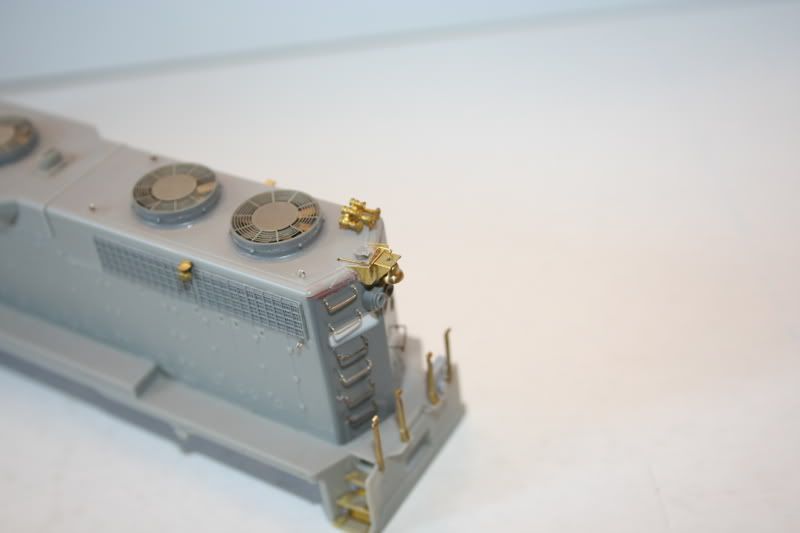
That looks good Chuck. What unit number are you modeling? Thanks for then kind words Stephen...although I didn't didn't notice till I posted the pics that I managed to get one of the bracket braces slightly askew..grrrr, LOL. As for the loco number it's going to be the 2772H, simply because there are pictures of both sides of the prototype in Withers' "Diesels of the Southern Railway"  |
|
|
|
Post by Randy Earle on Feb 16, 2009 1:00:42 GMT -5
Thanks Chuck, I'll get a few someday.
|
|
|
|
Post by cyeargin on Feb 16, 2009 15:02:08 GMT -5
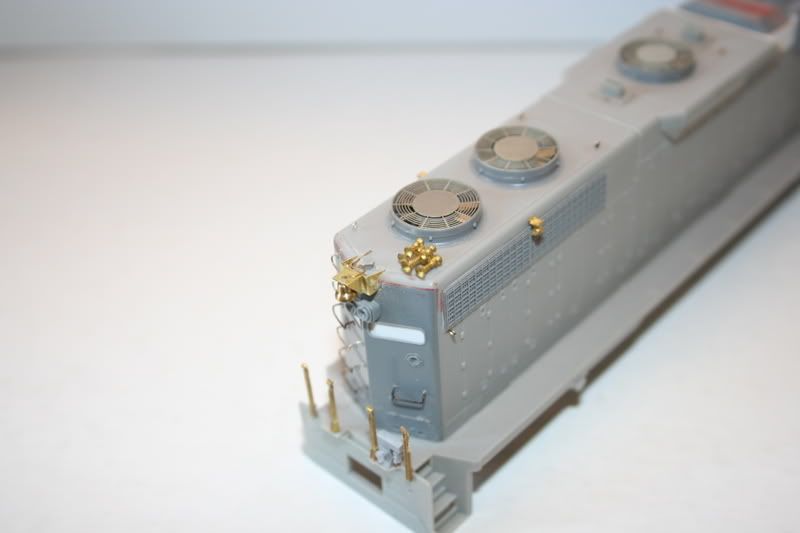
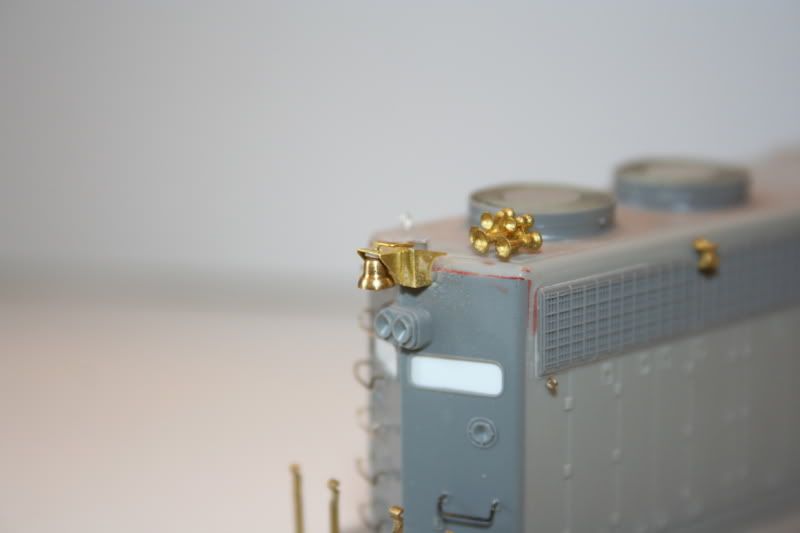
Chuck, I see one more problem. The mounting base for the bell, the injection molded plate is placed between the bell and photo-etched bracket. It seems like you have it placed on top of the bracket instead. See the images on my web-site for a close look, I will post some more in the resources site. Thanks, let me know if you can fix it OK. CJH DOHHHHHH!!! *slaps forehead* Actually read this this morning, and have since corrected my error. That's the nice thing about brass: a little nail polish remover to debond the ACC, scrape the the residue off with an Xacto blade, and make the correction. I have updated pictures, but my camera is being stupid on letting download them; I will try and get them up later. Chuck Yeargin |
|
|
|
Post by cyeargin on Feb 16, 2009 16:29:10 GMT -5
|
|
|
|
Post by Randy Earle on Feb 16, 2009 18:59:20 GMT -5
That looks great Chuck. What horns are you using? I need to get a pair for my GP-50.
|
|
|
|
Post by 12bridge on Feb 16, 2009 19:03:57 GMT -5
I never knew anyone made an all bell forward M5...Now if only an M3 would follow..
|
|
|
|
Post by cyeargin on Feb 16, 2009 19:05:43 GMT -5
That looks great Chuck. What horns are you using? I need to get a pair for my GP-50. Thanks Randy; the horns are Overland #9003 5-chimes, which unfortunately were the last ones I had. I sure hope someone gets the rights to the molds on these from OMI, cause they are pretty much a "must-have" for Southern/NS modelers. Chuck Yeargin |
|
Smoke
Chairman
The Ski Train!!!!
Posts: 753
|
Post by Smoke on Feb 16, 2009 21:25:28 GMT -5
I sure hope someone gets the rights to the molds on these from OMI We need Chris to make us some of those. They would be the best horns out there.  |
|
|
|
Post by Randy Earle on Feb 16, 2009 23:29:18 GMT -5
We need some Nathan P5 horns.
|
|
|
|
Post by cyeargin on Feb 17, 2009 13:00:15 GMT -5
Guys, Here are the finished instructions. I do need some larger file images from Chuck (Hint, Hint) but as you can see, he did an awesome job. CJH Chris, just sent you some more pictures, and hopefully they are a little better than the last ones. As I said in the email I'm a little better at model building than I am at photography, LOL. Chuck Yeargin |
|