Gav Smart
Engineer
Standard gauge in the late 1960's, in 1:29th.
Posts: 43 
|
Post by Gav Smart on Oct 20, 2014 10:21:45 GMT -5
Hi, Work is progressing well on a Southern F3 I'm kit bashing. (I've got a thread over in the early EMD section) I just have one slight problem that I was wondering if anyone could help me with please? I have a decal sheet of loco details in 1:29 from Mircoscale which covers all possible pieces of diesel data, and on it is a selection of builders plates. The problem is I'm just not sure exactly which one to use!!! I would have thought that on an F3, EMD would have used the early style of football shaped builders plate that seems to be common on these types of early 1st generation units, but on the photos I'm looking at there seems to be another style. Did the Southern maybe change the plates when they re-built these units? Or did EMD use a different style? My current thought is just to go with the normal football EMD plate but any help, ideas or suggestions would be very much appreciate! Many thanks, Gavin Here are some proto pics to show what I mean: (PS: the loco I'm modelling is #6706) 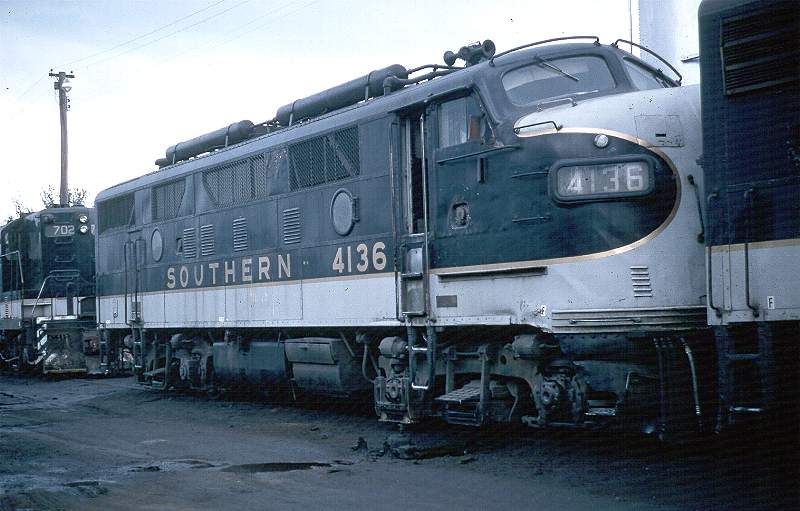  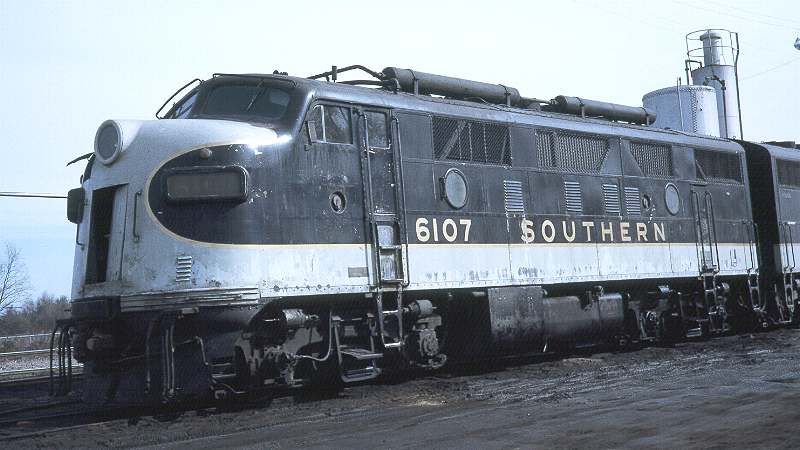 |
|
|
|
Post by nsc39d8 on Oct 20, 2014 17:58:12 GMT -5
Gavin,
The photos you have posted are all rebuilt locomotives. Southern rebuilt all the F3's to F7 specs at their first major overhaul. Most of the builders plates got removed. BTW this is the same loco I modeled in HO, no builders plates. All the pictures I find on the net don't show the plates either.
James Wall
Rural Hall, NC
|
|
Gav Smart
Engineer
Standard gauge in the late 1960's, in 1:29th.
Posts: 43
|
Post by Gav Smart on Oct 21, 2014 5:59:22 GMT -5
Hi James, Many thanks for your reply to my message. You are exactly right, the loco I'm modeling is also a re-build. According to Paul Wither's book on Southern Diesels it was re-built at Spencer in 1950, and later upgraded with dynamic brakes in 1956. The photos I have of #6706 seem to show some kind of plate to one side of the main steps up to the cab on each side, beneath the engineer's and fireman's windows? Do you have any idea of what this might be? Did the Southern make their own plate? Thanks again for you help! Gavin Here are a few more I found of #6706. As you can see I think there is some kind of plate beneath the side windows similar to the photos above(?): 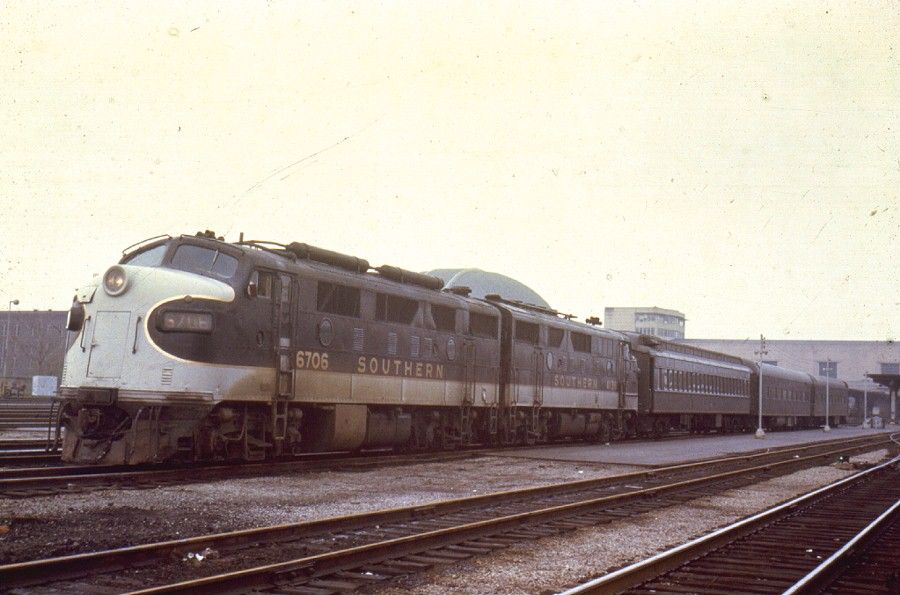 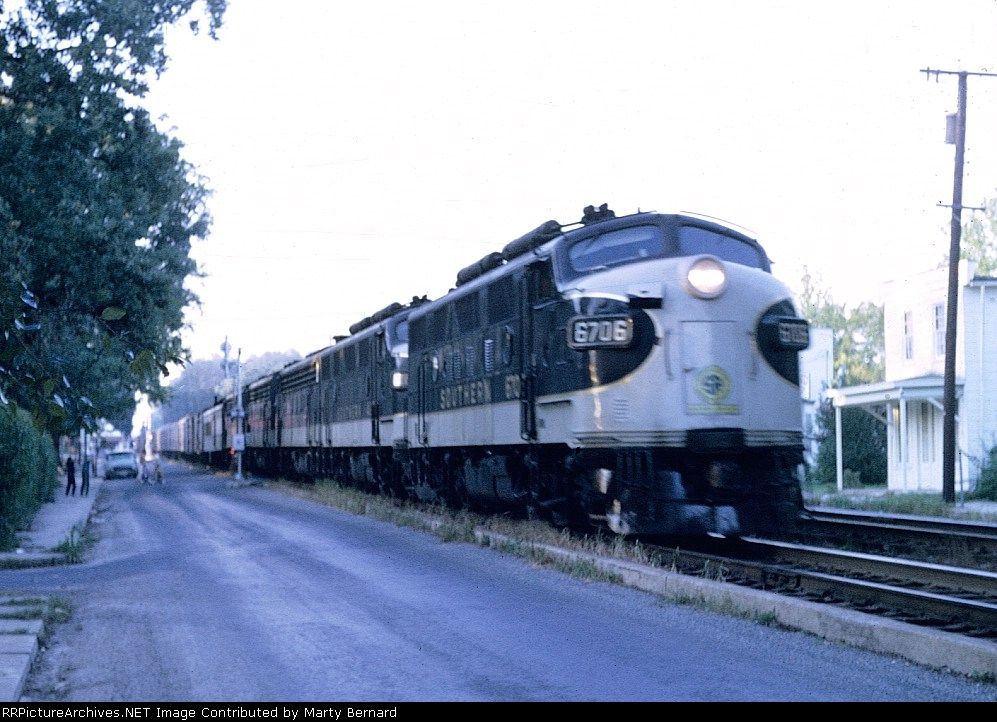 |
|
|
|
Post by hotshot3305 on Oct 21, 2014 16:25:30 GMT -5
Gavin,
Looking at my Southern slides and roster books, all "F" units built before 1948 had the early style rectangular plate and those built 1948 and after received the oval "football" shaped builders plate.
I also see some units without a builders plate. These may have been rebuilds and may have had the plates removed.
I think the plate you want to use is in the seventh column counting from your left and also in the second column counting from your right. You should see a small GM in the upper right hand corner of those decals.
Bob
|
|
Gav Smart
Engineer
Standard gauge in the late 1960's, in 1:29th.
Posts: 43
|
Post by Gav Smart on Oct 22, 2014 2:02:45 GMT -5
Hi Bob, Many thanks for your help with this, I really appreciate your input here! I have the decal sheet in front of me but I'm still not sure which one you mean? Do you mean the one that is mainly black but with "GM" written in the top right hand corner over a silver background? Counting from the top left, it is six rows down and is a group of four plates? I'm sorry for my stupidity and confusion here it's just I would really like to get this right! Thanks again for your kind help, Gavin PS: here is a scan of the sheet to help explain things. (The blank spaces are where I used the EMD "football" style plates for a previous kit-bash.)  |
|
|
|
Post by hotshot3305 on Oct 22, 2014 8:37:17 GMT -5
Gavin,
I apologize for the original, incorrect info I gave you as I thought both of the MS data decals sheets would be lined up the same. You picked the correct ones with the GM in the top right hand corner.
I'm looking forward to seeing the finished model.
Bob
|
|
Gav Smart
Engineer
Standard gauge in the late 1960's, in 1:29th.
Posts: 43
|
Post by Gav Smart on Oct 22, 2014 9:17:15 GMT -5
Bob,
No problem at all! Many thanks again for you help here.
I really appreciate your experience to help get things looking good.
I'm just finishing off the last of the detail and touching up the paint work before I can get some decals on. I will definitely share some more pictures as soon as I have some more progress to report! These projects always seem to take much longer than I first imagine as the more I study the photos, the more extra details I begin to notice.
Thanks again,
Gavin
|
|
|
|
Post by hotshot3305 on Oct 22, 2014 11:47:33 GMT -5
Bob, No problem at all! Many thanks again for you help here. I really appreciate your experience to help get things looking good. I'm just finishing off the last of the detail and touching up the paint work before I can get some decals on. I will definitely share some more pictures as soon as I have some more progress to report! These projects always seem to take much longer than I first imagine as the more I study the photos, the more extra details I begin to notice. Thanks again, Gavin Gavin, are you going to be able to save the Imitation Aluminum stripe on your model or will you need to sand it down in places?? Bob |
|
Gav Smart
Engineer
Standard gauge in the late 1960's, in 1:29th.
Posts: 43
|
Post by Gav Smart on Oct 22, 2014 23:25:41 GMT -5
Hi bob,
I did manage to save the white/imitation aluminium band so that will save a bit of extra work. The only minor problem will be the gold trim as the existing strip is sadly just to yellow to pass. There aren't really pre-made decal sheets for this in large scale but with a bit of careful masking I should be able to add a new gold band. It all just takes a bit more time! That's one of the plus points though of this scale as the larger size is a lot more forgiving.
Thanks again,
Gavin
|
|


