Post by royalblue72 on May 23, 2013 16:47:23 GMT -5
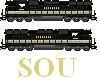
I haven't posted any of my builds here yet because most of them were done many years ago and i am still accumulating parts for my new builds. Here is my first build ever. I was 13 and it was to enhance my first "Real" HO locomotive. I received this loco for Christmas in 1981. I started to get the jest of things and found all of the parts at a hobby shop in Silver Spring, MD for the detail. They included coupler lift handles, drop steps, DW-130 plow, MU hoses, class light jewels, and number board decals. With Kadee #5 couplers, the parts cost was around $30.00. I know that's what my parents paid for the loco itself!! We didn't have much money back then, and I had to mow 5 lawns to pay for the details. I have improved it over the years and lately, it has lost a few details in moving and such, but I look back and feel it was pretty good for a 13 year old kid.
The first thing I did was sand the nubs off the cab roof. I brush-painted it with C&O Blue. I took an Xacto knife and trimmed off the bell housing leaving the nubs in the holes and glued them in. I sanded them smooth and painted them as well. I then used a drill to hollow the horns, painted it C&O blue and cemented it into place. Remember, this is just enhancing the factory model and paint job. I drilled for the lift handles and MU hoses and cemented them into place. I painted the lift handles C&O Blue as well. I painted the drop step, Railbox Yellow, then cemented the nose light glazing in reverse and sanded that smooth. I then painted the nose light area Railbox Yellow with a brush. I cemented the drop steps in, cut the hand rails at the drop step and painted them Testors Orange by brush. I drilled and mounted the Kadees on the chassis, then assembled the model. The last step was cementing the plow into place.
When I was in high school, I replaced the trucks with EMD Blomberg trucks and repowered with a GSB Tan Can motor. The result is what you see here. (Minus the lift levers that fell off long ago and a partial number board number on the left side.) I thought I weathered the model quite well using chalks and "diluted" Engine black & Grime. This was a big step for me as all of my models were in pristine "Like-New" condition. I quickly started weathering everything after that because it looked real!!
I hope you enjoy. Don't be too harsh, this was my first attempt. LOL!!