jazzlife1
Probationary Member
I model Conrail, Canadian National, and Canadian Pacific in the late 90's
Posts: 19 
|
Post by jazzlife1 on Feb 22, 2016 1:07:33 GMT -5
I can't wait for the next install. This has help me a lot. Thank you for posting.
|
|
|
|
Post by analogbeatmaker on Feb 22, 2016 8:50:25 GMT -5
I can't wait for the next install. This has help me a lot. Thank you for posting. No problem jazzlife1! I'm glad the thread is helpful. There is going to be a pause for a few weeks though as I'm in the process of moving. Hopefully I'll be back on this unit by early-mid April. |
|
|
|
Post by analogbeatmaker on Sept 8, 2016 23:19:27 GMT -5
Hi everyone! So, after a longer than expected pause, I'm back at the bench. I'll start with a couple pilot progress flicks.  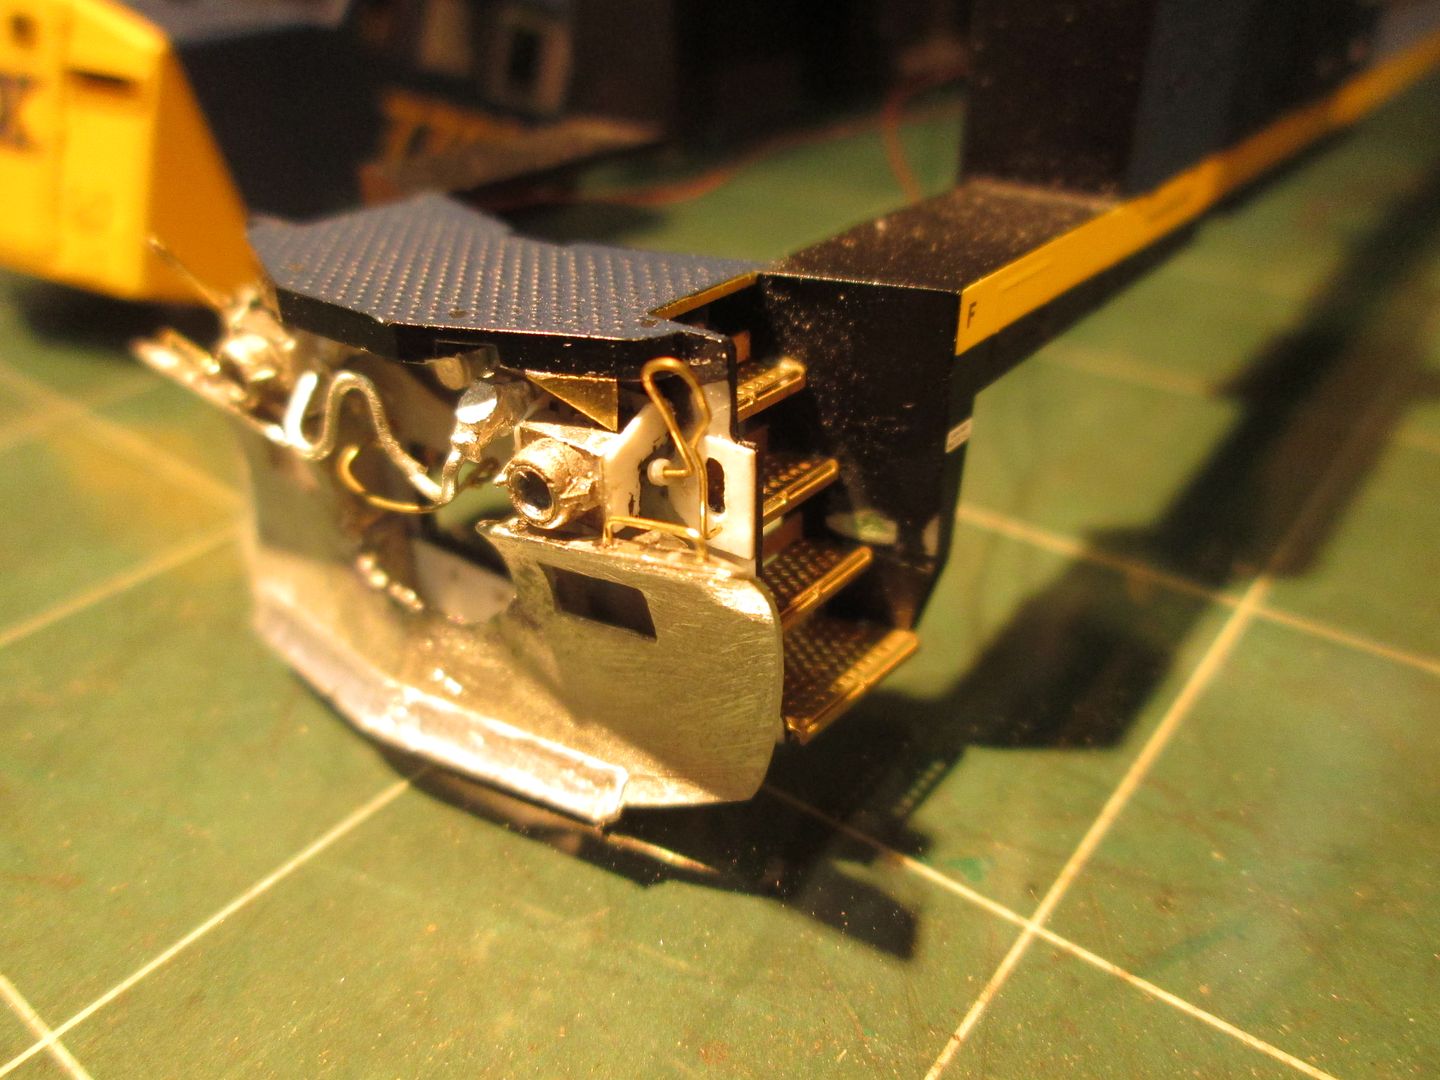 Holes filled/sanded cab roof. 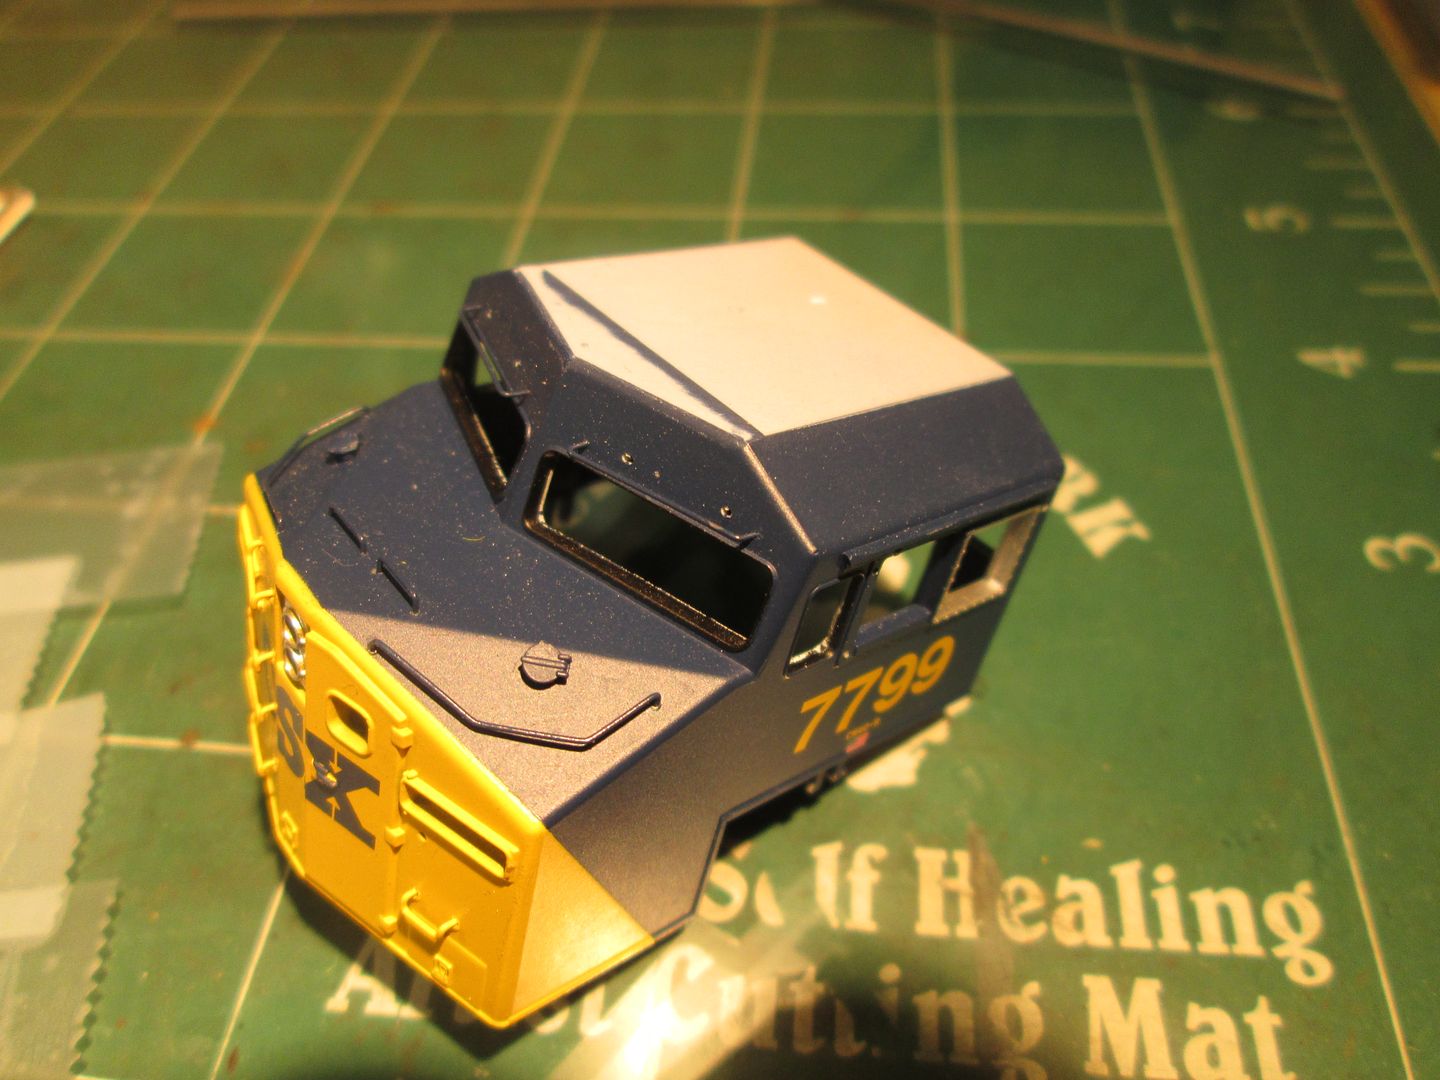 The trucks are way off as usual it seems. I have to scratch sanding brackets/hoses, flange lubricators, shocks/mounts, hand brake chain tensioner on the one truck and add better bearings. Here I start the brackets for the sanding hoses. 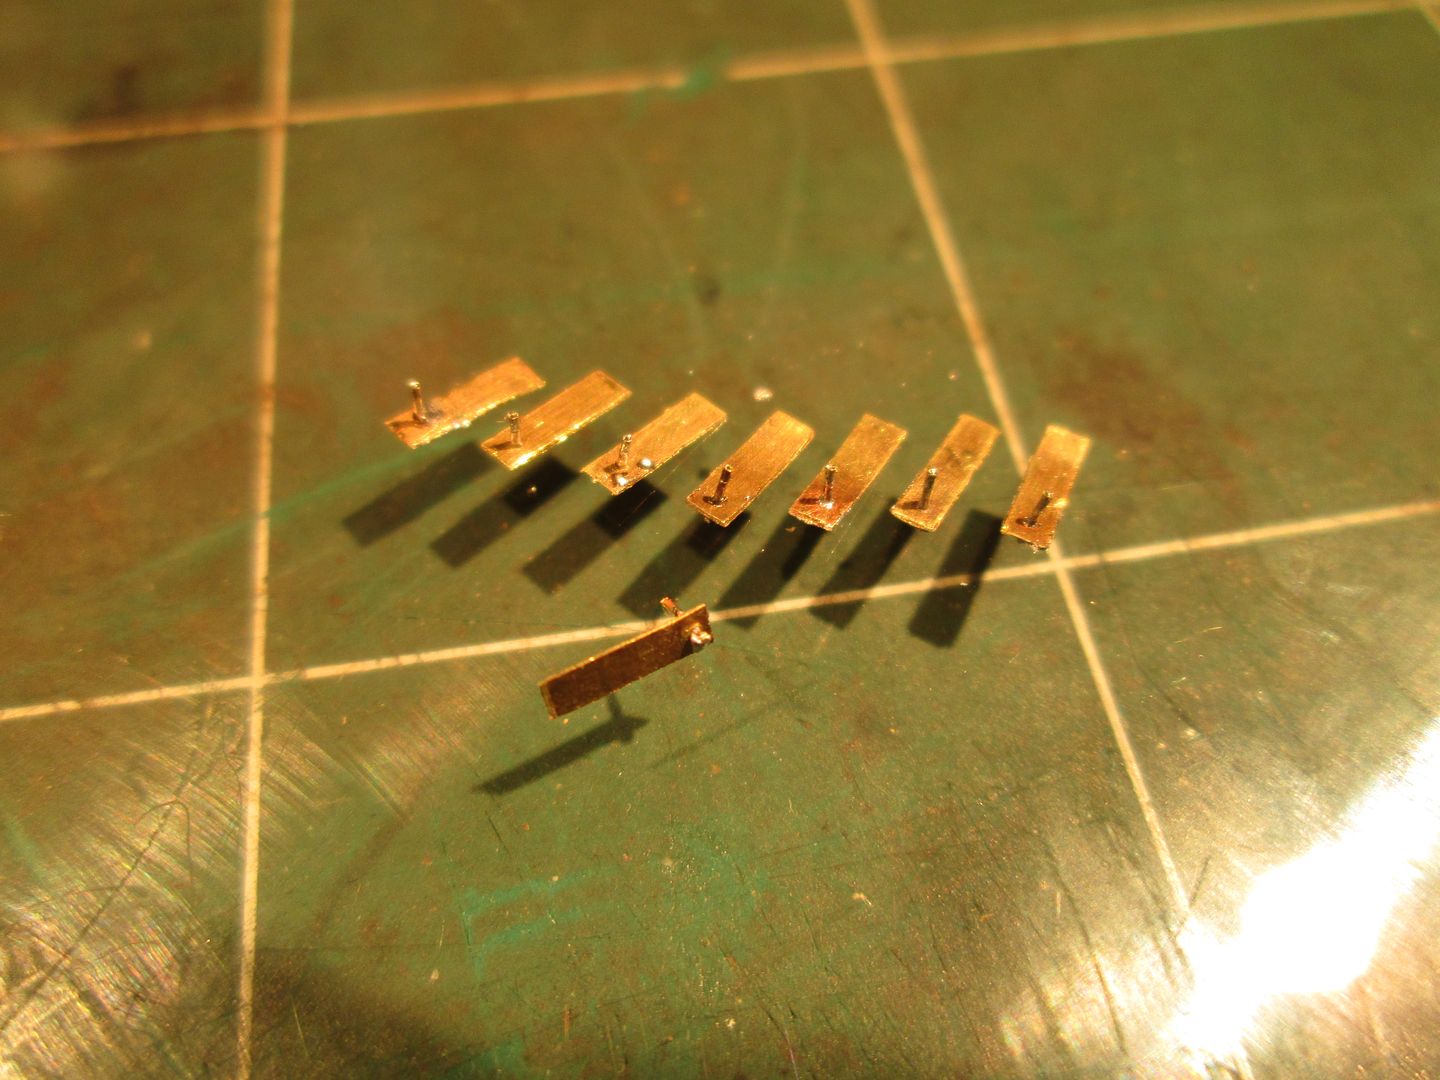 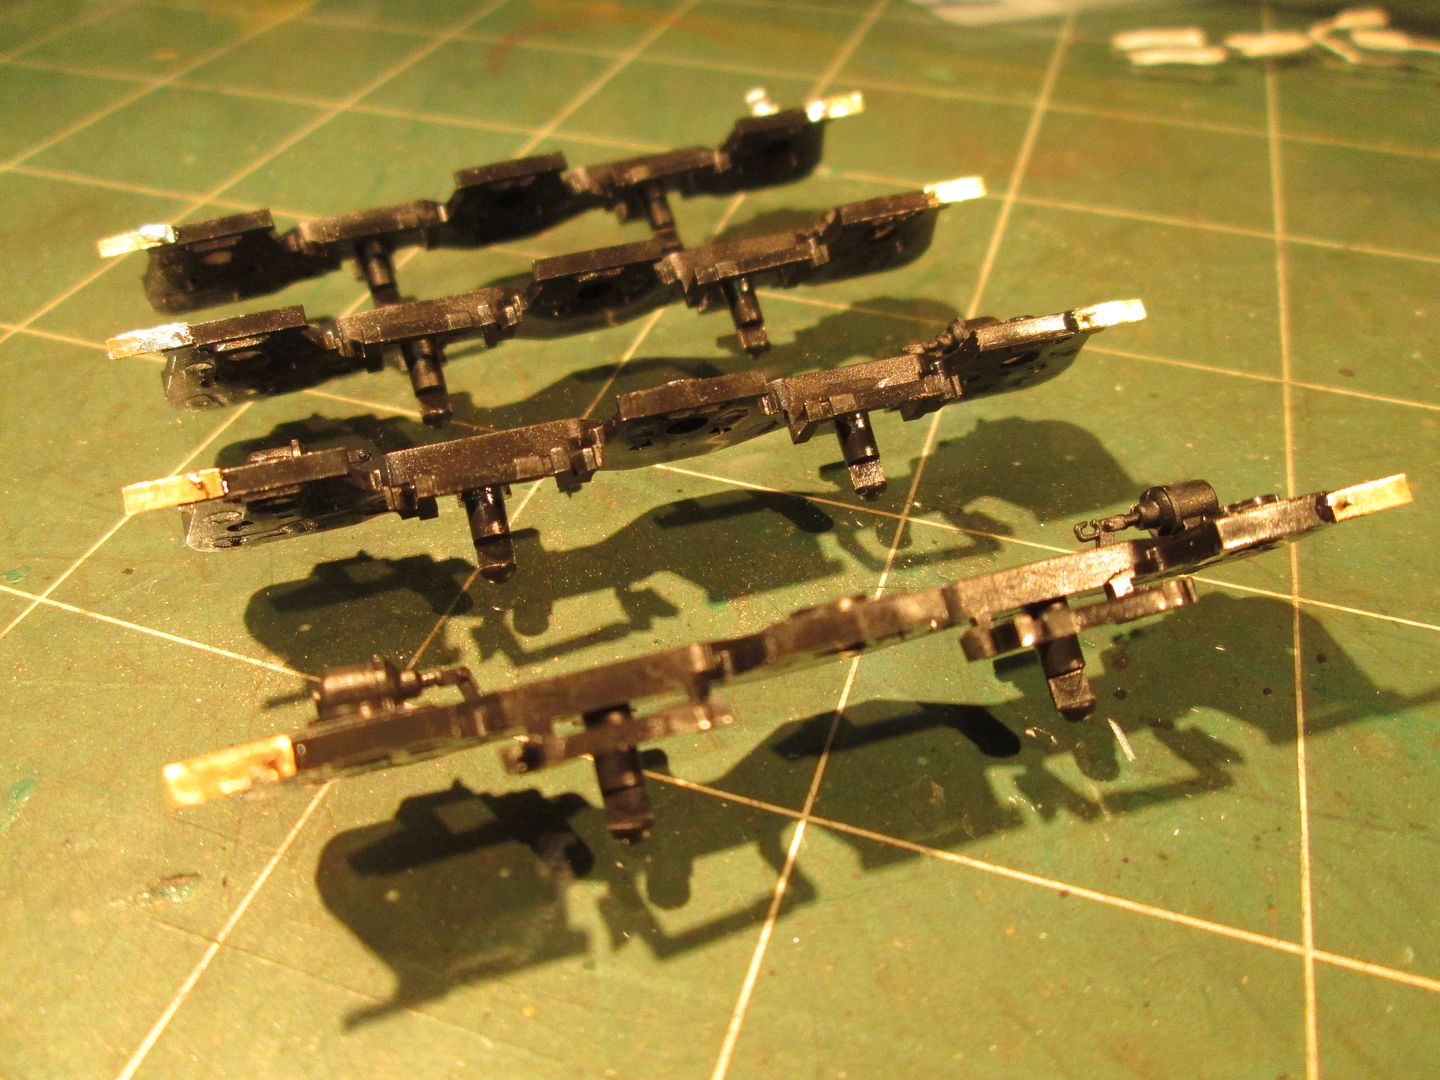 Removing the molded on shocks and adding the new bearings. 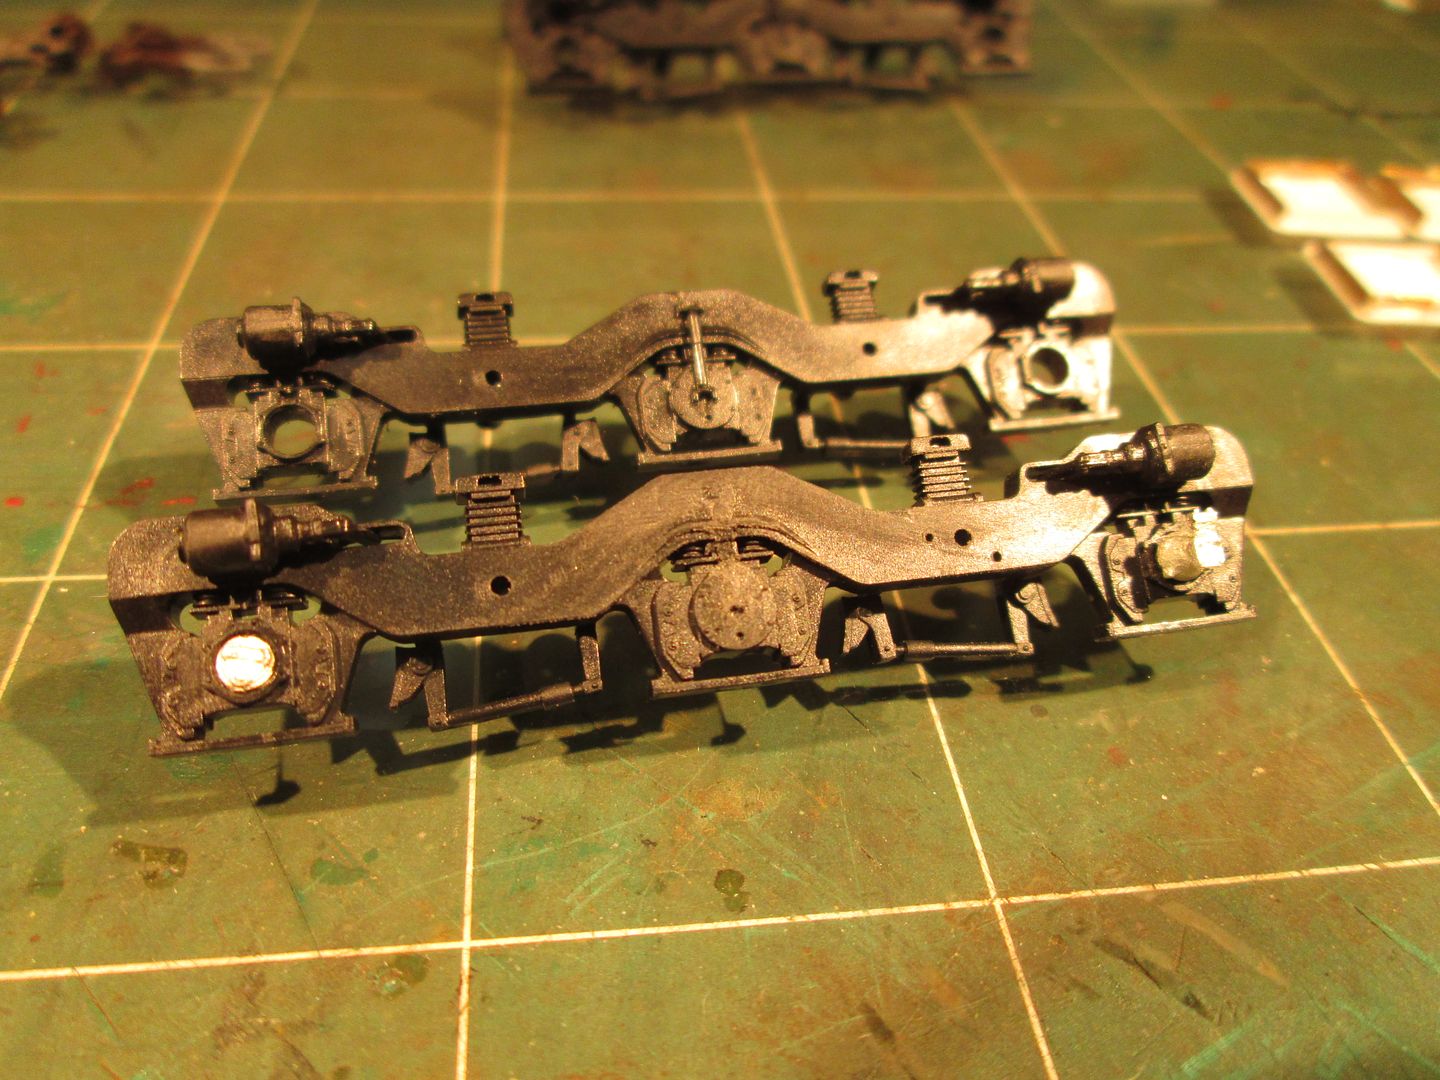 Scratched replacement shocks.  I drilled a hole in the arm of the piston for part of the chain tensioner equipment. Then, the part that part of the assembly will mount on (sorry for the blurry pics). 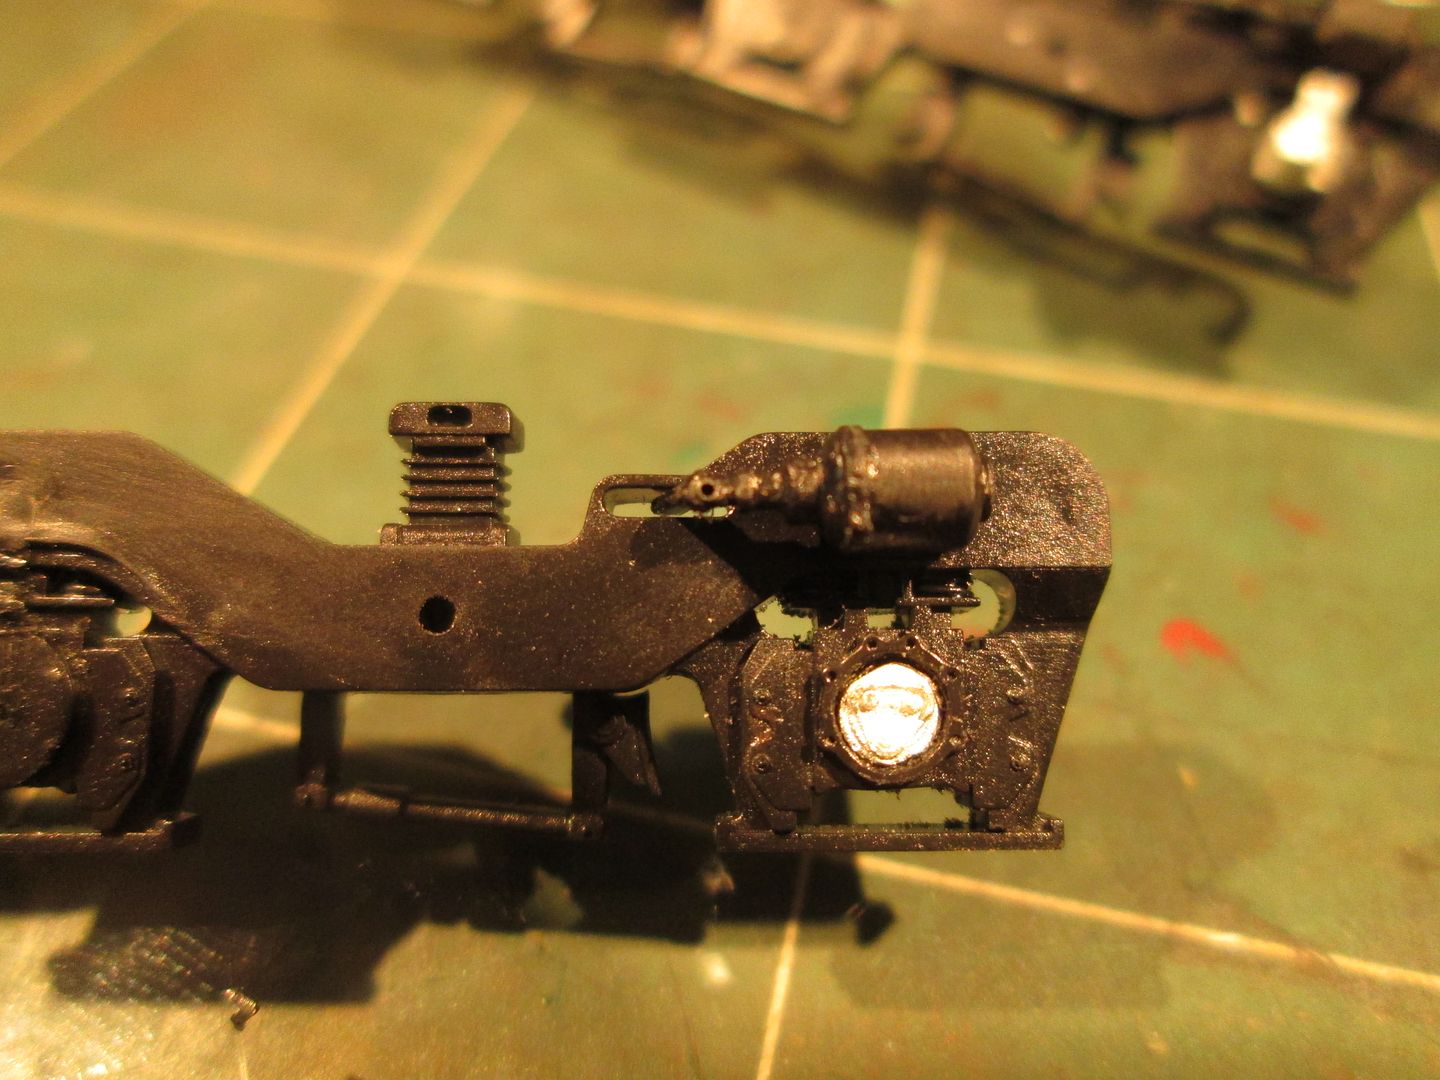  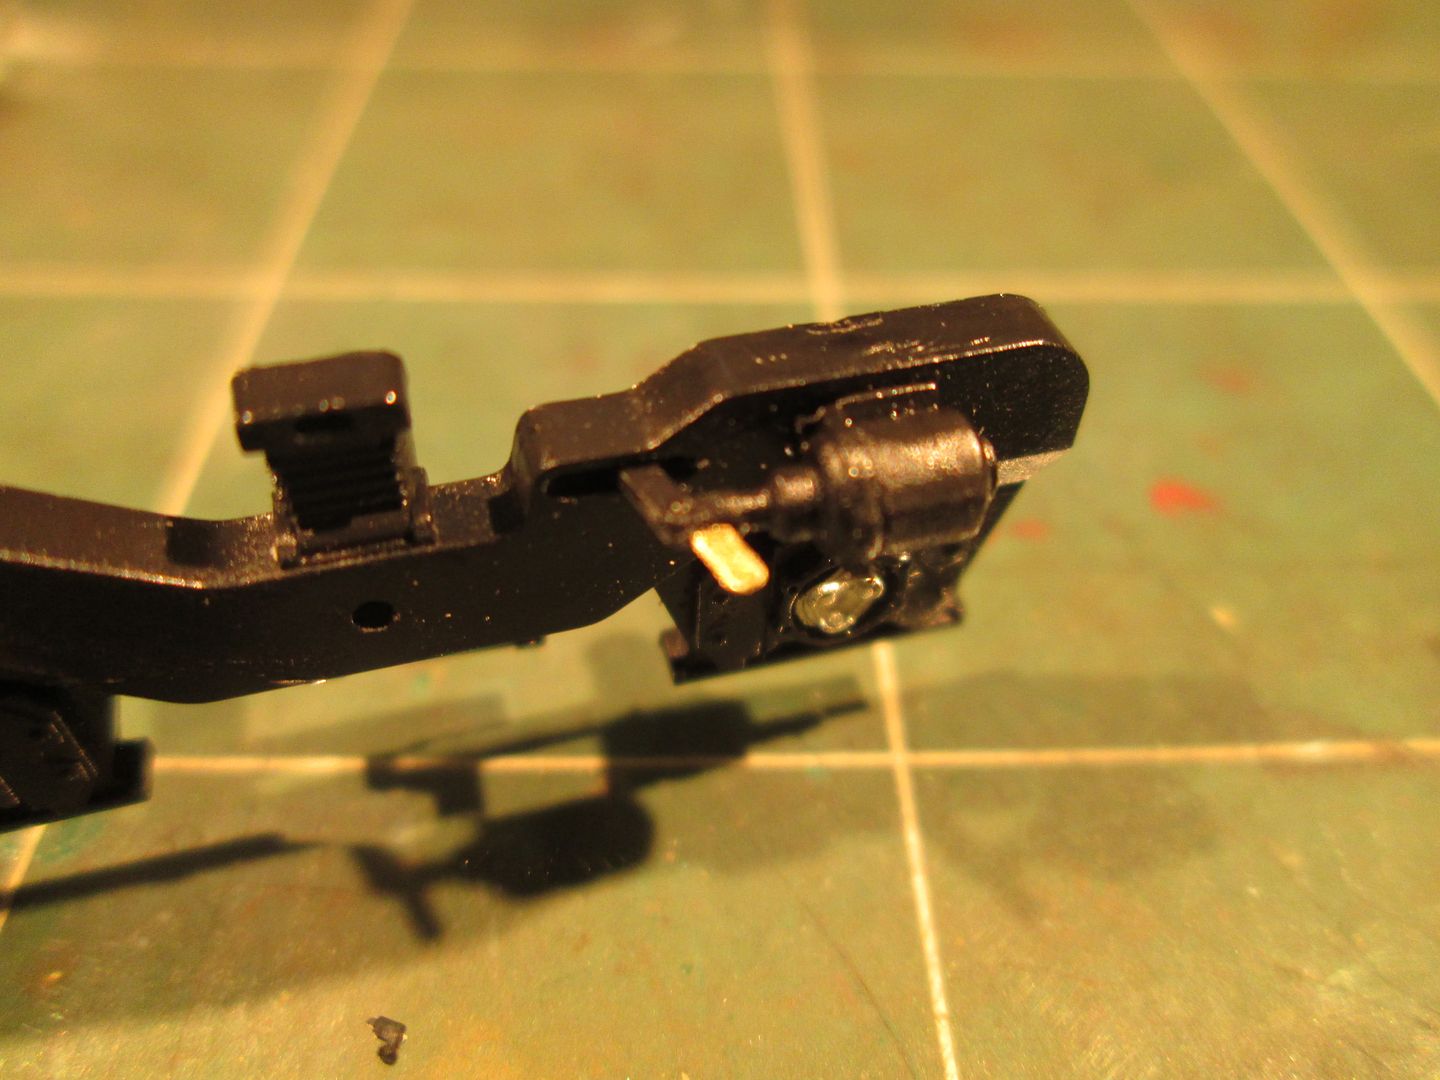 A touch more progress on the Tier 4 radiators. 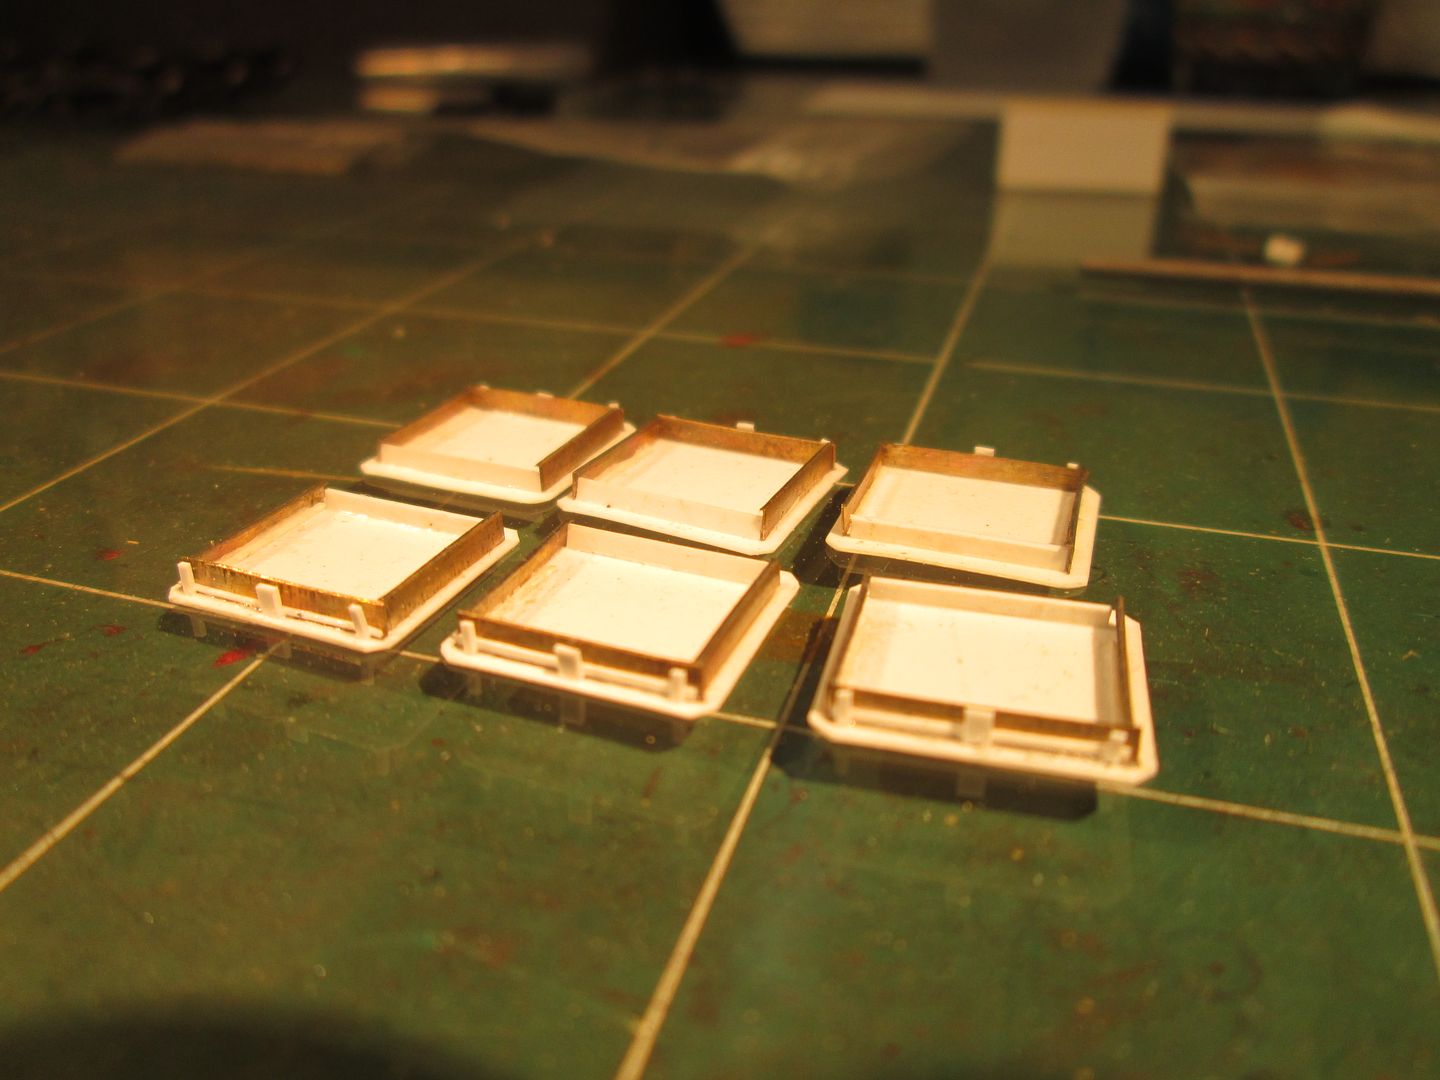 Thanks for looking! |
|
|
|
Post by tamaman on Sept 14, 2016 17:09:04 GMT -5
Nice build!
|
|
|
|
Post by analogbeatmaker on Sept 14, 2016 17:42:21 GMT -5
Thanks Kevin! Here's more! The trucks needed a lot of help. Here I scratch the parts for the shock...which are 9 pieces each!  Here are the flange lubricators. 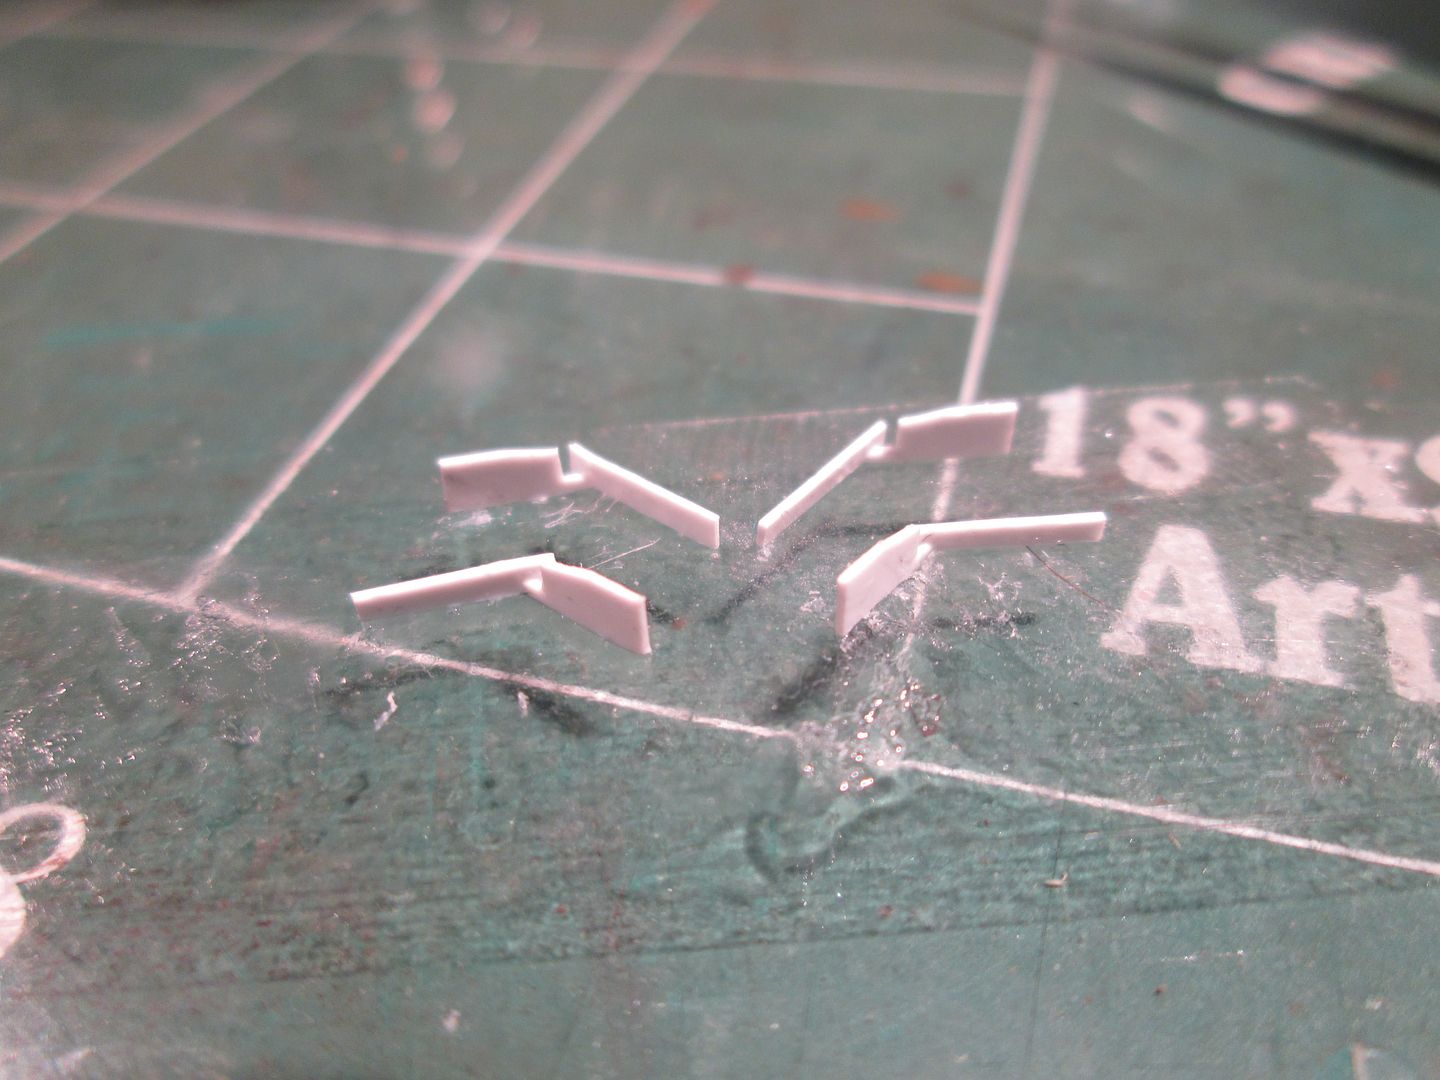 Here are the brackets and hose braces for the sanding hoses which are being made from solder. 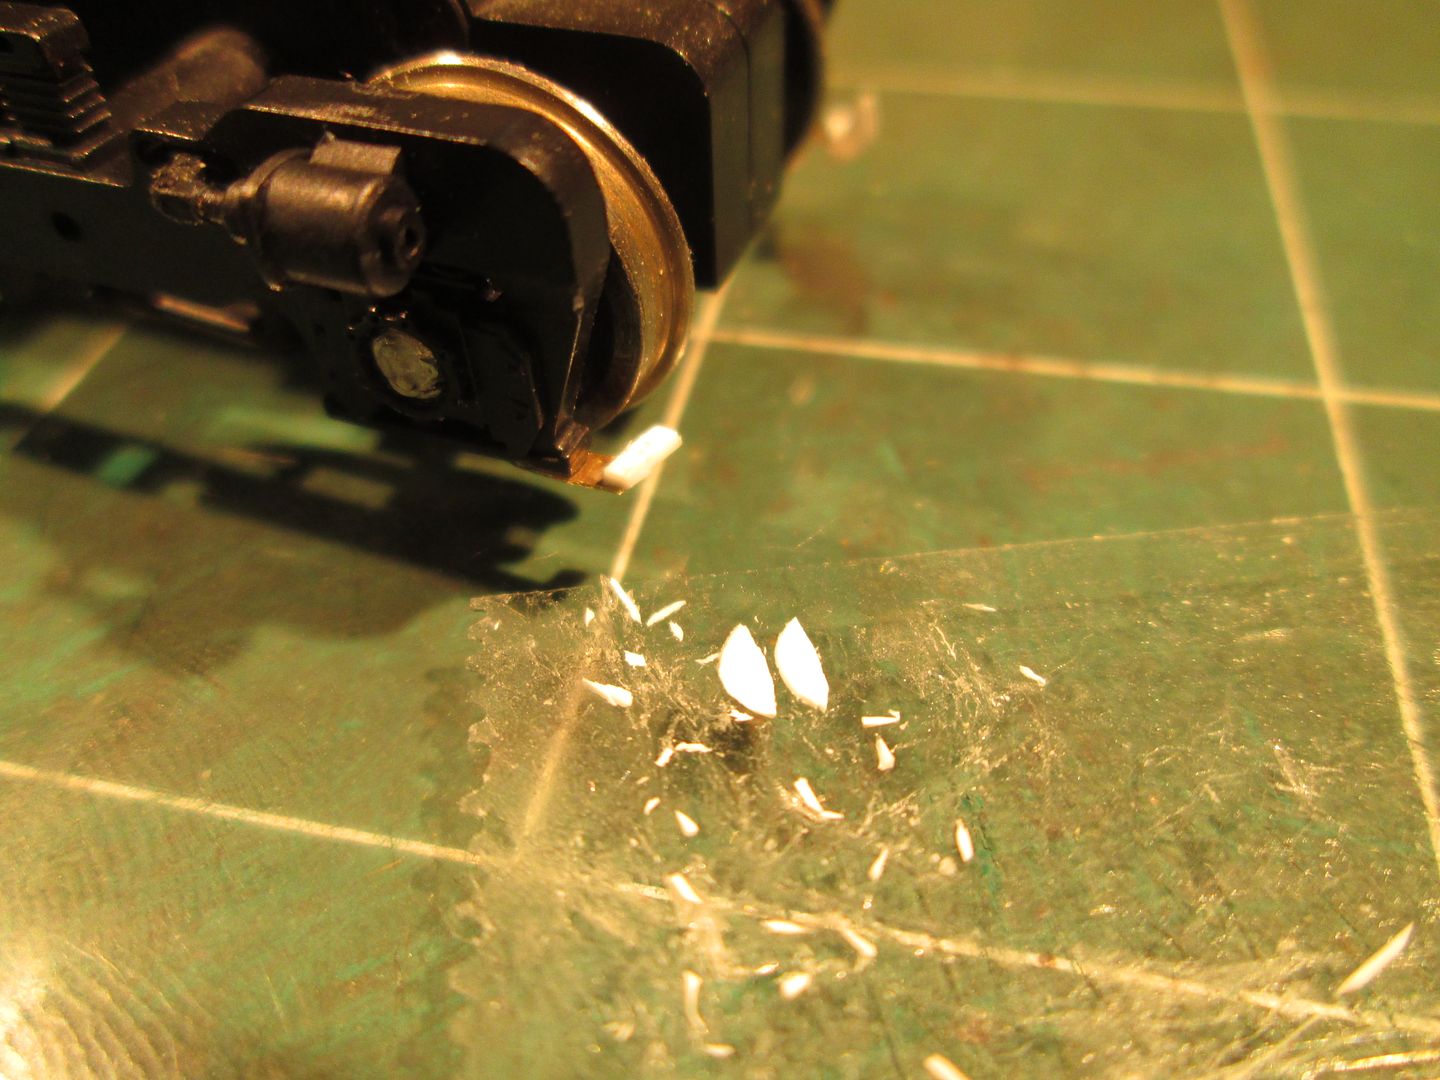 Here is the airline with the correct bends as the factory ones were straight.  Here are the completed sideframes prior to paint. 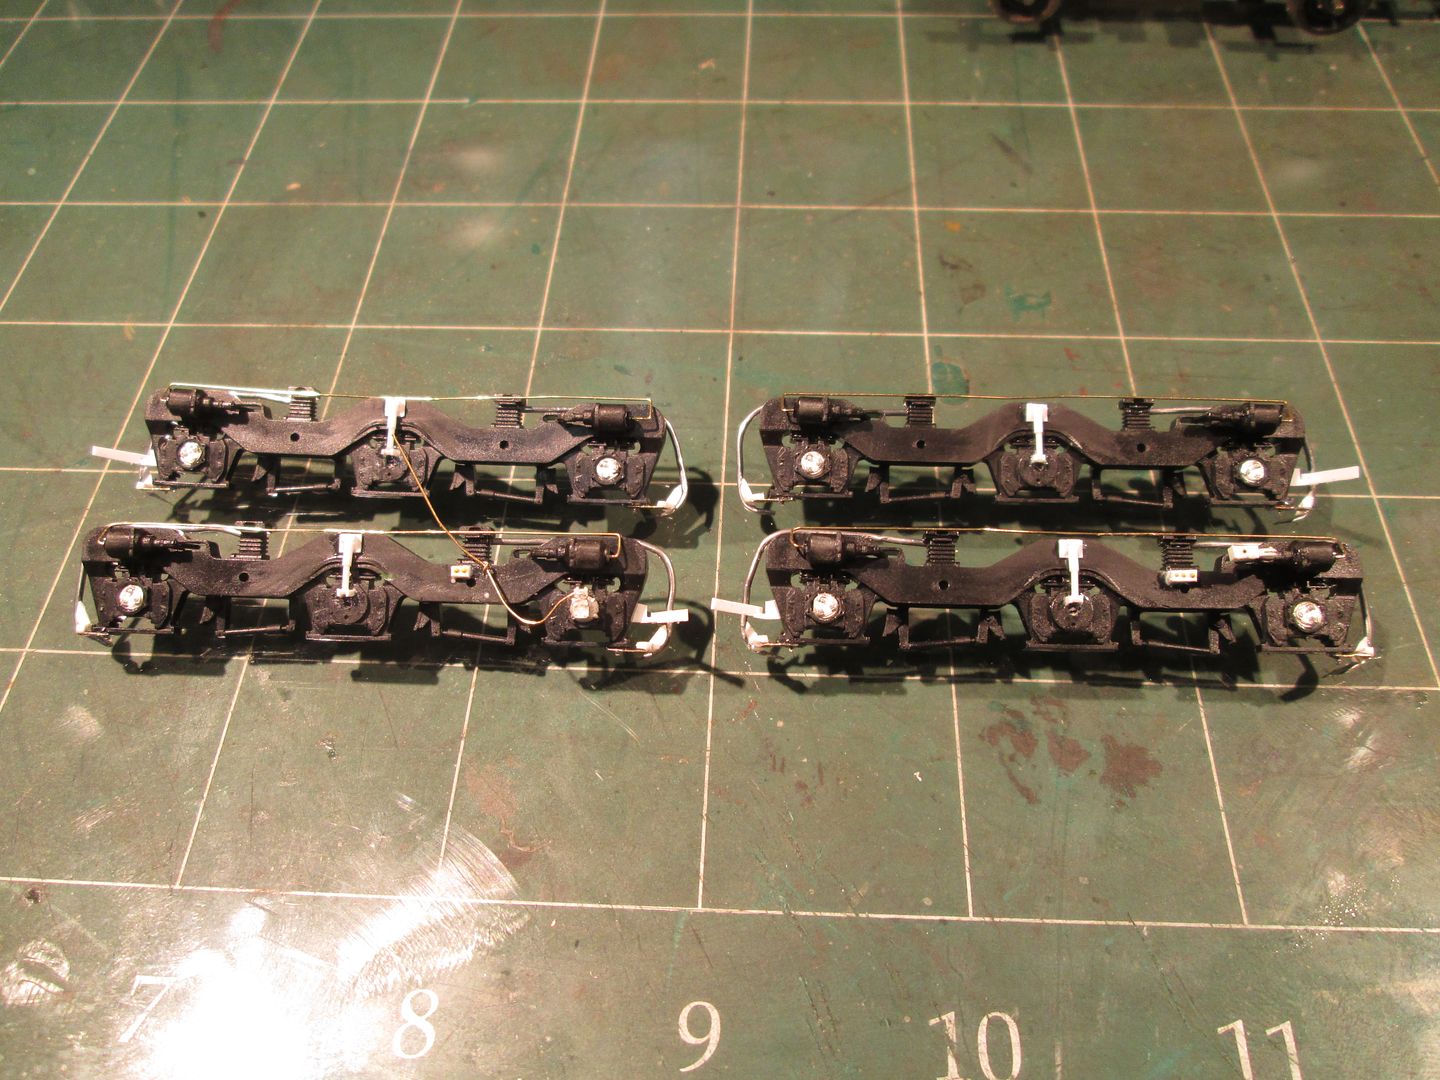 Sideframes in primer! 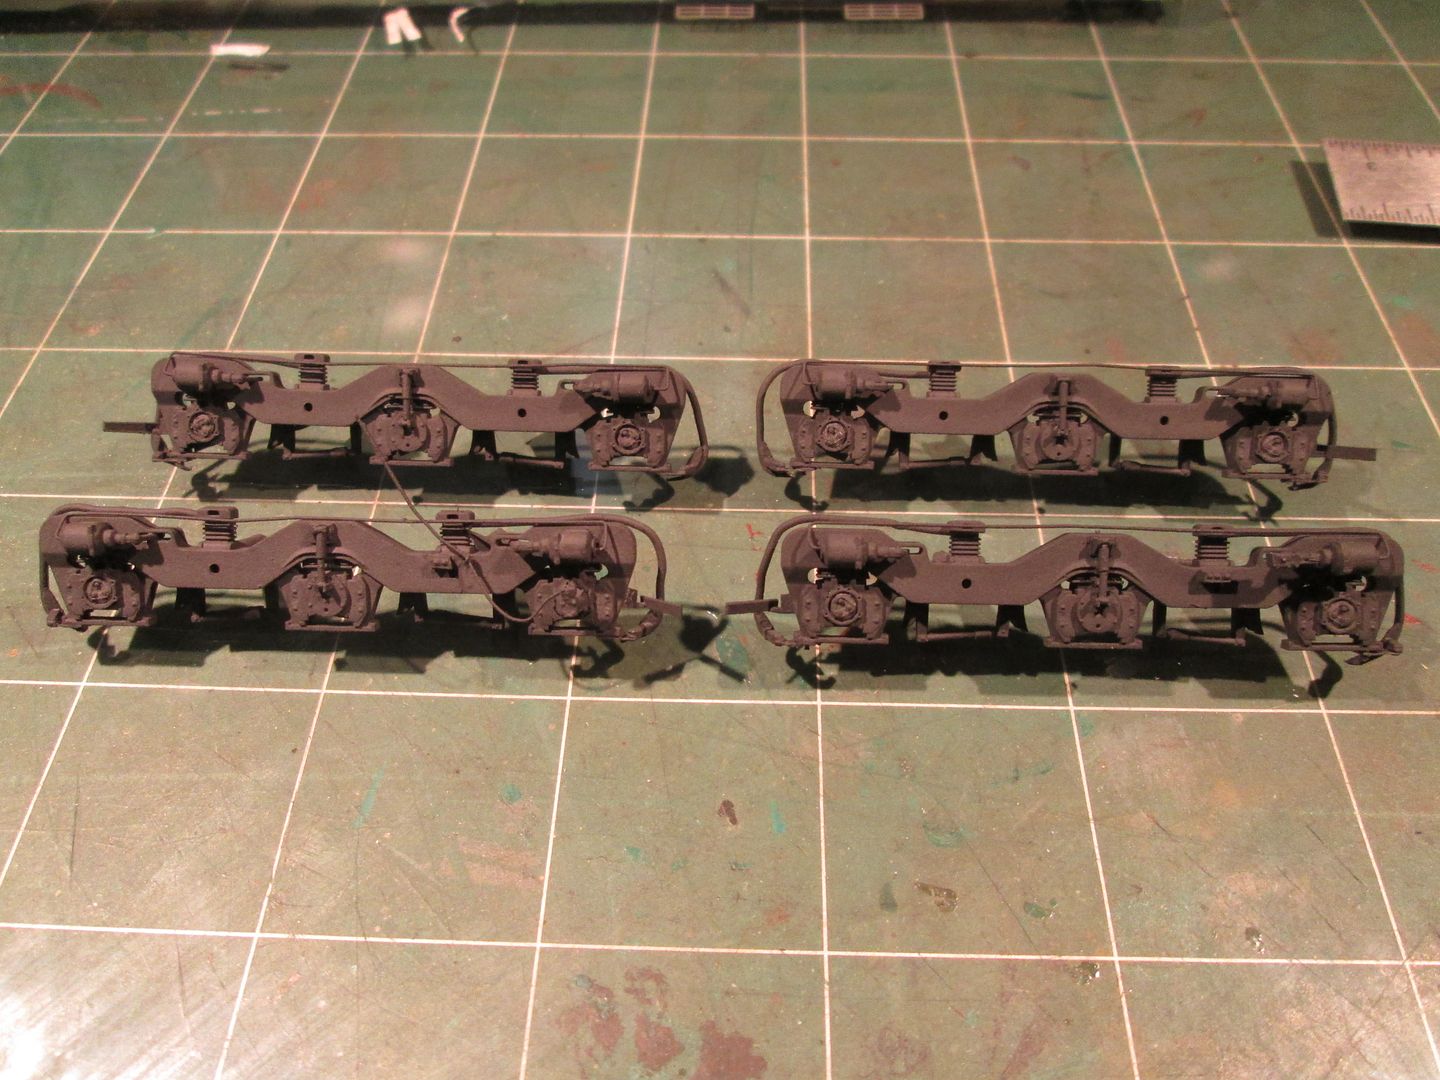 A detail shot showing the scratched hardware for the handbrake chain. 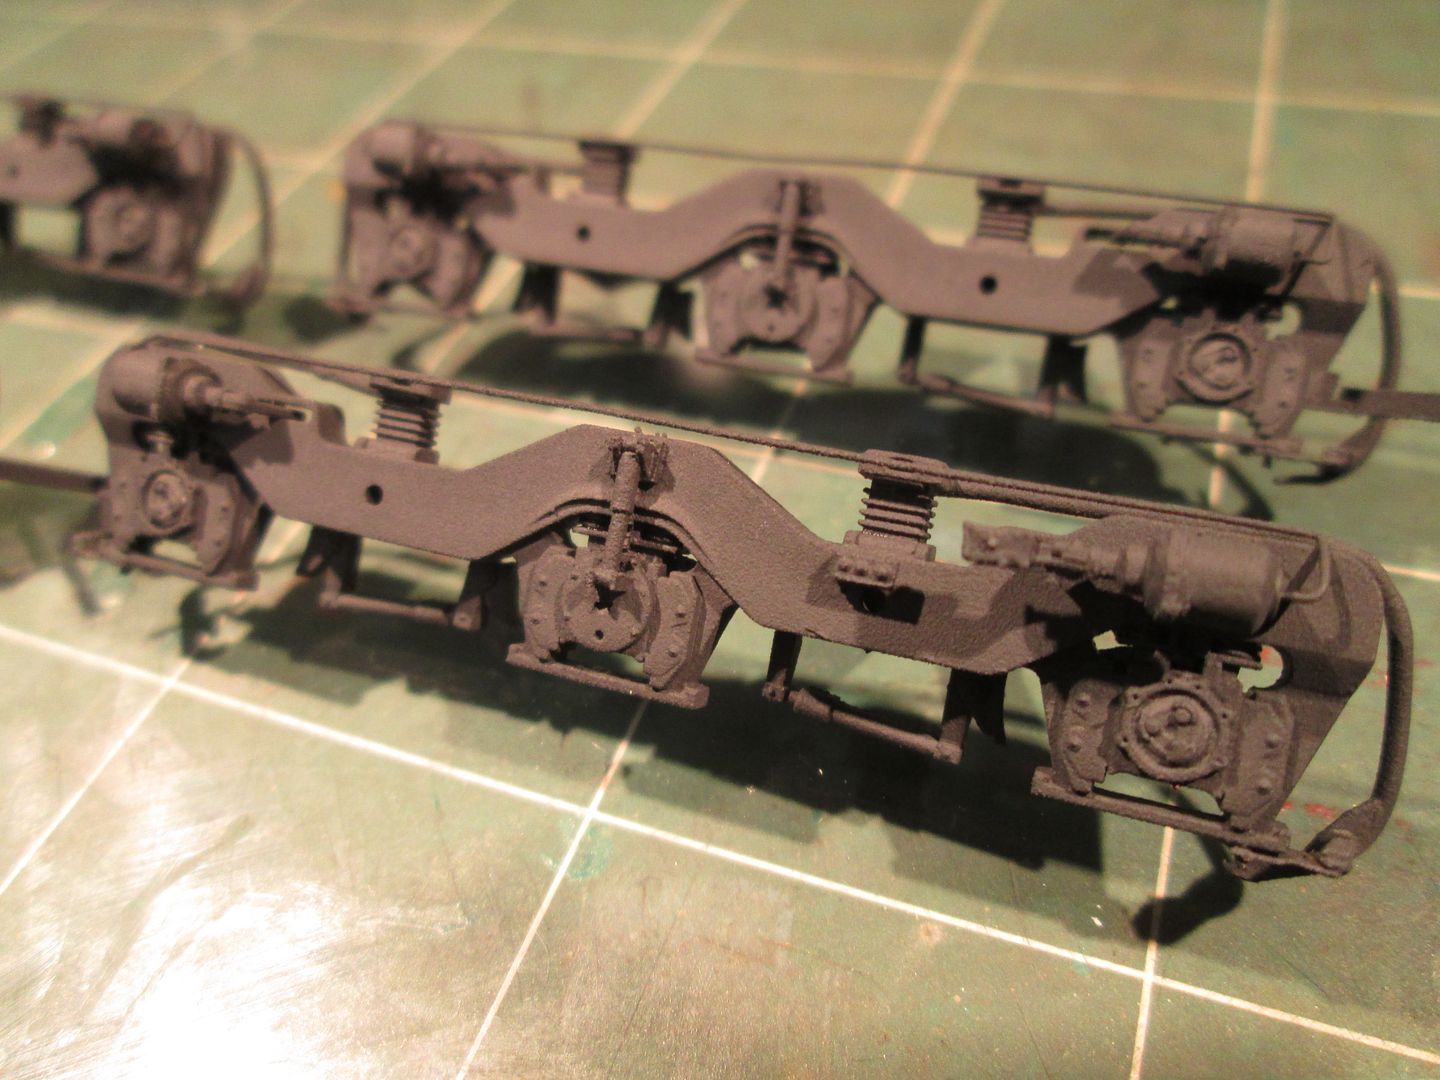 Thanks for looking everyone! |
|
kcw
Road Foreman
Posts: 60
|
Post by kcw on Sept 14, 2016 23:00:46 GMT -5
Very nicely coming along
|
|
|
|
Post by m a y o r 79 on Sept 15, 2016 8:44:37 GMT -5
Very nice, I don't think I'd have the patients for 9 tiny pieces to build each shock. Turned out great though.
|
|
|
|
Post by analogbeatmaker on Sept 25, 2016 19:44:42 GMT -5
Thanks KCW! Very nice, I don't think I'd have the patients for 9 tiny pieces to build each shock. Turned out great though. Thank you Mike! Yeah...those shocks (among other details on this loco) tried my patience for sure.  |
|
osrr
Trainmaster
Posts: 130
|
Post by osrr on Sept 30, 2016 15:58:58 GMT -5
A touch more progress on the Tier 4 radiators. Partly correct. The shutters bring them to either Tier 0+ or 1 (0+ I believe). |
|
|
|
Post by analogbeatmaker on Oct 3, 2016 0:07:07 GMT -5
A touch more progress on the Tier 4 radiators. Partly correct. The shutters bring them to either Tier 0+ or 1 (0+ I believe). Honestly, I don't know anything about the radiators other than what others more knowledgeable than me have told me...such as yourself. Now I have to decide who to believe! lol  |
|
|
|
Post by analogbeatmaker on Oct 5, 2016 14:19:38 GMT -5
Hi everyone! Another progress update. Here are the scratched radiator sections getting the vanes installed. 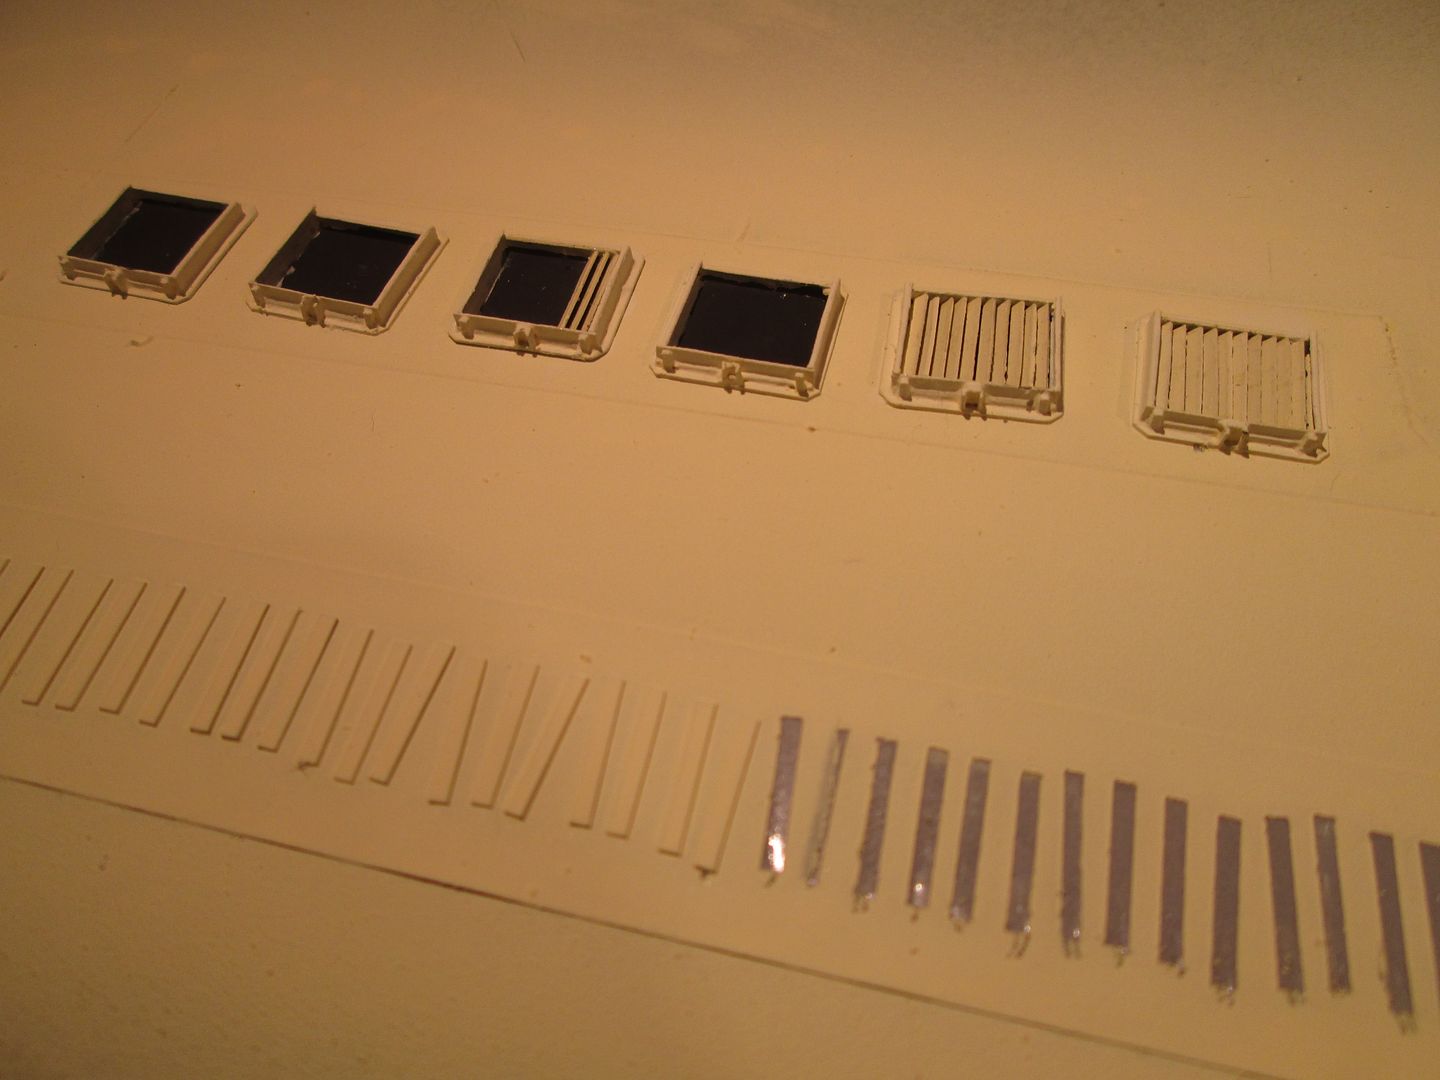 This pic shows the .005 styrene I used to create extended window surrounds and the armrests.  Here are the scratched antenna arrays and a Tony Sissons GPS dome, can't see the detail in it cause it's washed out in the photo...but it's very nice as are all the detail parts he offers. 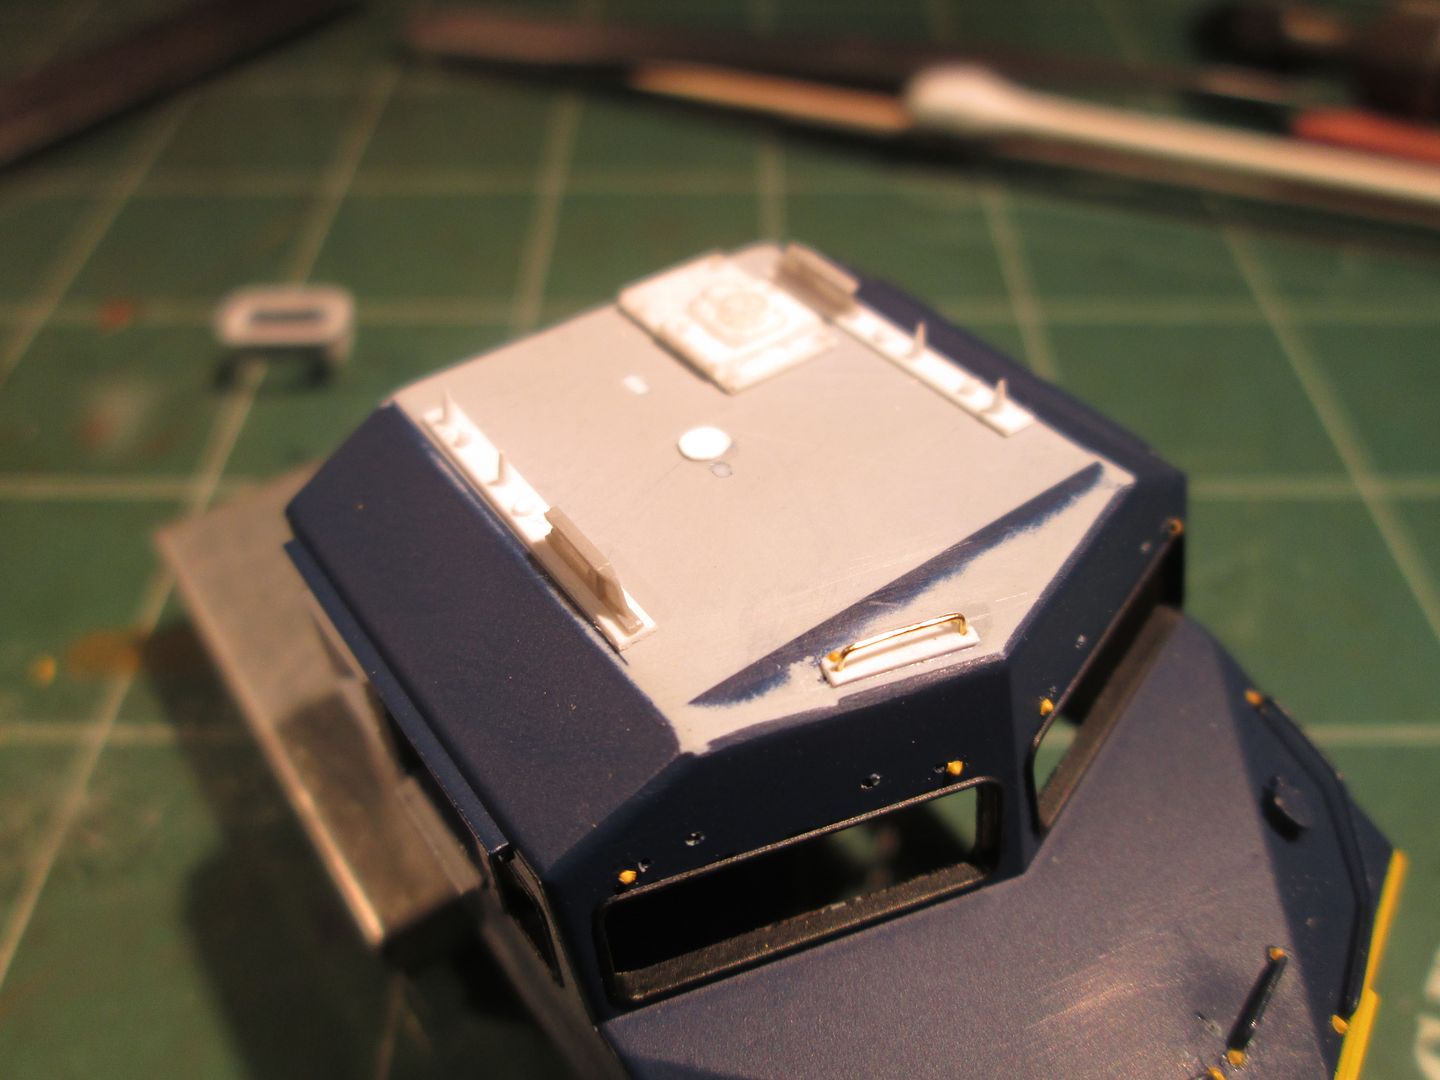 In this pic you can see a lot of the small yellow "rivets" I carved off an old Athearn BB 89' Box and glued on to represent bolt head detail at the ends of all the grabs. You can also see a little door lock thingy I scratched. 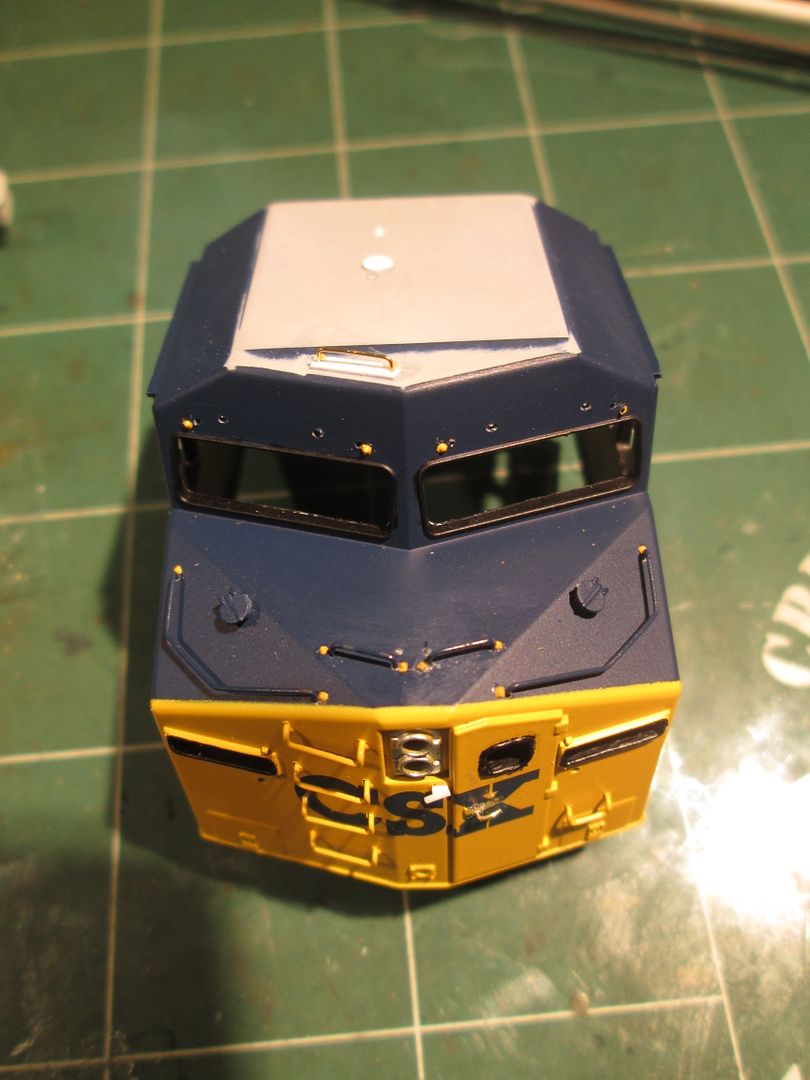 Dry fit of the radiator stuff. 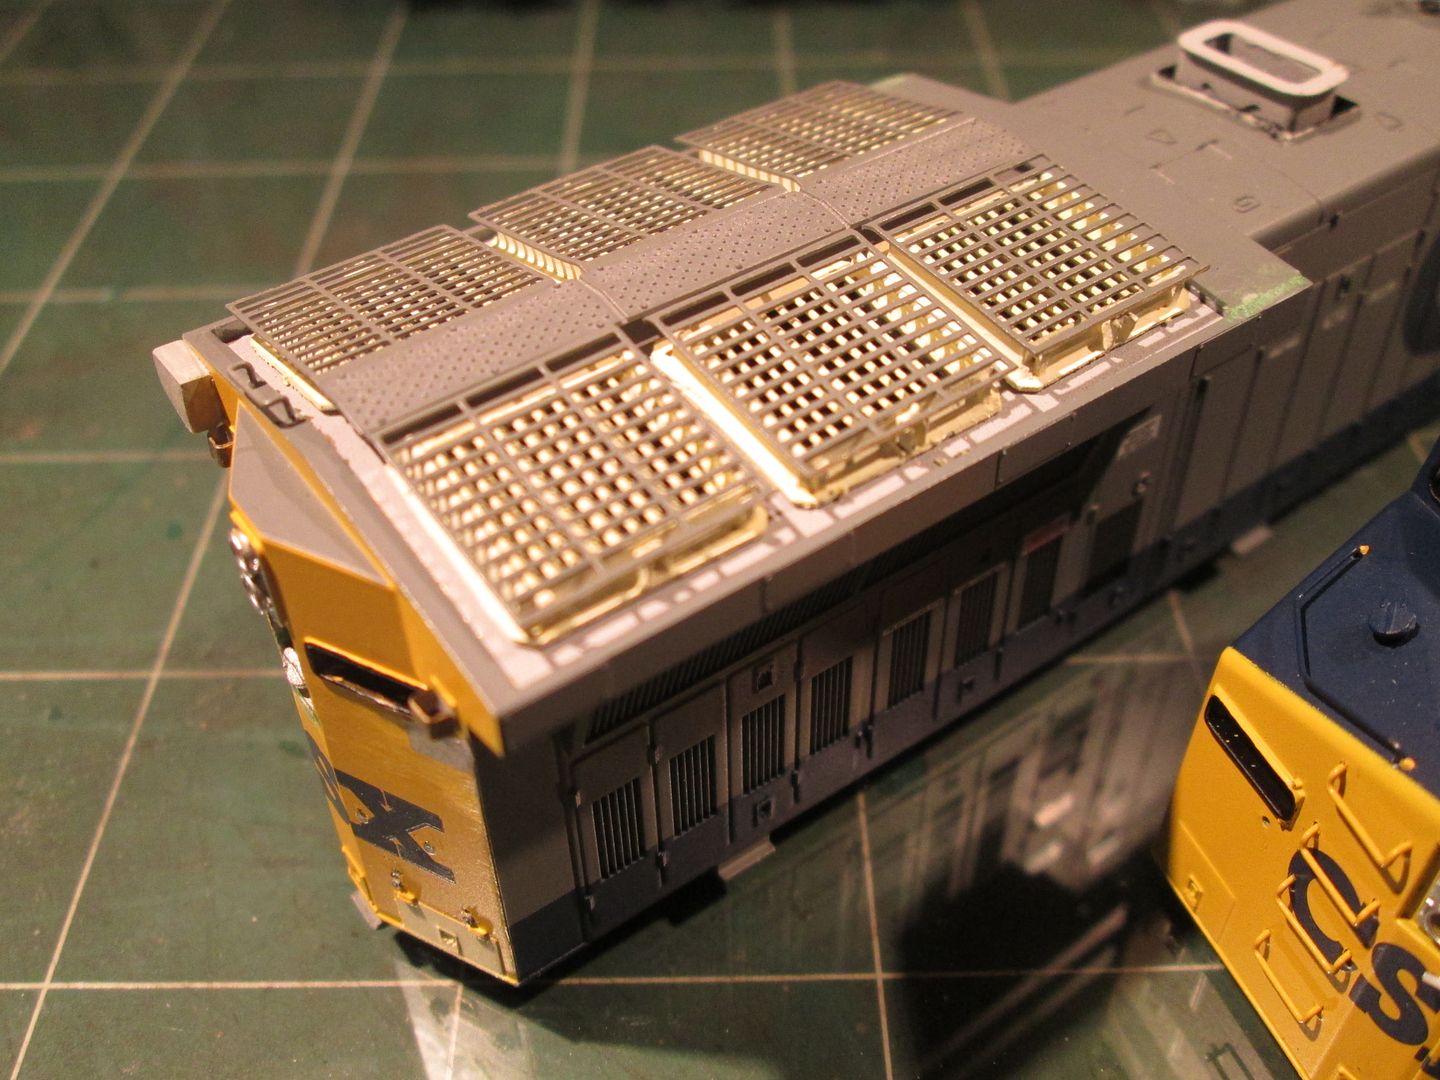 A couple images of the overall model at this point.  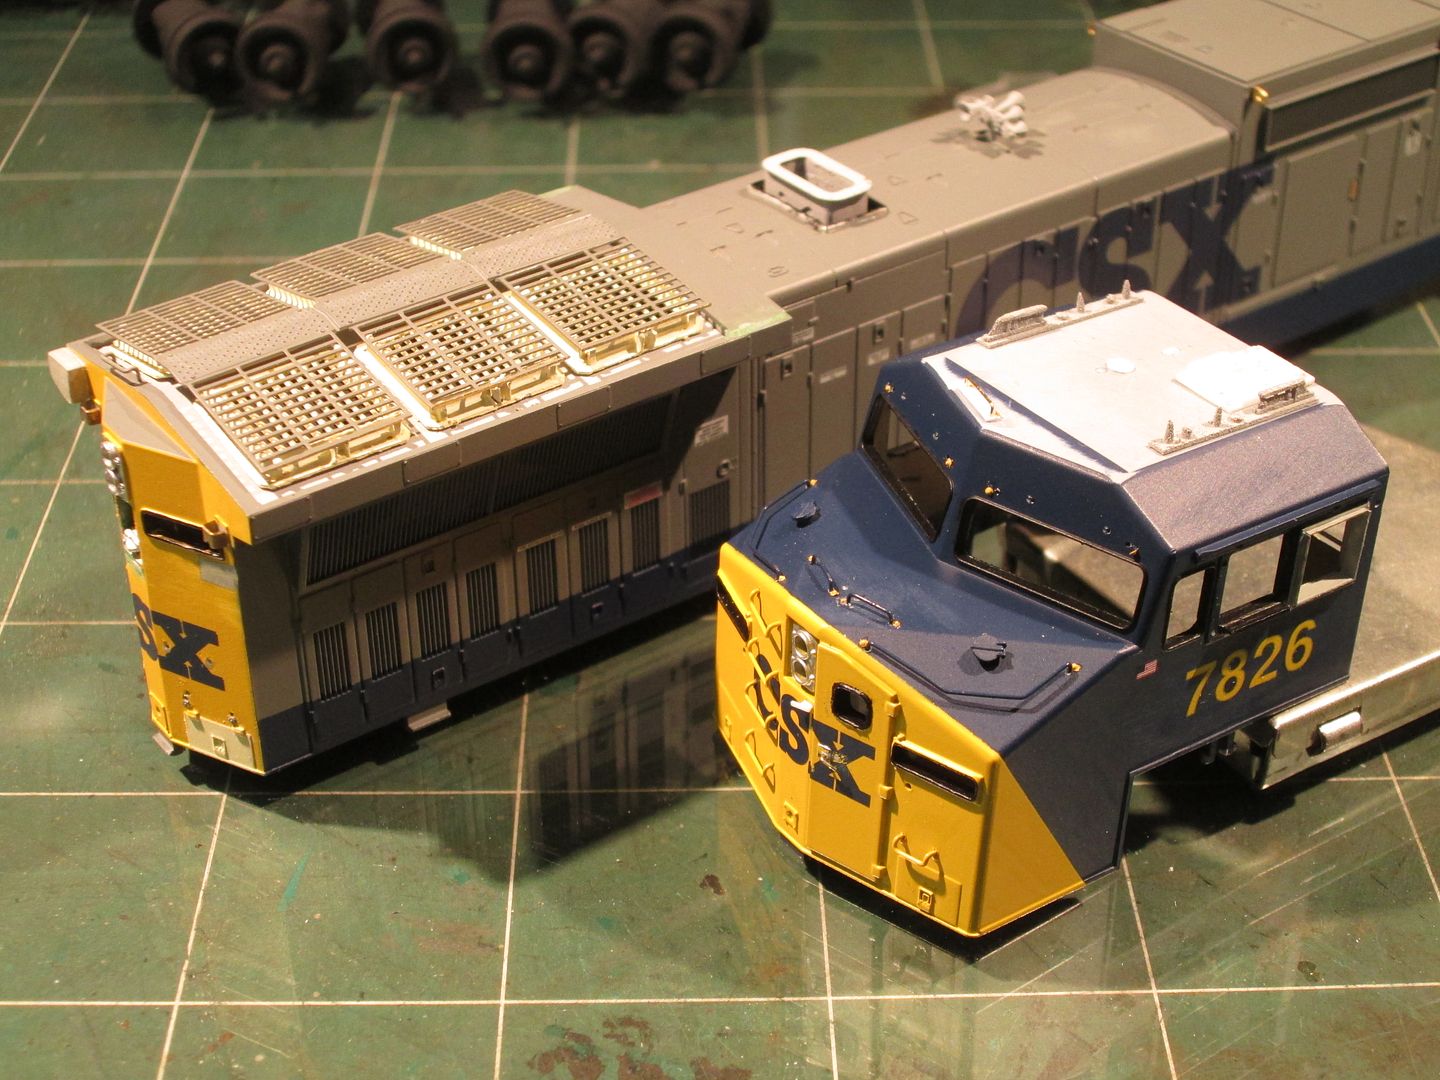  |
|
|
|
Post by airchime30109 on Oct 15, 2016 23:42:14 GMT -5
Excellent work!!! It makes me happy to see somebody modeling CSX power and actually doing it right! I am very impressed!!! Two questions: 1) Where did the exhaust stack come from? Is that stock or is it a Dash-9 exhaust stack (from somewhere?) that is filed down. 2) The later model C40-8Ws (after number 7758) have smaller number boards on the rear end with hinges but they are slightly different than the ones on the front although the number board itself is the same size as the ones on the front and on the older units the rear boards were larger.. How would a person go about modeling these correctly? See link below for reference  Also, one more quick note, and this may not be something worth looking at because it is so small but after years of looking at phases of CSX GE units it is just something else I have noticed. The later model C40-8Ws have the walkway lights on the nose ends recessed into the nose like the Dash-9/AC4400/AC6000 units. On the front it is just a hole in the nose with white lexan over the light bulb, and on the rear it is a little square lexan piece with four bolts and a circle in the middle that the bulb is behind. On the older units and C40-8 standard cab units, the whole walkway light square piece sticks out on each end. - Nick O'Dell |
|
|
|
Post by analogbeatmaker on Oct 17, 2016 19:40:42 GMT -5
Excellent work!!! It makes me happy to see somebody modeling CSX power and actually doing it right! I am very impressed!!! Two questions: 1) Where did the exhaust stack come from? Is that stock or is it a Dash-9 exhaust stack (from somewhere?) that is filed down. 2) The later model C40-8Ws (after number 7758) have smaller number boards on the rear end with hinges but they are slightly different than the ones on the front although the number board itself is the same size as the ones on the front and on the older units the rear boards were larger.. How would a person go about modeling these correctly? See link below for reference Also, one more quick note, and this may not be something worth looking at because it is so small but after years of looking at phases of CSX GE units it is just something else I have noticed. The later model C40-8Ws have the walkway lights on the nose ends recessed into the nose like the Dash-9/AC4400/AC6000 units. On the front it is just a hole in the nose with white lexan over the light bulb, and on the rear it is a little square lexan piece with four bolts and a circle in the middle that the bulb is behind. On the older units and C40-8 standard cab units, the whole walkway light square piece sticks out on each end. - Nick O'Dell Thank you Nick! I appreciate the info. I have several photos of my specific proto unit and it looks like the lights you mention are modeled correctly on the shell from Atlas. I noticed the numberboard details you mentioned as well. However, I couldn't think of a good way to represent these details in styrene or brass so I am just painting to get the "feel" of the protos. The exhaust stack comes from Hi-Tech Details and the top flange (that looks filed down) comes from Tony Sissons. The surrounding flange coming off the long hood is .010 styrene as the Atlas surround was far too thick. |
|
|
|
Post by PVRR 2647 on Oct 23, 2016 18:36:21 GMT -5
Nice thread and build so far. I feel that out of all the class 1 carriers, CSX is the least modeled. CSX motive power is really difficult to model correctly though, the devil is in the details like the handrails, stanchions, and grab irons. they seem to never be correctly rendered by the manufacturers. Now that CSX has started to modify some of their older locos as they are worked on it gets even more challenging. This project is a good example, your Dash-8 looks to have Dash-9 radiator cores shoe horned into the enclosures. I've seen this on quite a few of their old warhorses. It's an often over looked detail that you have included, and it really kicks the model up a notch or two, like going from run 6 to run 8. You have really good skills, and excellent attention to detail!!!
Sincerely,
PVRR2647
|
|
|
|
Post by analogbeatmaker on Oct 25, 2016 23:54:22 GMT -5
Nice thread and build so far. I feel that out of all the class 1 carriers, CSX is the least modeled. CSX motive power is really difficult to model correctly though, the devil is in the details like the handrails, stanchions, and grab irons. they seem to never be correctly rendered by the manufacturers. Now that CSX has started to modify some of their older locos as they are worked on it gets even more challenging. This project is a good example, your Dash-8 looks to have Dash-9 radiator cores shoe horned into the enclosures. I've seen this on quite a few of their old warhorses. It's an often over looked detail that you have included, and it really kicks the model up a notch or two, like going from run 6 to run 8. You have really good skills, and excellent attention to detail!!! Sincerely, PVRR2647 Thank you for the kindness pvrr2647! I'm trying to model this as closely as my meager skills will allow. Hopefully it will turn out decent. It's funny, I've been told those radiators are Tier 4, Tier 0 and now Dash9 radiators crammed into a Dash8...I don't know what to think. lol I'm just trying to replicate what I see.  |
|
|
|
Post by drudge on Nov 2, 2016 15:01:32 GMT -5
Really liking the sander line and flange lubricator details!
|
|
|
|
Post by PVRR 2647 on Nov 2, 2016 17:22:44 GMT -5
Meager skills? As the old saying goes: "You've forgotten more than I'll ever have". I did a little surfin' and the best that I can come up with is that the radiator cores are a tier 0 upgrade to the cooling system. So I was wrong about the larger radiator core from a dash 9 assumption.
PVRR2647
|
|
|
|
Post by analogbeatmaker on Nov 3, 2016 11:47:45 GMT -5
Really liking the sander line and flange lubricator details! Thank you drudge! Meager skills? As the old saying goes: "You've forgotten more than I'll ever have". I did a little surfin' and the best that I can come up with is that the radiator cores are a tier 0 upgrade to the cooling system. So I was wrong about the larger radiator core from a dash 9 assumption. PVRR2647 Thank you, that's very kind. I also appreciate the info confirmation on the rads! |
|
|
|
Post by PVRR 2647 on Nov 5, 2016 20:55:47 GMT -5
Nick~
Keep up the good work and post updates, when you get the chance. I'll be watching this thread closely, I have a couple of SD80Macs' that I'm gonna paint up this winter. One of them will be [CSX] 4598 YN3b, the other will be in YN3. I plan on posting that build when I get started. And for anyone who cares to mention, I am aware that CSX sold all of their SD80Macs' to NS. I have applied for creative license.
PVRR2647
|
|
|
|
Post by analogbeatmaker on Jan 12, 2017 14:44:58 GMT -5
|
|


