|
|
Kurt
Road Foreman
Posts: 56
|
Post by Kurt on May 18, 2014 19:57:42 GMT -5
I wanted to detail the process I used to fill the old style side mounting pins. While looking for parts I came across an old air tank piece from an Athearn U boat. The pin on the air tank seemed to be about the size of the hole in the shell so I thought why not use this? The pin was oversized and not perfectly round so I decided I could push it through my drill bit gauge and get it perfectly round. 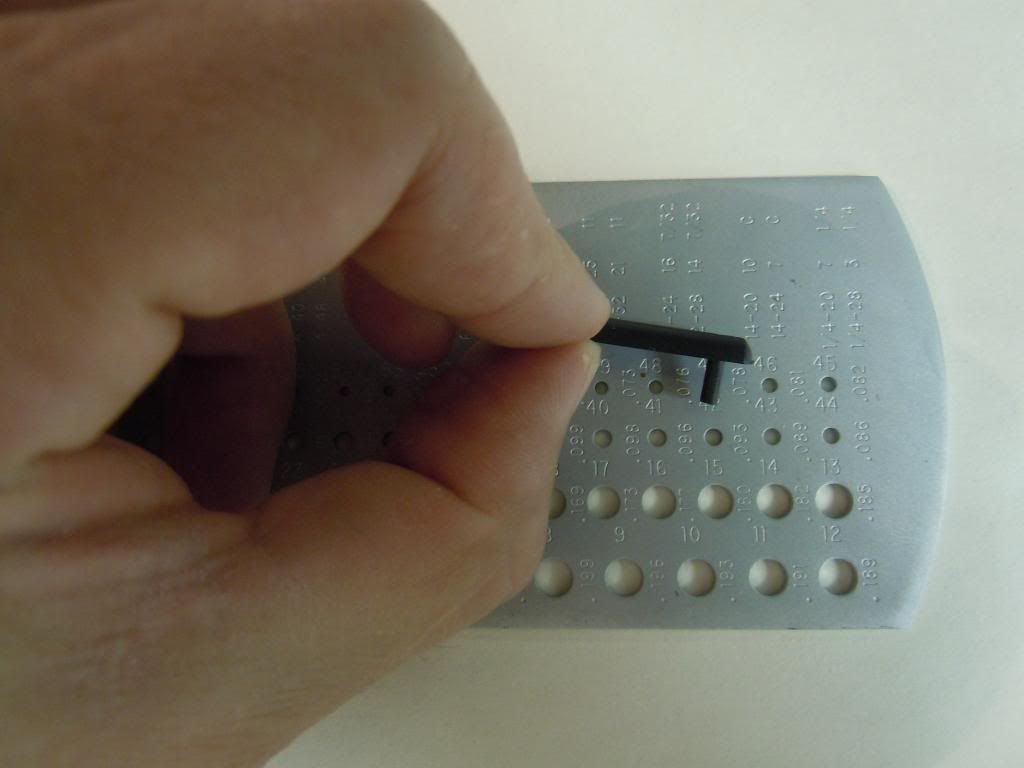 Besides the benefit of having the pin perfectly round it was also the exact size of a number 42 drill bit. So I drilled all 4 holes in the shell a little larger with a number 42 drill bit. 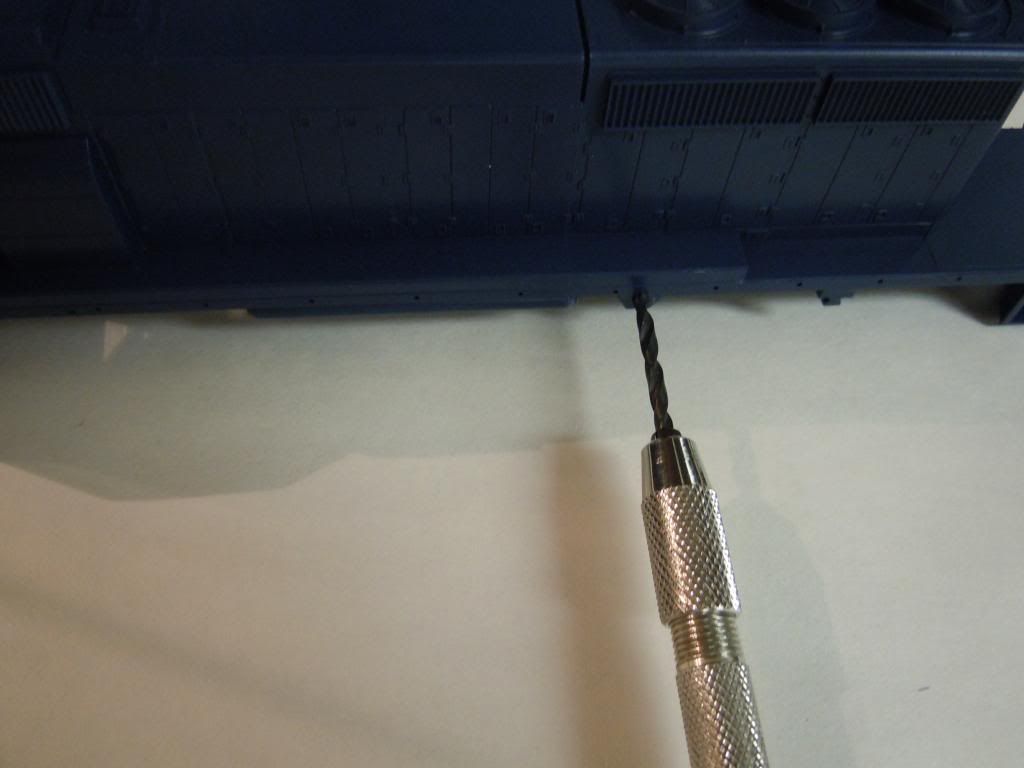 After drilling all four pins out to a number 42 I then glued the rod into each hole. I let the glue cure completely before trimming off the excess plastic. 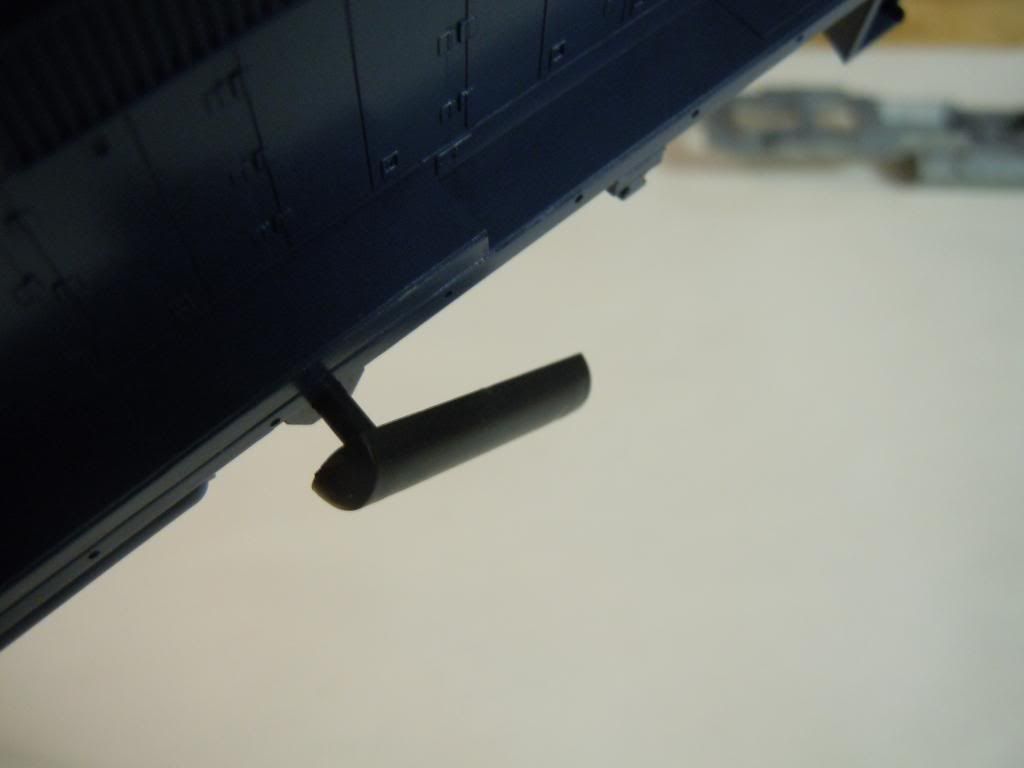 The next picture shows the pin in place ready to be trimmed. You can see how nicely it fits and in fact I would need to use no filler. 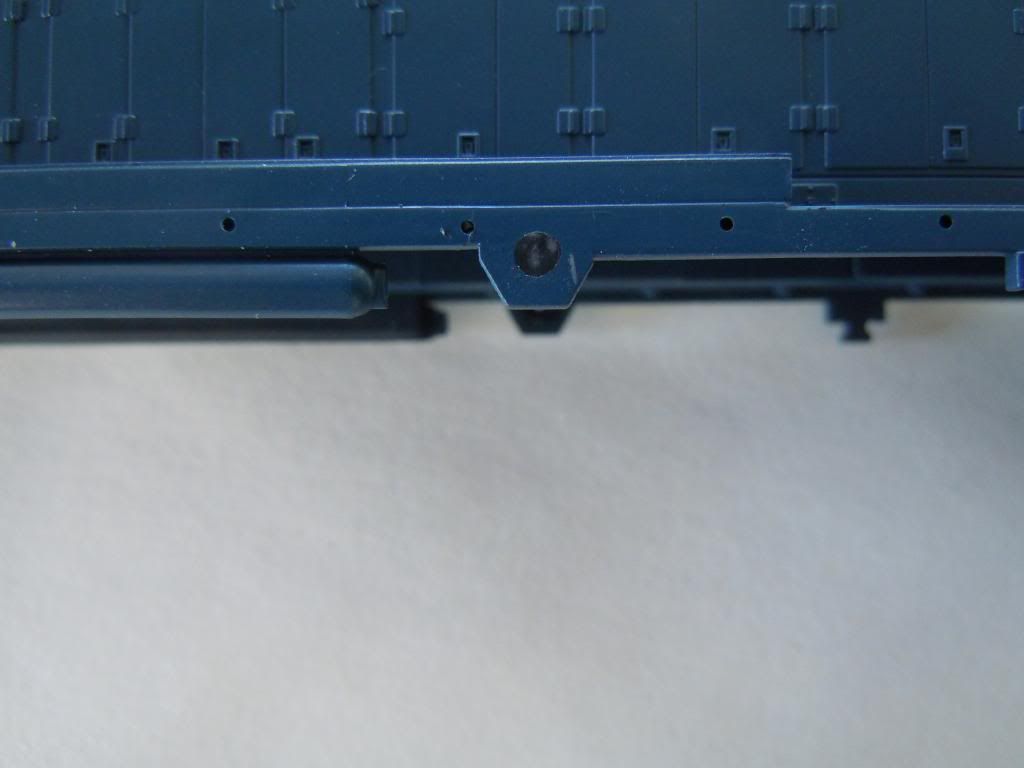 Here is the trimmed area before painting. 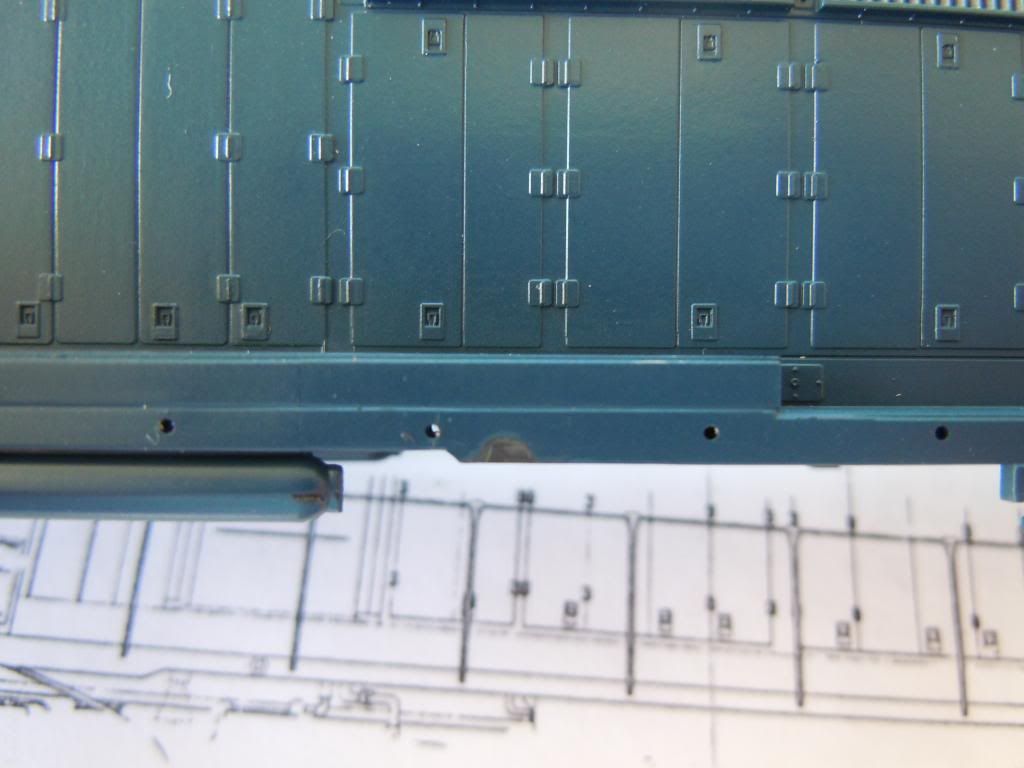 And after the primer was applied. 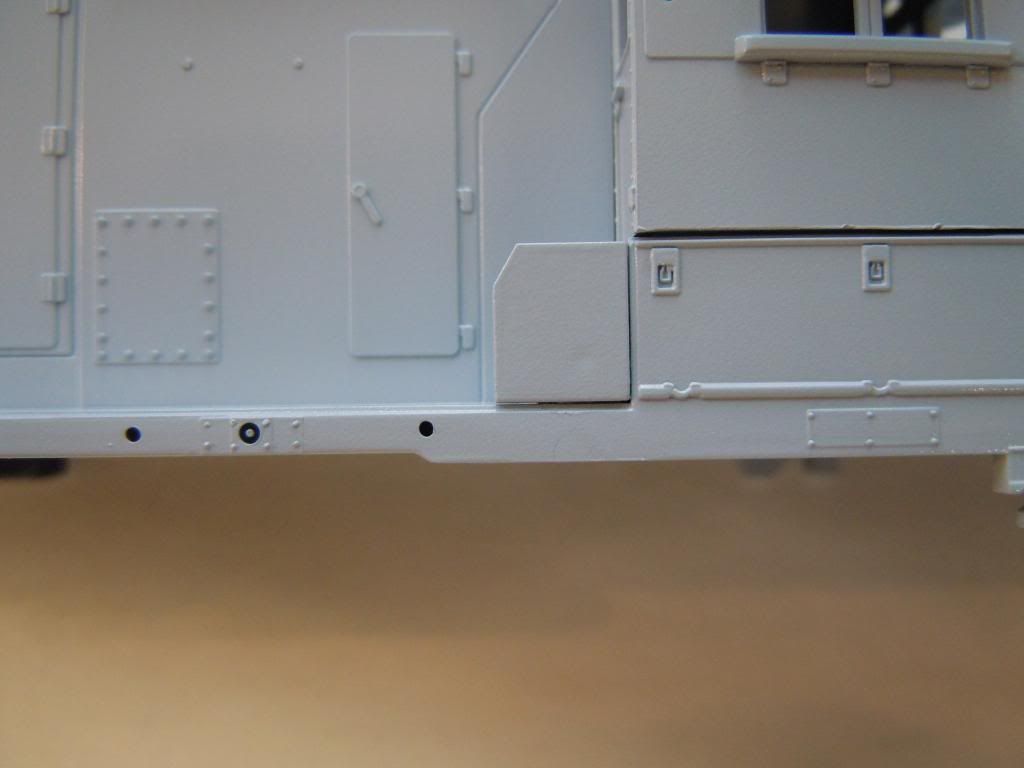 There appears to be a bit of a ghost outline in the picture of the old pin but I honestly can't see it with my naked eye. Also there will be a decal here for the white frame stripe. The other advantage about this process is that I used the same same type of plastic to fill the hole that the shell was made with. Sometimes its hard to get a good joint when using dissimilar plastics and also they scrape and sand differently due to the different properties. So by using the same exact plastic the job was much easier to do. |
|
Kurt
Road Foreman
Posts: 56
|
Post by Kurt on May 18, 2014 20:19:23 GMT -5
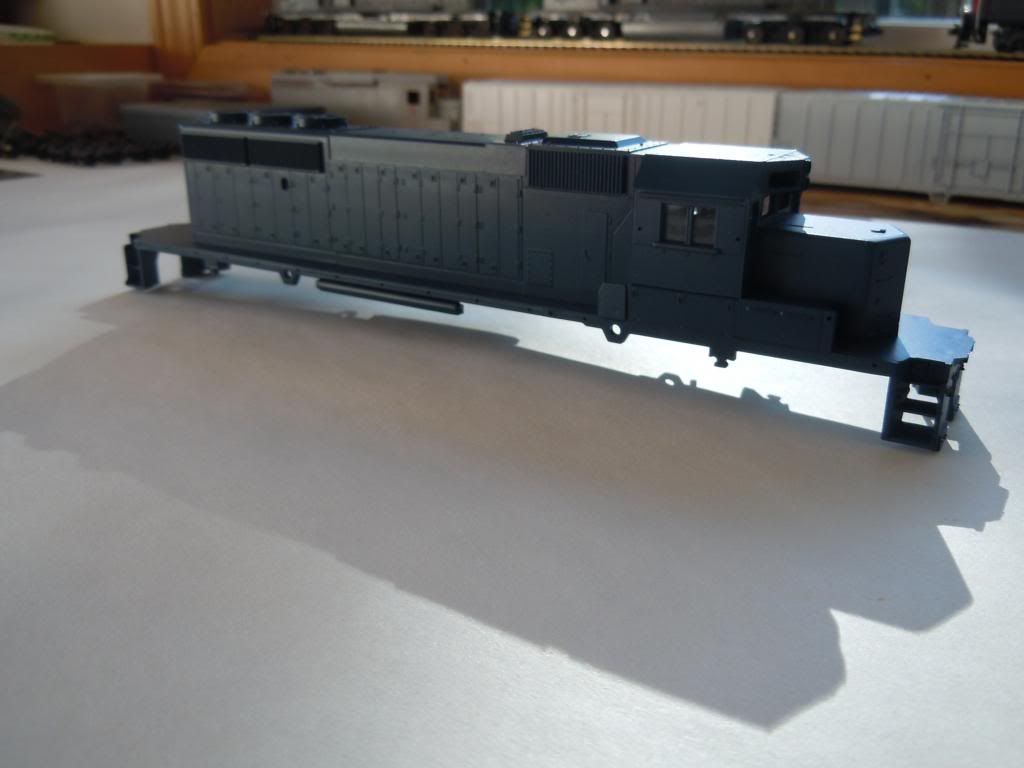
When I first started this build I thought I would keep the factory paint but decided there was no benefit as I didn't want to try to match the blue when I went to spray the frame and detail parts. So the shell got an overnight dunk and the blue came off with ease. Since I was going to repaint everything anyway I did a little body work on the gap where the non dynamic hatch sits. It appears Athearn may have made the hatch a little too short so I added a piece of .030" styrene to the end and shaped it to match the contour of the hatch. I also added my selected detail parts at this time. 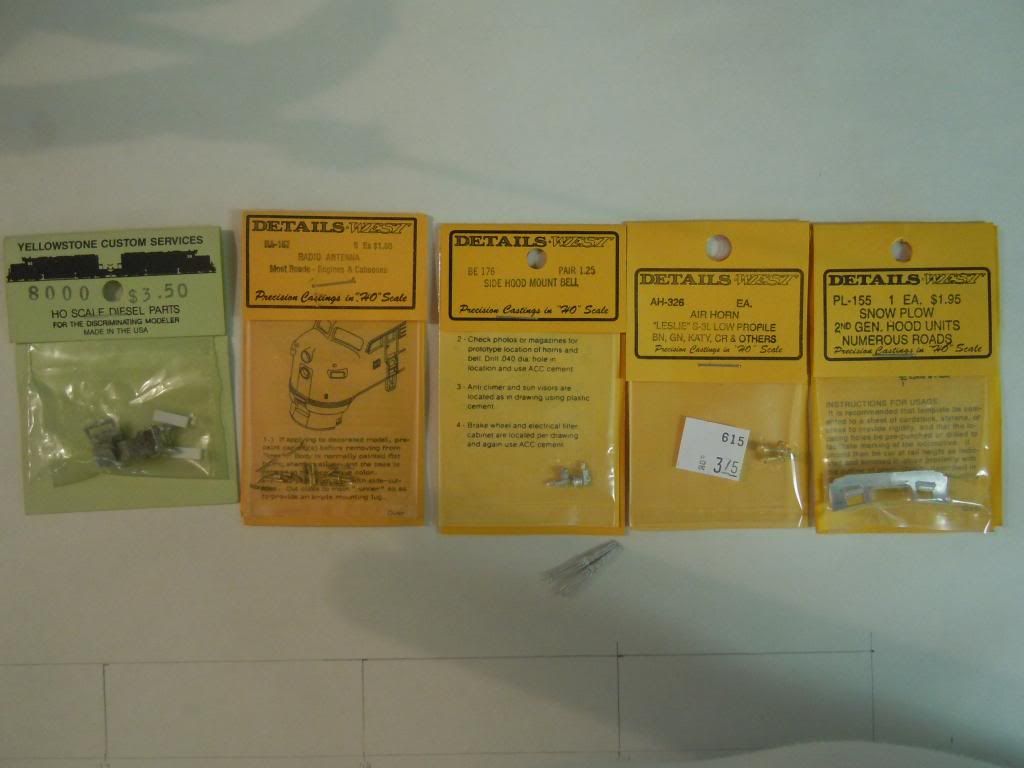 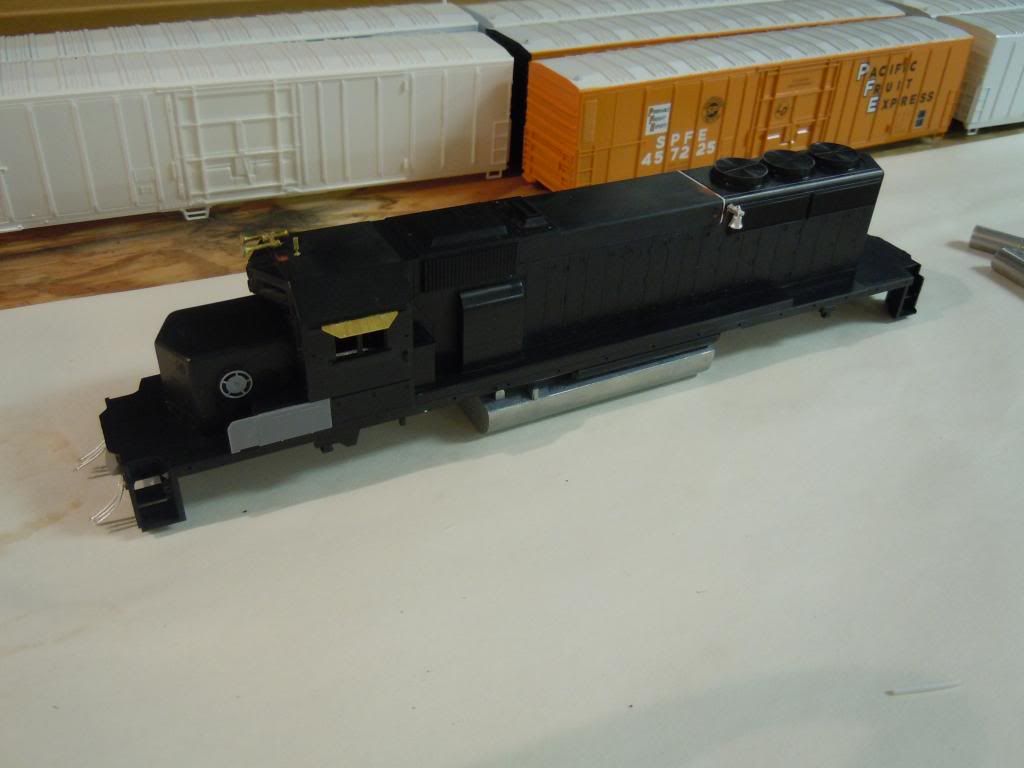 I also ended up adding eye bolts as I sanded the nubs off the non dynamic hatch when smoothing the seem from the styrene shim. The Cannon battery box door was a spare part from a sub base kit that I made at some point in the past. The original Athearn part had a large dimple where the pin was located. The Cannon brake wheel is an essential part in my opinion as the Athearn part is undersized and detracts from the look of the model. |
|
fr8kar
Chairman
Little man raise the cotton, beer joints get the money
Posts: 309
|
Post by fr8kar on May 18, 2014 20:23:57 GMT -5
Did somebody say Mopac? Well, you got my attention!
That's a great point about using plastic rod to fill in the hole instead of filler/putty and a pretty ingenious use of the air reservoir (which is better cast aside for the Details West part).
It looks like you're off to a good start. Have you gotten very far on this project or is this thread pretty much current?
|
|
Kurt
Road Foreman
Posts: 56
|
Post by Kurt on May 18, 2014 20:44:22 GMT -5
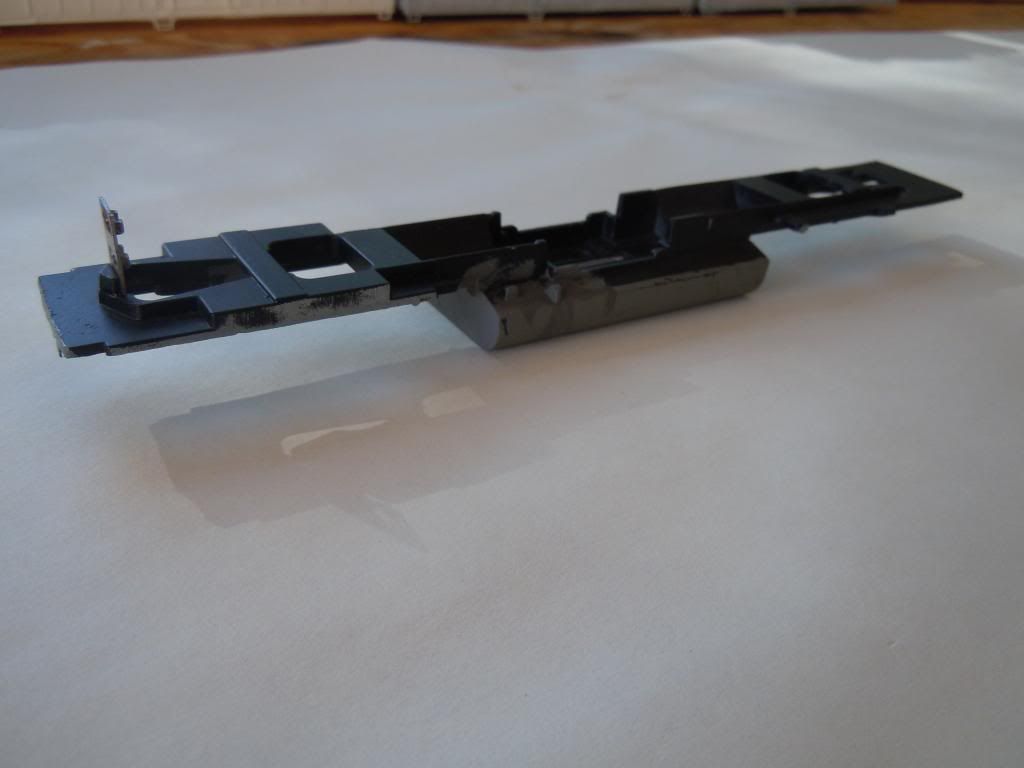
The next stop is the frame... We all know Athearn used the thickest paint formula ever invented when they painted these old frames black. Luckily for us Kleen Strip makes a great aerosol stripper that takes the black paint off with relative ease. Here is a picture of the frame in my utility sink with the stripper applied: 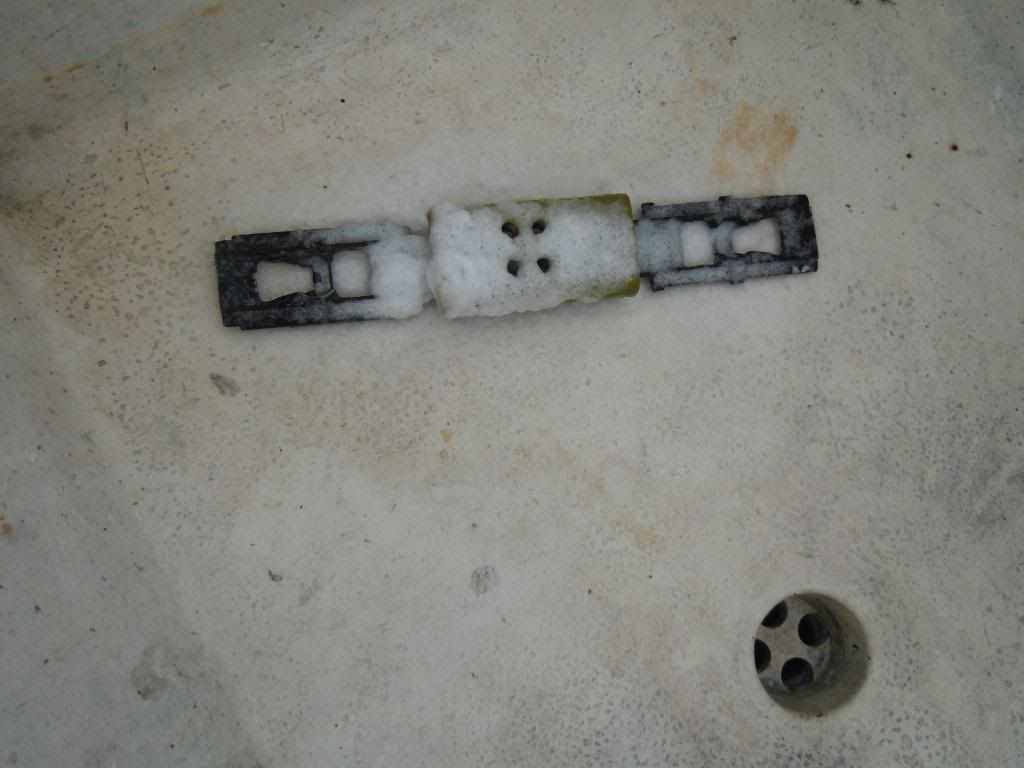 And here is the frame after a few applications of stripper: 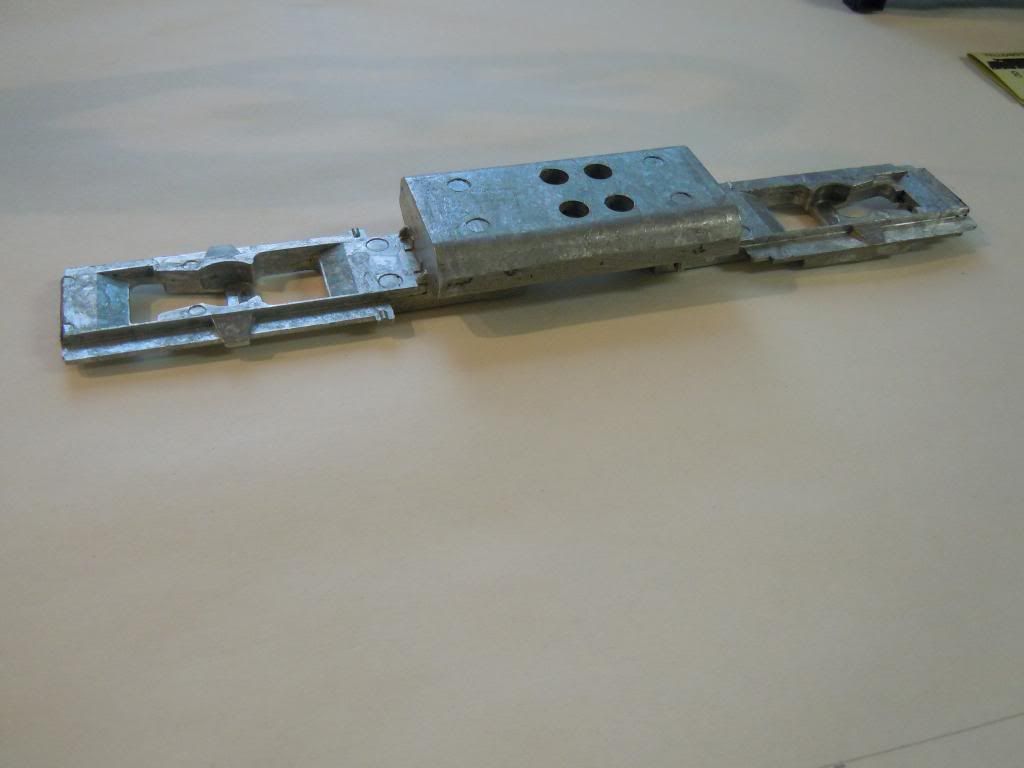 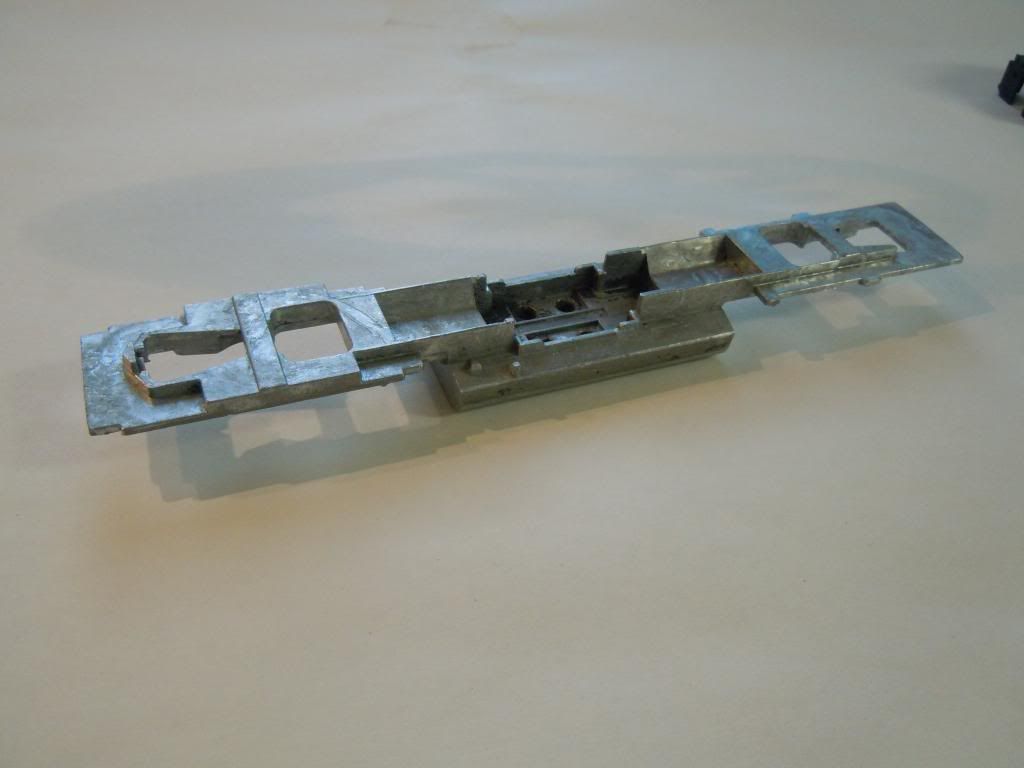 Now that the frame is free of all the old paint it's time to smooth out the rough casting marks that made the fuel tanks look terrible and unrealistic. I start by clamping the frame into my bench vise and then I use a smooth file to take the casting marks off the fuel tank. After the tank is relatively smooth I start sanding. I cut strips of 400 and 600 grit paper and start wet sanding the fuel tank sides smooth. I don't have a picture because its a messy process but think of how a shoe shine boy holds both ends of the polishing cloth when shining shoes. That's how I hold the sand paper when sanding- I hold both ends of the paper and continuously sand the tank sides until all of the file marks are gone. After I finish with the 400 a polish the sides out with 600 grit (wet) in the same fashion. 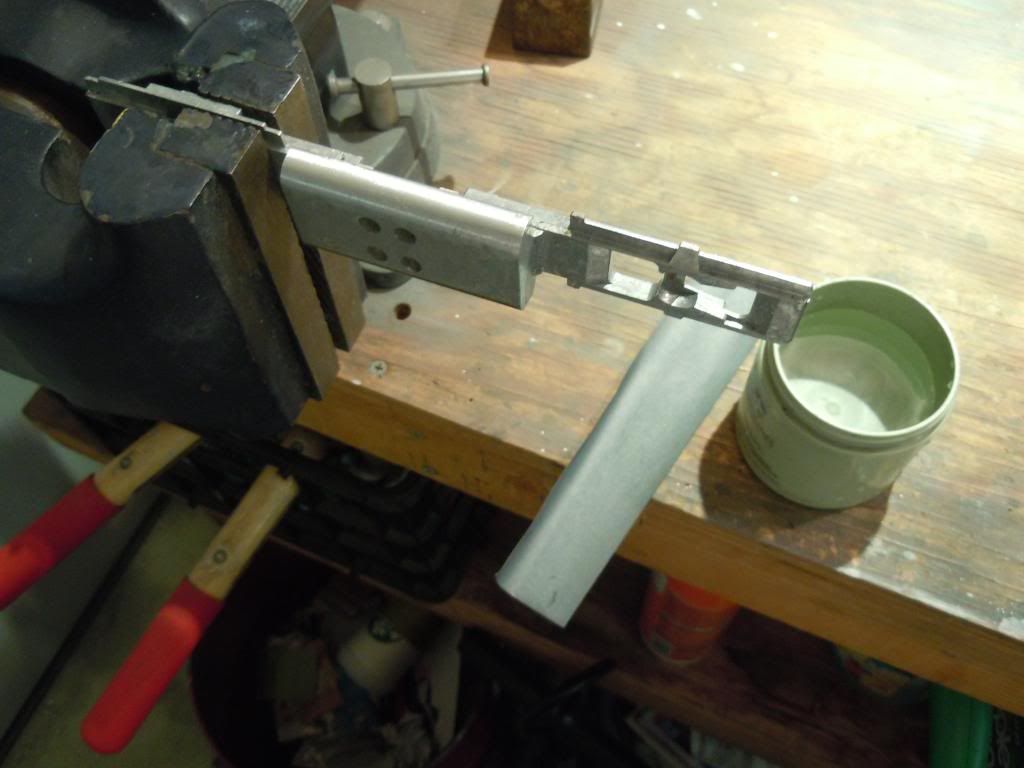 The finished product: 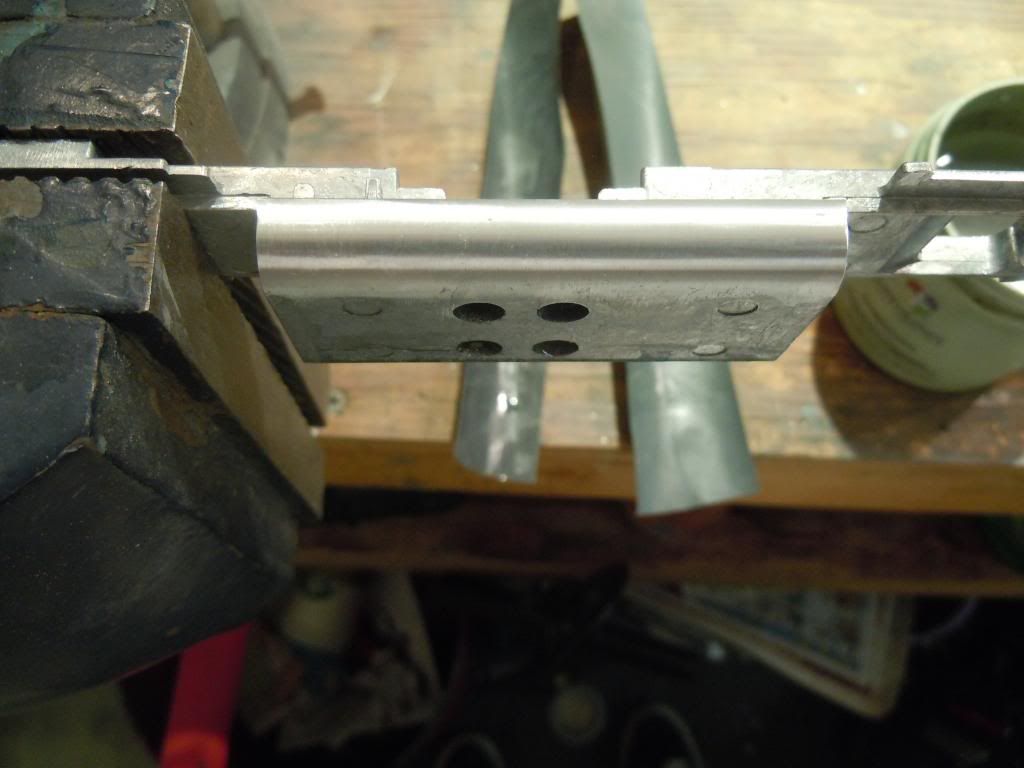 I should note that I went no further in my detailing of the tank. The model itself is relatively sparse in terms of super detailing and I was happy having a smoothed out tank that will look 100 times better after it i painted than the unmodified Athearn one ever would. |
|
Kurt
Road Foreman
Posts: 56
|
Post by Kurt on May 18, 2014 20:57:33 GMT -5
The last piece of fabrication required is the handrail assembly. I debated about what to do when it came time to think about the handrails. At first I thought I could find a newer plastic set on Ebay and just install those however I couldn't find a MP blue set and let's face it Athearn messed up on the stanchion spacing so they always seem to lean forward. I then dug up enough pieces to do the stock metal wire handrail assembly. These look OK and are very sturdy but the handrail wire they used is completely oversized and I knew I wasn't going to be happy. So I compromised and bent my own handrails out of Detail Associates .015" brass wire and used the older Athearn metal stanchions. I used the measured drawing that comes with the Smokey Valley handrail set for SD40-2's and used that as a guide to bend the wire. I then test fit the handrails to a junk shell and glued the assembly together. Once the CA dried between stanchions and the wire I gently pulled the handrails off the junk shell and had sub assemblies I could then airbrush. 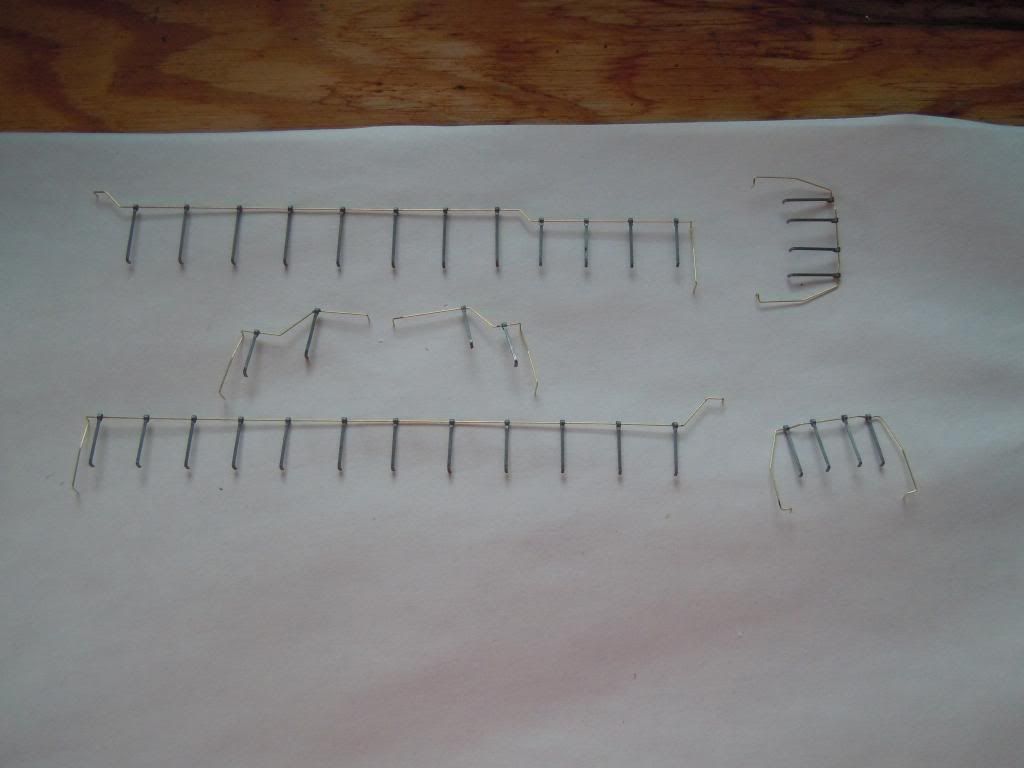 |
|
Kurt
Road Foreman
Posts: 56
|
Post by Kurt on May 18, 2014 21:19:27 GMT -5
At this point I stole a set of sideframes from another project because I didn't have any yet. I haven't been able to find any sets on Ebay, only the 4 axle Blomberg B and M... Let me know if you have an extra set!!! I have a sideframe-less tunnel motor now that needs them:-[ I always steal stuff from other projects and regret it later! Now that I had all the pieces together I started the painting process. I of course washed all the parts in warm water and scrubbed everything down with a little soap and an old toothbush. After letting it dry I sprayed it with my favorite primer- Scalecoat MOW Grey. 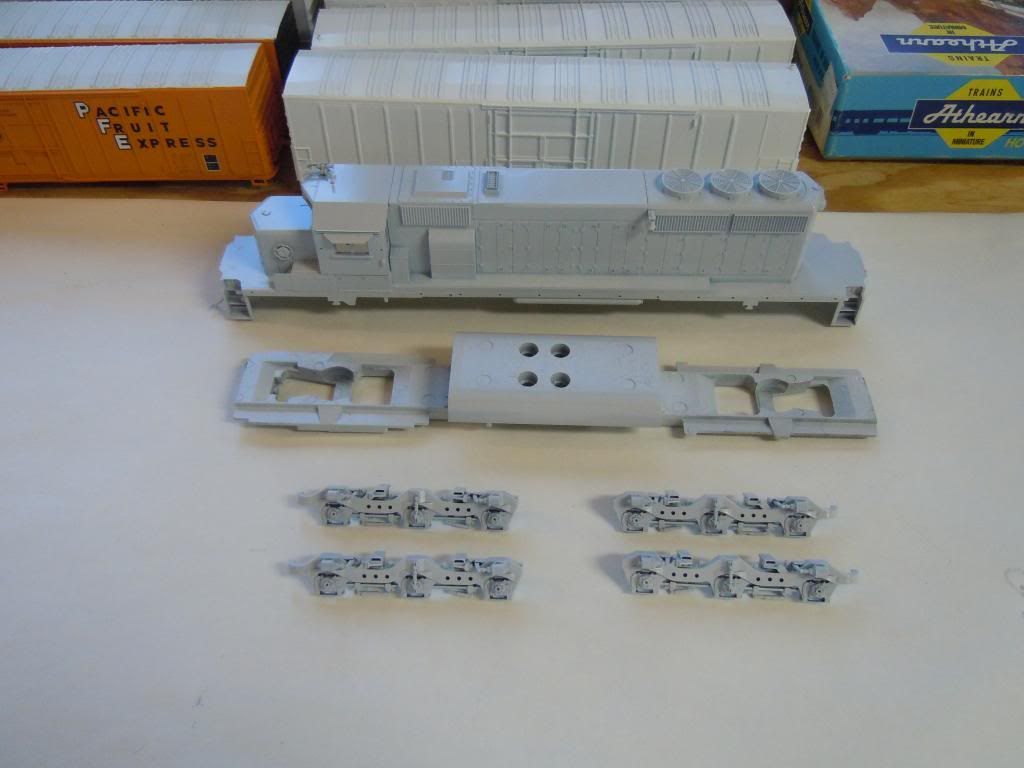 After letting the Scalecoat dry for a few days I painted everything with TruColor MP Jenks Blue. I have never used TruColor before as I love Scalecoat but Scalecoat doesn't make MP Jenks Blue and Trucolor does. It was a bit of a learning process as it is an acetone based paint and I had problems with my airbrush clogging. I found I needed to thin it a little more than I was used to and had no problems with clogging after that. The nice thing about Trucolor is it dries very quickly and very glossy- perfect for decaling. 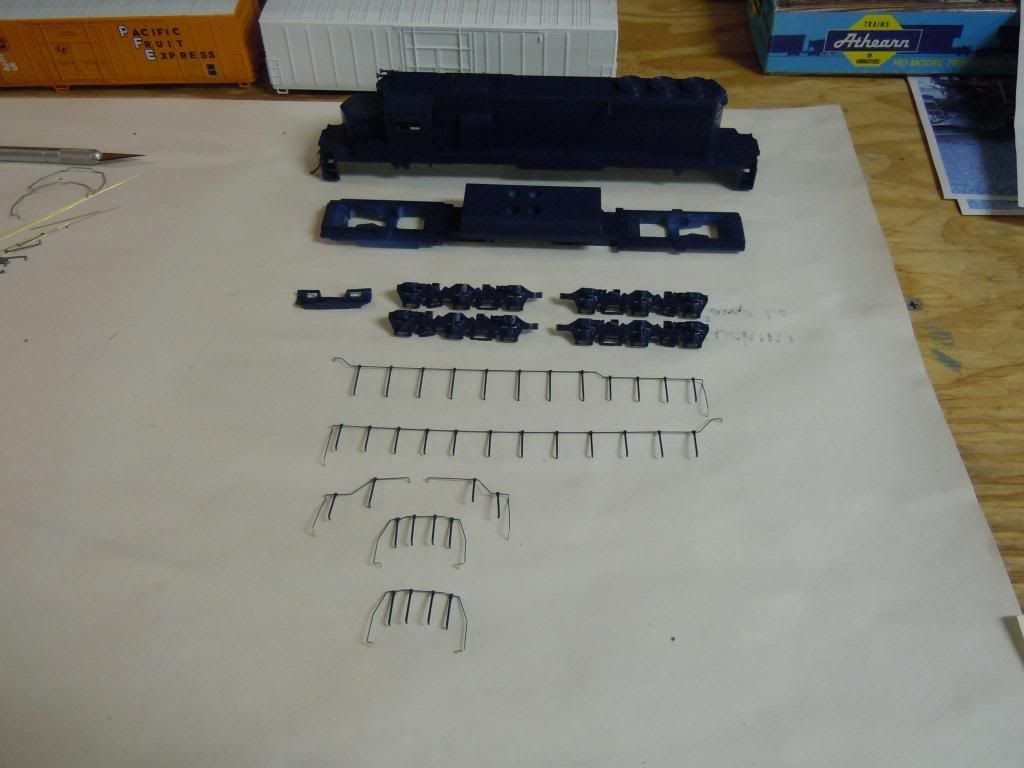 After the blue dried I masked off the grills and sparayed them with a brown/grimy black mixture to give them some depth. I also started detail painting the items like the white on the step edges and the aluminum on the headlight housings and window frames. 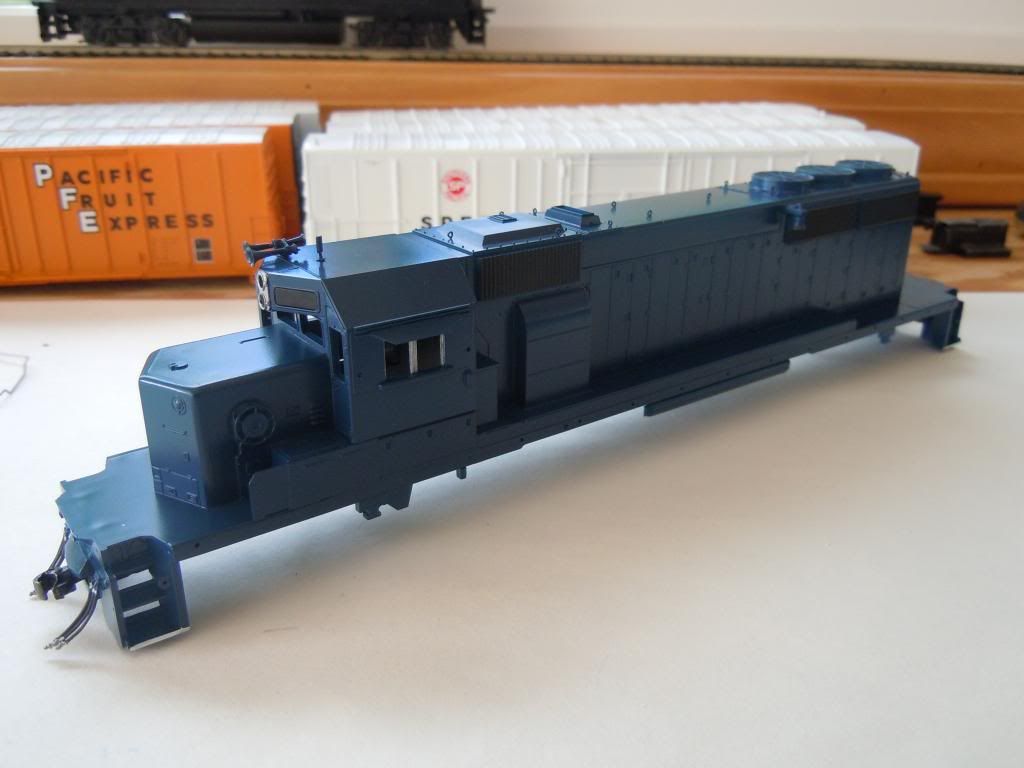 |
|
|
|
Post by icghogger on May 19, 2014 8:36:32 GMT -5
Lookin' good, Kurt, lookin' REAL good!!  |
|
|
|
Post by santafemikie on May 19, 2014 10:30:50 GMT -5
Those Yellowstone coupler pockets are ancient. For this project, they are a perfect and good looking solution to your problem. This is really coming along very nicely.
Mike
|
|
Kurt
Road Foreman
Posts: 56
|
Post by Kurt on May 19, 2014 22:43:47 GMT -5
I bought as many of the Yellowstone and Warren's Custom Services coupler pockets as I could get my hands on. I still have a few more sets although I am very careful about what projects I use them on. I did modify the coupler pockets slightly by drilling a second #50 hole and tapping it 2-56 to move the coupler back a little. 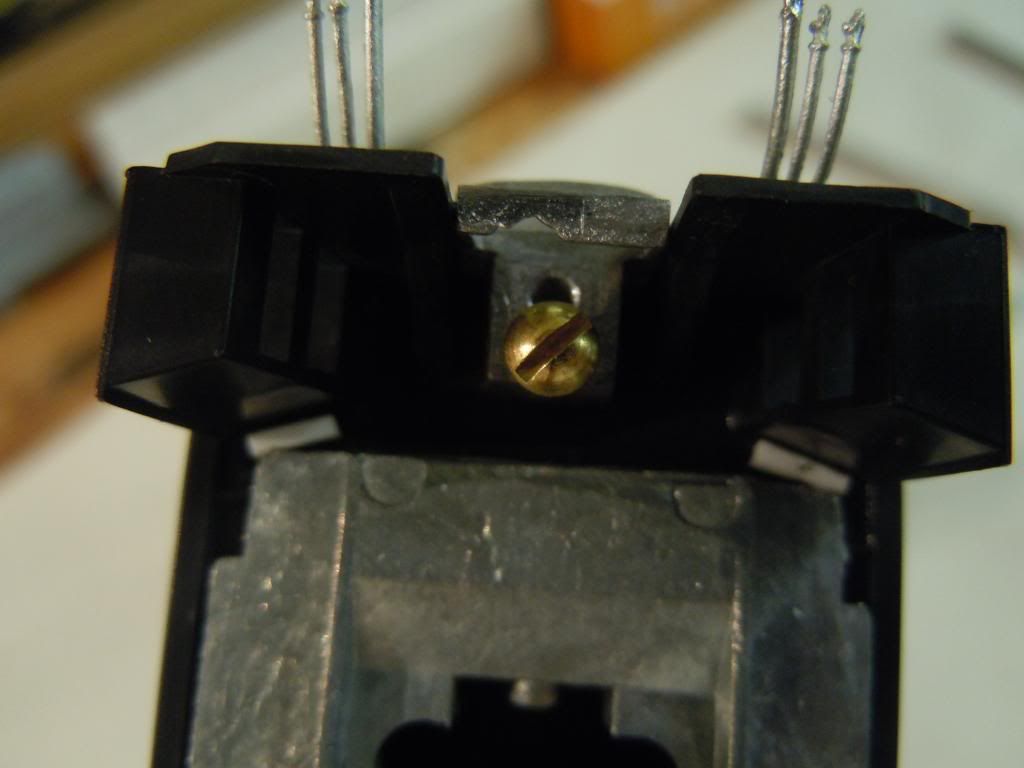 |
|
Deleted
Deleted Member
Posts: 0
|
Post by Deleted on May 20, 2014 10:32:10 GMT -5
I am starting to like these original blue box models more and more. They are fun to work on and bring back to life.
The finish on your model looks very nice. The overall look of the model look great. For some reason, even using the old metal stanchions looks OK with your new hand made railings.
|
|
Deleted
Deleted Member
Posts: 0
|
Post by Deleted on May 20, 2014 16:52:31 GMT -5
nice build can't wait to see more
|
|
Kurt
Road Foreman
Posts: 56
|
Post by Kurt on May 20, 2014 23:58:13 GMT -5
Thank you all for the kind words so far. This project has been enjoyable to this point and hopefully I should be able to make some progress decaling and building the chassis this weekend. I'm still looking for that front truck part but I do have some feelers out there.
These kinds of builds are more of an exercise in restraint than anything else. It's a battle to find the balance between cheap and perfect, as scope creep rears it's ugly head at every turn. And if you are like me that keeps detail parts "in stock" the battle gets even harder as the temptation is right there! But I have been down the full Cannon path before and honestly this locomotive doesn't deserve that treatment as I have newer models with the improved pilots that are more appropriate for that level of detail. But so far I am VERY happy with how this one is turning out and I feel I've made the right choices in terms of improvements and detailing.
|
|
Kurt
Road Foreman
Posts: 56
|
Post by Kurt on May 23, 2014 0:06:51 GMT -5
I did some decaling over the last couple of nights. It still has a ways to go but is coming together nicely. 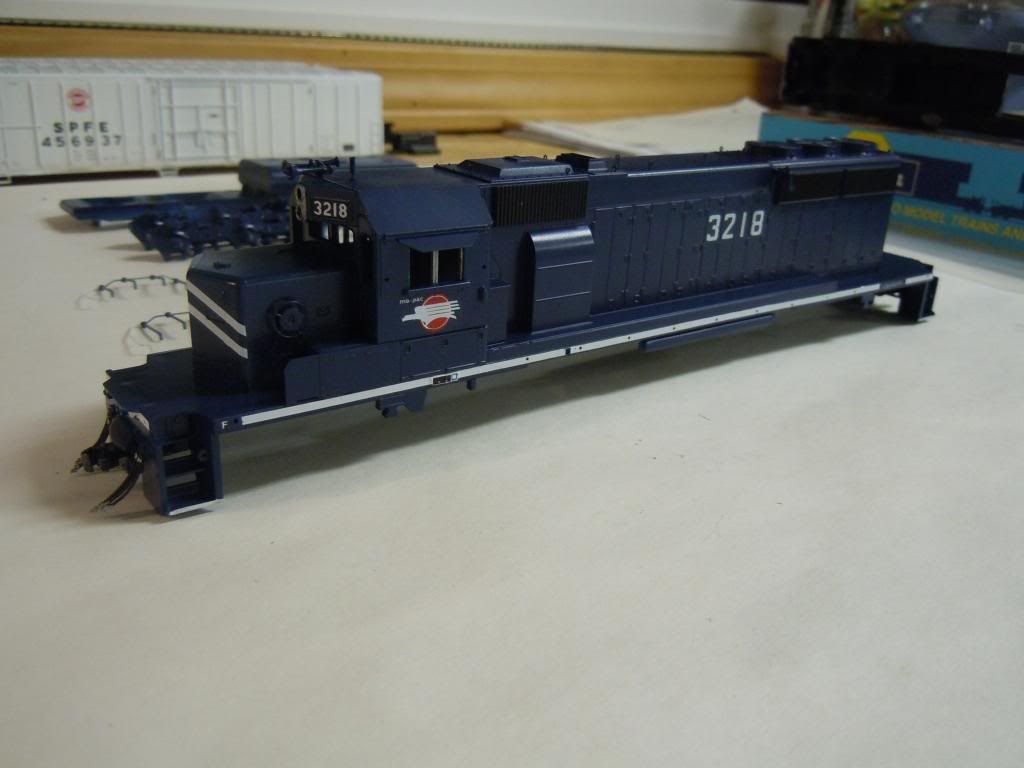 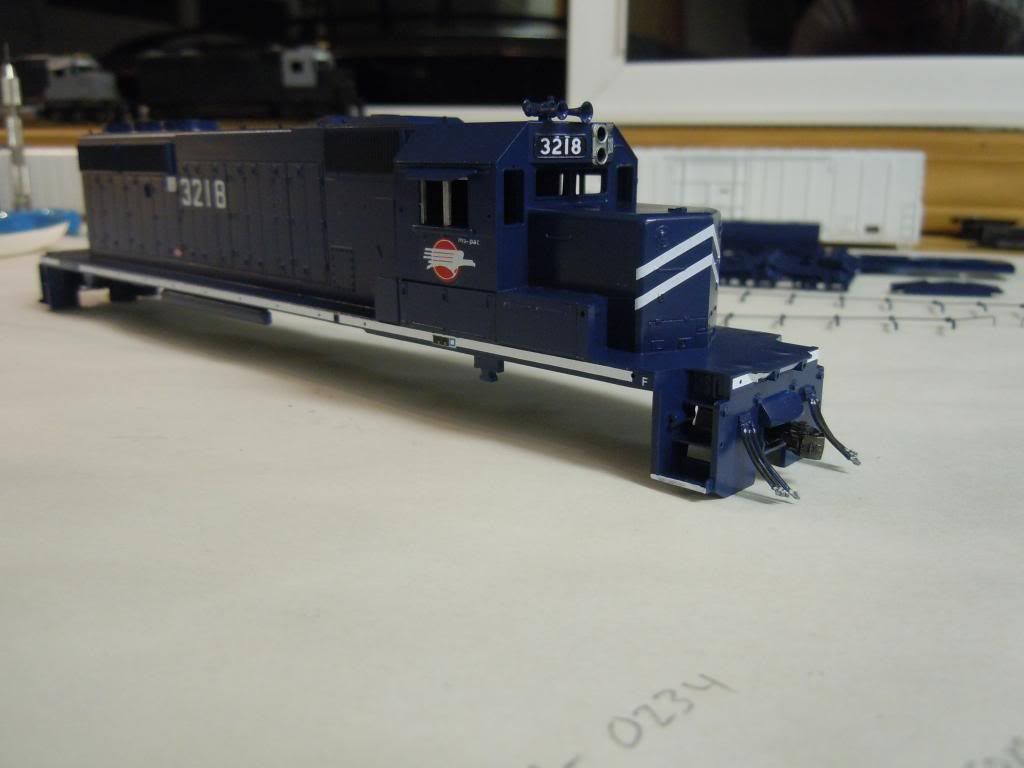 |
|
Deleted
Deleted Member
Posts: 0
|
Post by Deleted on May 23, 2014 7:10:43 GMT -5
Kurt,
You added all the right details. You really have me wanting to do something similar. I'll use the upgraded blue box model.
As always, there is a "the only thing I would do different" comment. That would be to add the Details West air reservoirs. That is it though.
Will you be using the AMB window sets?
|
|
Kurt
Road Foreman
Posts: 56
|
Post by Kurt on May 23, 2014 20:09:13 GMT -5
Thanks for the comments Brian. To answer your question I will be adding AMB windows along with A-Line windshield wipers. The laser cut windows are the best thing you can do to improve the Athearn cab along with chucking the horn and sanding the sprue tab off the center of the roof.
As far as adding reservoirs I was this close but then backed off. I have an assembled Cannon set I put together after watching one of your YouTube videos and I wanted to try out the techniques you demonstrated. I thought I was slipping down that same old slippery slope yet again and put them away. I also had a Cannon cab kit sitting out too but put it away. For me the one thing I would change would have been to shave off the cast on grab irons and add new BLMA grabs. Oh well!!
I'm interested in seeing an extreme Detailer such as yourself take on a project like this. The decisions are the hard part, not the modeling!!
|
|
|
|
Post by emd16645 on May 23, 2014 20:14:55 GMT -5
Shaving off the cast on grabs is always a must in my book. I have a similar shell that I've been playing around with lately. Unfortunately, I've decided to treat it as a practice build, so I'm throwing just about the whole cannon catalog at it!
|
|
Deleted
Deleted Member
Posts: 0
|
Post by Deleted on May 23, 2014 21:07:22 GMT -5
I plan on it. After seeing your build, I really want to give it a go. You said it Kurt. The decisions are the hard part. I find myself saying, I can do this and then that and then........and then I have to step back and tell myself to stop and re-evaluate the project. My friend here calls it "primitive modeling" I like that term. I am going to start with an improved "Blue Box" model. From there I am only going to add the things that make it the prototype. except for a couplethings that will enhance the model, but not going the whole route. The things I am not going to do: - No changing fans - No changing cab - No cutting off inertial filter hatch - No cutting off exhaust hatch - No motor change Things I will do: (these are things we typically did way back in the 1980's) - Add prototype specific details such as horn and location, bell and location or plows if needed - Replace air reservoirs - Add Cannon tread plate - AMB windows - Windshield wipers - Wind deflectors - Clean up fuel tank and mill end flat - DCC & Sound - Lighting - Add wire grab irons - Change out wheels to 40" - MU hoses - relocate hand rail holes to match Athearn hand rails so they stand up straight - Any needed antennas I want to do a trio of units. I wanted to build them in Oneida & Western, but if Highball Graphics does not have them available from the Oro Decals, then I think I will do some L&N and Family Lines units. To do the Family Lines units, I need to find two Q-equipped SD40-2. I have the parts to make one, but that means I would have to cut the fans off and I do not want to do that so I need to find two Q-equipped Athearn models. I have one, but it is slated for my Copper State Railway roster and do not want to sacrifice it. I think the paint and weathering will set the models off more than all the detailing. Especially for runners. Sorry Kurt, did not mean to take your discussion in a new direction. |
|
Deleted
Deleted Member
Posts: 0
|
Post by Deleted on May 23, 2014 21:09:41 GMT -5
For me the one thing I would change would have been to shave off the cast on grab irons and add new BLMA grabs. Oh well!! I did not even notice you did not shave off the grabs. I was looking at the overall picture and it looked great! OK, so there are two things I would have changed.  |
|
Kurt
Road Foreman
Posts: 56
|
Post by Kurt on May 23, 2014 21:24:15 GMT -5
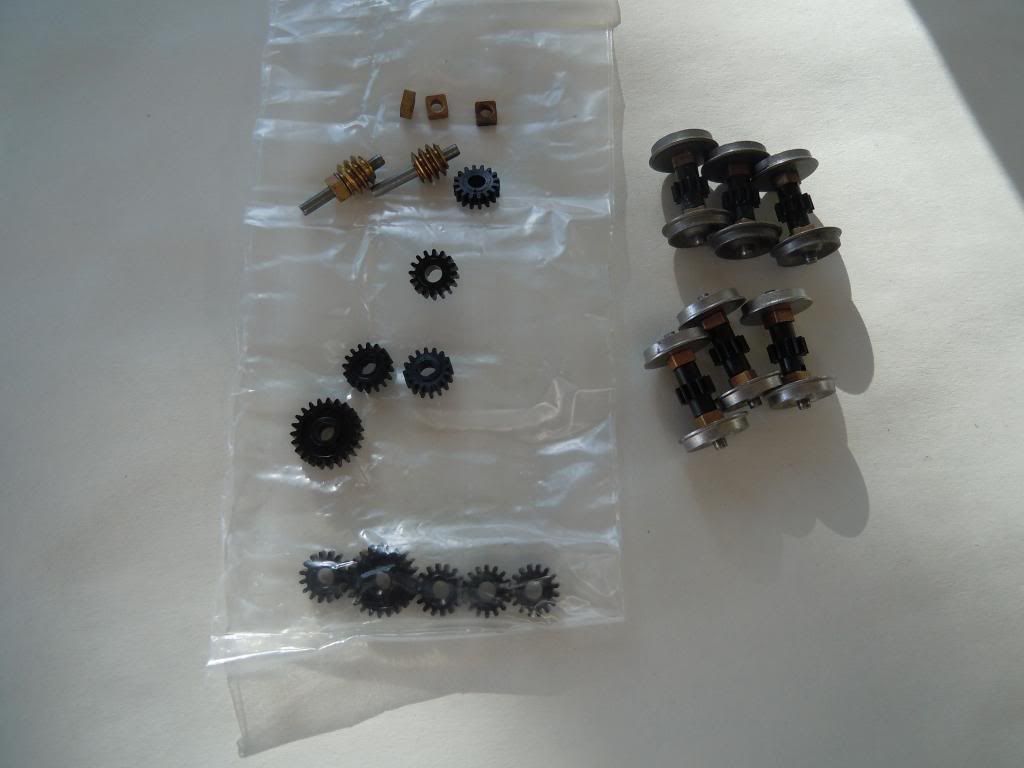
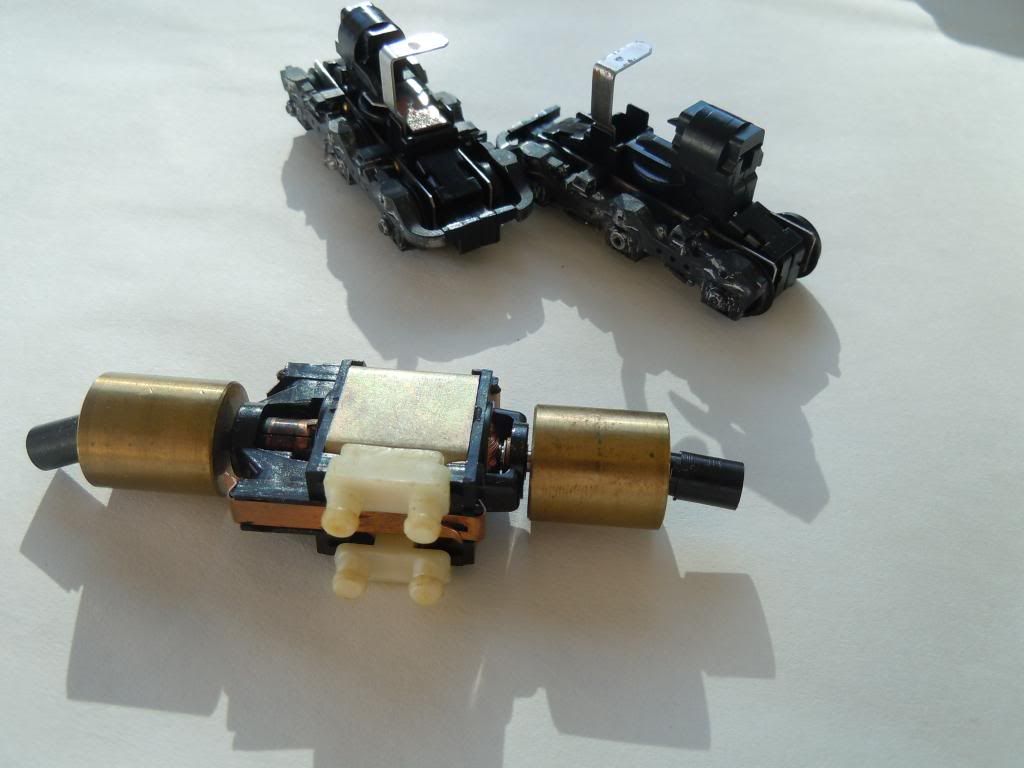
I've really been having a lot of fun doing this project tonight and made more progress. I clearcoated everything with a mix of about 1/3 Glosscaot and 2/3 Dullcoat. I airbrushed the trucks with engine black and then assembled and lubed. I airbrushed the new wheels roof brown before assembly. I added the handrails and glued the plow in place, completed assembling the chassis and put it all together for a first look tonight. 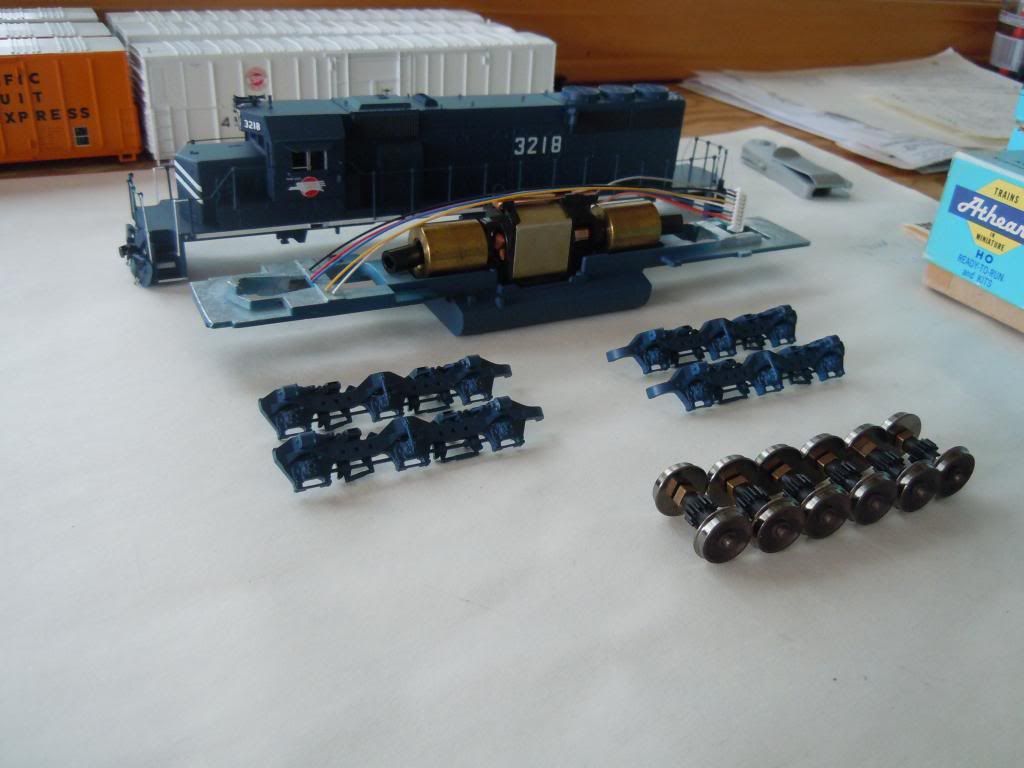 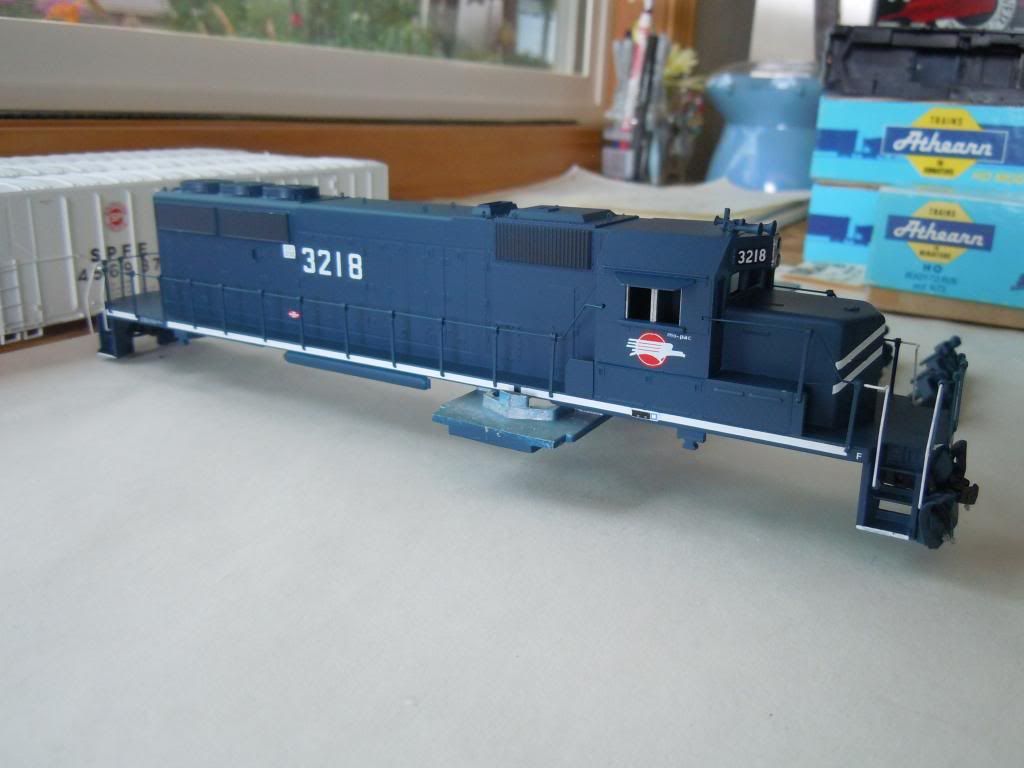 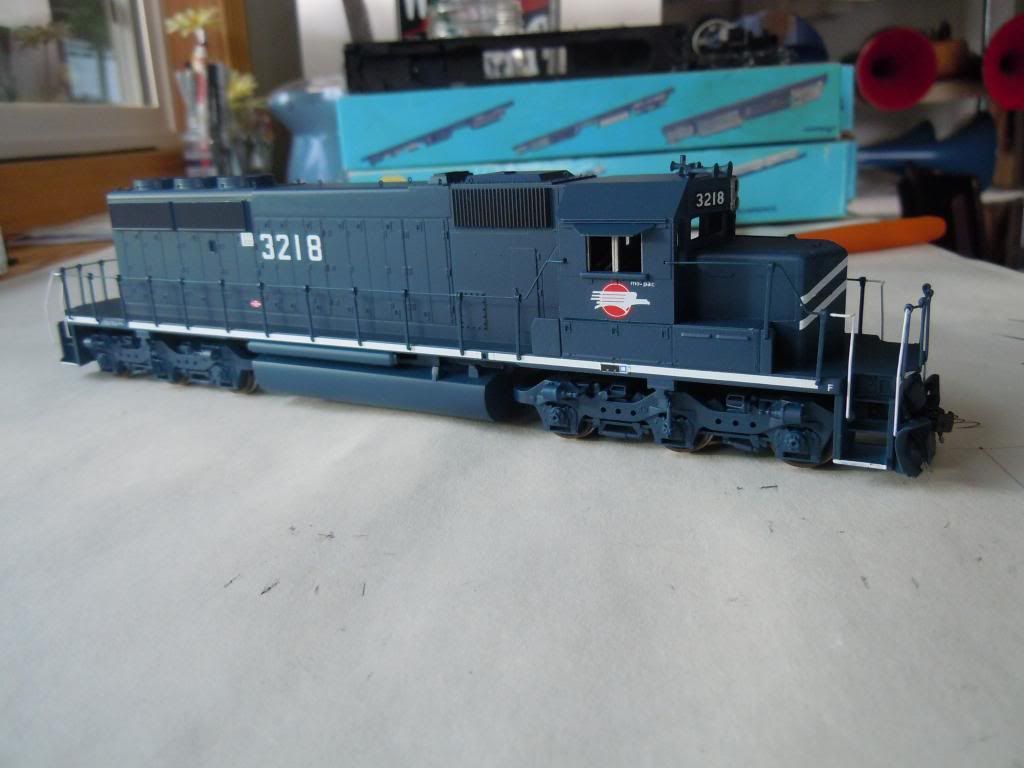 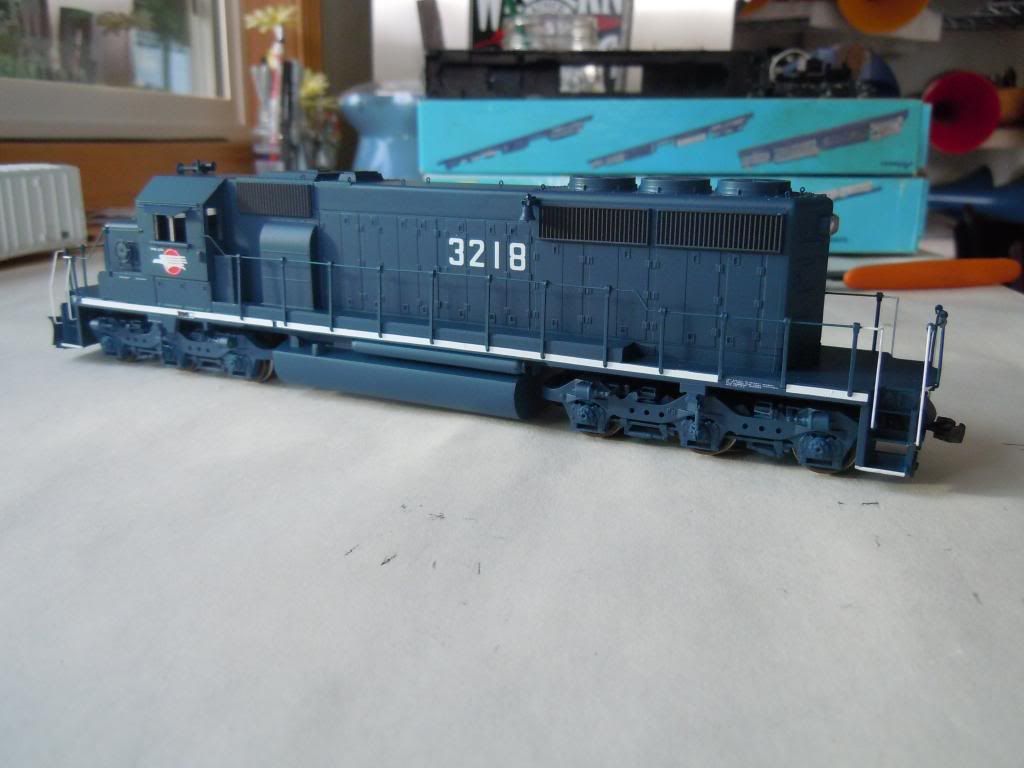 Still needs weathering but it's looking better and better! |
|