|
|
Post by cudak888 on Jul 6, 2013 0:22:30 GMT -5
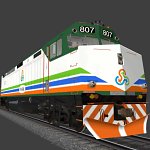
Pre-project stages are covered here: dieseldetailer.proboards.com/thread/12926/revising-hood-doors-panels-f40phThe goal: An F40PH-2C, TRCX (Tri-Rail) spec. The parts guinea pigs:- 1 Atlas B40-8 drive (50' between truck centers)
- 1 set of Atlas Blomberg M truck sideframes
- 1 set of Atlas wiper contacts to match the Blomberg M's (an unplanned surprise - have to order them by phone on Monday)
- 2 Walthers F40PH shells (three on order from Walthers).
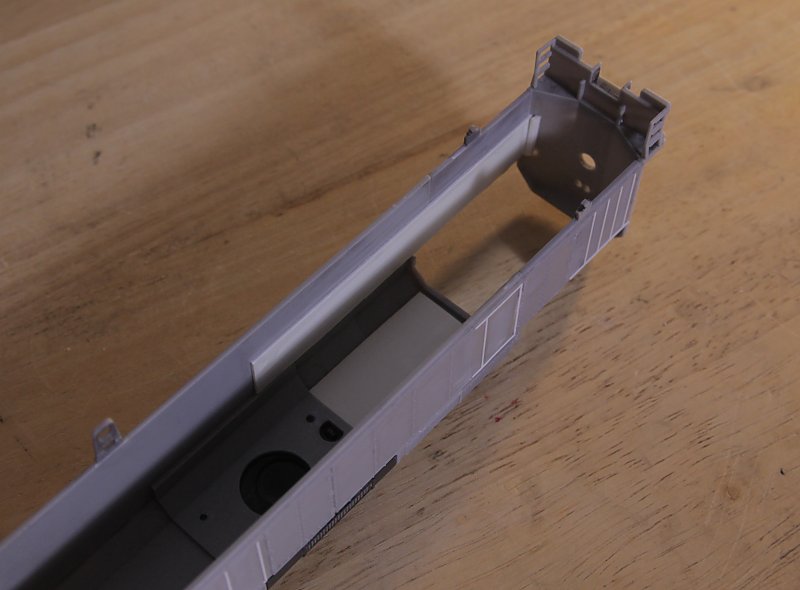
Only the drive and the sideframes have arrived, neither of which I can put together due to the missing wipers. Nevertheless, I've taken the opportunity to do some preliminary checks for overall fit, which has given me the following: A. The Walthers shell is 31mm wide inside; the Atlas chassis 30mm wide. A perfect opportunity to reinforce the inside of the shell with 0.5mm styrene on each side to strengthen the cut and ensure a snug fit. B. There is VERY little area on the Atlas chassis to sneak in mounting screws that a screwdriver can get to without risking working around the sideframes or the fuel tank details that will eventually make their way onto the chassis. Strangely enough, the area with the best possibility appear to be the ends - exactly where the Walthers shells are drilled from factory. I don't recall the thickness of the Walthers chassis, but if anything, it'll likely be thicker than the Atlas unit - which means shimming the chassis or the shell, rather than removal of material. C. Ride height is almost identical to that of the Walthers unit. No tinkering necessary in this department. D. The Atlas coupler pocket bracket will need to be cut off the front; won't know about the rear until I play a bit with shell fit. It looks as if the front weight will clear as well - if anything, it'll only need a bit of filing. 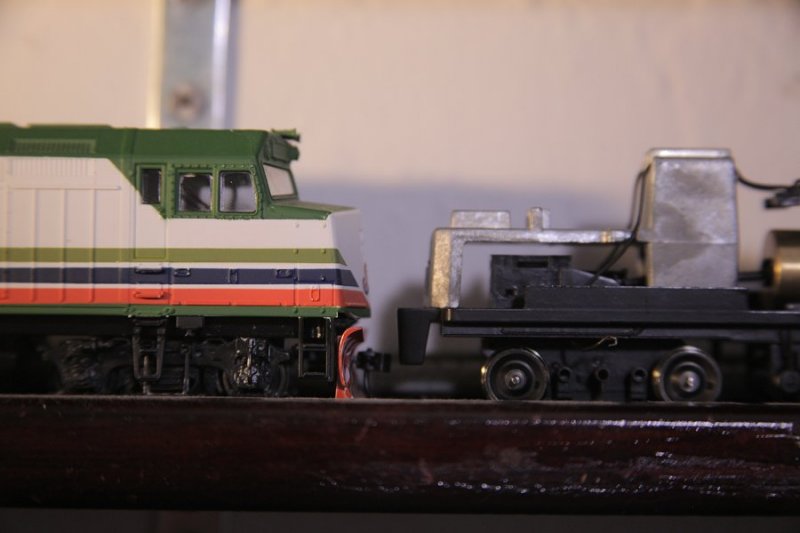 That's where it stands now until the shells arrive. Will post updates as things progress. -Kurt P.S.: Any recommendations for a good hobby saw to make the cuts in the shell? I'm not worried so much about the length split as I am about the amount of material lost when cutting the rear roof off to section the radiator grilles and fans.
|
|
|
|
Post by bbrunell on Jul 6, 2013 5:48:19 GMT -5
Kurt, For fine detail cutting on exposed shell areas I use a knife saw I picked up from Micro Mark - it's a small sawblade that fits in an Exacto holder - #11 saw bladesmeasure twice, cut once.... -bill |
|
|
|
Post by cudak888 on Jul 8, 2013 18:10:09 GMT -5
Shells won't arrive until Thursday, but the styrene for the batten strips arrived today - Evergreen's #8102 1"x2" (0.28mm X 0.56mm), their narrowest. Matches up with the existing Walthers sides perfectly. Went ahead and trimmed a few to length, using TRCX #811 as a guide: 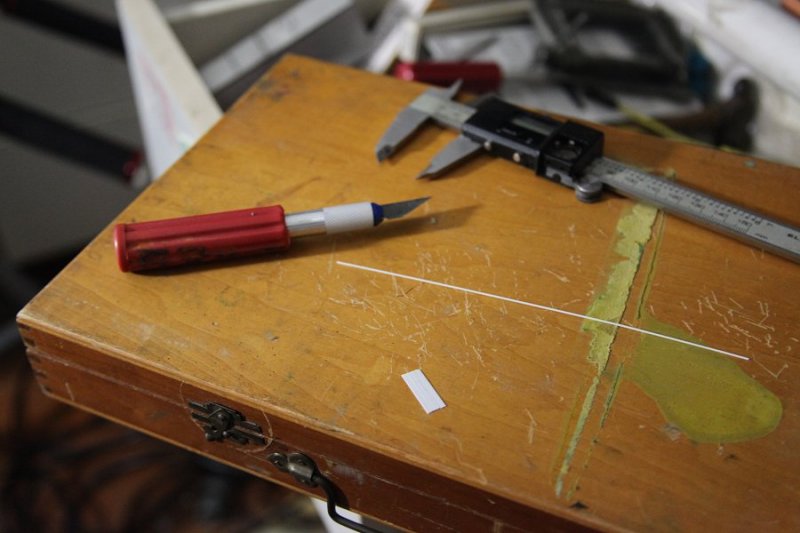 A few are a tad too long, but better to trim a few times than have them too short:   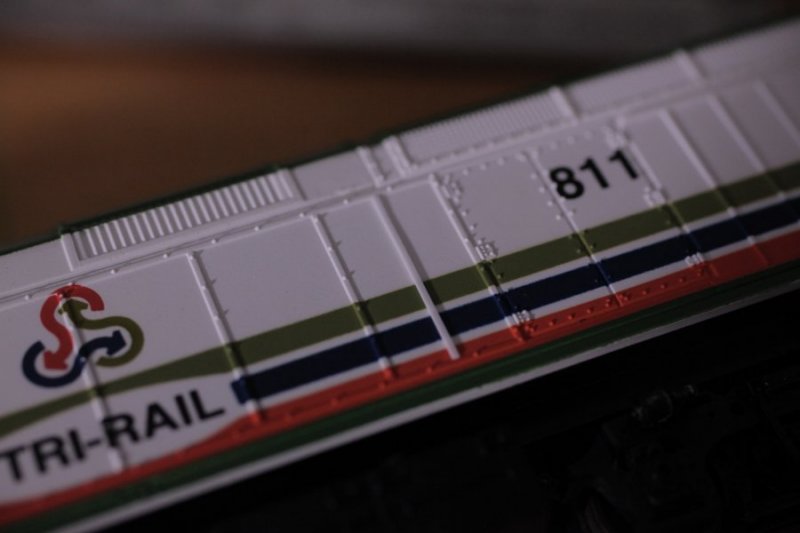 Now the real fun part will be to find out which of the various formulas of MEK cement will hold these down without warping AND remain strong enough not to pull off the shell. So far, I've been advised of the following (pretty much listing for reference when I visit Pearls to pick up a glue from what they have available - unfortunately, no good hobby shops in Miami): Tenax 7R: Discontinued, but said to be ideal Plastruct Bondene: Again, supposed to be ideal, works on styrene + ABS, other plastics Plastruct Weldene: Ideal, out of stock at Walthers, styrene-to-styrene only Testors Liquid Plastic Cement: Ideal, though some say not strong enough Straight MEK from ACE: Probably too aggressive Ambroid ProWeld: Too aggressive Tamiya cement: As aggressive as ProWeld Kurt, For fine detail cutting on exposed shell areas I use a knife saw I picked up from Micro Mark - it's a small sawblade that fits in an Exacto holder - #11 saw bladesmeasure twice, cut once.... -bill Excellent - will pick up a few. -Kurt |
|
|
|
Post by cudak888 on Jul 11, 2013 20:08:33 GMT -5
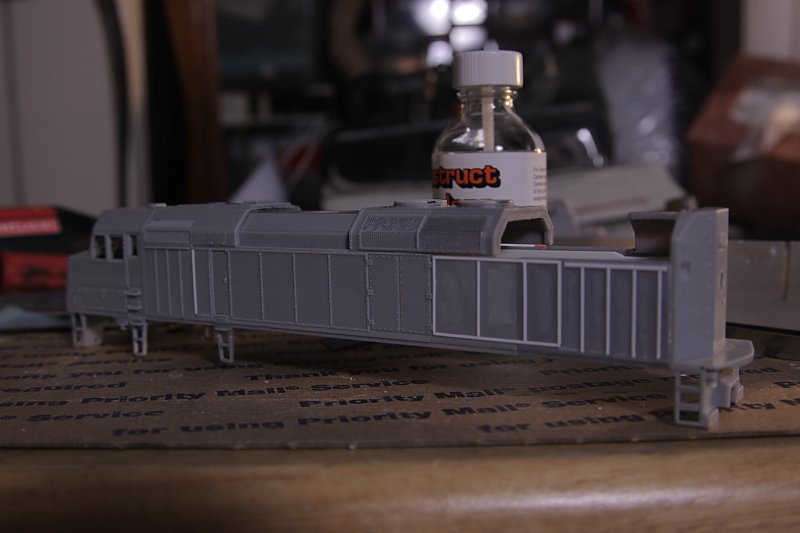
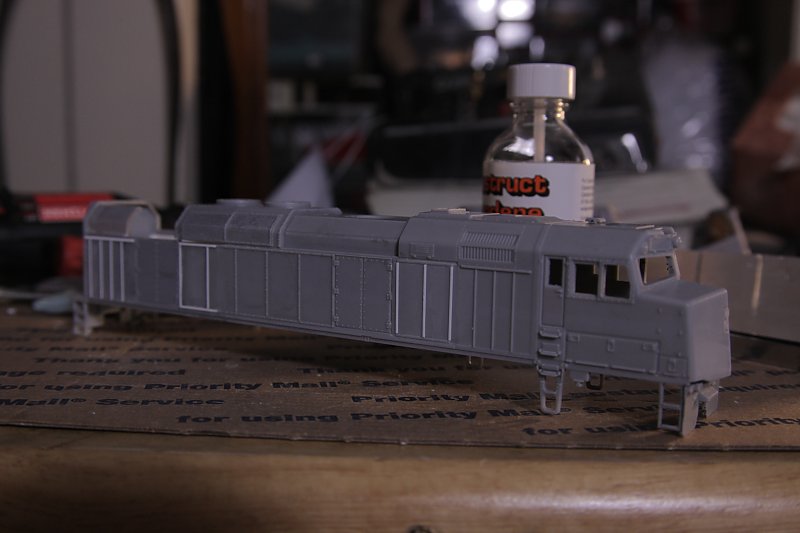
Shells arrived today. I'm still short on tools, so I decided to put only the hobby saw and isopropyl alcohol to work. Since I got one chassis in the bargain, I put the Metra unit together as a working locomotive with the chassis from AMTK 300; the Coaster will be put aside for future use: 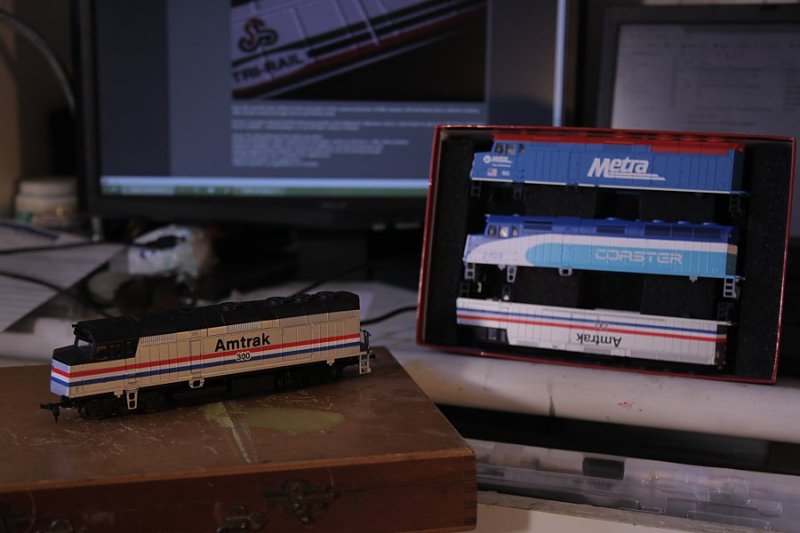 The two Amtrak units. Turns out Walthers improved them somewhere down the road - I recall #300 from the 2000/2001 run, with the improper lettering and slightly toy-like numbering. #242 is apparently later - better lettering and numberboards to boot. Either way, the older scheme is giving me fits with the lettering and striping with the alcohol - the new one comes off easier with exception to the red stripe, which is clinging for dear life. 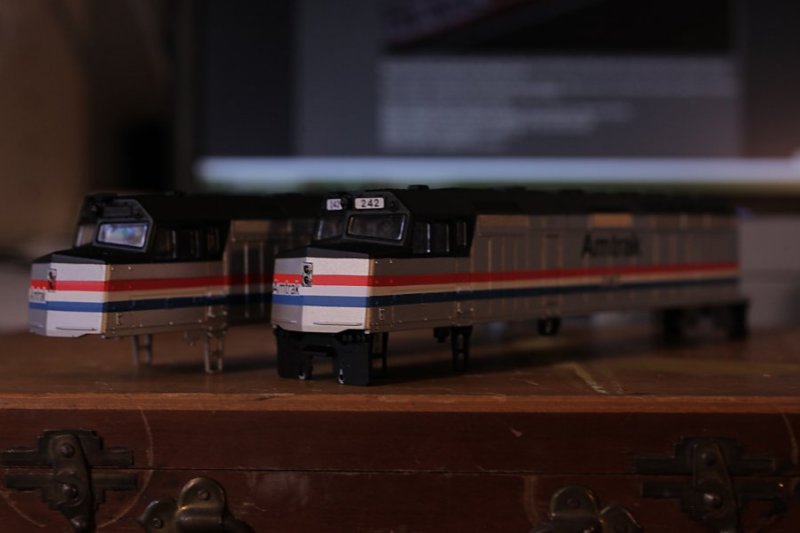 I cut up #242 as the primary donor, given the damage on #300's front end. I've cut 300's radiator area at both ends as well, in preparation for removing it entirely, as it'll become the grill donor for the HEP area. 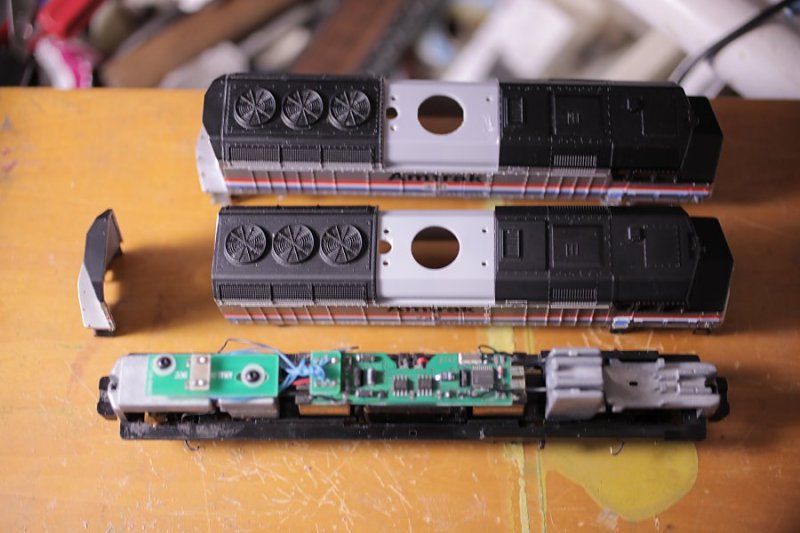 Back end will need to be cut short. Perhaps a bigger pain than the front.  Front end before cutting. I found that the chassis - post removal of this area - clears well; more than enough to get the front bolster dead center with the cab steps:  The top of the front weight - ironically enough - butts up against the roof in such a way as to place the chassis at the exact proper ride height. The front lamp bracket on this same weight interfered with the nose:  Well, it used to, anyway:  Last picture - have to go outside and see how the stripe stripping job is coming along. 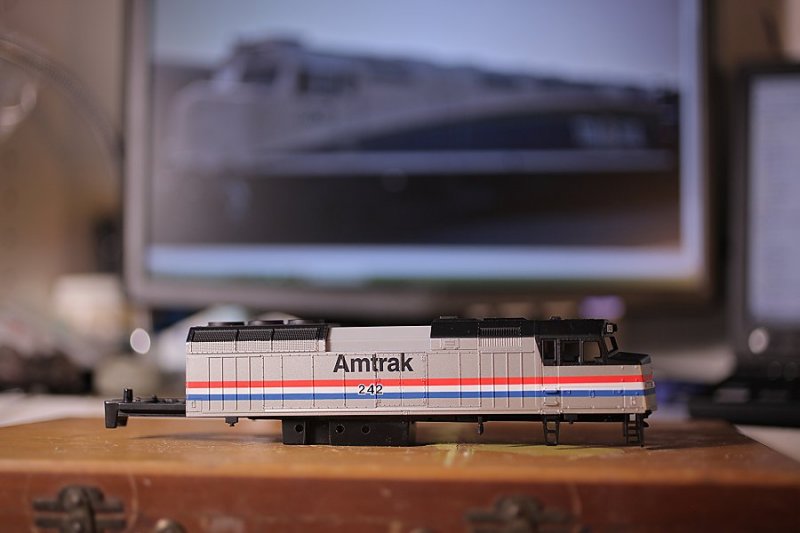 EDIT: Results of the paint strip: 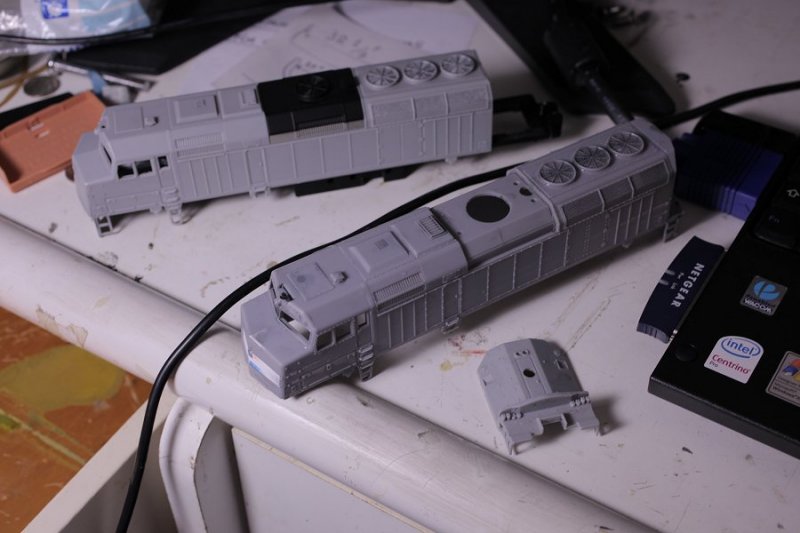 -Kurt |
|
|
|
Post by cudak888 on Jul 11, 2013 22:35:16 GMT -5
Chopped one of the batten strips off on the LH side; following is a dry fit of its replacement: 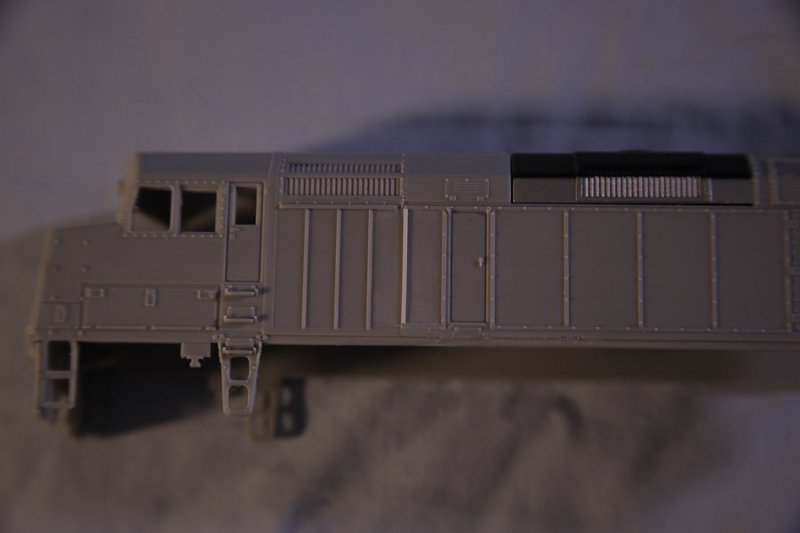 Short step has also been removed and shaved: 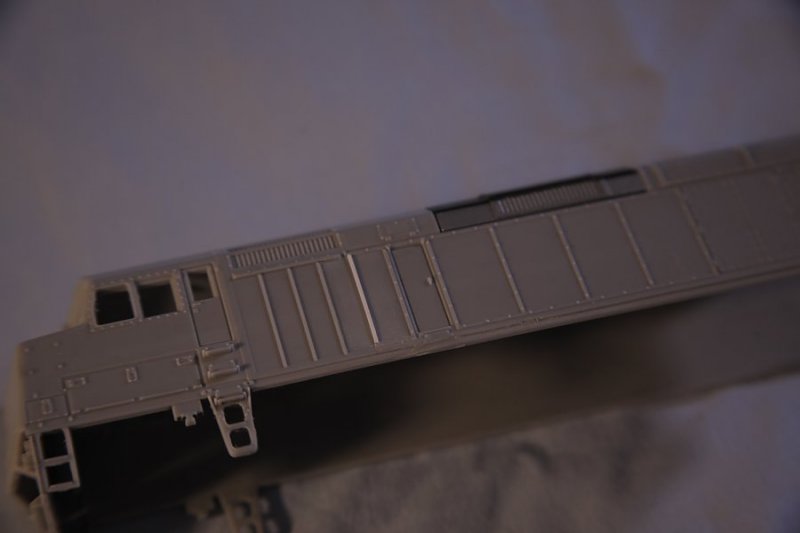 -Kurt |
|
|
|
Post by cudak888 on Jul 12, 2013 9:29:30 GMT -5
Donor radiator grille was cut out today, and the #242 cut to match. Needs a styrene shim in between, but the fit is good. Shaved off some of the rear detail for extending the batten strips. 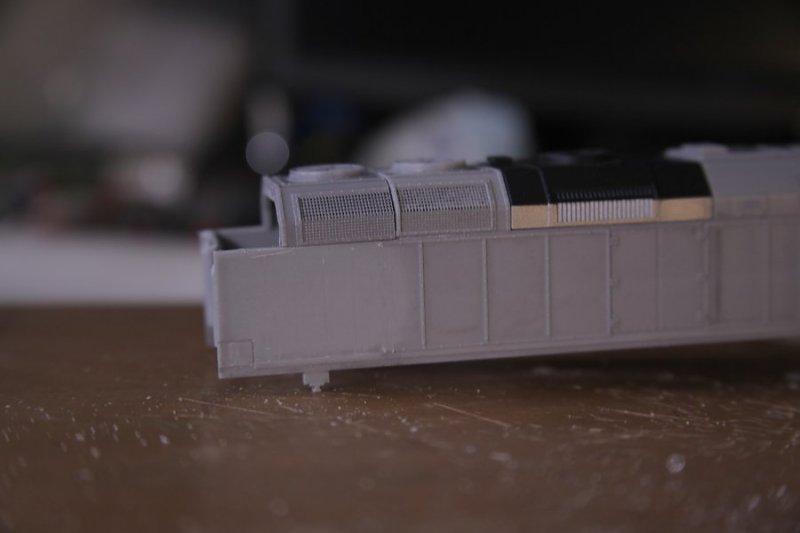 -Kurt |
|
|
|
Post by cudak888 on Jul 12, 2013 17:15:21 GMT -5
Decided not to reposition the RH engine access doors, but fiddle with the batten strip positions. A reasonable compromise:   -Kurt |
|
|
|
Post by cudak888 on Jul 13, 2013 21:32:30 GMT -5
Thanks to a friend, a bottle of Bondene worked its way to me today. Batten strips and stretched end are coming along nicely:   |
|
|
|
Post by cudak888 on Jul 13, 2013 22:32:23 GMT -5
|
|
|
|
Post by cudak888 on Jul 14, 2013 14:37:39 GMT -5
|
|
dekon
Staff Member
Posts: 635
|
Post by dekon on Jul 14, 2013 20:34:38 GMT -5
Nice looking build!
|
|
sgoti
Chairman
Posts: 459 
|
Post by sgoti on Jul 14, 2013 20:51:17 GMT -5
Agreed- This is coming along nicely, can't wait to see the finished product! |
|
|
|
Post by cudak888 on Jul 14, 2013 21:36:15 GMT -5
Thank you, gentlemen.
I have an Athearn 2600 gallon tank on order (#90722) which should lend itself to being mounted around (partially) the Atlas frame - bottom end of this thing should look a bit more organized once it is installed.
Only thingholding me up at this point are the shell mounting locations. The Atlas frame doesn't give many options - it looks as if a few 1/16" counter-sunk holes at the corners are about as much as I can get away with without making the mounting screws too obvious or difficult to remove due to the trucks or tank detail being in the way.
Any suggestions on which Diesels West tanks will best suit this? I was considering the #263 GE tanks, but if they're anything close to the size of the Atlas tanks, they'll be too small. The switch heater propane tank from #924 looks as if it may be a workable alternative, but eyeballing yields limited accuracy.
-Kurt
|
|
|
|
Post by jbconn on Jul 14, 2013 23:00:38 GMT -5
I will add my appreciation. Great job.
I've thought of doing one of these, but have not yet found clear shots of the roof area to plan. I can see from some available pictures that there seems to be a boxy exhaust hatch at the rear behind the HEP radiator fan, but can't see what it looks like. Do you have a link to photos you can share or is there a particular part you will use for this?
Excellent job so far and thanks.
|
|
|
|
Post by cudak888 on Jul 15, 2013 0:03:40 GMT -5
I will add my appreciation. Great job. I've thought of doing one of these, but have not yet found clear shots of the roof area to plan. I can see from some available pictures that there seems to be a boxy exhaust hatch at the rear behind the HEP radiator fan, but can't see what it looks like. Do you have a link to photos you can share or is there a particular part you will use for this? Excellent job so far and thanks. This photo from rrpicturearchives.net was amongst the roof shots I used for the F40PH-2C when I modeled it for Microsoft Train Simulator a few years ago: www.rrpicturearchives.net/showPicture.aspx?id=3063912This is what I settled on for the 3D model - two raised boxes at the back and a raised section in between the fans that resembles an EMD filter hatch - in fact, I'll probably cut and install a Cannon & Co. 35-series hatch to represent it: 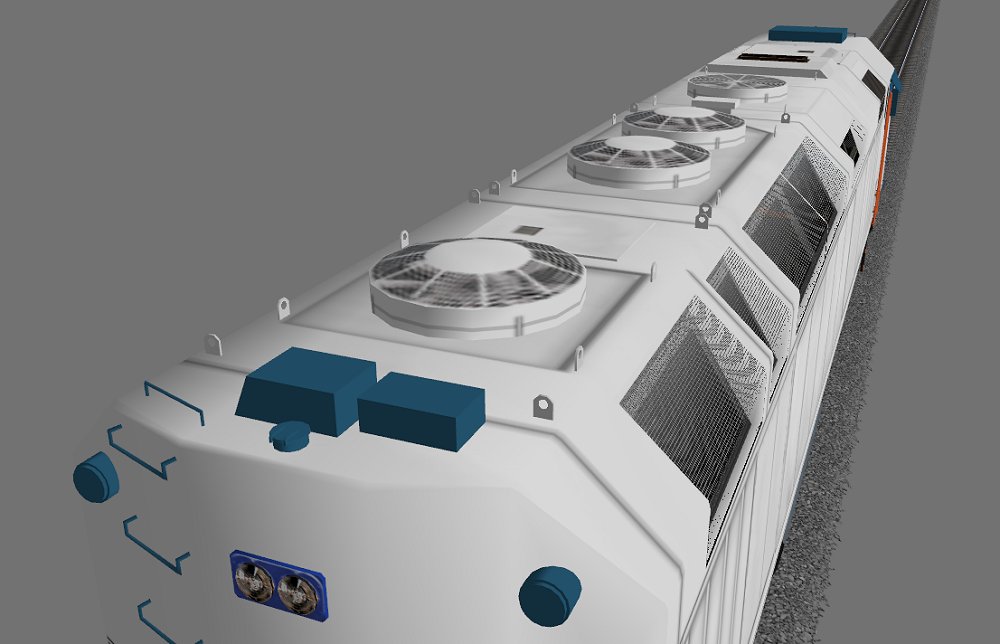 -Kurt |
|
|
|
Post by bbrunell on Jul 15, 2013 6:07:33 GMT -5
I agree - you are making great progress. One suggestion - Atlas makes a 2600 gallon tank that press-fits right onto that weight. I'm not sure if there were prototypical reasons for your use of the Athearn part.
The Atlas part number of the 2600 gallon part is 890251 and takes 890653 air tanks. The tank is $2.30 and each air tank is .85 - both in stock at Atlas.
Good luck and keep posting!
-bill
|
|
mgwsy
Road Foreman
Posts: 86
|
Post by mgwsy on Jul 15, 2013 8:27:32 GMT -5
Thank you, gentlemen. Any suggestions on which Diesels West tanks will best suit this? I was considering the #263 GE tanks, but if they're anything close to the size of the Atlas tanks, they'll be too small. The switch heater propane tank from #924 looks as if it may be a workable alternative, but eyeballing yields limited accuracy. -Kurt How about these tanks.  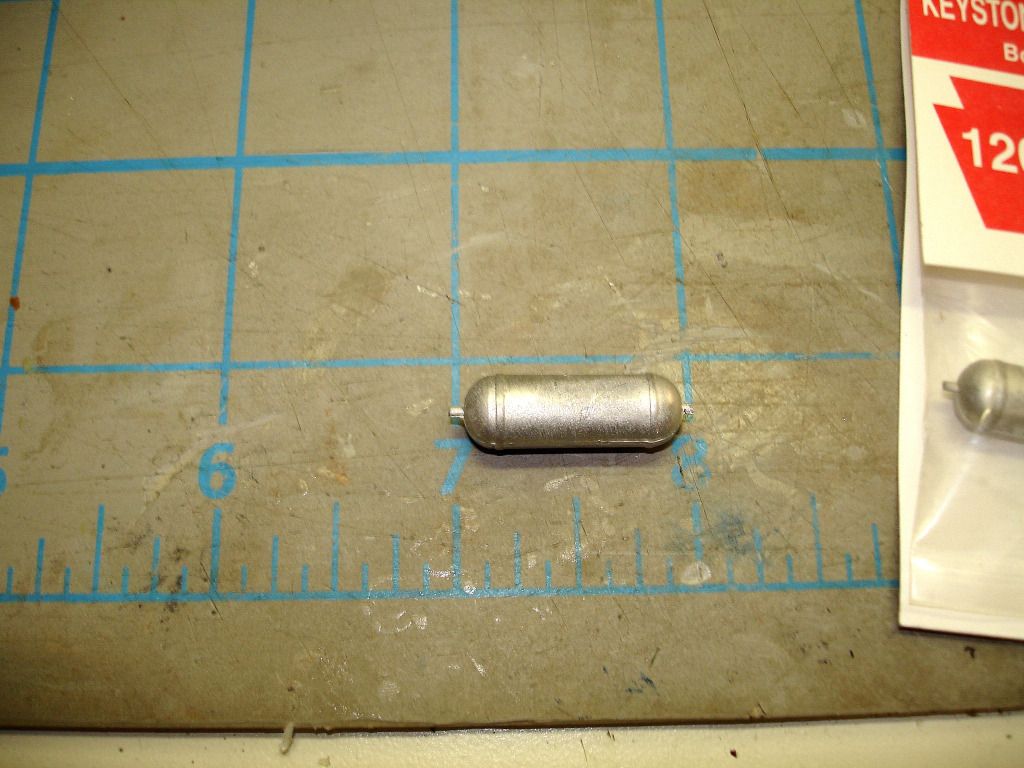 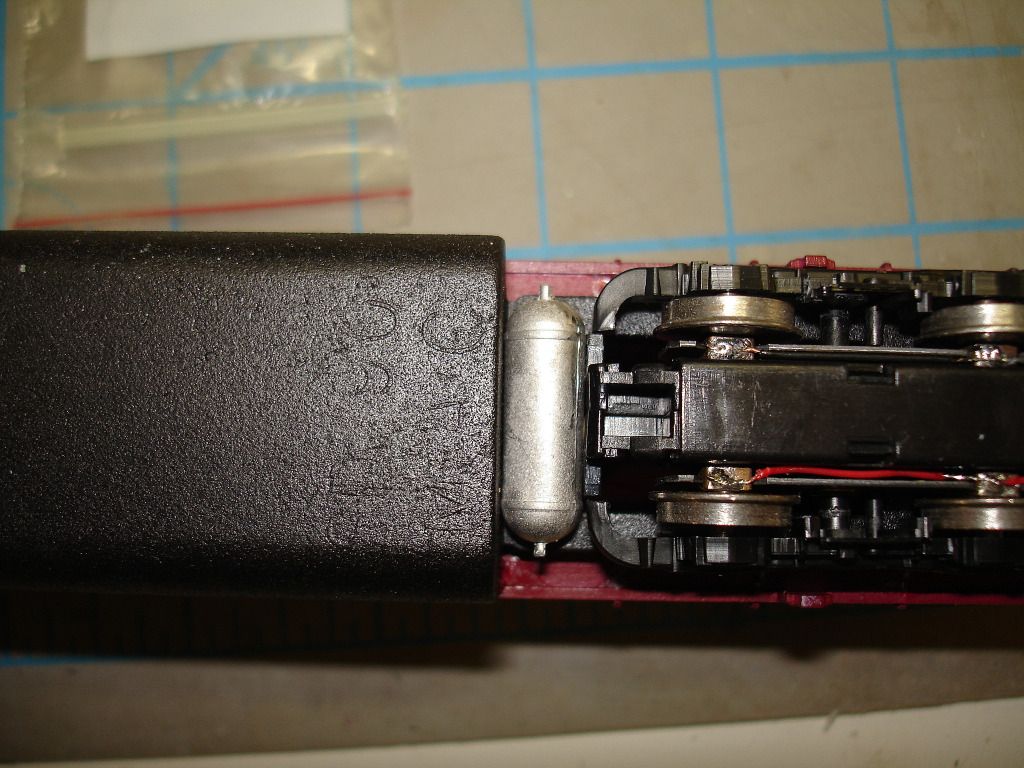 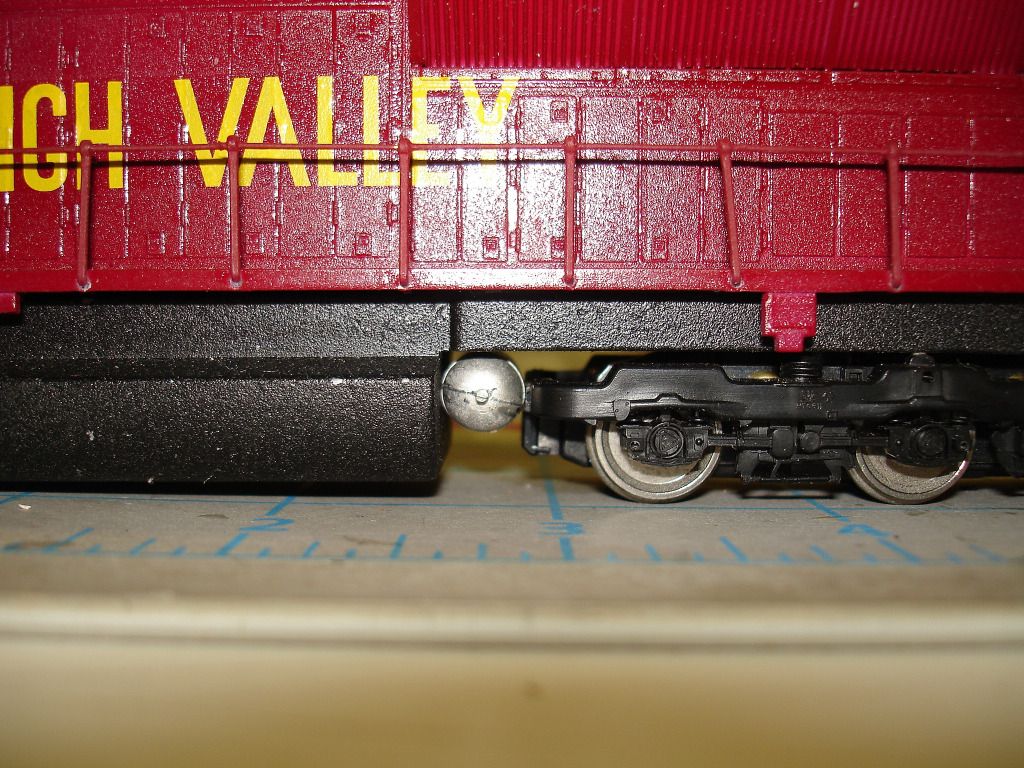 |
|
|
|
Post by cudak888 on Jul 15, 2013 10:33:04 GMT -5
That certainly looks bigger than a scale 2'x6', but they still appear on the small size in comparison to the tanks on the prototype: (From: www.rrpicturearchives.net/showPicture.aspx?id=2060131) That's a fair share of under-frame real estate that they take up - and anything too small won't quite look right. -Kurt |
|
|
|
Post by bdhicks on Jul 15, 2013 11:18:16 GMT -5
You might be able to use Plastruct VHE-12 (3/8") or VHE-14 (7/16") elliptical domes and corresponding tubing to scratchbuild them.
|
|
|
|
Post by cudak888 on Jul 15, 2013 11:49:06 GMT -5
You might be able to use Plastruct VHE-12 (3/8") or VHE-14 (7/16") elliptical domes and corresponding tubing to scratchbuild them. It's a thought. Might lose out on a bit of end detail that way, but the white metal castings don't look to offer much more either. -Kurt |
|


