

Post by CP_8530 on Jun 30, 2013 17:10:18 GMT -5
I was slightly unhappy with the gutless turd of a motor Bowser supplied with the C630M's. It seemed like the thing would struggle to start moving, and stall with a heavy load at slow speeds. I've heard a few people attribute this to the Mabuchi can motor they have.
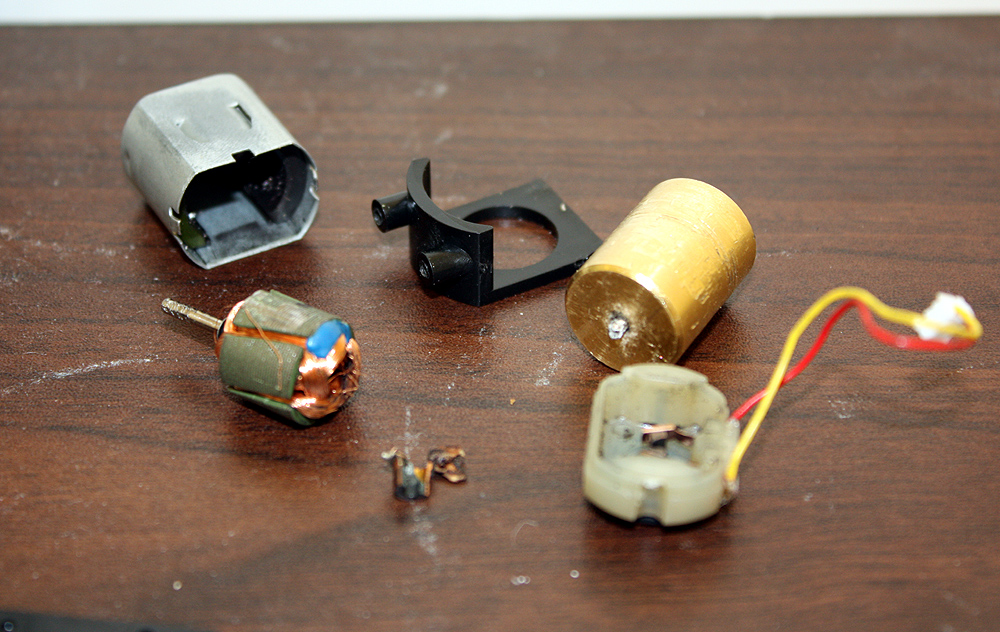
Well, the time was right to remotor it. I had a new Kato HM-5 motor on hand, and set to work. First I disconnected all the wiring, disassembled the motor area and removed the old motor. Then, since we picked a non-flywheel model, time to remove the flywheels, which was easier said than done.
They were press-fit on by God himself, and proved to be difficult to remove without damaging the hole in the flywheel or motor shaft. The first one came off ok with the use of a pair of vice grips and lockjaw pliers, but on the second I ended up snapping the motor shaft and damaging the armature, which I expected would be the case...too bad so sad.
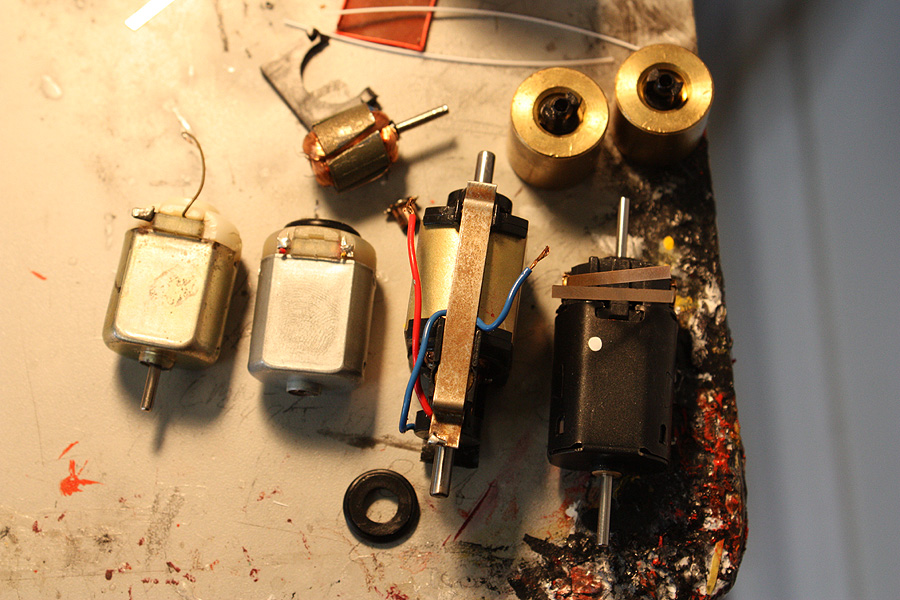
Motors 101: on the left we have a cheap toy motor I had lying around from an old toy truck. Next to it the Bowser/Mabuchi motor which is basically identical (except having an extra output shaft at the other end - not visible since it was removed when destroyed). Then the standard Athearn BB gold can motor. And the black Kato HM-5 which was used for repowering the unit.
Once the flywheels were liberated, I removed a bit of material from the flywheel holes with a small drill bit to ensure they slipped on the Kato motor shaft easily. Remove too much and they can become unbalanced when applied on the shaft.
Next was to test-fit the new Kato motor. It was slightly too long to sit inside the motor opening snugly without milling a bit from the bottom of the frame. On top of that, the Kato motor is longer that the old Bowser/Mabuchi, and there is little to no room for the motor and both flywheels to sit in the frame opening without milling the ends:
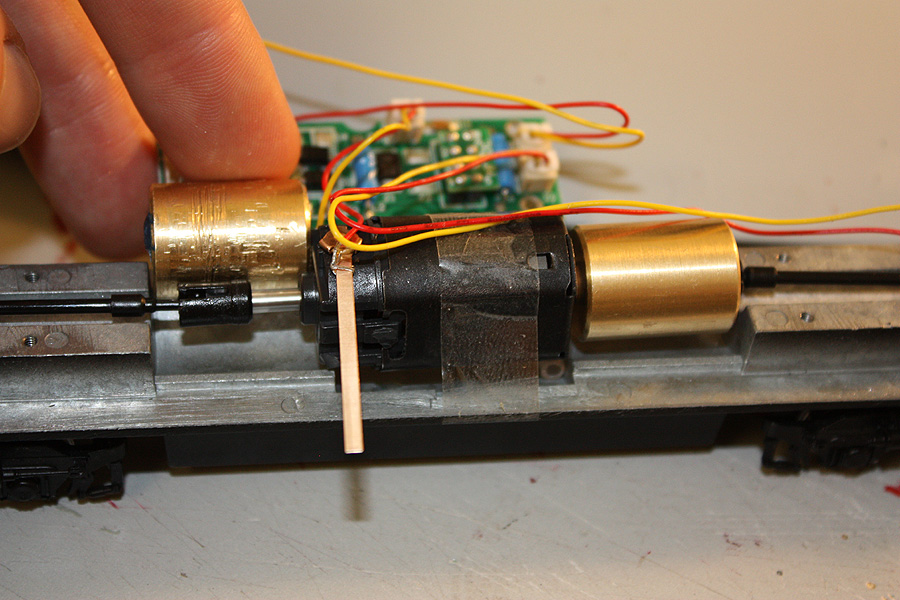
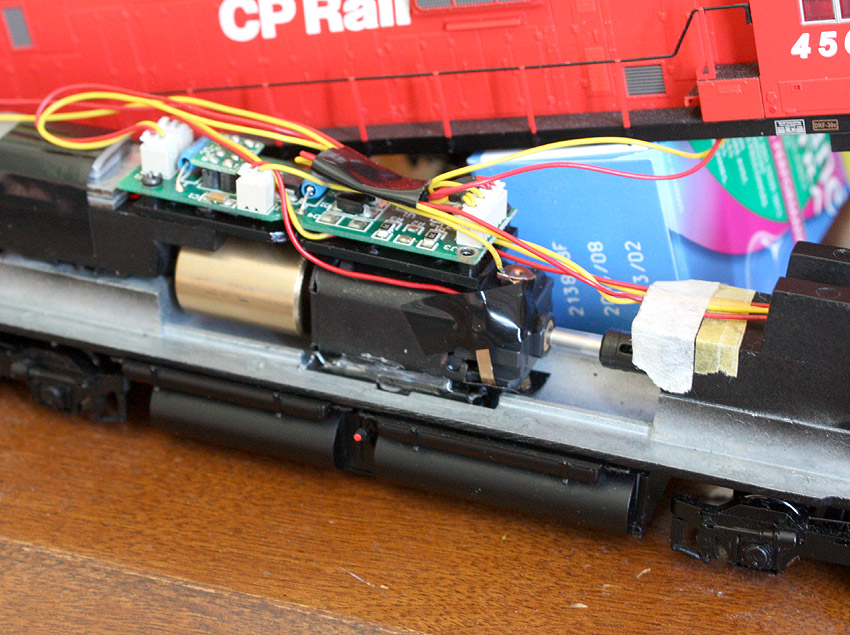
Since the flywheels were big anyway, I decided using only one wouldn't affect performance too much. So, I mounted one flywheel on the rear, removed the coupling from the front flywheel (it was press-fit in, I carefully removed it with a screwdriver and needle nose pliers), and used an old pen tube to make up the thickness between the motor shaft and coupling hole. I reused the Bowser motor mounts by cutting away the top motor cradles leaving only the curved bottom area. I then shimmed it with a (bent) piece of 0.040" styrene and hot-glued it all together with a high-temperature glue gun. I cut the existing motor wiring off the old motor and soldered it onto the Kato motor leads. I screwed the motor back to the frame, hooked up the driveshafts, and tested it out.
Since the motor was mounted a bit higher because it didn't fit in the old motor cutout, the driveshafts and flywheel were a bit higher. The front weight on mine was ok, but I had to raise the rear weight with some more 0.040" shims to clear the flywheel. I also drilled out and tapped two of the unused existing holes in the weight and mounted the plastic circuit board mount on them (since it's now mounted further back, the motor wires may be a tad short). I added some weight at the back, and will probably add more inside at a later date (ran out of small stick weights )
)
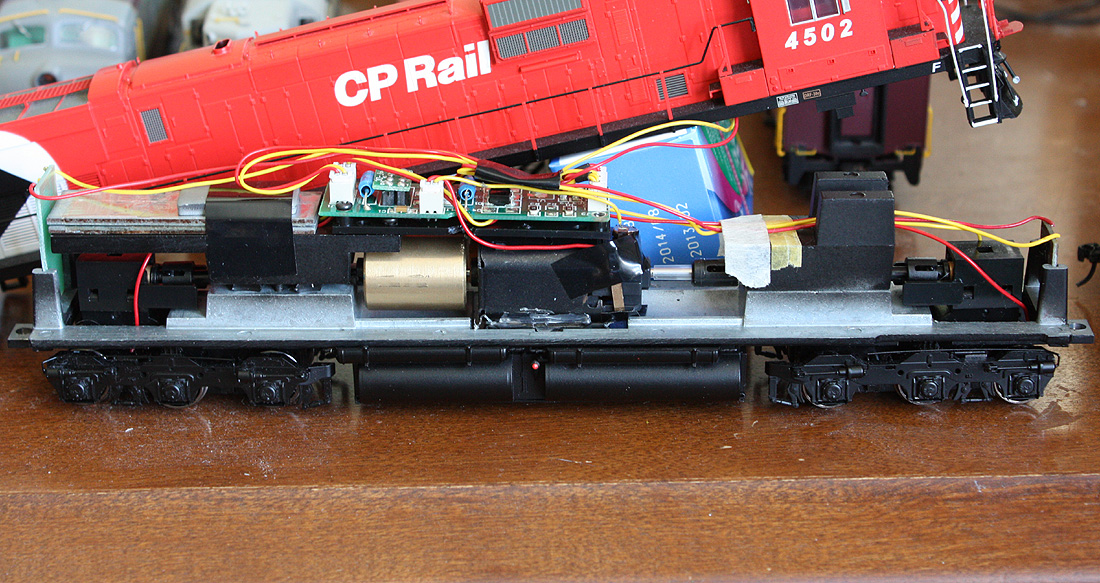

The remotored C630M starts at a much lower voltage, runs smoother at low speeds without hesitation, and (seems) a bit quicker at the high end. A definite improvement, even with one flywheel. There's still a bit of noise from the mechanism which I supposed could be the trucks.
Well, the time was right to remotor it. I had a new Kato HM-5 motor on hand, and set to work. First I disconnected all the wiring, disassembled the motor area and removed the old motor. Then, since we picked a non-flywheel model, time to remove the flywheels, which was easier said than done.
They were press-fit on by God himself, and proved to be difficult to remove without damaging the hole in the flywheel or motor shaft. The first one came off ok with the use of a pair of vice grips and lockjaw pliers, but on the second I ended up snapping the motor shaft and damaging the armature, which I expected would be the case...too bad so sad.
Motors 101: on the left we have a cheap toy motor I had lying around from an old toy truck. Next to it the Bowser/Mabuchi motor which is basically identical (except having an extra output shaft at the other end - not visible since it was removed when destroyed). Then the standard Athearn BB gold can motor. And the black Kato HM-5 which was used for repowering the unit.
Once the flywheels were liberated, I removed a bit of material from the flywheel holes with a small drill bit to ensure they slipped on the Kato motor shaft easily. Remove too much and they can become unbalanced when applied on the shaft.
Next was to test-fit the new Kato motor. It was slightly too long to sit inside the motor opening snugly without milling a bit from the bottom of the frame. On top of that, the Kato motor is longer that the old Bowser/Mabuchi, and there is little to no room for the motor and both flywheels to sit in the frame opening without milling the ends:
Since the flywheels were big anyway, I decided using only one wouldn't affect performance too much. So, I mounted one flywheel on the rear, removed the coupling from the front flywheel (it was press-fit in, I carefully removed it with a screwdriver and needle nose pliers), and used an old pen tube to make up the thickness between the motor shaft and coupling hole. I reused the Bowser motor mounts by cutting away the top motor cradles leaving only the curved bottom area. I then shimmed it with a (bent) piece of 0.040" styrene and hot-glued it all together with a high-temperature glue gun. I cut the existing motor wiring off the old motor and soldered it onto the Kato motor leads. I screwed the motor back to the frame, hooked up the driveshafts, and tested it out.
Since the motor was mounted a bit higher because it didn't fit in the old motor cutout, the driveshafts and flywheel were a bit higher. The front weight on mine was ok, but I had to raise the rear weight with some more 0.040" shims to clear the flywheel. I also drilled out and tapped two of the unused existing holes in the weight and mounted the plastic circuit board mount on them (since it's now mounted further back, the motor wires may be a tad short). I added some weight at the back, and will probably add more inside at a later date (ran out of small stick weights
 )
)The remotored C630M starts at a much lower voltage, runs smoother at low speeds without hesitation, and (seems) a bit quicker at the high end. A definite improvement, even with one flywheel. There's still a bit of noise from the mechanism which I supposed could be the trucks.


