|
|
Post by jakeloyst on Jan 27, 2013 20:26:47 GMT -5
I have found 3 different sets, the MBE sets, are the later version, same style as Juneco, but much better, the other is a Custom Finishing set, detail, isnot bad, and it is the earlier version, with the headlight extending above the body of the numberboard, with the charateristic "bump".
|
|
|
|
Post by CP_8530 on Feb 1, 2013 15:18:39 GMT -5
Bit of paint, bit of decals, frame still needs some finishing in this photo, the front is still a bit iffy (I hate decalling over grills). I think the rad should sit out more too (so later scratchbuilt a little extension...still need to find some fine screening for it though). The decals were from Microscale. I had to modify the yellow angled and curved stripe parts near the front to get the proper angle according to the prototype. There's a small bit of grey showing on the bottom that needs some maroon paint. The back of the cab was all maroon. 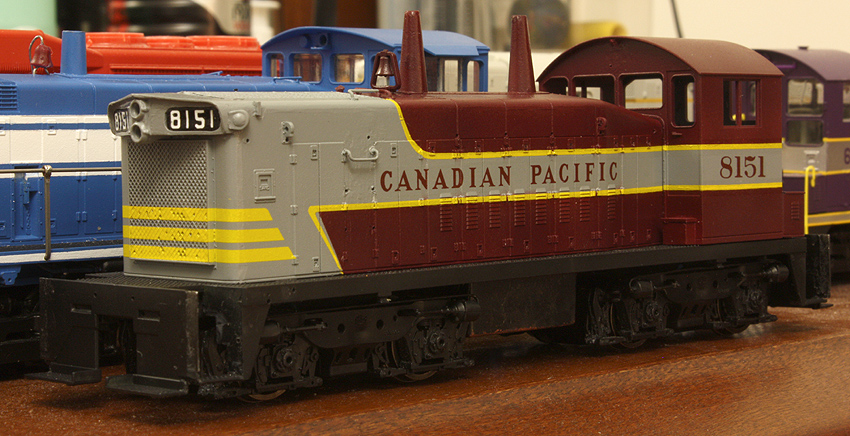 A bit more progress since then: grabs added, some end pilot decalling and stepwork, handrails fitted and soldered together (stanchions from a Kaslo GP9RM kit, handrails bent). The drop step is just there for reference, CP's units only had a small stand there early on, as the drop step and pass-across chains were added later. 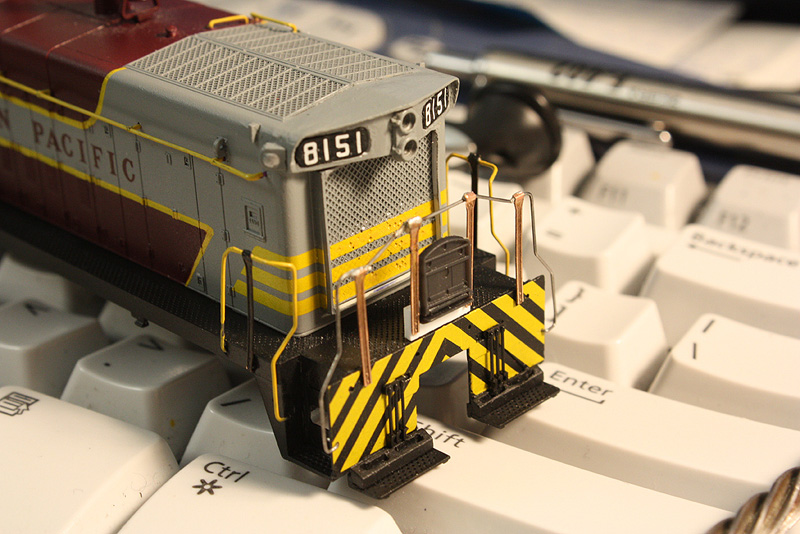 |
|
|
|
Post by jakeloyst on Feb 1, 2013 21:06:09 GMT -5
Detail Associates GR 2709 frame and screen has both a solid front, and a fine mesh screen, the center can be removed for the see thru effect, also if you look on atlas website, they have avail, the front screen for thier mp15, it comes preformed to fit around the rad sides, as the prototype, but you can either trim it, or build a frame around the outside, it has a scale depth of about 6in. Atlas part number is 990218 mp-15 front grill $1.50 each. hope that helps
|
|
|
|
Post by chestateegold on Feb 7, 2013 13:22:26 GMT -5
Wow! very nice. I really like how the paint turned out. Thanks for sharing!
|
|
dekon
Staff Member
Posts: 634
|
Post by dekon on Feb 8, 2013 10:20:08 GMT -5
A trick to decaling over grills is when Micro Set/Sol or Solvaset, hit it with a hairdrier and it will snuggle down over just about anything. I also do model cars, and have done a Porsche 911 GT1 in carbon fiber decals and that trick worked wonders on it.
|
|
|
|
Post by CP_8530 on Feb 15, 2013 1:53:57 GMT -5
Detail Associates GR 2709 frame and screen has both a solid front, and a fine mesh screen, the center can be removed for the see thru effect, also if you look on atlas website, they have avail, the front screen for thier mp15, it comes preformed to fit around the rad sides, as the prototype, but you can either trim it, or build a frame around the outside, it has a scale depth of about 6in. Atlas part number is 990218 mp-15 front grill $1.50 each. hope that helps Hmm, I'll keep an eye out for that part. I fabricated a styrene housing to add-on, all I really need is a fine mesh. Wow! very nice. I really like how the paint turned out. Thanks for sharing! A trick to decaling over grills is when Micro Set/Sol or Solvaset, hit it with a hairdrier and it will snuggle down over just about anything. I also do model cars, and have done a Porsche 911 GT1 in carbon fiber decals and that trick worked wonders on it. Thanks guys. Dekon, I'll have to keep that in mind. I'm probably going to spray the grill area with a bit of black for some depth, as I'm planning on putting an extension housing and fine mesh over it because the stock P2K housing is shorter than the one on the prototype. Anywho, I gave the (somewhat still unfinished) unit a good running on the test track, both alone switching and with a pair of Atlas C424's in road service, and the converted trucks seem to be running nicely with no major issues. I haven't had any complaints from the two I did for a friend either (converted a pair of BC Hydro units, link to thread here). |
|
|
|
Post by iomalley on Feb 15, 2013 13:39:51 GMT -5
Dan, have you ever built a Kaslo S13 or RS23? There's an extra grille on their photoetched sheet that doesn't have the square hole at the top like the S13 or RS23 has...Here it is fitted to the Details Assoc GR 2709. I could not seperate the grille from the backing without stretching the delecate etch in the DA kit, not even with steam to try to release it.  |
|
|
|
Post by Matthew on Feb 17, 2013 6:40:43 GMT -5
I have found soaking in thinners dissolves the fixative.
Matthew
|
|
|
|
Post by CP_8530 on Feb 23, 2013 21:51:09 GMT -5
Hmm, no S13/RS23's here.  I could probably find some thin screening somewhere. Moving on to the other end, I applied some newly acquired Black Cat decals. The Microscale sets do not include the small rear yellow number letterering that switchers had (both sides on block units, only one side on script) nor do they include the class plates and end "Do not ride footboard..." lettering. Both the Black Cat hood diesel sets for block and script lettering (8479 and 5517 resp.) have them, which is a very nice touch. I cut the black background pieces incluled down to size and used them behind the class plate and do not ride footboard decals. The latter seems slightly too big for the ends than prototypical, so I cut the bottom line off. Also note painted exhaust stacks and bell black as per early scheme. 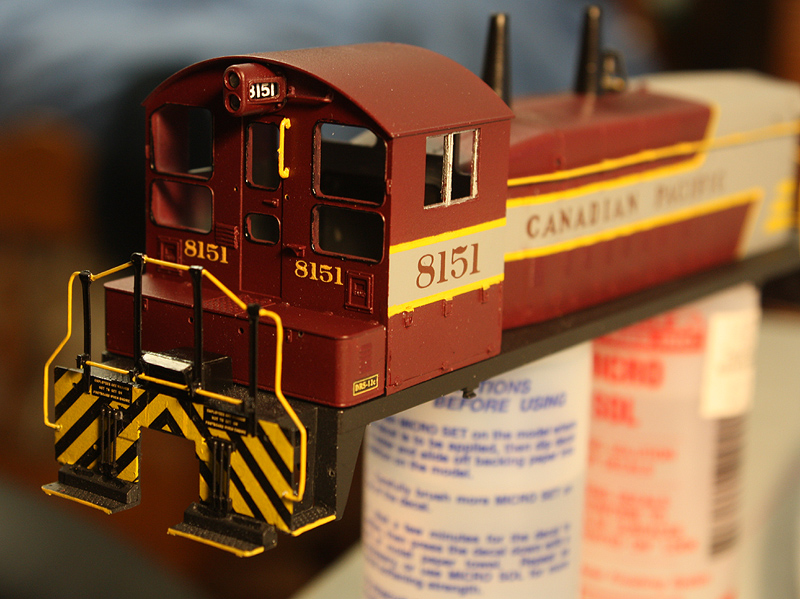 |
|
|
|
Post by iomalley on Feb 24, 2013 9:56:42 GMT -5
Looking good! Now you just need one of those weird CP only bay windows. Are we going to see your stuff at the Humber RPM March 16? I have found soaking in thinners dissolves the fixative. Matthew D'uh, I shoulda tried that....  |
|
|
|
Post by CP_8530 on Feb 28, 2013 23:37:43 GMT -5
Looking good! Now you just need one of those weird CP only bay windows. Are we going to see your stuff at the Humber RPM March 16? I have found soaking in thinners dissolves the fixative. Matthew D'uh, I shoulda tried that.... Unfortunately, I've been a bit busy with things of late and probably won't be able to make it. The problem of the previous week was front grills. I think I may have fixed it with the help of a fine coffee filter. Now I think the grills might be too fine  oh well, looks a lot nicer now. If I'm feeling adventurous sometime I might even hack the old ones underneath out and install and paint some styrene shutters. And that might lead to mounting a fan...who knows! The photo kinda exaggerates the appearance a bit because I applied some sharpening. I had mounted the styrene-fabricated shutter extension on the front with 4 pieces of wire at the inside corners that fit into the grilles. I'd glue them on from the get-go if I were to do another, but since everything is painted and decalled... Hmm, I might have to make those front numberboards slightly bigger. MU stands and cut levers are probably next.  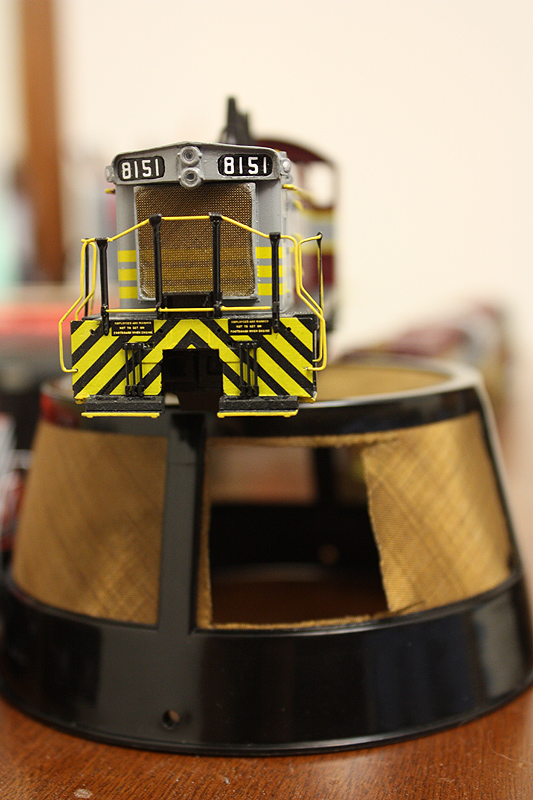 |
|
|
|
Post by CP_8530 on Mar 8, 2013 16:32:40 GMT -5
Still a few things to do (cut levers, MU stands, and maybe the rad shutters, etc) but it's pretty much done: 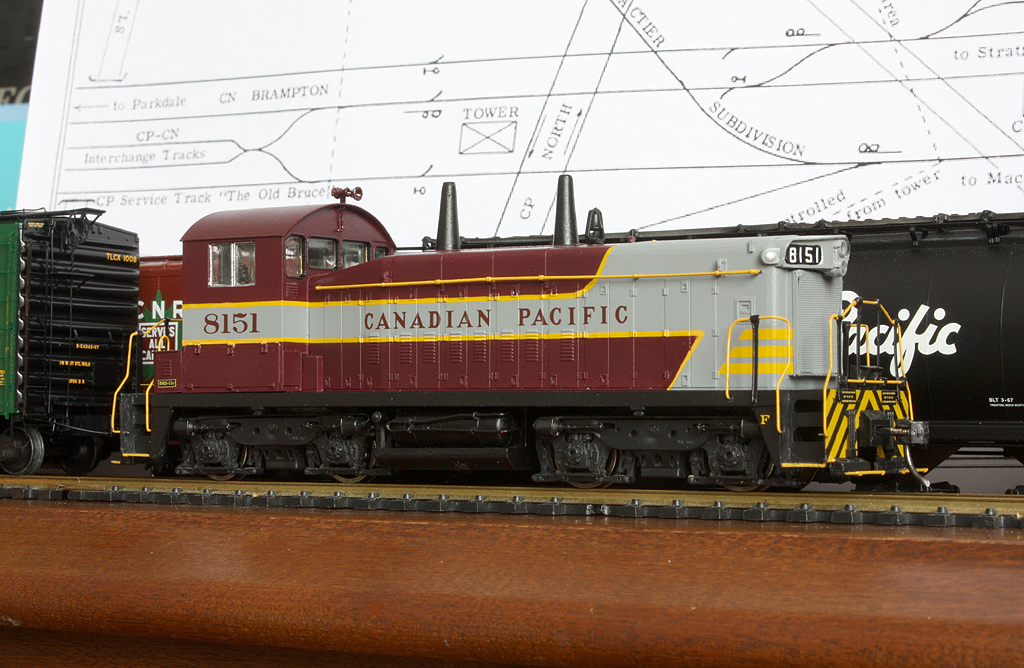 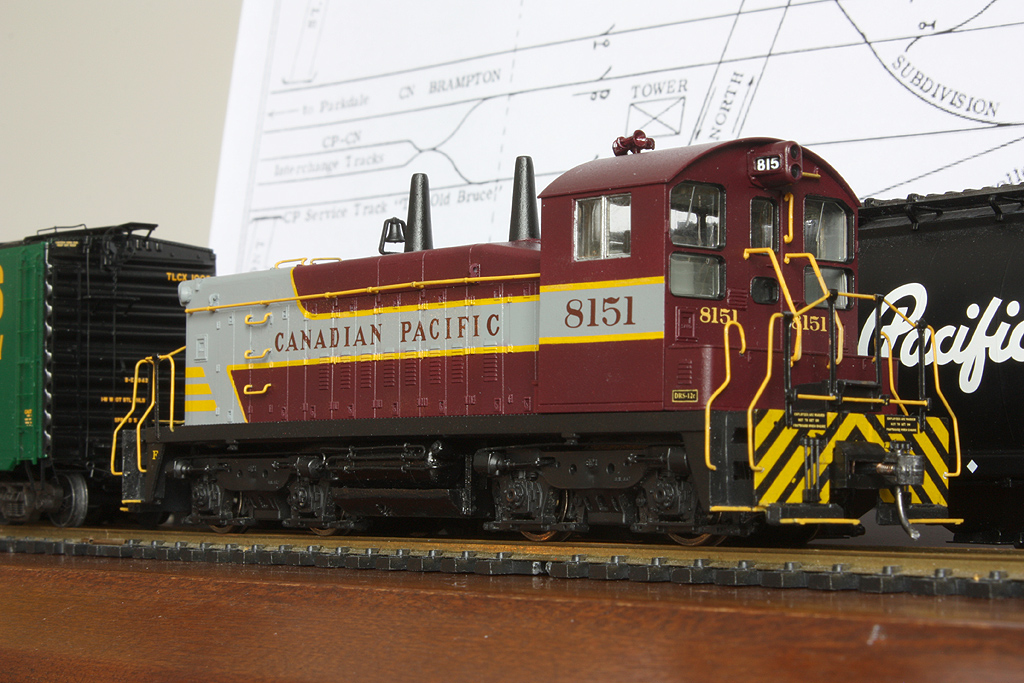 |
|
|
|
Post by spud7378 on Mar 8, 2013 18:18:39 GMT -5
Very nice Dan I'm starting a cn version and looking forward after seeing yours done now! I also saw the preview of it in CRO modelers corner looking good
|
|
|
|
Post by CP_8530 on Mar 9, 2013 20:46:43 GMT -5
Thanks Kevin. The two above shots will probably be in the next CRO as well Depending on the CN version, you may have it easier, as the earlier 1200 series ones have the stock EMD early handrail stanchions (that the P2K parts match) and steps. |
|
|
|
Post by CP_8530 on Jul 24, 2013 22:51:58 GMT -5
Some may recall me mentioning initially I was working on another SW1200RS before the 8151. I shelved it for the time being in favour of 8151, but now it's back out of storage and waiting for a trip to the paint booth to paint the frame. Also note the air intake "snowshields" applied to the front of 8151 . 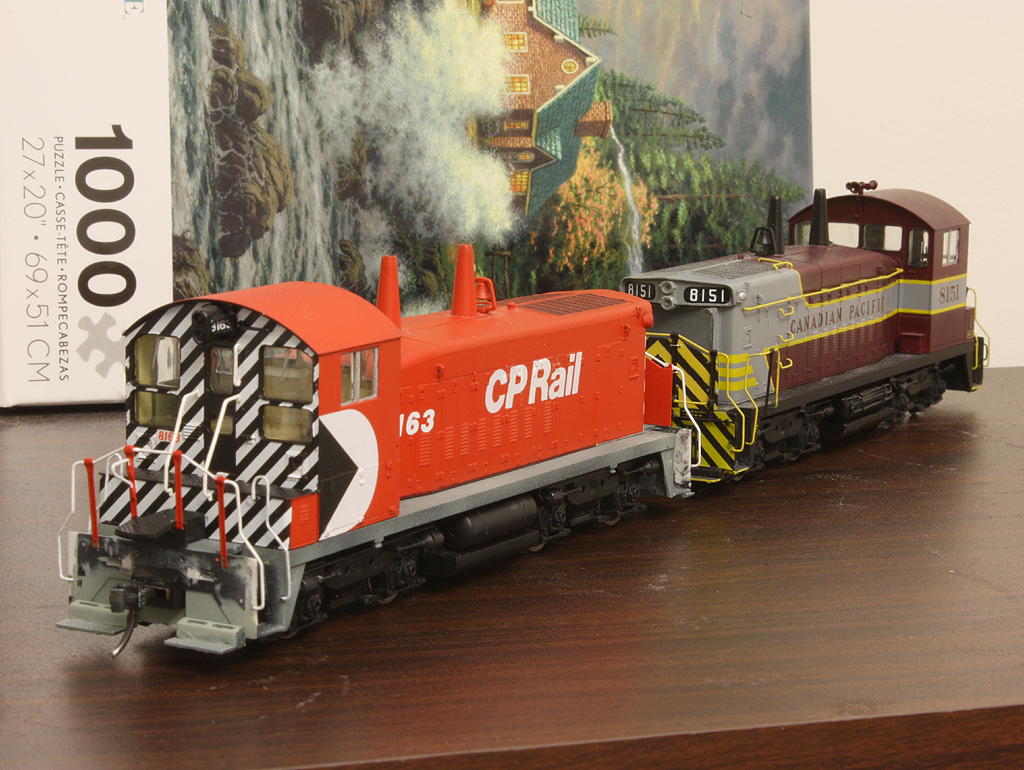 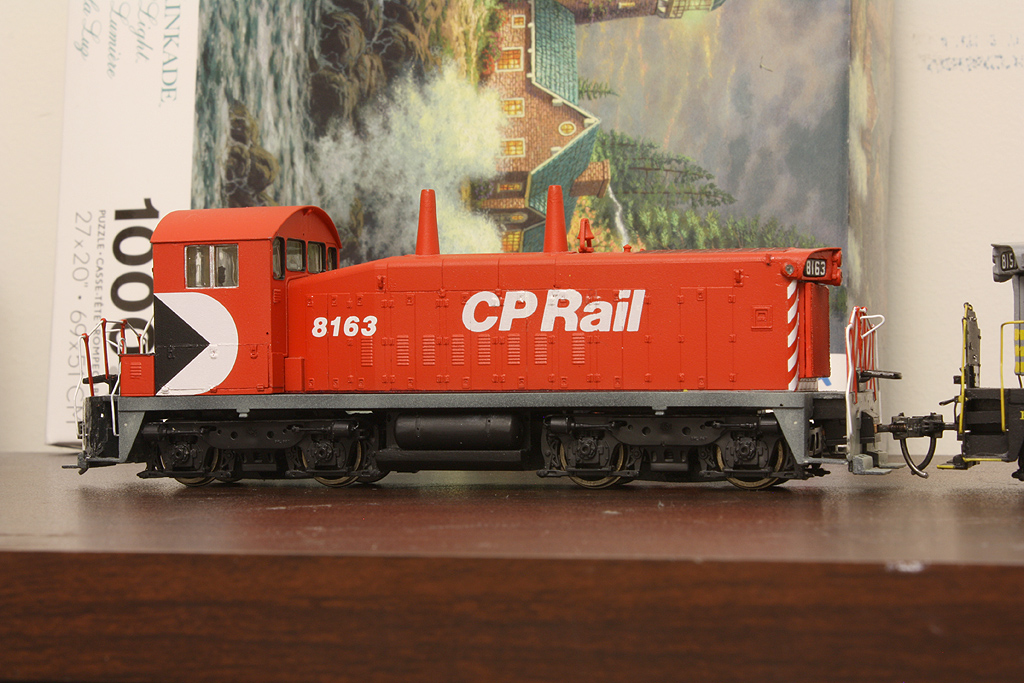 |
|
|
|
Post by CP_8530 on Aug 1, 2015 6:18:19 GMT -5
Time to dust this thread off for a bit of progres on 8163. The side handrails were the biggest thing holding the project up, so after making some Canadian-style styrene step inserts (which I had done before until I had to strip and repaint the shell frame), it was looked into. All CP's SW1200RS units were delivered with body-mounted handrails. In the late 60's/early 70's most CP SW1200RS units were converted to frame-mounted handrails for safety reasons (other CP SW units lasted longer with the stock setup, and CN started their retrofitting a bit earlier). When CP did the deed, unlike CN that used standard EMD rolled stanchions, CP used the two stock ones, but fabricated their own 2-piece stanchions similar to (but different than) the Alco S-series ones for the rest of the length. Essentially they made a flat strip perpendicular to the frame, welded 90 degrees to another strip located on one side, that tapered near the top and bolted to the frame at the bottom. The tapered pieces typically were all facing the same way on each side, but could be facing opposite ends from unit to unit and side to side (always check prototype photos). Since nobody made these in HO, I decided to scratchbuild some using two strips of styrene sheet cut to size and glued together. Holes were drilled at the tops for the handrail wire, and the tops rounded off. To fasten them to the frame, rather than just gluing them, I made a spacing template on a piece of painter's tape and used that to mark out the spacing. I then drilled two holes through the stanchion and frame, fastened with a tiny U-shaped piece of metal wire going through (and glued to) the stanchion and into the frame. A bit primitive, but effective. In the future I'd probably do them out of thin brass strips, as I had to replace a number of them due to handling damage. The regular EMD ones are leftovers from a Kaslo kit, and the wire is 0.015" steel piano wire bend to shape. 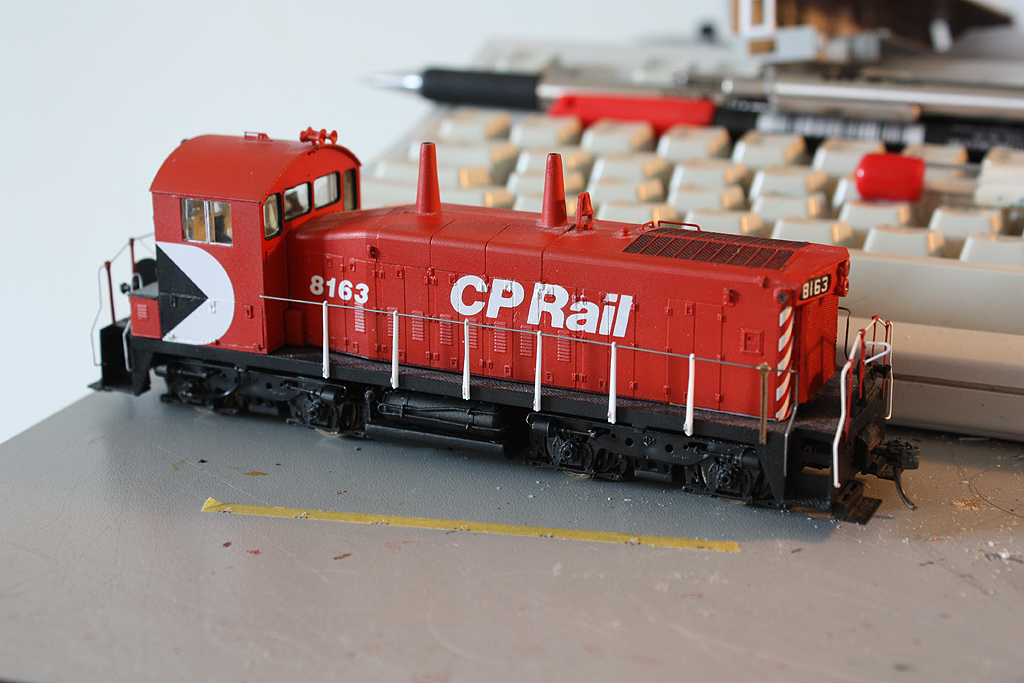 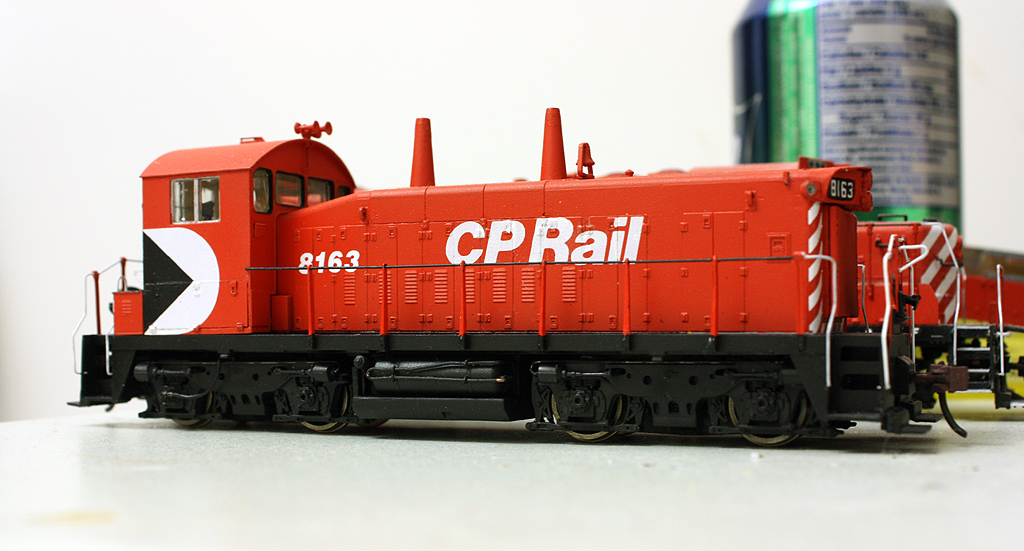 |
|
|
|
Post by CanadianRails43 on Aug 1, 2015 12:59:29 GMT -5
Great work!! Your SW projects are absolutely superb! Kinda motivates me to find a SW one of these days and do up a CP too, since you stated at the start of the thread that CP SW1200RS' are rather uncommon in the HO world. Please keep us up-to-date with these projects! They're outstanding!
|
|
|
|
Post by CP_8530 on Aug 1, 2015 16:08:32 GMT -5
|
|
|
|
Post by shinobi on Nov 5, 2015 6:30:19 GMT -5
TLT announcement? You're probably safe to take a decade to build yours before it comes out... Nearly 3 years after this post by iomalley, I was discussing this very subject with the owner of my LHS recently and the situation still has not changed. His exact words were "I don't think we'll be hearing from True Line Trains ever again" - implying that in his opinion, their next move will be to shut down entirely. He's lumbered with an inventory of their overpriced freight cars that nobody wants, and has pre-orders that have been on his books so long that he doubts the customers even remember placing them. More on topic, CP_8530 you've done an excellent job on these. I think I would feel more comfortable tackling the CN unit purely because I've had no experience with decals yet and those end stripes look intimidating. I'd also feel more comfortable if the side frames were not such a PITA. Coming across a set of Kaslo flexicoils would probably be the motivator for me. Seeing the photo of that flexing delrin as you were installing the sideframes made me nervous thinking about the stress that would be placing on the brittle cyanoacrilate joint. I'm currently in the process of detailing a pair of Athearn BB SW7's into some ex-Great Northern BN units, which have flexicoil trucks, beehive harco spark arrestors, full handrails, marker lights, auxiliary number boards, etc. I'm also doing the same with a Lifelike n scale SW1200. So once I get done with those, maybe I'll move on to an HO proto 2k SW1200RS. The Athearn units have been interesting actually; I was always told that the hoods were way over scale width, but in fact as it turns out they're almost exact. The biggest mistake was that the front and top radiator grilles were wrong, the top being too long and the front being too short! So the toughest job I've been faced with so far has been scraping these details off the shells to be replaced with Details Associates 2709 EMD switcher radiator grill, and 2727 EMD switcher hood grill. They're also getting Cannon switcher cabs. The chassis will be hardwired, but I may yet remotor them. Impressively, the ride height is exactly correct, something that manufacturers still seem to struggle with. |
|


 I could probably find some thin screening somewhere.
 oh well, looks a lot nicer now. If I'm feeling adventurous sometime I might even hack the old ones underneath out and install and paint some styrene shutters. And that might lead to mounting a fan...who knows!


