|
|
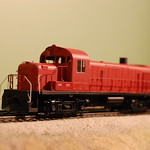
Post by bdhicks on Aug 24, 2011 2:08:52 GMT -5
I recently started a build of EMDX 7102, one of the GP22ECO demonstrators for EMD's 710ECO repower program. The other demonstrator, and all of the ordered GP22ECOs, are GP40-based with little to no external changes. 7102, on the other hand was originally a GP9, and has been extensively modified, with the long hood getting almost completely redone, on top of the chop nose job that had been done before. rrpicturearchives.net/locoPicture.aspx?id=100276I've still got a lot of work to do, but I've gotten to the point where there's at least something to take a picture of: 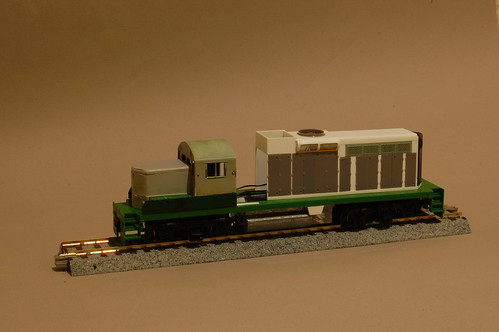 www.flickr.com/photos/ckape/6075667198/ www.flickr.com/photos/ckape/6075667198/The starting point is a combination of Atlas and Front Range GP9 parts. |
|
|
|
Post by dmfoamer on Aug 24, 2011 10:15:56 GMT -5
Very nice start. How/what did you do for the D/B housing? Boy they sure packed the parts on the roof sections didn't they?
Are you modeling as that exact unit or something else. If so, whar are you going to do for the decals on it.
Super build. Keep posting the progress.
Frank Lovejoy
|
|
|
|
Post by bdhicks on Aug 24, 2011 20:21:25 GMT -5
I built up the dynamic brake by bending some 1/32x1/64 brass strip around a rod, laying mesh on top of that, and then a layer of .005 styrene that I cut the grill openings out of. A bit of work, but it went surprisingly smoothly.
I will be trying to model it as shown in my link. The prototype has actually been sold off to Ferromex, but I figure a demonstrator has a lot more chance of showing up in the Twin Cities than a Ferromex geep.
My plan for the decals is to do up the graphics myself and print them on white decal paper with a background color matched as close as I can to the paint. Then I'll try to do a big decal that covers the whole side of the hood and go back over it with an airbrush to smooth over the edge of the decal. I've never done that sort of thing before, but I think it should work.
|
|
|
|
Post by antlorch on Aug 24, 2011 20:33:35 GMT -5
Hey on your decals, Jim at Highball Graphics is back into doing custom decals and I would try and talk to him about the decals now. That way as you work on the model he can work on the decals and they should be done around same time I would think. Call and talk to him personally.
|
|
|
|
Post by bdhicks on Aug 31, 2011 21:38:11 GMT -5
I made some more progress. The hood is all there now, although I've still got plenty of details to add to it. I put in some A-Line steps and put most of the cab roof details on. 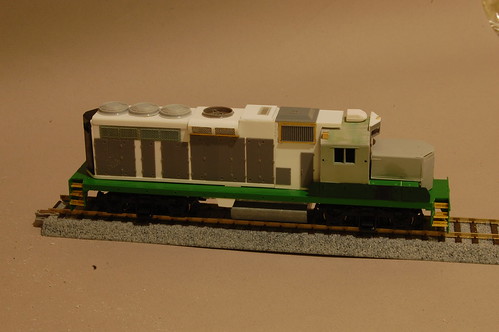 www.flickr.com/photos/ckape/6102009490/ www.flickr.com/photos/ckape/6102009490/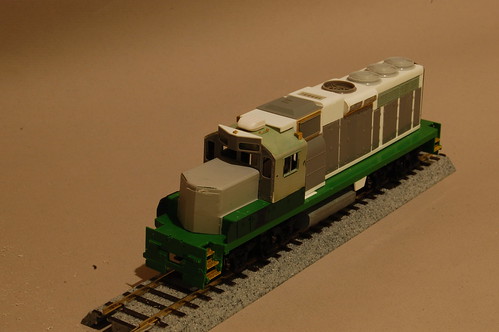 www.flickr.com/photos/ckape/6102009508/ www.flickr.com/photos/ckape/6102009508/Radiator fans aren't glued on yet, and the air conditioner and cab number boards won't get glued on until after painting (they're held in place by a bit of brass rod for now) |
|
|
|
Post by icghogger on Sept 1, 2011 9:17:46 GMT -5
Great Work, BD, keep it up (and keep us posted)!!
|
|
|
|
Post by Randy Earle on Sept 1, 2011 9:34:33 GMT -5
That's pretty cool.  |
|
sgoti
Chairman
Posts: 459 
|
Post by sgoti on Sept 2, 2011 1:55:28 GMT -5
Here are shots of a test shell I did a couple of years ago when I was trying to figure out the lettering and graphics of the GP40-core version:  and 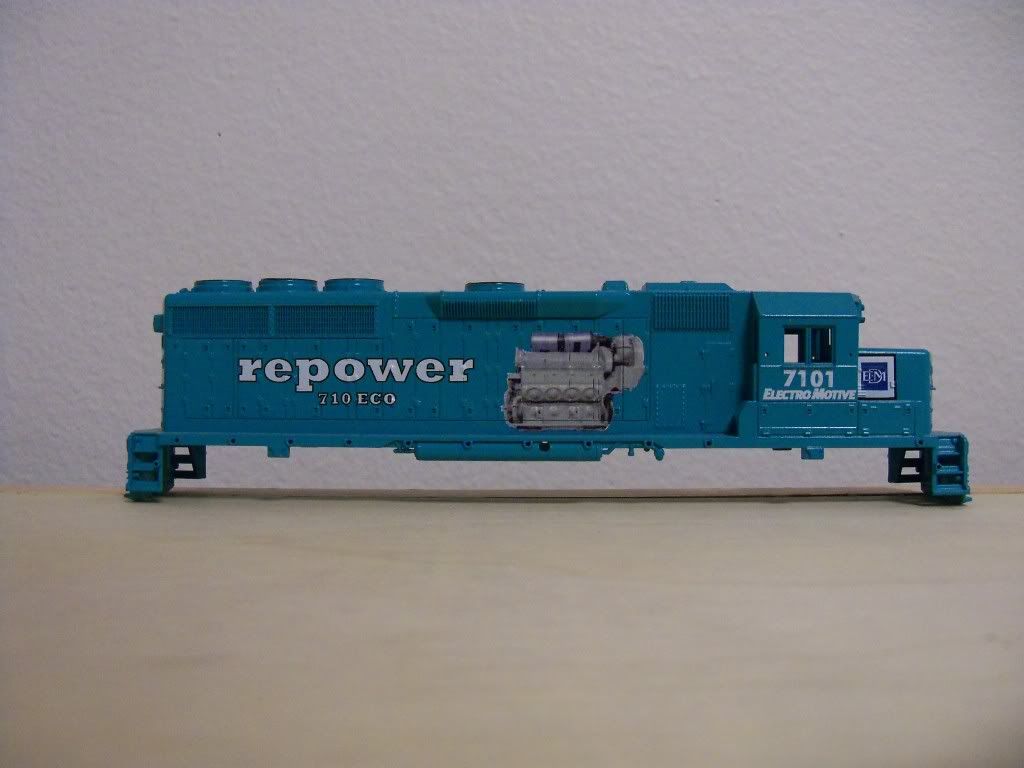 Shell was (obviously) an old Roco/Atlas version. Color is off a bit- I used Testors Model Master Tropical Turquoise, it was a bit lighter in real life. Printed back when I had white ink for the ALPS... (sigh) Globe was a NASA image, printed on Microscale white trimfilm with a laser printer (looks like I needed to darken the edges). The engine graphic was pulled from an EMD catalog I found online (I think it was for marine applications). The original image was of a 20-cylinder block, I "chopped" it in Photoshop and printed it on white decal film as well. Font for the "repower" and "710 ECO" graphics is called "Rockwell". EMD logos on the short nose were robbed from a Microscale set, not quite an exact match for what's on the prototype GP22Eco units. |
|
|
|
Post by bdhicks on Sept 2, 2011 2:17:42 GMT -5
Nice job with 7101 there. I did find the same globe picture with minimal googling. I also found a picture of the engine on the EMD India site, although it has a little bit of text in front of it that I'll need to clean up if I choose to use that image, and the picture is pretty small to begin with.
I did notice that the paint will be particularly tricky to match, it's certainly not a common shade and the way it shows up in pictures tends to vary a lot with the lighting.
I probably won't be taking any detail shots until it's nearly done, but you can click through the link to my flickr page and right click on the photo, then it will give you an option of a higher resolution picture. Then you can see just how crooked everything really is.
|
|
drgwguy
Chairman
Modeling the DRGW in the 70s-80s!!
Posts: 528
|
Post by drgwguy on Sept 2, 2011 20:09:04 GMT -5
|
|
|
|
Post by CP_8530 on Sept 3, 2011 21:11:00 GMT -5
Very impressive GP22ECO!
Hmm, that GP40 shell looks very Bachmann. I wonder if the tooling was shared at one point...
|
|
sgoti
Chairman
Posts: 459
|
Post by sgoti on Sept 4, 2011 1:05:59 GMT -5
Very impressive GP22ECO! Hmm, that GP40 shell looks very Bachmann. I wonder if the tooling was shared at one point... Atlas/Roco -> ConCor -> Bachmann... Yeah, it's been shared! ;D |
|
kcs1967
Chairman
SWLA-SETX PINE SCENTED
Posts: 1,726
|
Post by kcs1967 on Sept 4, 2011 8:59:59 GMT -5
Looks great, I snagged a globe off a KCS unit for one of Damian's projects, he had a decent shot that I cleaned up and sized.
|
|
|
|
Post by Randy Earle on Sept 4, 2011 14:56:16 GMT -5
Better watch out for the CAT Police! LOL  |
|
|
|
Post by NCCR 2580 on Sept 6, 2011 2:17:55 GMT -5
Holly crap! Looking great! I shot this unit in Atlanta Ga once.
|
|
|
|
Post by stump on Sept 6, 2011 8:39:48 GMT -5
A nice detail for the trucks are MBE gp38 bearings. This unit started its life as a CP GP9 and was rebuilt to a GP9u, I have done work on many CP geeps and the bearings look great. Your model looks really nice as do the decals on your 710 ECO shell. Keep up the good work... |
|
|
|
Post by bdhicks on Sept 6, 2011 9:49:21 GMT -5
Thanks for the compliment, but only the 7102 model is mine, the 7101 shell with the decals is sgoti's work.
|
|
|
|
Post by ncrail95 on Sept 7, 2011 22:40:19 GMT -5
super nice ;D
|
|
|
|
Post by bdhicks on Sept 11, 2011 14:40:45 GMT -5
When I was looking at pictures for adding details to the radiator section, I noticed that it actually bulges out a bit in the back, which I hadn't modeled. So I had to re-do that part (unfortunately, after I had glued the fans on). The radiator section of the roof wasn't glued on (and still isn't), so at least it wasn't as messy as it could have been, but it was still troublesome. On the plus side, the spacing between the fans looks better now. The Detail Associates fans are nice, except the little detail parts are easy to lose. I eventually decided to just drill mounting holes and replace the plastic conduit parts with brass wire, since it was so hard to keep the plastic parts on. I also put the horn and lift rings on, so the roof is pretty much done except for the grill on the dynamic brake fan. 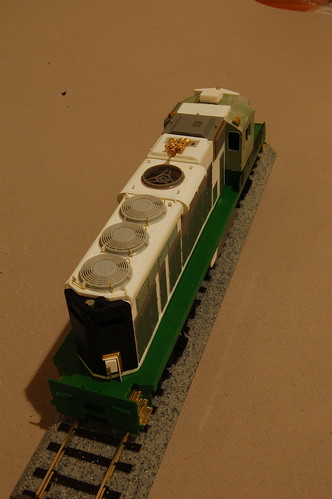 www.flickr.com/photos/ckape/6136985407/ www.flickr.com/photos/ckape/6136985407/ |
|
garyrsatx
Trainmaster
It's been a while, but I'm back!
Posts: 119
|
Post by garyrsatx on Feb 27, 2012 9:28:37 GMT -5
Dude that looks freaken awesome!!!
|
|