|
|
Post by Randy Earle on Mar 14, 2009 12:37:28 GMT -5
I'm going to re-start this thread again. Times are tough, so here's a project most people can afford. I'm building an SD-45 a from Rail Power Products shell, and the drive will be a simple Athearn Blue Box drive that can be had for a few bucks. I picked up a Cannon Cab, Sub-Base, and High Hood at a Train Show for less than 10 dollars. The RPP shell cost $7.50, and the Athearn Drive was 10 bucks. You will need a Dremel for this project. If you plan on doing diesel detailing one tool you must have is a Dremel. 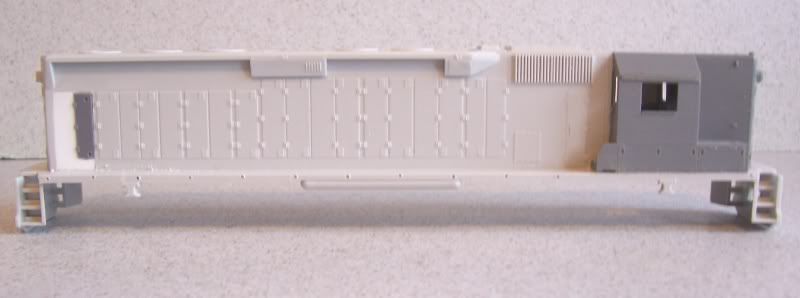  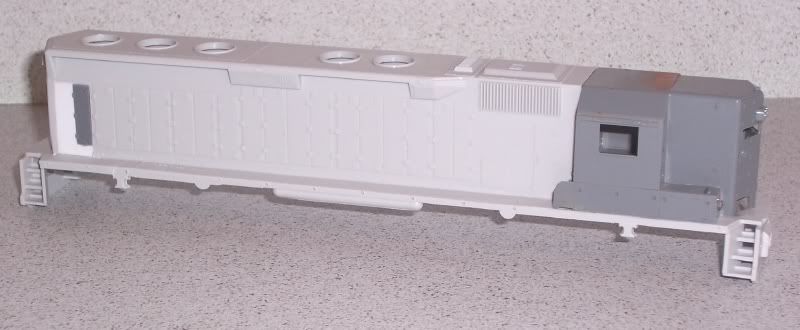 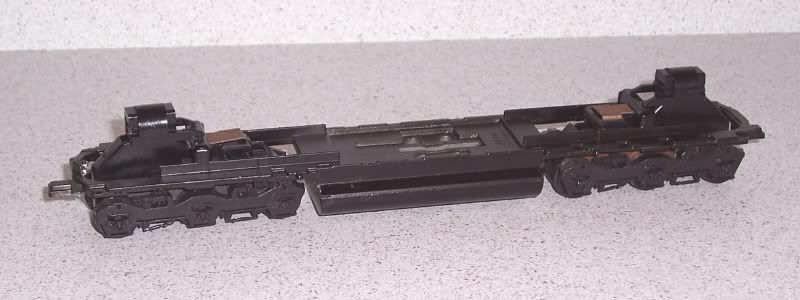 I have used an Xacto Razor Saw to remove the nose and battery boxes. As I'm building an early N&W SD-45 I had to remove the area where the rear handbrake was located and fill the area with .020 plastic. I purchased a set of Cannon & Company radiator section doors to get the door I needed to replace. Once this door was located I cut a piece of .010 styrene to surround the area and level out the surface. If you cut carefully you shouldn't need to apply filler. |
|
|
|
Post by Randy Earle on Mar 14, 2009 12:42:07 GMT -5
Following the instructions provided with the RPP SD-45 Shell, get out the Dremel and a fiber cut off disk and remove the areas on the Athearn frame to provide clearance for the shell. 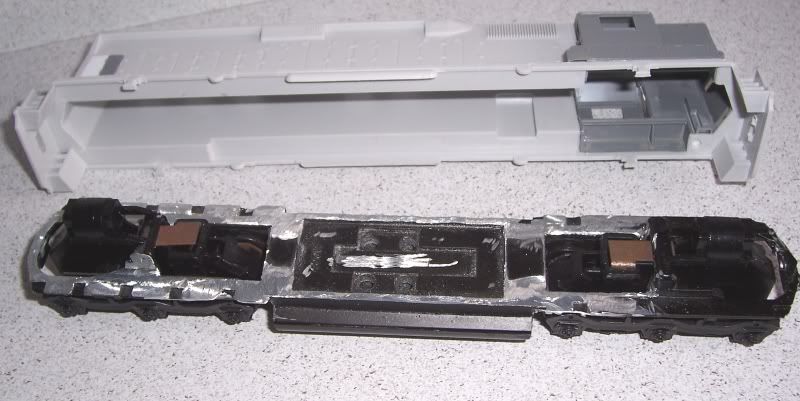 Once you get this done, the shell will sit down level on the frame. (you will have to trim back the coupling pads a bit to clear the pilots) 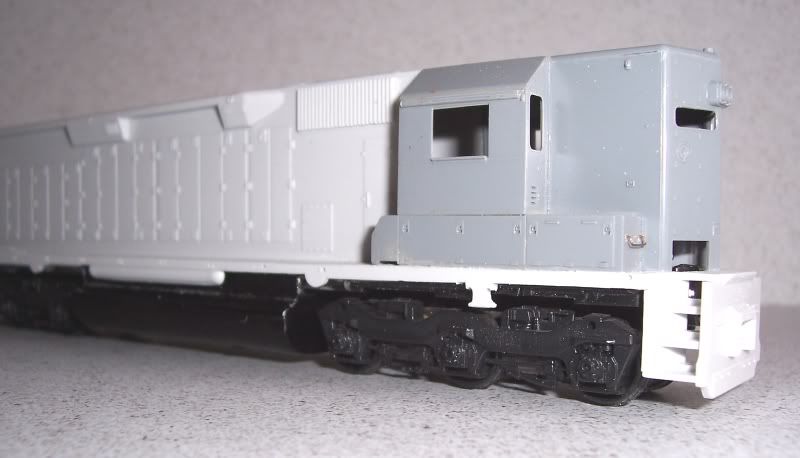 |
|
|
|
Post by antlorch on Mar 14, 2009 13:58:21 GMT -5
Looks good so far Randy,at the end post a list and price of each item so we can get an idea of how much the total package cost you.......That looks like a lot of frame removal...is the frame just as strong as it was before?
|
|
sarge
Chairman
Posts: 1,132
|
Post by sarge on Mar 14, 2009 14:08:00 GMT -5
Looking good Randy. I have several cheap builds in the line up, just have to get to them.
|
|
|
|
Post by upnick on Mar 27, 2009 5:17:18 GMT -5
Great build up Randy .... gives me ideas for some projects as well  |
|
|
|
Post by Randy Earle on Mar 27, 2009 14:53:31 GMT -5
Those would be former Erie Lackawanna SD-45s wouldn't they? I don't know what I'm doing with the fans and grilles yet, I've got 38 other projects going. lol
|
|
|
|
Post by Randy Earle on Apr 17, 2009 23:13:42 GMT -5
|
|
Smoke
Chairman
The Ski Train!!!!
Posts: 753
|
Post by Smoke on Apr 18, 2009 0:08:21 GMT -5
Looking good Randy! How did you go about making your own lift rings?
|
|
|
|
Post by riss2509 on Apr 18, 2009 8:41:59 GMT -5
very cool Randy, makes me wanna drop doing BNSF stuff and go do some NW!!!
|
|
|
|
Post by Randy Earle on Apr 18, 2009 9:52:15 GMT -5
Looking good Randy! How did you go about making your own lift rings? I've got those jewelry making pliers that have very small round jaws. I took florest's wire (found at craft stores like JoAnn Fabrics) and made the little eyebolts by hand. They are another expense I don't have the money for. This is a "cheap build". |
|
|
|
Post by Randy Earle on Jun 14, 2009 23:00:23 GMT -5
Now that the Dremel is fixed, I had the time today to cut off the old Athearn cast fuel tank to mount the KATO SD-40 fuel tank. Makes a big difference. So far, except for the Plano Grilles, I haven't spent much money on this build. Most of the parts used were laying dormant in my parts box, some for over 10 years. The Cannon parts were parts I purchased from Gordon back in the mid 1990s and the cards they were attached to were yellowed with age. The Kato fuel tank was from an auction I won that was just a box full of train parts. That box in all reality probably had over 100 dollars worth of detail parts in it and I got it for 20 bucks. I would have to estimate that I still only have about 40 dollars into this build, and I already have everything I need to finish it. The N&W SD-45 is the one that was the super glue blob. I've cleaned it up but I haven't detailed it yet. Also lurking in the background is the GP-15X.   |
|
|
|
Post by cf7 on Jun 15, 2009 7:03:32 GMT -5
Looks good Randy! I agree that the Kato tank is a great improvement.
|
|
|
|
Post by rdg5310 on Jun 15, 2009 21:24:11 GMT -5
That does look good with the Kato fuel tank! I have several of those tanks on hand for various projects. Nice work Randy!
|
|
|
|
Post by Randy Earle on Jun 15, 2009 22:18:43 GMT -5
I'll tell ya what, when you do that much cutting with the Dremel it gets hot and starts howling.
|
|
|
|
Post by Randy Earle on Jul 3, 2009 16:40:46 GMT -5
It will be in the sheep dip black N&W scheme, one of the Phase I units in the low 1700s and low cylinder trucks. I have the Smokey Valley sideframes, I just haven't installed them yet.
|
|
upyardrat
Probationary Member
Smoke'n outside Helper, UT
Posts: 22
|
Post by upyardrat on Sept 22, 2009 13:50:57 GMT -5
Nice work.... After you cut the old fuel tank off...how did attach the Kato tank and did you add any weight back to the frame as a result of the loss?
|
|
|
|
Post by Randy Earle on Sept 22, 2009 22:19:34 GMT -5
I used epoxy and lead shot.
|
|
|
|
Post by Randy Earle on Feb 1, 2010 0:21:28 GMT -5
|
|
|
|
Post by graftonterminalrr on Feb 1, 2010 9:41:28 GMT -5
Lookin' good!
|
|
|
|
Post by icghogger on Feb 1, 2010 10:51:47 GMT -5
That is really a sweet build, Randy!
|
|