|
|
Post by diesel on May 22, 2010 22:34:23 GMT -5
Hey Guys, This isn't a new project, I started cutting out the parts that would be replaced with Cannon ect. parts last year in-between other projects. I made a parts run yesterday and as it turns out, they had only half of what I needed, but yet almost everything I need for this project so it came off the back burner. It should move pretty fast from here. I still need safety tread/steps and a few other things. I also got parts for 2 SD40-2s but they didn't have noses, cabs or fans! Other projects wait for parts like anti-climber safety treads ect. Mail order time I guess. 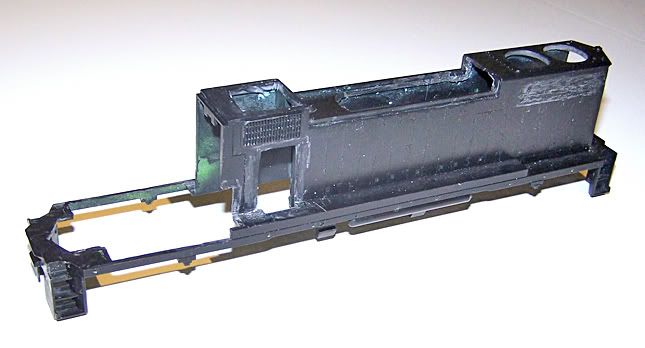 |
|
|
|
Post by Randy Earle on May 22, 2010 23:40:32 GMT -5
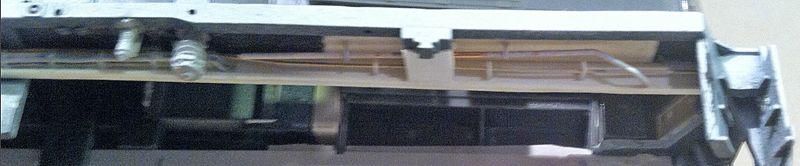
Don't ya hate that hole the electrical cabinet leaves when you cut it out? Messes up the walkway duct too. 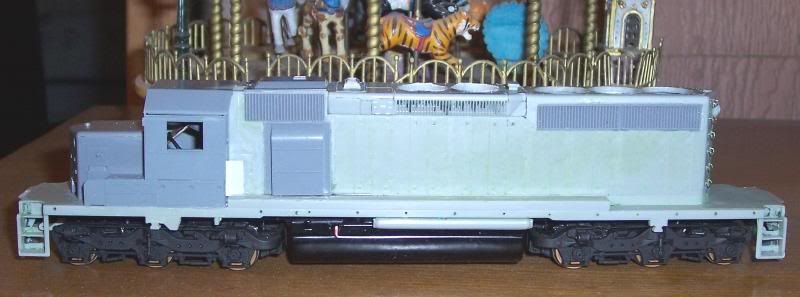 |
|
drgwguy
Chairman
Modeling the DRGW in the 70s-80s!!
Posts: 528
|
Post by drgwguy on May 23, 2010 0:30:06 GMT -5
Keep 'em comin! (the pix, that is),
Rick
|
|
|
|
Post by diesel on May 23, 2010 0:49:09 GMT -5
YUP! I didn't realize that was gonna happen til after I cut it out. But at least I've gotten used to patching with styrene... -how long does it take to get good at it?
I'll post update pics along the way.
|
|
|
|
Post by diesel on May 26, 2010 19:12:53 GMT -5
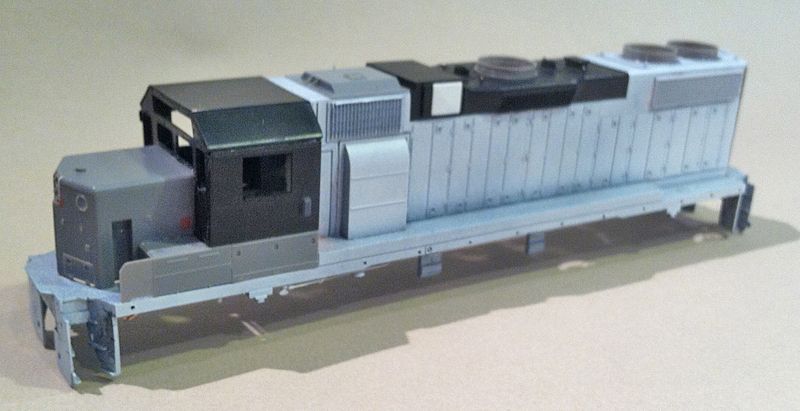
here's a couple of progress shots, BUT, I also have a couple of questions. Despite the recent parts run, I still don't have everything I need. I still have to get the safety tread and steps, ditch lights, and coupler pocket. -I think that's all! At least I have enough fans for this one! Here's where I'm at; I've patched a few large gouges I made by accident, finished all the cutting, ie. for the inertial filter hatch, almost finished drilling for things like mu hoses & grabs ect. I made a notch in the shell where the sub-base will go. Although it fits snug now, is this something that is done all the time? -see pic I filled in where the electrical cabinet was and I'll smooth and fill with putty later, but is there anything else I need to do at this point? I know you're not actually looking at the shell and that these things are usually a case by case basis, but is there anything that is usually done at this point that I'm missing? Like how I didn't know I should apply gloss coat BEFORE the decals. I think it's a good move to not cut out the steps until later, just because the shell is delicate now that so much is cut away. Is that not really an issue though? 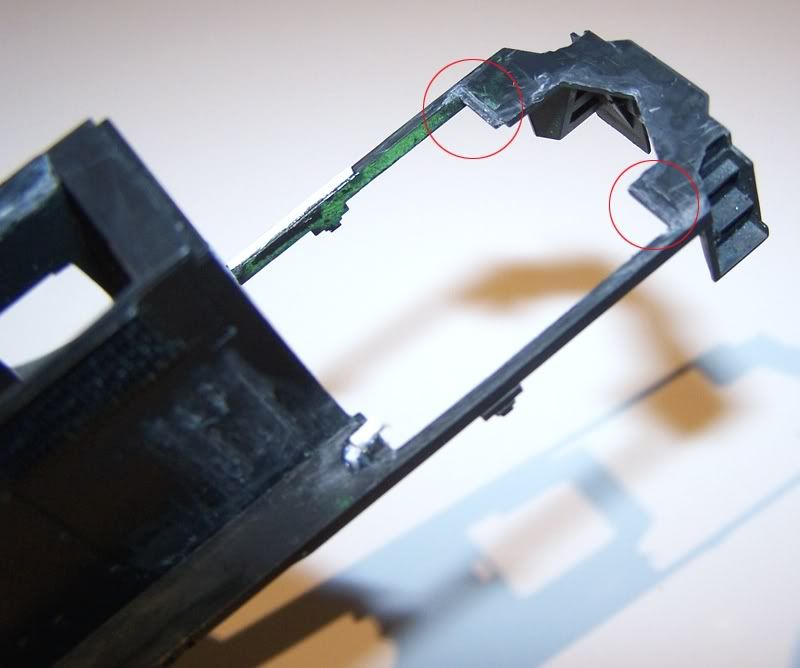 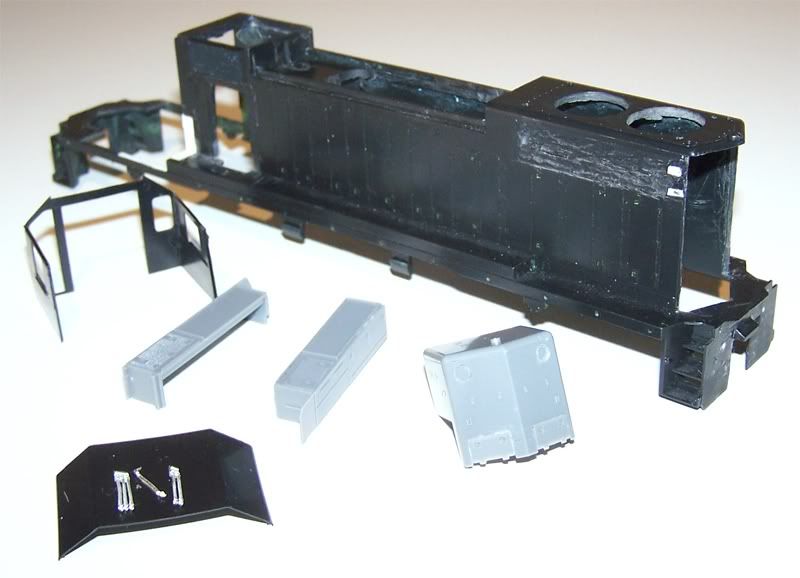 |
|
|
|
Post by diesel on Dec 15, 2010 21:18:02 GMT -5
|
|
|
|
Post by diesel on Jan 14, 2011 16:10:57 GMT -5
Hey Guys, This is a change of plans operation, and so I knocked off one of the air resevoirs while working on this, so I think I'll add that when I get the other things done. I decided to add the plastic frame rail to the plastic body after the air tanks were already were on ; /... But, I think I like doing this better even though I've only done about 4 where I've added the frame and only 1 is done. This thing still needs more undersill details, but I figured I'd post now for the fun of it. 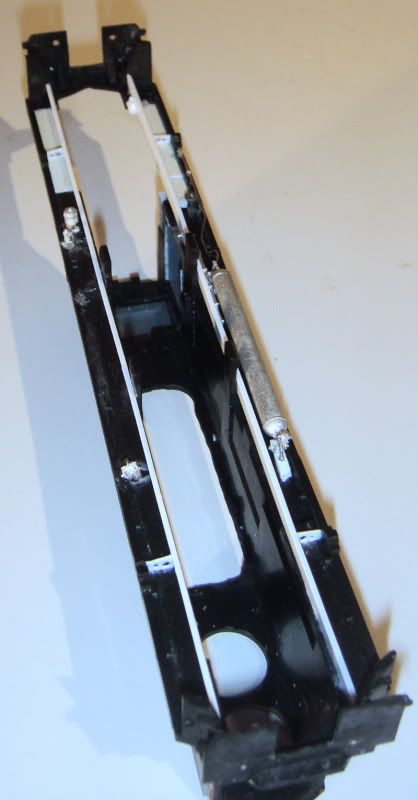  |
|
deez
Chairman
Midland Belt Railway
Posts: 949
|
Post by deez on Jan 15, 2011 0:22:30 GMT -5
Very nice job on the frame rails! Looks great.
|
|
|
|
Post by diesel on Apr 28, 2013 20:06:33 GMT -5
|
|
|
|
Post by Randy Earle on Apr 28, 2013 23:43:06 GMT -5
Most of us remove those body/frame mounts on the Athearn Geeps because the act of squeezing the body shell makes detail parts fall off or get damaged. You can coupler pad mount the shell.
|
|
|
|
Post by shoofly on Apr 29, 2013 0:47:12 GMT -5
That's one fabulous looking GP38-2! The frame railing detail is completely on point. Great job!
You might want to take a quick look at the access doors on the bottom of the nose, they look upside down.
Chris
|
|
|
|
Post by grandtrunkfan on Apr 29, 2013 9:57:39 GMT -5
Most of us remove those body/frame mounts on the Athearn Geeps because the act of squeezing the body shell makes detail parts fall off or get damaged. You can coupler pad mount the shell. What has to be done to the shell in order to do that? |
|
|
|
Post by Randy Earle on Apr 29, 2013 10:27:25 GMT -5
You will need to build up a block of plastic behind the pilot, and drill it with the number 50 drill making sure you don't drill all the way up through the deck. Then you can tap it for the 2-56 screw. You'll need to make sure the plastic block is level with the coupler mount so you can use the Kadee coupler box. Then drill a larger hole into the metal pad on the frame so the screw will go through and hold the body on. You will need to thin the metal pad to adjust the height of the frame, but drill the hole in the pad first.  |
|
|
|
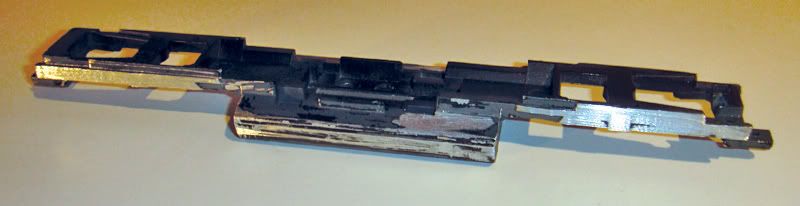
Post by diesel on Apr 29, 2013 19:26:21 GMT -5
Thanks for the comments.
Sorry but I've not been letting you guys in on my frame work. Those tabs will come off, right now they're handy just to line things up for test fits. I got that strip kleen Brian Banna showed us in his video. That stuff works super fast. 10 minutes and the paint slides off. Anyway, I want to do the type of coupler pocket BB shows in his builds. Then I will make an actual box that I can slide the assembled KD into but I will allow for a screw through from the bottom it to hold it together.
|
|
pacbelt
Chairman
Building Layout #11!! ;)
Posts: 682 
|
Post by pacbelt on May 9, 2013 5:23:16 GMT -5
I for one of many, cannot wait to see where you take this incredible build next!!  I'm gonna have to try doing frame rails on my BB builds. That looks GREAT!!  |
|
|
|
Post by m a y o r 79 on May 12, 2013 8:24:24 GMT -5
Lookin good diesel. Your inspiring me to dig out my Atnearn Gp38-2 (if i can figure out which box its in) and taking the same approach you did, though as a Milwaukee Road instead. With that amount of Cannon parts and some work pn the drivetrain it should run just as well as my Proto 38-2s.
|
|
|
|
Post by slowfreight on May 12, 2013 8:55:45 GMT -5
I've seen it in person, and it's coming out great!  |
|
|
|
Post by diesel on May 12, 2013 22:38:10 GMT -5
thanks guys! i thought about this today, does that count? lol
Thank you Chris, the doors are on upside down, i have no idea what i was thinking.
but, i really wanted to see if i could paint today instead.
i tried to get it together and take the gp35u and the SD40 to club and paint the small areas that need it
along with the gp39e (former gp35) that's getting total paint.
but no.
the cap top fans are smaller than the ones i drilled for so i had to add the shims from a 48" set.
then i found areas i had puttied and forgot about. so i spent time sanding those.
after i cut all the cap top fans from the sprus and cleaned them up it was too late for paint.
so, i went to club, ran a local switch job on the lower level and then called it a nite.
i will have more on this soon, i'm starting to wonder what it's gonna look like!
|
|
|
|
Post by diesel on Mar 13, 2014 0:45:08 GMT -5
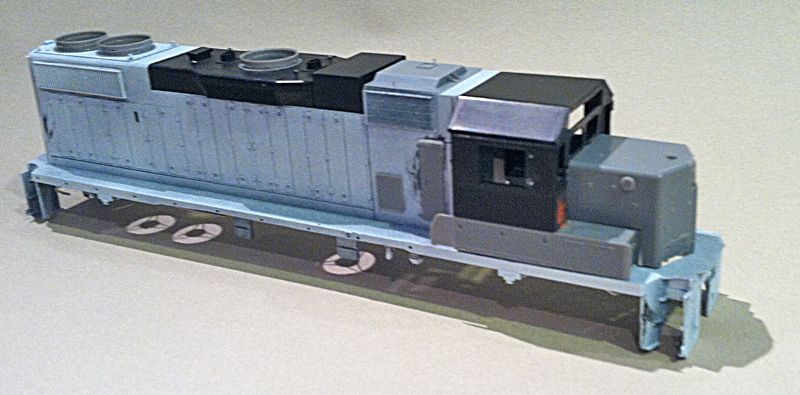
I just realized I started this in May of 2010... I think I'm picking up speed these days, but I need a break from this thing. I had a list of things I wanted to do on this before it goes to paint, I did almost all those things and I also a few things I forgot to list. Such as I totally forgot I was putting safety tread on this thing. I put down one piece so far and have some clean up work to do etc. and I only started the air reseriors. I don't know about you guys, but I did that stuff all pretty much within the last week and a half and that's a lot for me. I'm pretty fried looking at this thing even with as happy as I am with it. This does have a couple pretty big firsts for me on this thing such as my first functional coupler pocket built around the metal tab that actually works. I can feed in a #5 Kadee with the spring and the half of the #5 box that the spindle in through the front and then put in a screw in though from the bottom; the same way you would on an Atlas or P2k and it works! -That way I'm pulling from the frame. -here's that list: cut for fuel gauges drain pipe, left side fuel tank front coupler pocket details & buffer plate air reservoirs & piping wast retention tank & bracket make channel for drop step drill for: ditch lights, mu stands, stanchions drill for spare coupler bracket finish clean air room doors drill for lift rings under radiator grilles on rear cab assembly: plate over 2 louvers on cab/short hood fix channel of headlight on the nose drill for antennas set up/test fit sun shades re-drill for mirrors I know these pics aren't the greatest, but here's what it looks like now: 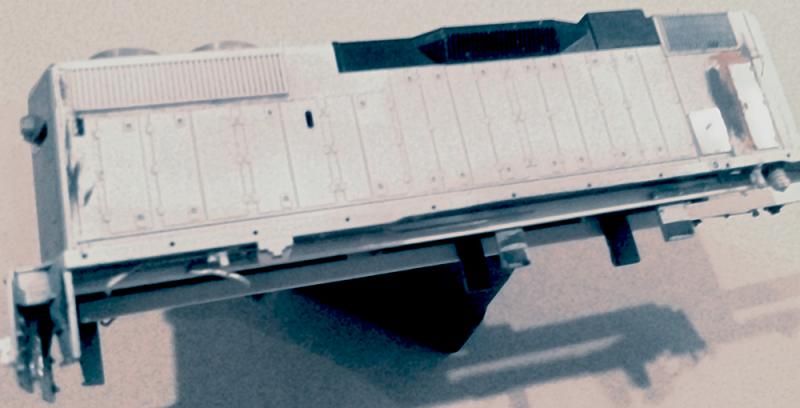  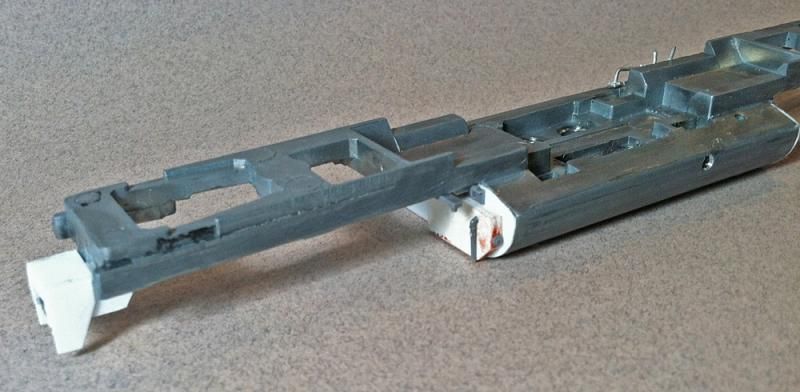 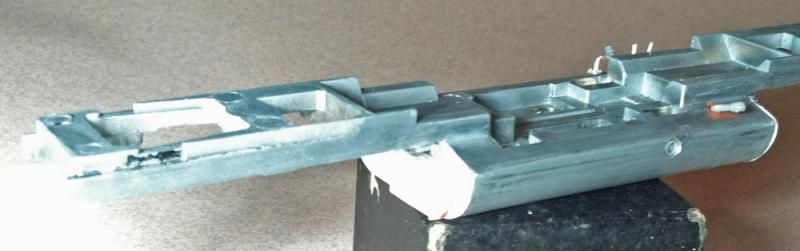 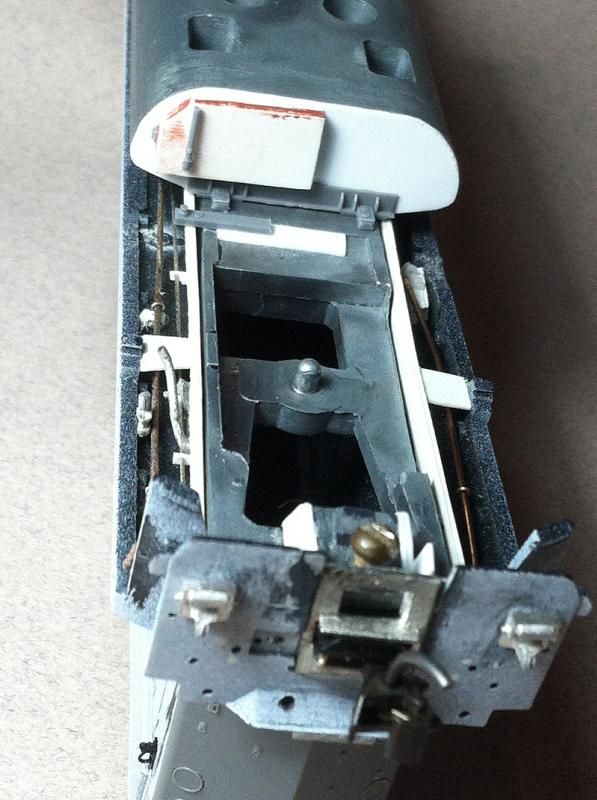 |
|
pacbelt
Chairman
Building Layout #11!! ;)
Posts: 682
|
Post by pacbelt on Sept 12, 2015 15:33:03 GMT -5
That's really looking fantastic!! The frame details are outstanding! I hope you've made some progress by now.... I'd love to see it.  |
|