|
|
Post by lindsaya99 on Jan 28, 2010 11:56:40 GMT -5
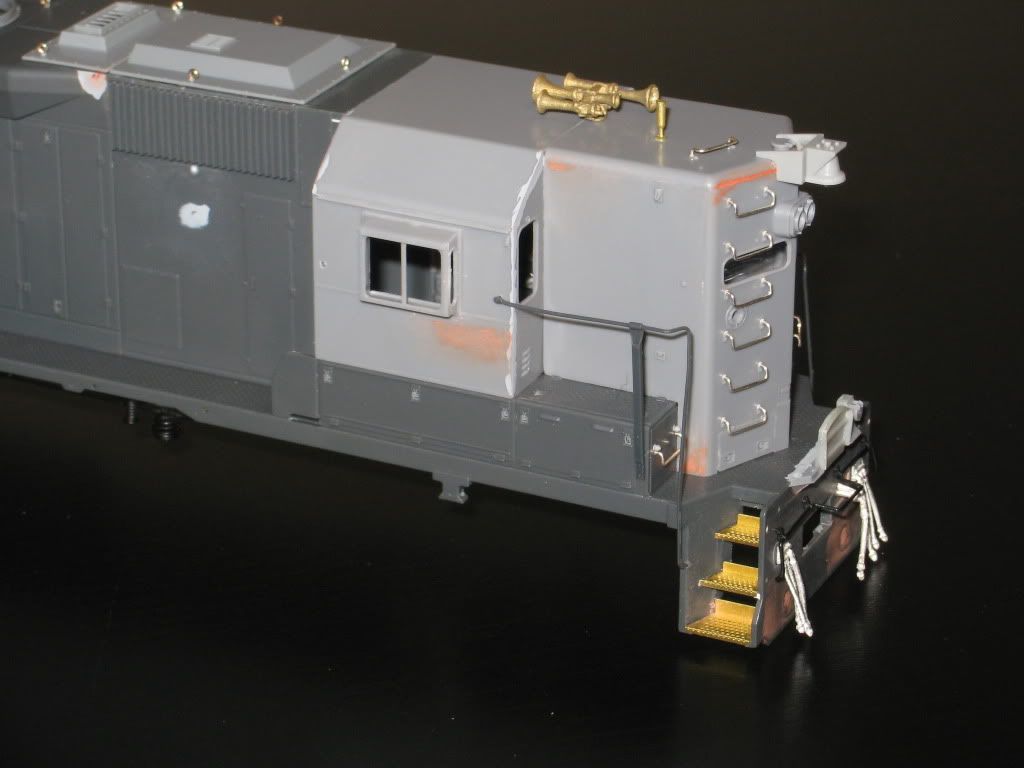
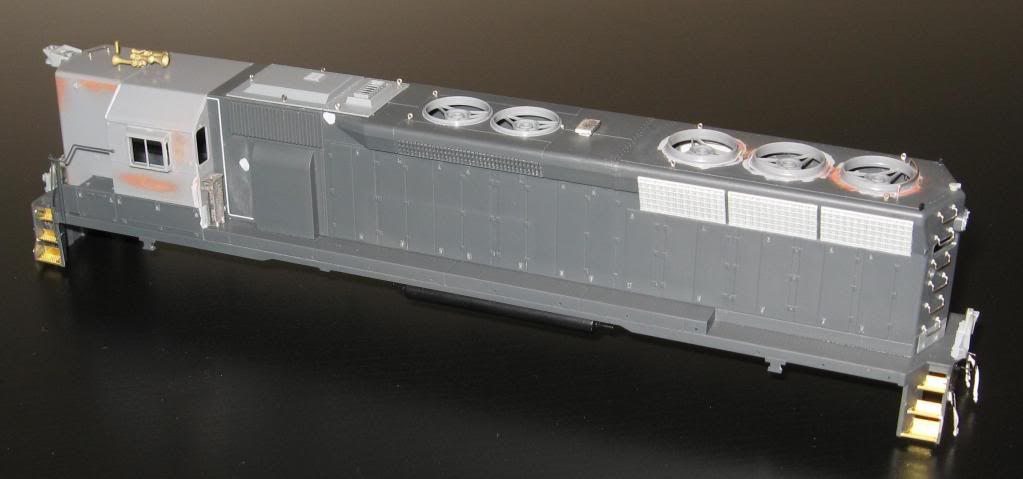
I thought I would share my first attempt at a Norfolk and Western diesel. It is a Proto 2000 SD-45 that has been sitting on my shelf for a few years. I've added a number of Cannon parts. As you can see, I'm a bit rusty with building the cab and high hood kits. Hopefully all the putty and Mr. Surfacer will cover up my goofs. I'm close to painting it so I'll post some pics as I make more progress. Charlie Attachments:
|
|
|
|
Post by Randy Earle on Jan 28, 2010 12:02:35 GMT -5
Looks good so far.
|
|
|
|
Post by lindsaya99 on Jan 28, 2010 12:27:50 GMT -5
|
|
|
|
Post by mosteam3985 on Jan 28, 2010 14:53:23 GMT -5
IMHO I think it looks fantastic! Keep making progress, and I can't wait to see it all painted up and running!
|
|
|
|
Post by Matthew on Jan 28, 2010 16:35:57 GMT -5
I'll second that. Nice work.
Matthew
|
|
Freightrain
Chairman
Modeling CSX from 1995 to present
Posts: 625
|
Post by Freightrain on Jan 28, 2010 19:11:18 GMT -5
Looks awesome, gotta love the almighty HH. ;D
|
|
dtinut
Chairman
Modeling the DT&I of the 60's & 70's
Posts: 661
|
Post by dtinut on Jan 28, 2010 23:57:37 GMT -5
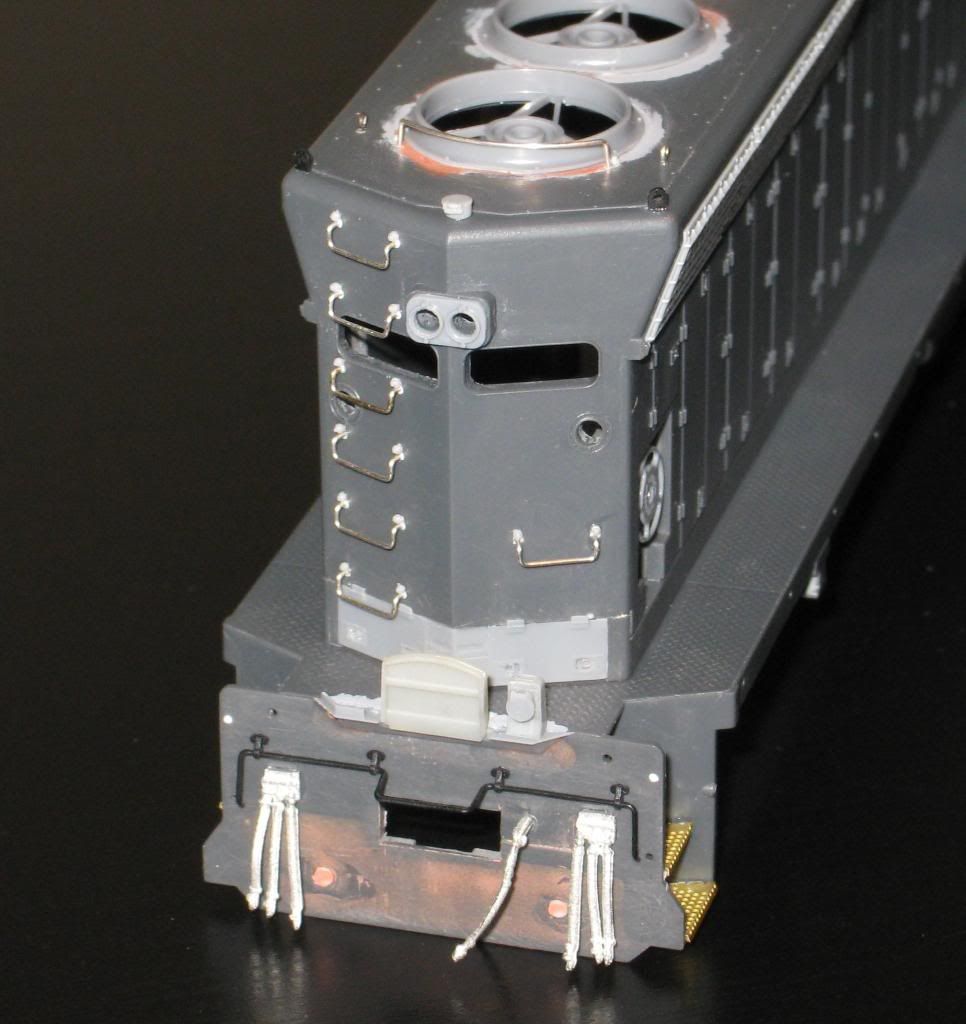
Nice work - I like that you added the lift rings on the end of the long hood - most people miss that detail.
How are you planning to paint it? Hamburger Blue or 13Dip Black?
Regards,
Brian
|
|
deez
Chairman
Midland Belt Railway
Posts: 949
|
Post by deez on Jan 29, 2010 0:11:40 GMT -5
So far, so good. I like it alot! Any plans for the underframe?
|
|
|
|
Post by graftonterminalrr on Jan 29, 2010 10:19:01 GMT -5
That looks incredible! I like how you modified the Atlas hiogh-hood bell - I did the same for my SOU SD35 project.
|
|
|
|
Post by lindsaya99 on Jan 29, 2010 10:25:55 GMT -5
Thanks guys. I plan to paint it in the black "NW" scheme. I don't have much planned for the underframe. The fuel tank already has sight glasses, fuel fillers, and breather pipes. The truck sideframes are incorrect but I don't know of a way to replace them with correct ones. I think I'll just add a speed recorder and replace the plastic sander lines.
Charlie
|
|
|
|
Post by lindsaya99 on Feb 2, 2010 11:38:54 GMT -5
Here is the progress I have made to date. The underframe is almost done. First I replaced the brake cylinders with some extra Athearn parts I had. The P2K ones looked a little too skinny to me. The airlines to the cylinders was replaced with brass wire and the sand lines are made from 0.015" solder attached with eyebolts. I ended up replacing the fuel fillers with Details West ones after I accidently broke one of the plastic ones off. I also used round sight glasses from Details Associates. After the detailing was complete and everything was washed I primed the entire model. I'm mainly using Tamiya acrylics and the primer coat is Medium Grey. Next I painted the underframe a mixture of about 75% Flat Black and 25% Medium Grey. After I let that dry for a day or so I gave the truck sideframes and fuel tank a wash of Burnt Umber artist oil paint thinned with turpentine. Again, I let it dry for a day and then airbrushed thinned Tamiya paints to finish up the weathering. All that is left is to add fuel spills and a flat finish. I haven't made quite as much progress on the shell. After looking through prototype pics of N&W SD45s I noticed that some had black paint peeping off revealing the original Pevlar Blue underneath. I mixed up some Polly Scale C&O Echantment Blue with Reefer White and painted some areas along the long hood. I also gave the walkway and steps some Tamiya Flat Brown. I plan to use the Salt Mask technique for chipped paint in those areas. I've never done if before but the AFV guys make it look pretty easy. Wish me luck with that. Charlie 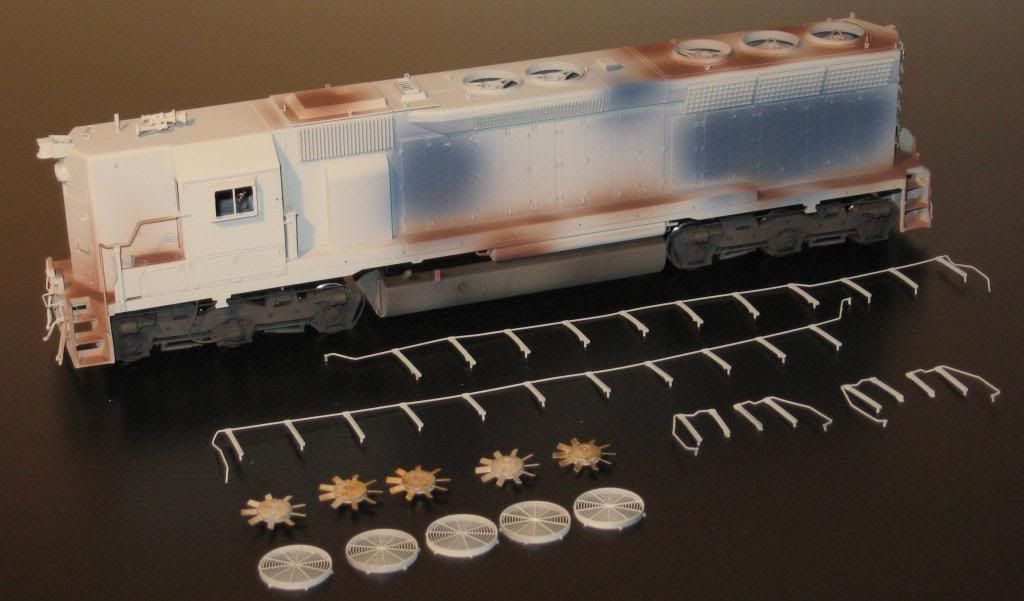 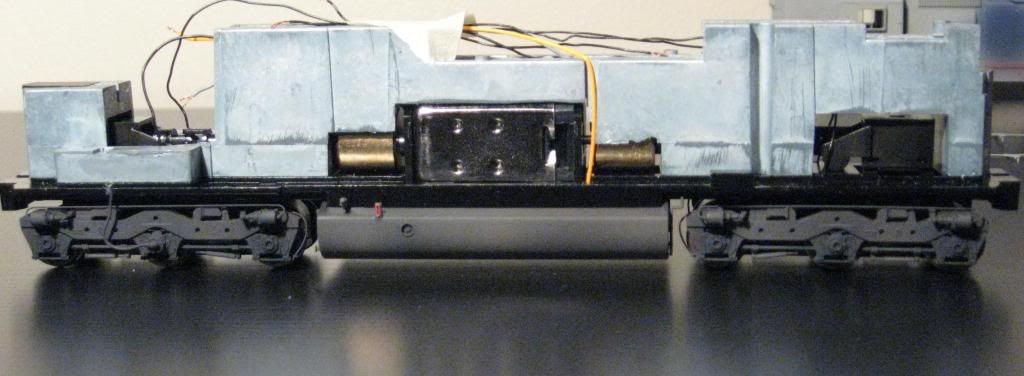 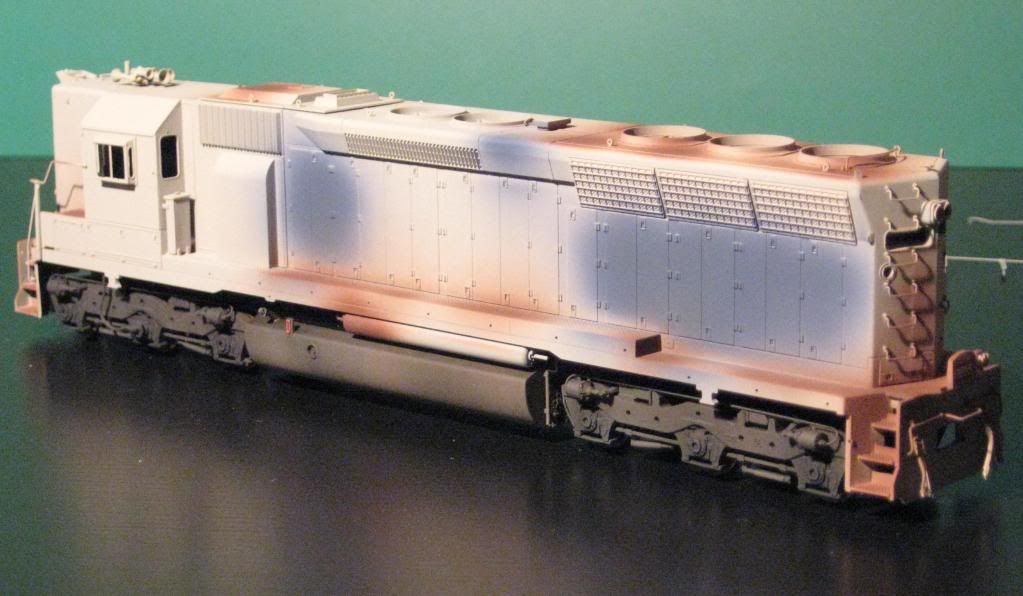 |
|
|
|
Post by Randy Earle on Feb 2, 2010 12:52:12 GMT -5
Charlie, get one of those Plano Coupler Baskets for it. I bought some and they are really nice. Your SD45 looks great so far.
|
|
|
|
Post by Randy Earle on Feb 2, 2010 12:55:55 GMT -5
Those Plano grills are nice, I put them on my Cheap Build 45.  |
|
|
|
Post by lindsaya99 on Feb 4, 2010 22:08:52 GMT -5
I'm familiar with both the Plano grilles and knuckle basket but my LHS doesn't have them in stock. Also I'm in a bit of a hurry to make as much progress as I can. The wife and kid will be out of town so I have 48 hours to get this puppy done. I finished painting today so I'll try to get some pics online before I spray on the Future.
|
|
|
|
Post by lindsaya99 on Feb 5, 2010 12:11:13 GMT -5
Here it is with some paint on it. I posed it on my "layout". One day I plan to built a larger one. Anyway, as you can see I'm going for the well used look. I painted it with several different shades of Tamiya flat black mixed with medium grey. I also started with the weathering. Next, I need to do some touching up on the handrails. I sprayed the handrails yellow then masked it with artists masking fluid. Unfortunately, most of the yellow paint came off when I removed the dried masking fluid. Once I'm done with that I'll spray it with Future and apply the decals. Charlie 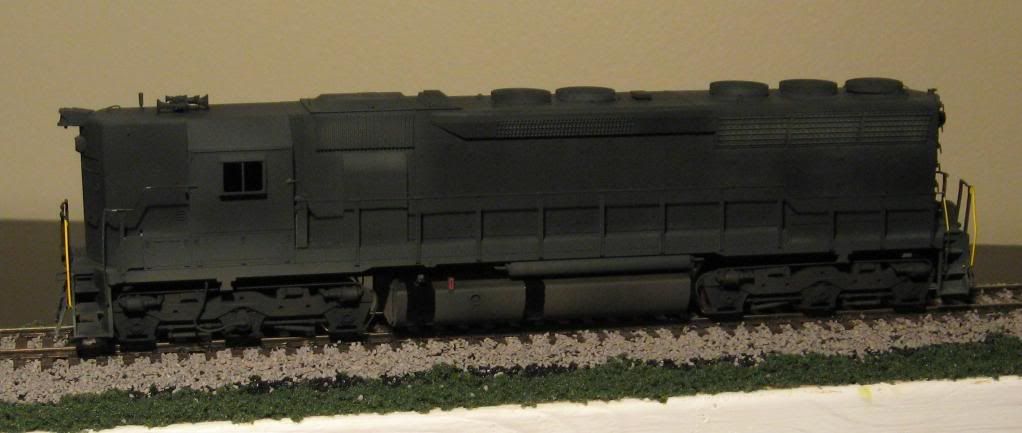 |
|
|
|
Post by lindsaya99 on Sept 19, 2010 8:42:38 GMT -5
So much for "trying to "get this puppy done". I did give it a clear coat and decals but I wasn't happy with the results. The paint surface had an orange peel texture which showed up in the decals. I did a bit more research online about Tamiya paints and found out I should have been using their laquer thinner. The good news is that stripping the paint was unbelievably easy. After a brief google search I discovered an article written by a modeler who uses Oxi-clean to strip Tamiya acrylics. I tablespoon of the stuff in two quarts of hot water (from the tap, not boiling) and the paint melts away in minutes. I barely had to scrub the shell which saved all of my details. The only stubborn parts were under the decals. Now the shell is as clean as it was in my first post. It may be a while before I get it painted again but I just wanted to share my new tidbit of knowledge. Thank you Billy Mays!
|
|
|
|
Post by Randy Earle on Sept 19, 2010 15:49:14 GMT -5
I'll be waiting to see this one. I love HH SD-45s.
|
|
|
|
Post by sd45longhoodfoward on Sept 19, 2010 16:58:09 GMT -5
looking good! the high hoods rule!
|
|
|
|
Post by lindsaya99 on Sept 20, 2010 8:55:09 GMT -5
I like the reverse weathering and its a shame you had to strip the shell. Good luck in round #2. I was actually pretty happy with the weathering too. Its a shame but I just chalk it up as a learning experience. |
|
kcs1967
Chairman
SWLA-SETX PINE SCENTED
Posts: 1,726
|
Post by kcs1967 on Sept 20, 2010 9:17:57 GMT -5
Sad the beautiful work had to be stripped, but I guess, that gives you a second shot, bummer though.
|
|