artur
Chairman
Posts: 580
|
Post by artur on Feb 7, 2015 10:35:20 GMT -5
|
|
|
|
Post by iomalley on Feb 7, 2015 14:12:57 GMT -5
That's good to know! I'm going to embark on my second Kaslo 9 and was thinking of the genesis route...
|
|
|
|
Post by tamaman on Feb 12, 2015 14:52:49 GMT -5
Hi Artur,
Any progress on this project?
|
|
artur
Chairman
Posts: 580
|
Post by artur on Feb 12, 2015 22:18:11 GMT -5
|
|
artur
Chairman
Posts: 580
|
Post by artur on Aug 9, 2015 11:15:04 GMT -5
Its been quite a while but I finally got back to this project. I wanted to know if anyone has or know the dimensions of the smaller winterization hatch in the picture below.  |
|
|
|
Post by samoa switcher on Aug 11, 2015 16:57:35 GMT -5
Thanks for the idea. I'm going to try this with my Kaslo CPR GP9u kit
Cyrus
|
|
|
|
Post by iomalley on Aug 11, 2015 20:29:06 GMT -5
Is there not a small hatch in the kit? They are CN-specific with the inner side (next to the exhaust stack) curved to match the spark arrestor.
|
|
artur
Chairman
Posts: 580
|
Post by artur on Aug 11, 2015 20:41:49 GMT -5
Is there not a small hatch in the kit? They are CN-specific with the inner side (next to the exhaust stack) curved to match the spark arrestor. yes there is one but its for the bigger 48 inch fans the one in the picture above is for the 36 inch fans. |
|
|
|
Post by iomalley on Aug 12, 2015 7:07:23 GMT -5
Maybe drop an email to John at Kaslo, he has alot of botched kits and maybe an extra hatch or two. But I seemed to recall in my 48" GP9RM kit that both hatches were included, because I used the small hatch on my GP9LW project. 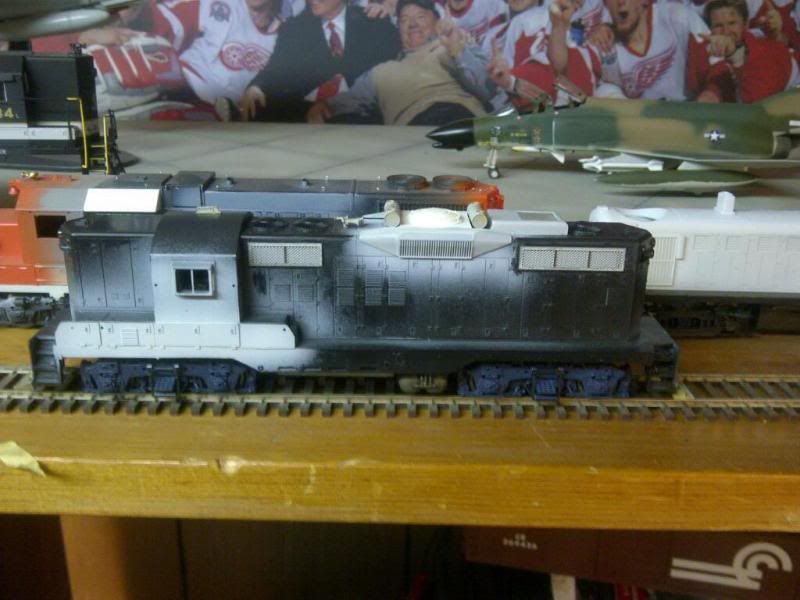 |
|
artur
Chairman
Posts: 580
|
Post by artur on Aug 12, 2015 19:31:04 GMT -5
I was already working on one. here is what I have so far, it looks about right for length and width but I might have to make it a bit taller.  |
|
|
|
Post by ironstef70 on Aug 14, 2015 19:35:50 GMT -5
Artur, I am always impressed by the quality of your work. Funny as we have similar projects on the bench, but taking different routes for the making. After the slug (been idle on this one as I need the help of a fellow club member for debugging the decode issue) I too am working on two CN GP9rm (#7229 & 7233). I am using Proto 2000 GP 18 DC locos (I like their heavy die cast frame; they make for heavy locos already) that I have heavily modified to fit CN standards (yes, the tanks among a few...). I will use one of the two remant plastic shells, the other being a Tenshodo brass one. Both of them need to have a major "face lift" so to match the CN cabs. I am using brass components for the cab and body modifications. I am slow during summer time but I will post the "making of" pictures later maybe in September once I am done. First because I want to get done with the slug first, and second because I don't want to interfere with your tread. 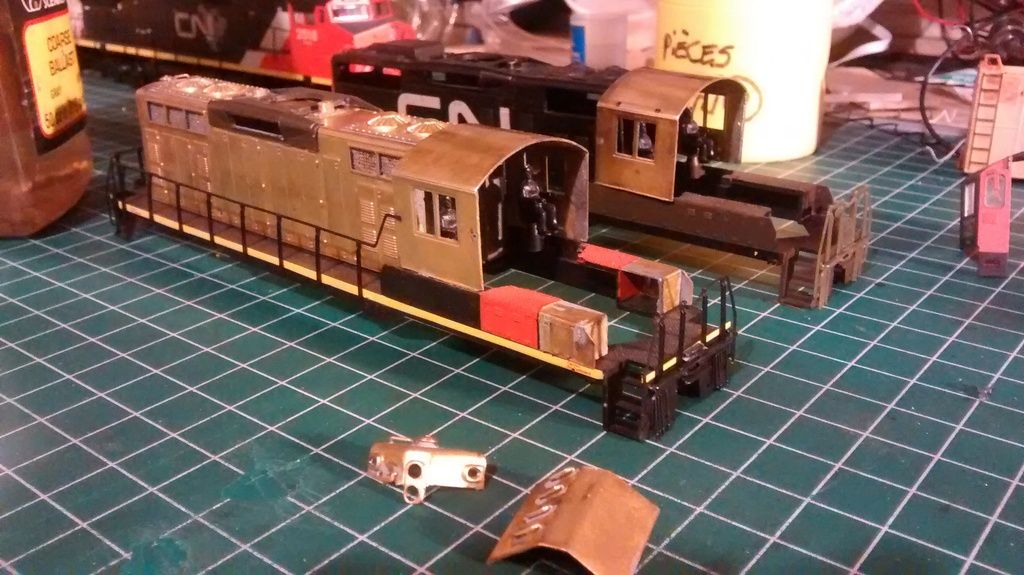  Good luck. Looks like you're on a good start aleady. Stephane |
|
artur
Chairman
Posts: 580
|
Post by artur on Aug 16, 2015 10:06:51 GMT -5
Artur, I am always impressed by the quality of your work. Funny as we have similar projects on the bench, but taking different routes for the making. After the slug (been idle on this one as I need the help of a fellow club member for debugging the decode issue) I too am working on two CN GP9rm (#7229 & 7233). I am using Proto 2000 GP 18 DC locos (I like their heavy die cast frame; they make for heavy locos already) that I have heavily modified to fit CN standards (yes, the tanks among a few...). I will use one of the two remant plastic shells, the other being a Tenshodo brass one. Both of them need to have a major "face lift" so to match the CN cabs. I am using brass components for the cab and body modifications. I am slow during summer time but I will post the "making of" pictures later maybe in September once I am done. First because I want to get done with the slug first, and second because I don't want to interfere with your tread. Good luck. Looks like you're on a good start aleady. Stephane Thanks, don't hold back the more info here the better  |
|
artur
Chairman
Posts: 580
|
Post by artur on Sept 18, 2015 20:34:18 GMT -5
|
|
|
|
Post by ironstef70 on Sept 18, 2015 21:54:58 GMT -5
Very sharp paint as usual. I like the different shells here.
So which road numbers are you doing?
S.
|
|
artur
Chairman
Posts: 580
|
Post by artur on Sept 18, 2015 23:12:07 GMT -5
Very sharp paint as usual. I like the different shells here. So which road numbers are you doing? S. its gona be 4111 and 7266   |
|
|
|
Post by diagnosis on Sept 19, 2015 9:16:09 GMT -5
Will you be including the seating with the panoramic view on 4111?  Just out of curiousity, what paint are you using? They look great so far! |
|
artur
Chairman
Posts: 580
|
Post by artur on Sept 19, 2015 10:35:16 GMT -5
Will you be including the seating with the panoramic view on 4111? Just out of curiousity, what paint are you using? They look great so far! yup that's why I chose this unique unit lol. The red paint is Tru-Color TCP-035 CN Red-Orange and the black is Canadian Tire flat black spray paint 48-0666-4 |
|
|
|
Post by ironstef70 on Sept 19, 2015 18:26:13 GMT -5
It's a good idea since they have different paint scheme and configuration.
I personnaly chose 7120 and 7133 because they were working around town last year. I've taken numerous pictures of them and I like to customize what I see.
|
|
artur
Chairman
Posts: 580
|
Post by artur on Sept 22, 2015 20:38:06 GMT -5
A bit more progress. the deck, battery boxes and etchings attached.   |
|
pacbelt
Chairman
Building Layout #11!! ;)
Posts: 682 
|
Post by pacbelt on Sept 22, 2015 22:36:51 GMT -5
Wow!! Those are stunning!!
|
|