Post by ednadolski on Jun 28, 2014 12:04:08 GMT -5
Hi Everyone! This project started out as an exercise in developing detail parts for N scale diesels, but it has transformed along the way into a 'proto' build effort, so I thought folks here might enjoy a look. I've been at this off and on over the last few months, so this first posting covers the project from the beginning to the present day, and hereafter I will update in "real time".
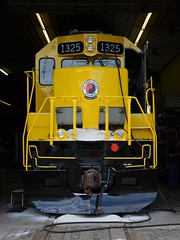
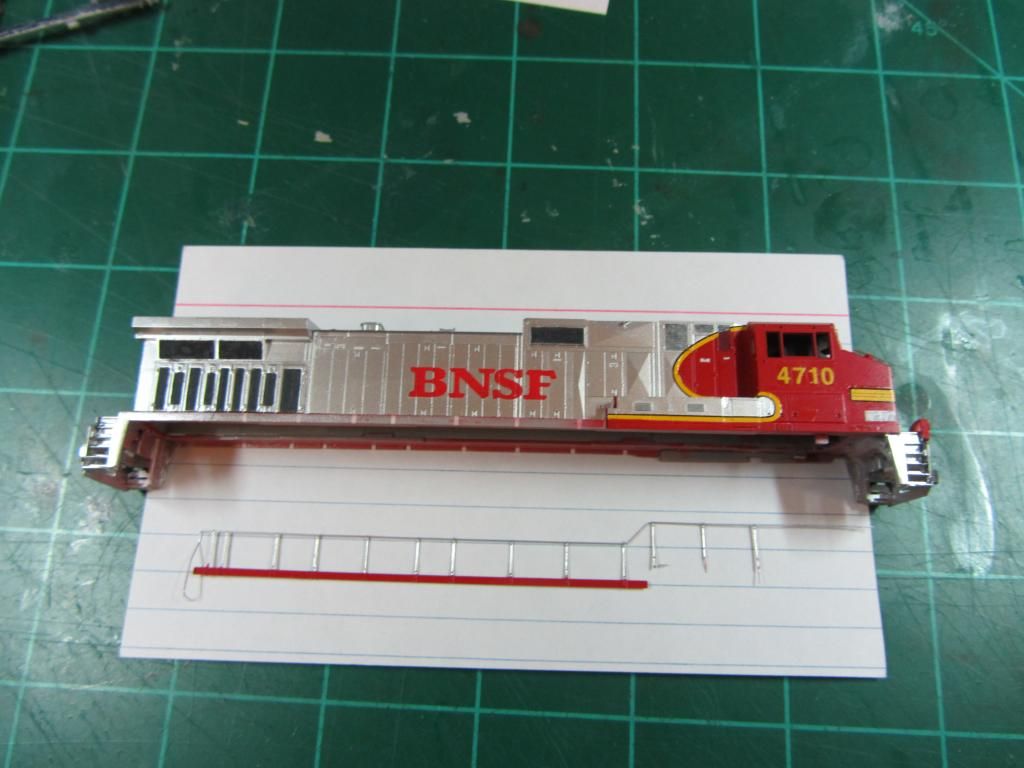
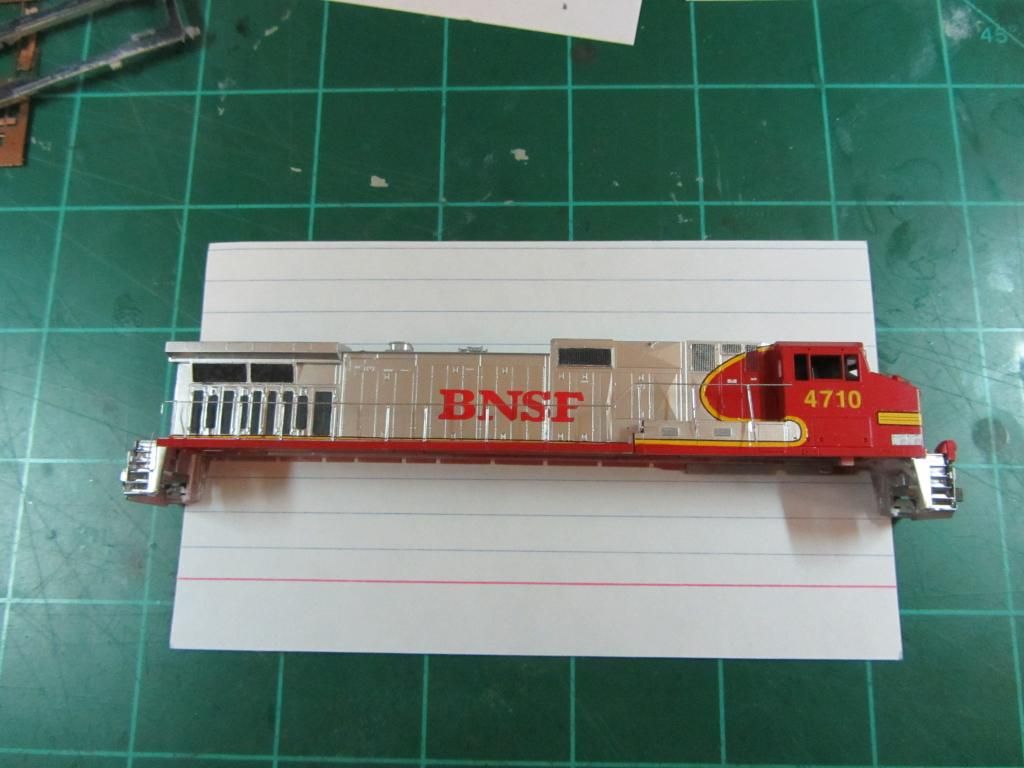
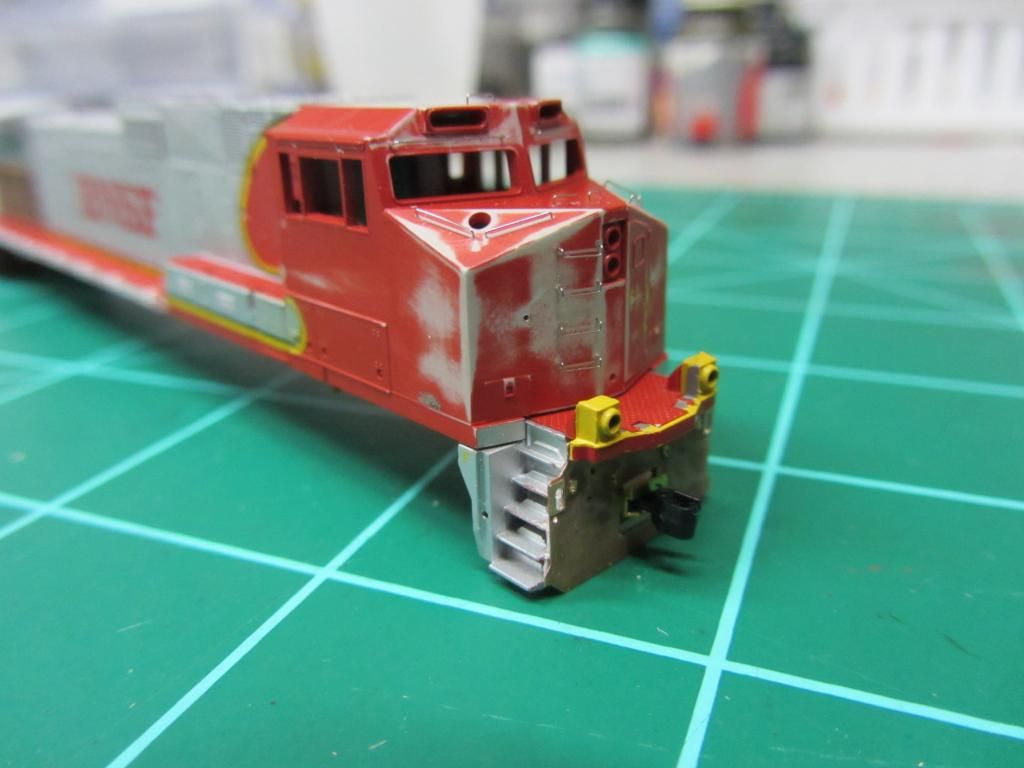
I've designed this photo-etch fret as a detail kit for the Kato C44-9W. I chose BNSF 4710, as it is a common type of engine found on Tehachapi that I like to model. Here are a couple of proto references:
www.locophotos.com/pix/4/Burlington%20Northern%20Santa%20Fe%20BNSF%204710_Denver%20CO_Steve%20Brown_2003-08-10_4990.jpg
www.locophotos.com/pix/92/BNSF%20Railway%20BNSF%204710_South%20Seattle%20WA_Brian%20Ambrose_2008-07-10_92092.jpg
www.locophotos.com/pix/126/BNSF%20Railway%20BNSF%204710_Denver%20CO_Bill%20Hedges_2012-07-20_126425.jpg
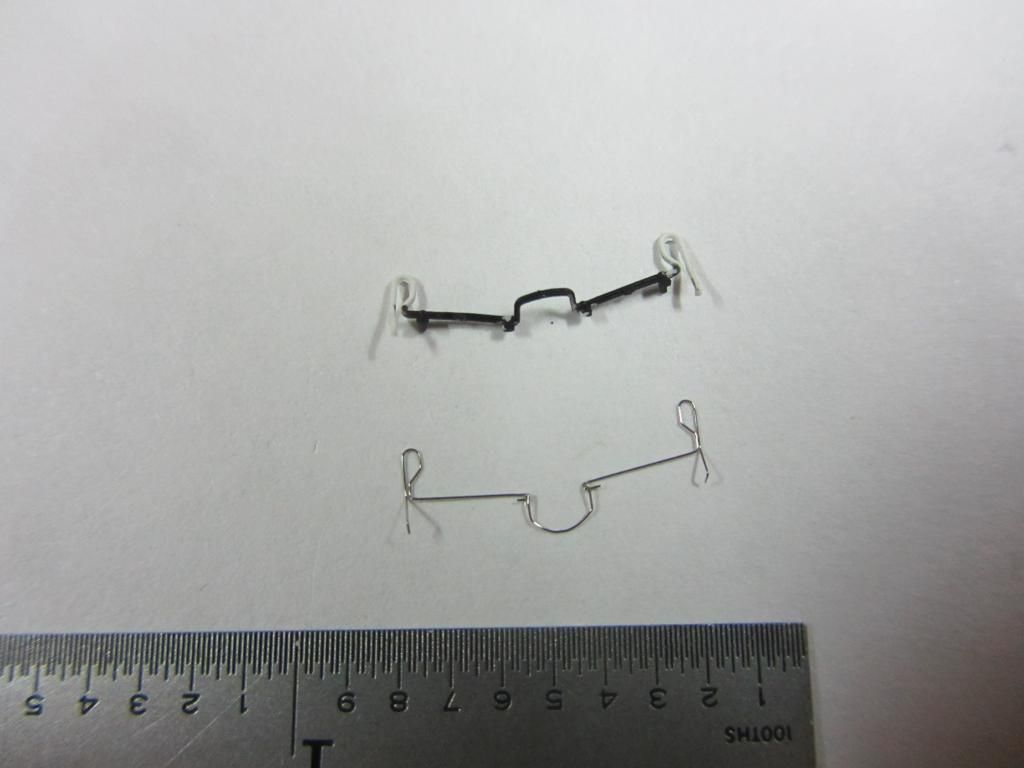
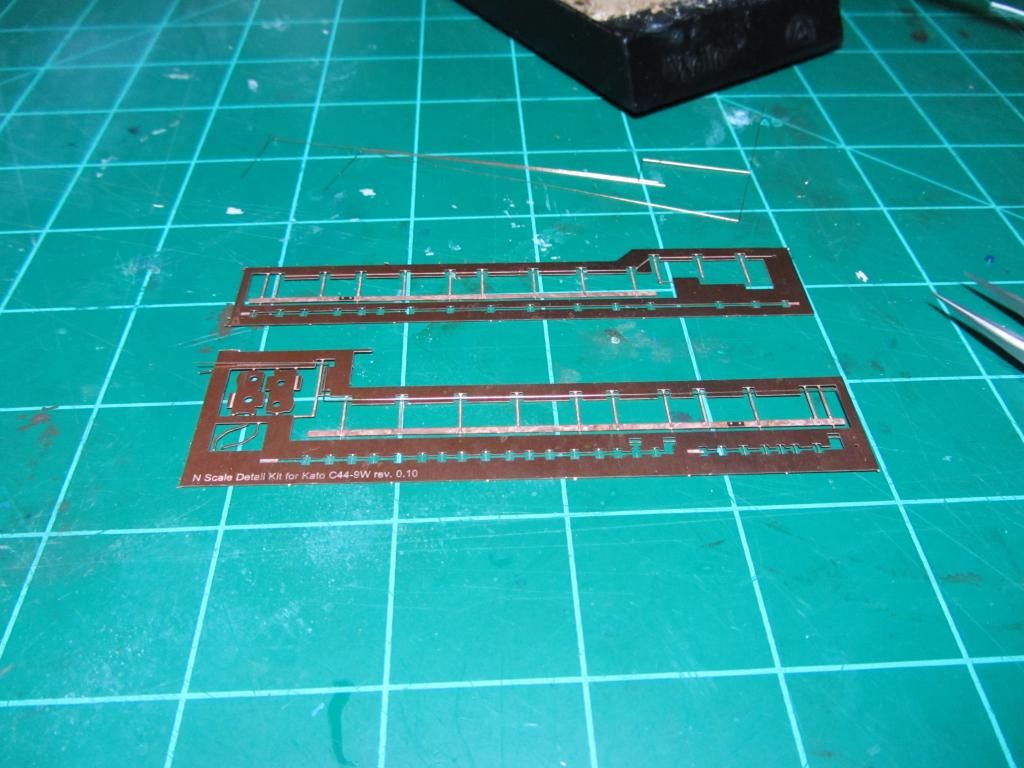
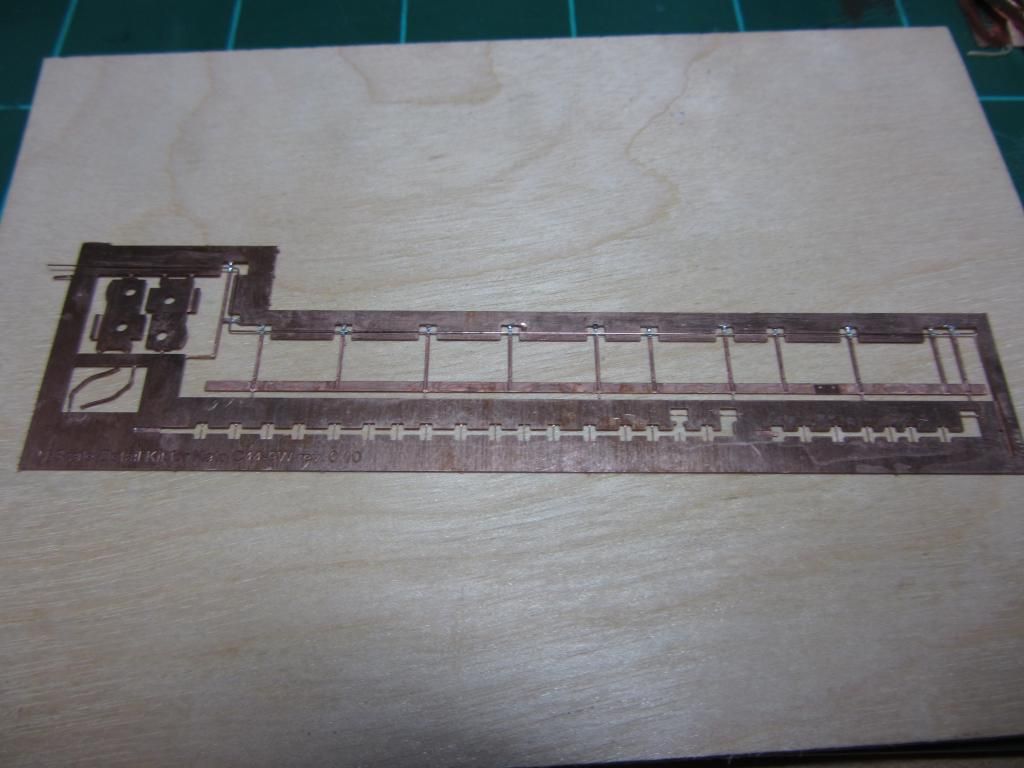
A primary goal was to come up with a easier way to do scale wire handrails in N scale. My previous attempts involved soldering together wire and individual stanchions, which is labor intensive to say the least. The new approach etches the stanchions together with the side sills, and includes a 'frame' with etched lines to hold the wire in place for soldering. Here is the basic fret:
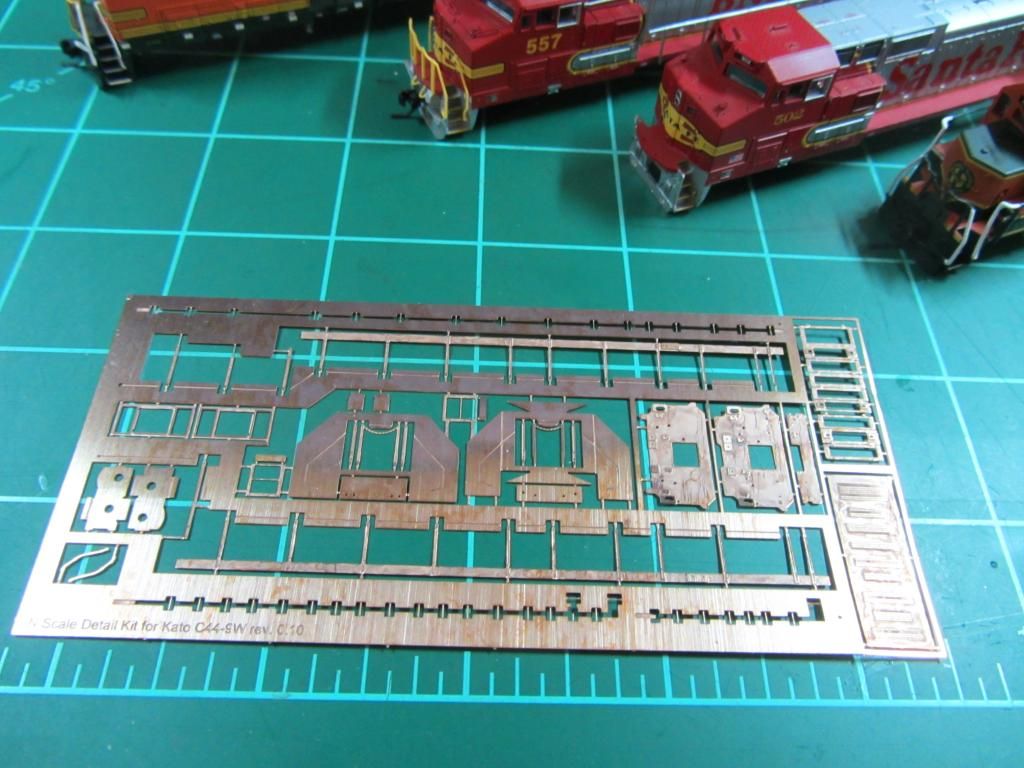
In addition to the side and pilot handrails, this etching includes front & rear pilots, coupler pockets to fit the Lee English Z-scale coupler, alternating-height radiator grilles for the engineer's side (all Kato Dash-9s have the early, same-height grilles), and some cab window frames.
Handrails are formed from 0.008" diameter phosphor bronze wire and soldered in place onto the stanchions, as shown in this sequence of pics:
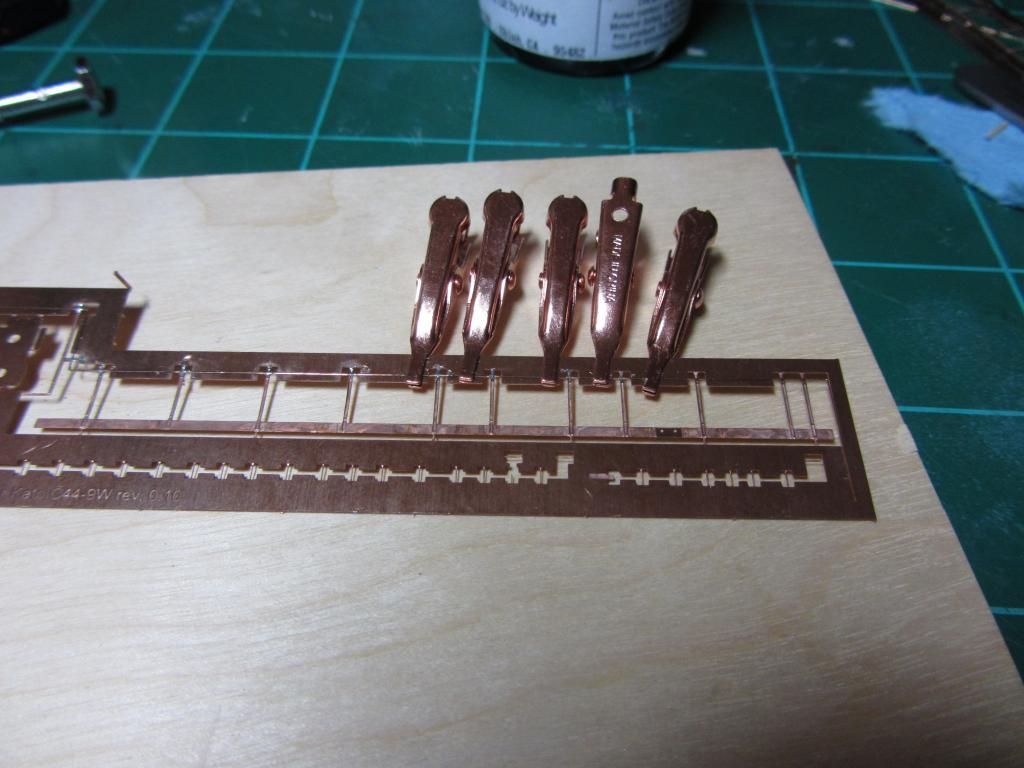
For soldering, I used PBL's pase solder, thinned with a bit of supersafe flux. The main goal is to avoid blobs and keep solder from flowing into the detailed recesses of the stanchion. After soldering, the handrail/stanchion/sill subassembly is cut from the fret, trimmed, and cleaned up. I will be making the final bends in the handrails as I get closer to installation.
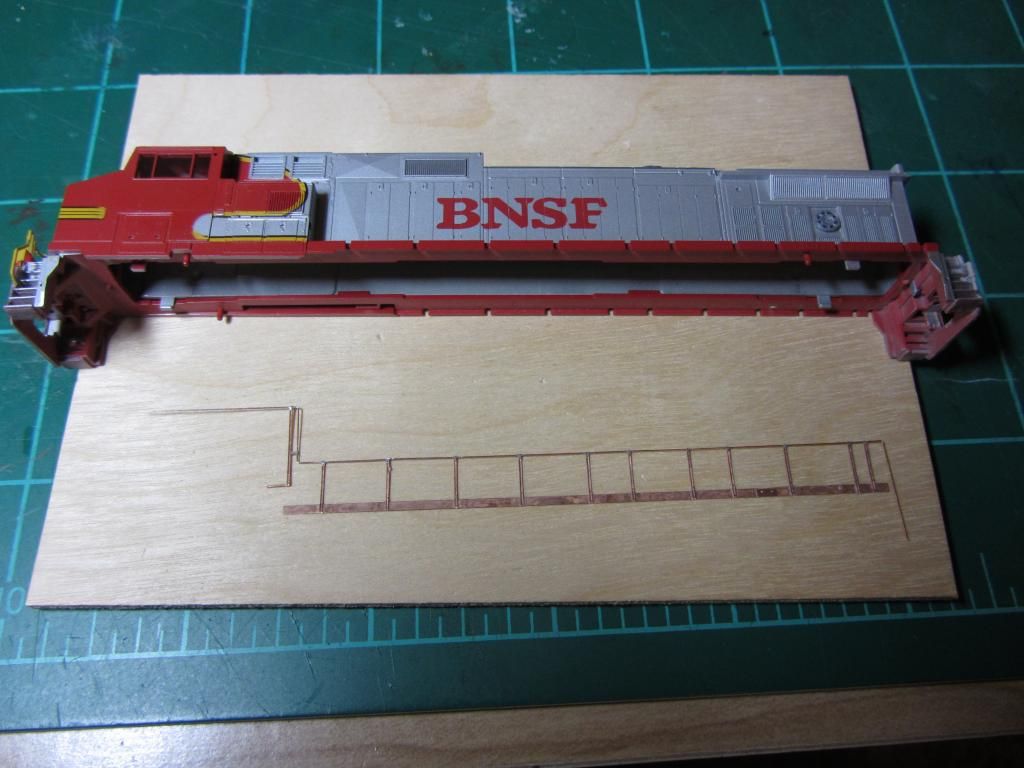
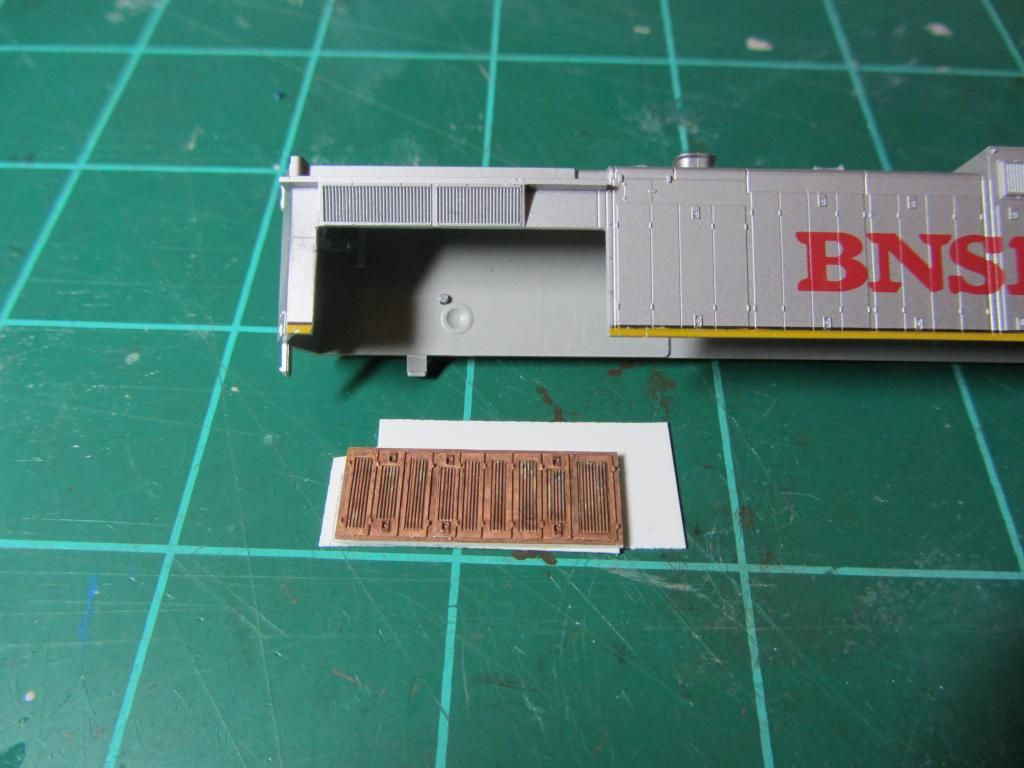
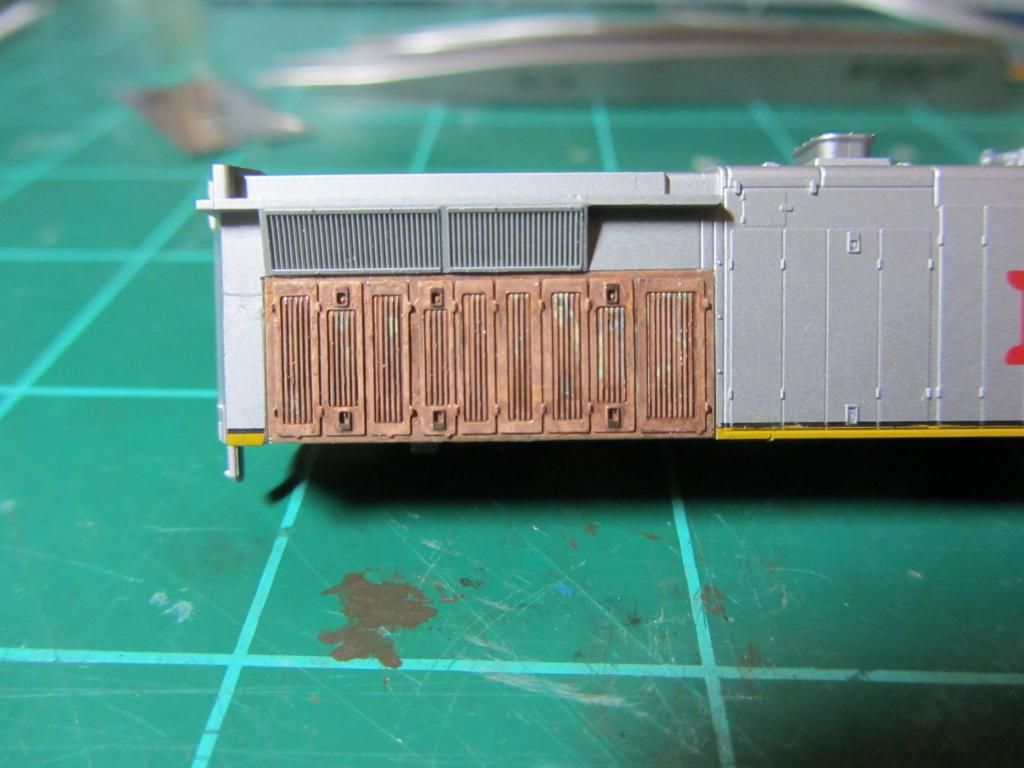
These next pics show how I replaced the radiator grilles with the correct, alternating-height style. (The only other way to get these is to splice in the rear half of an AC44 shell.) I was a bit nervous about taking such a big bite out of the shell, but I overcame it and installed the new parts:
These next couple of shots show the wire grabirons. I shaved off the cast-on plastic factory parts, drilled some #94 holes, and made the grabirons by hand from 0.005" stainless steel wire.
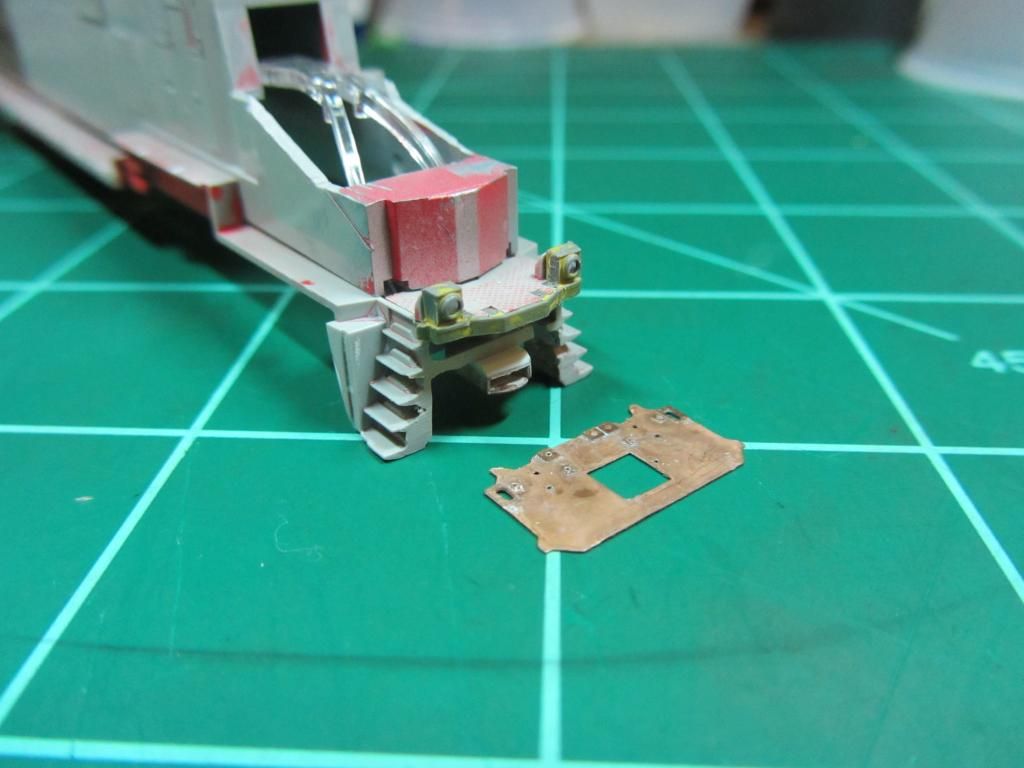
In these next pics, notice here how the pilots have a smaller-than-normal hole to accommodate the Z-scale coupler pocket. While still oversized it is substantially smaller than the convention N scale couplers and coupler pockets. As a *very* big bonus, these Z-scale couplers are not subject to the same slinky/pogo behavior that occurs with Micro-Trains couplers.
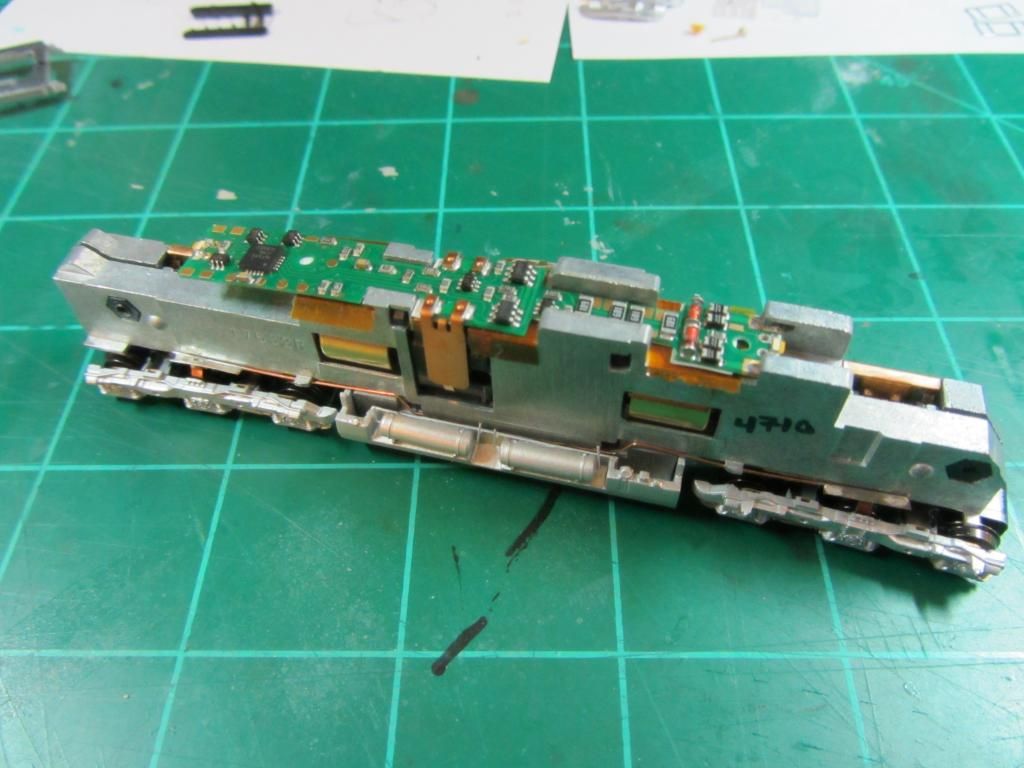
At this point the shell was still wearing factory paint. I tried matching the new parts, first with Pollyscale ATSF silver, then with Badger BNSF silver and Badger ATSF silver. But I was not pleased with the color match or how the paint went on, so I stripped it all down to the plastic and tried TCP silver. This turned out to be too bright-looking for me, so I went to TCP Aluminum which to me looks like the right color, and I also like the way that the paint goes on from the airbrush.
To strip it I use Brian Banna's technique of soaking the shell in 91% alcohol, then using a soft rotary brush in a Dremel to remove the paint from all surfaces. The paint comes off best with a light touch, and I have so far not marred or damaged any of the plastic surfaces. This not only removes the Kato paint, but also the Pollyscale, Badger, and TCP paint (I'm on my third iteration of paint removal). Here is what it looks like now:
Here you can see how much of the factory plastic pilots was trimmed away and filed off. As a future project, I am thinking of ways to do the steps with etched hole treadplates, if I can figure out how to scale it down to work well enough to be acceptable for N scale.
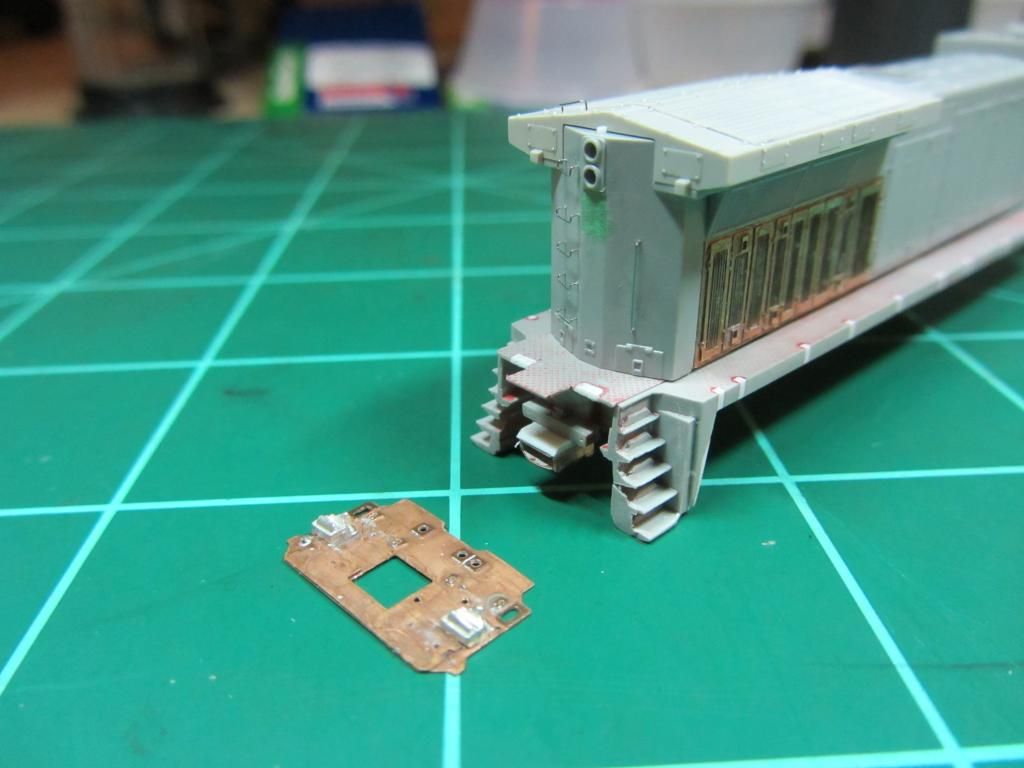
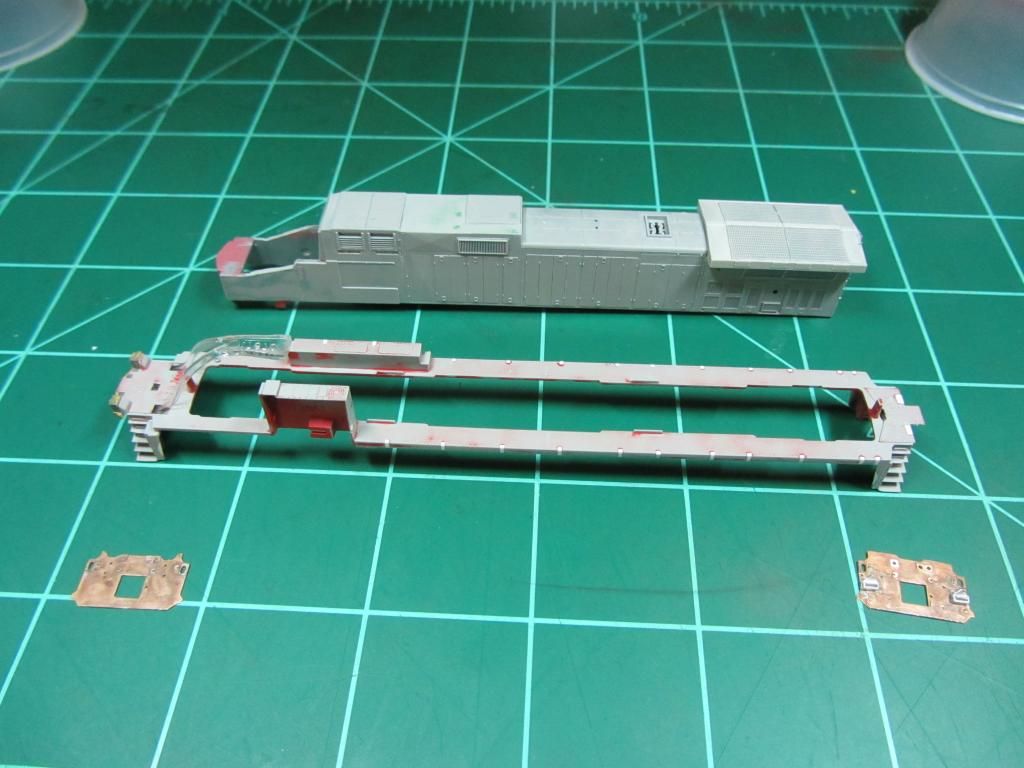
With the paint removed, I had the opportunity to fix some unprototypical panels on the hood roof. I also cut away more of the original plastic pilots and filled in some of the step well area that needed it, esp. the oversized holes made to accommodate the oversized plastic factory handrails.
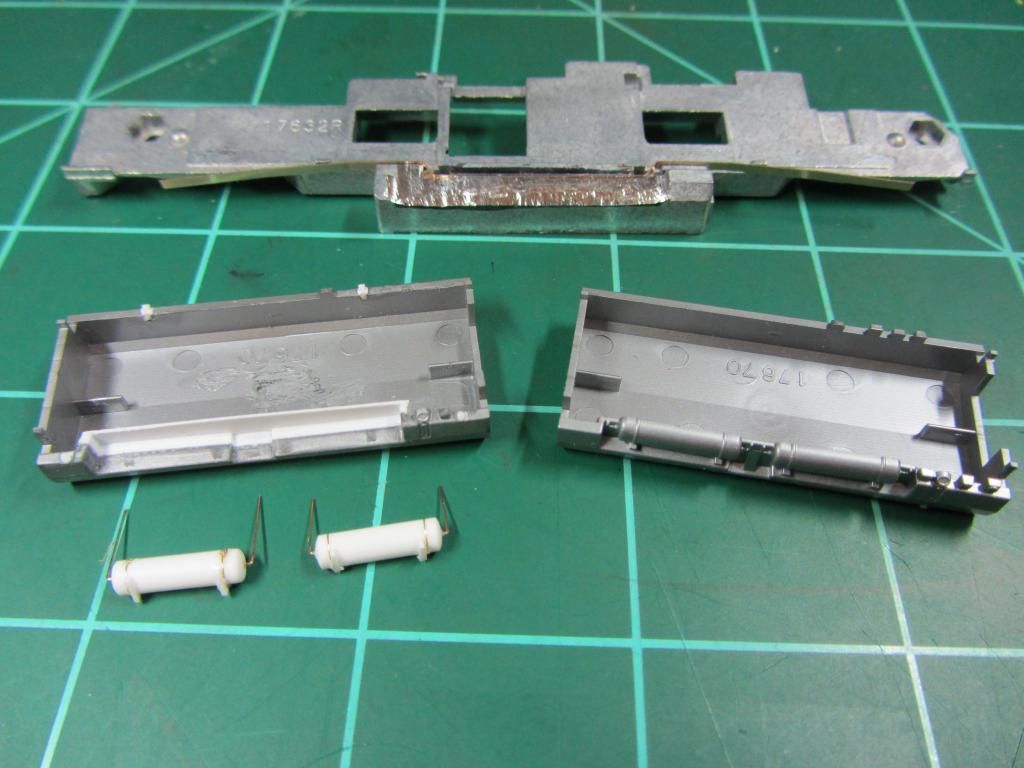
No project would be any fun witout a bit of "feature creep". I wanted to see what it would look like to replace the factory, flat-relief style air reservoirs with some full-depth scratchbuilt parts. Being N scale, I can't reach the same detail levels as larger scales, but still I think the full-depth, 3D look of the new tanks is an improvement. The hard part was trying to glue together two dissimilar plastics (styrene and Kato's ABS). I tried a number of plastic cements including Testors (contains MEK), MicroMark, Plastruct, and even some acetone. Some were better than others but ultimately I had to fall back to CA and hope for the best.
Note the original, unmodified fuel tank on the right. This is standard fare for Kato's C44-9W, AC4400, and ES44AC and ES44DC units, The full-depth tanks are going to look pretty good I think, even tho I had to sacrifice & grind away some of the metal frame (note, the grinding in this pic is incomplete)
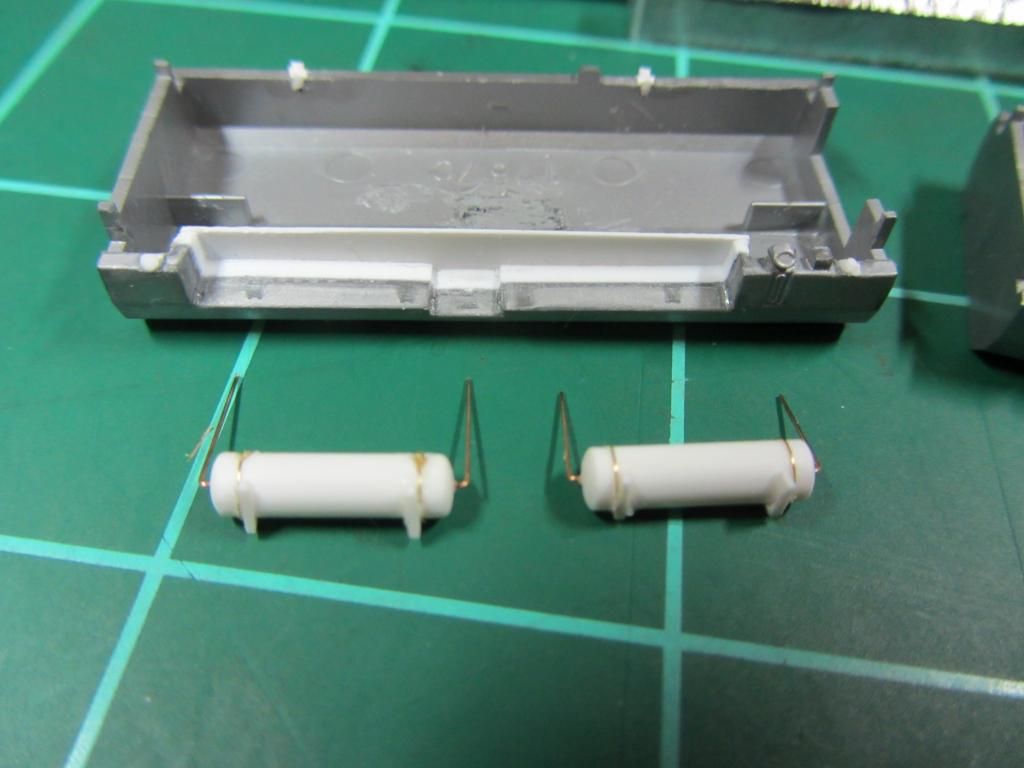
The reservoirs are made from 1/8" styrene rod, cut to length and shaped by chucking the part into a Dremel running at minimum speed, and holding a cutting blade (actually the edge of an old router bit) against the rotating end of the material to create the shape. Kind of a "poor man's lathe" approach
Well that's about where I am today. Hope you've enjoyed this, I will be adding more posts to this thread as progress continues. Some upcoming tasks include underframe details, and making laser-cut windows. Thanks for looking! All comments, feedback, and suggestions are greatly welcome and appreciated!
Cheers,
Ed
I've designed this photo-etch fret as a detail kit for the Kato C44-9W. I chose BNSF 4710, as it is a common type of engine found on Tehachapi that I like to model. Here are a couple of proto references:
www.locophotos.com/pix/4/Burlington%20Northern%20Santa%20Fe%20BNSF%204710_Denver%20CO_Steve%20Brown_2003-08-10_4990.jpg
www.locophotos.com/pix/92/BNSF%20Railway%20BNSF%204710_South%20Seattle%20WA_Brian%20Ambrose_2008-07-10_92092.jpg
www.locophotos.com/pix/126/BNSF%20Railway%20BNSF%204710_Denver%20CO_Bill%20Hedges_2012-07-20_126425.jpg
A primary goal was to come up with a easier way to do scale wire handrails in N scale. My previous attempts involved soldering together wire and individual stanchions, which is labor intensive to say the least. The new approach etches the stanchions together with the side sills, and includes a 'frame' with etched lines to hold the wire in place for soldering. Here is the basic fret:
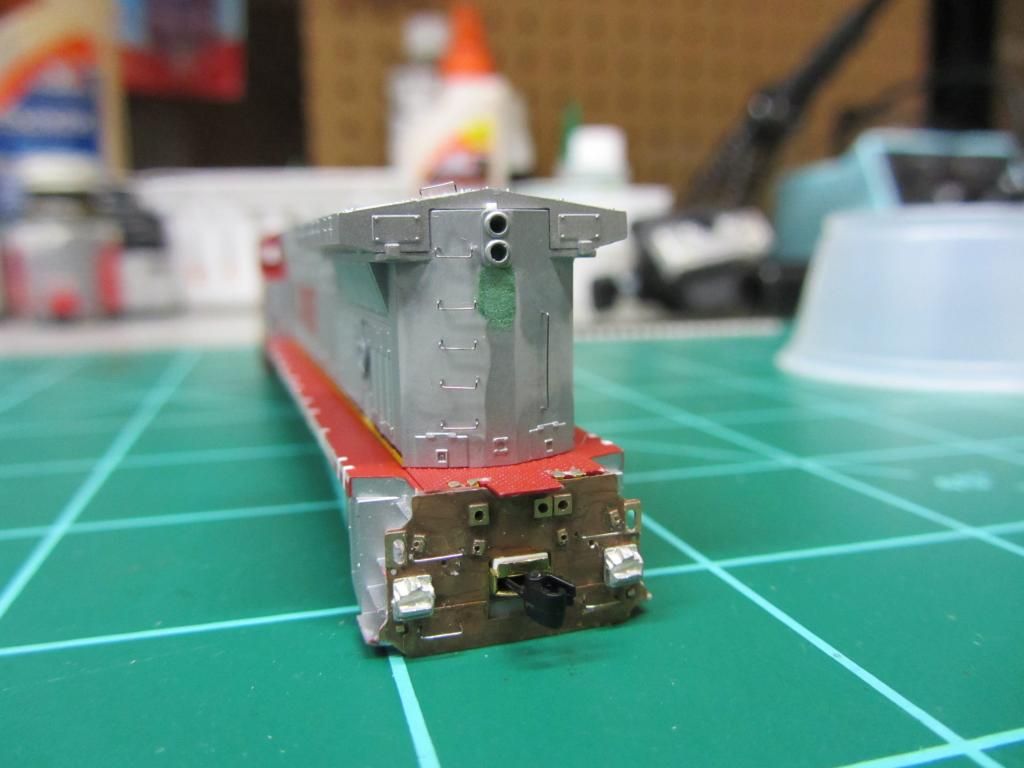
In addition to the side and pilot handrails, this etching includes front & rear pilots, coupler pockets to fit the Lee English Z-scale coupler, alternating-height radiator grilles for the engineer's side (all Kato Dash-9s have the early, same-height grilles), and some cab window frames.
Handrails are formed from 0.008" diameter phosphor bronze wire and soldered in place onto the stanchions, as shown in this sequence of pics:
For soldering, I used PBL's pase solder, thinned with a bit of supersafe flux. The main goal is to avoid blobs and keep solder from flowing into the detailed recesses of the stanchion. After soldering, the handrail/stanchion/sill subassembly is cut from the fret, trimmed, and cleaned up. I will be making the final bends in the handrails as I get closer to installation.
These next pics show how I replaced the radiator grilles with the correct, alternating-height style. (The only other way to get these is to splice in the rear half of an AC44 shell.) I was a bit nervous about taking such a big bite out of the shell, but I overcame it and installed the new parts:
These next couple of shots show the wire grabirons. I shaved off the cast-on plastic factory parts, drilled some #94 holes, and made the grabirons by hand from 0.005" stainless steel wire.
In these next pics, notice here how the pilots have a smaller-than-normal hole to accommodate the Z-scale coupler pocket. While still oversized it is substantially smaller than the convention N scale couplers and coupler pockets. As a *very* big bonus, these Z-scale couplers are not subject to the same slinky/pogo behavior that occurs with Micro-Trains couplers.
At this point the shell was still wearing factory paint. I tried matching the new parts, first with Pollyscale ATSF silver, then with Badger BNSF silver and Badger ATSF silver. But I was not pleased with the color match or how the paint went on, so I stripped it all down to the plastic and tried TCP silver. This turned out to be too bright-looking for me, so I went to TCP Aluminum which to me looks like the right color, and I also like the way that the paint goes on from the airbrush.
To strip it I use Brian Banna's technique of soaking the shell in 91% alcohol, then using a soft rotary brush in a Dremel to remove the paint from all surfaces. The paint comes off best with a light touch, and I have so far not marred or damaged any of the plastic surfaces. This not only removes the Kato paint, but also the Pollyscale, Badger, and TCP paint (I'm on my third iteration of paint removal). Here is what it looks like now:
Here you can see how much of the factory plastic pilots was trimmed away and filed off. As a future project, I am thinking of ways to do the steps with etched hole treadplates, if I can figure out how to scale it down to work well enough to be acceptable for N scale.
With the paint removed, I had the opportunity to fix some unprototypical panels on the hood roof. I also cut away more of the original plastic pilots and filled in some of the step well area that needed it, esp. the oversized holes made to accommodate the oversized plastic factory handrails.
No project would be any fun witout a bit of "feature creep". I wanted to see what it would look like to replace the factory, flat-relief style air reservoirs with some full-depth scratchbuilt parts. Being N scale, I can't reach the same detail levels as larger scales, but still I think the full-depth, 3D look of the new tanks is an improvement. The hard part was trying to glue together two dissimilar plastics (styrene and Kato's ABS). I tried a number of plastic cements including Testors (contains MEK), MicroMark, Plastruct, and even some acetone. Some were better than others but ultimately I had to fall back to CA and hope for the best.
Note the original, unmodified fuel tank on the right. This is standard fare for Kato's C44-9W, AC4400, and ES44AC and ES44DC units, The full-depth tanks are going to look pretty good I think, even tho I had to sacrifice & grind away some of the metal frame (note, the grinding in this pic is incomplete)
The reservoirs are made from 1/8" styrene rod, cut to length and shaped by chucking the part into a Dremel running at minimum speed, and holding a cutting blade (actually the edge of an old router bit) against the rotating end of the material to create the shape. Kind of a "poor man's lathe" approach

Well that's about where I am today. Hope you've enjoyed this, I will be adding more posts to this thread as progress continues. Some upcoming tasks include underframe details, and making laser-cut windows. Thanks for looking! All comments, feedback, and suggestions are greatly welcome and appreciated!

Cheers,
Ed