Post by CP_8530 on Mar 29, 2014 10:07:58 GMT -5
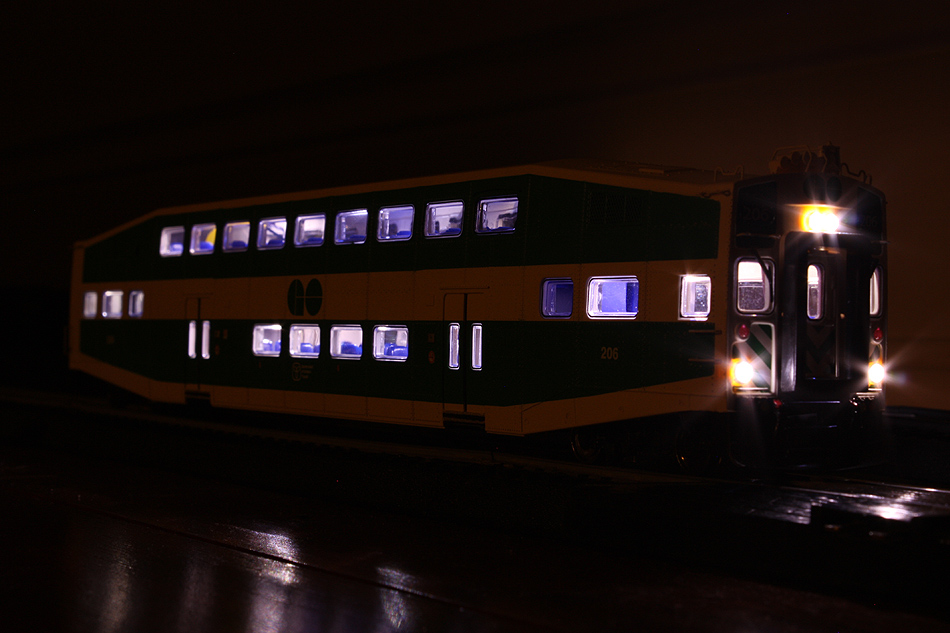
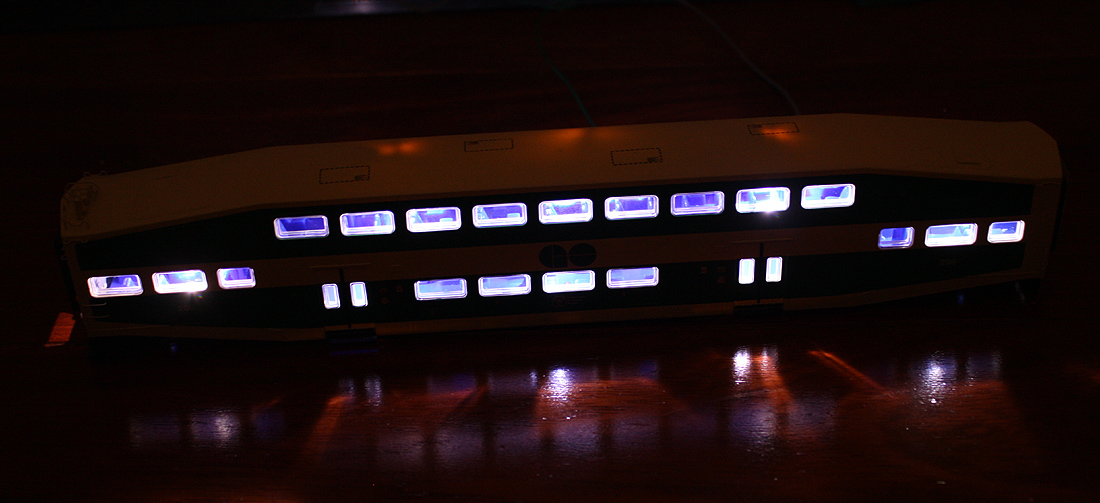
Some fun with SMD's LED's and an Athearn bilevel: installing a full lighting package including interior lights on all 3 levels, as well as working end cab headlights, ditch lights and marker lights. While Athearn installed lenses for the latter three, the numberboards are solid shell castings, thus cannot be lit without drilling them out and replacing them with new numberboard glazings.
(Note, this is just a lighting setup, with no real effort at this point to modify the bodies or interiors for prototypical accuracy, paint colours, interior bulkheads, etc)
First is to design a lighting scheme, The end lights would all have a single SMD LED per housing, so 2 for the headlights, 2 for the ditch lights, and 2 for the markers. Each pair was wired in series connected to a 550ohm resistor per circuit (the small SMD 0603 LED's taking about 3.0-3.8 volts each - I've seen varying figures and ranges).
The lower level lighting has 3 LED's per level, with a single LED at both intermediate ends. They were done in two circuits wired in parallel with each other, each circuits with 4 SMD LED's wired in series and one 100ohm per circuit. For simplicity of LED wiring, each would cover a main level plus an intermediate end (the upper level lighting and A-end intermediate level was wired together, and the lower level to the B-end intermediate). You can wire it any way - they're always all on together in the real thing.
My setup's not DCC as of yet, so for simplicity everything's hardwired together, keeping in mind decoder installation for the future.
==================================
Now, to work:
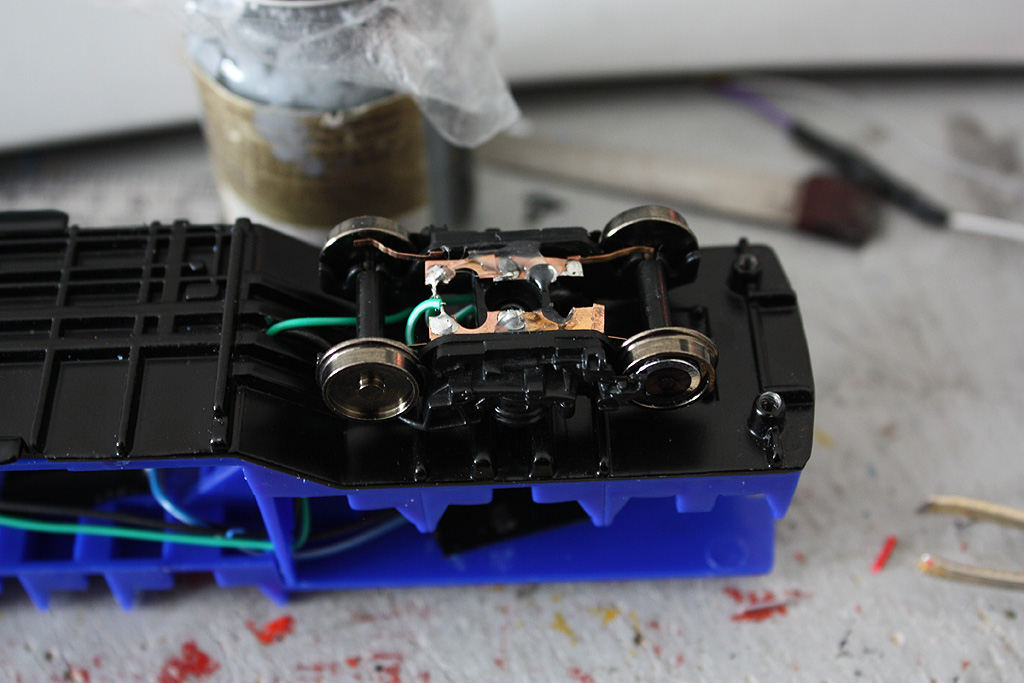
I drilled through the bottoms of the metal frame near the truck in the middle (see later photos) and ran the truck pickup wires through there. Then I drilled through the plastic interior behind the mid-upper level staircases, and snuck the wire to the side in a relatively hidden part of the interior by the bulkhead. The wires were then run up through holes drilled in the bulkhead along the upper level floor. The lower lighting wires were also run along the underside here.
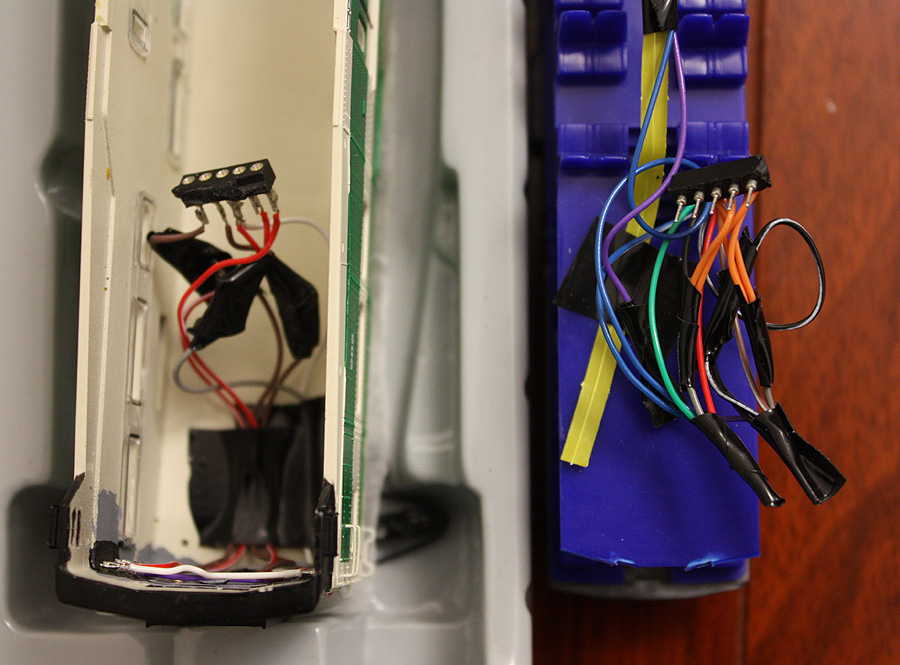
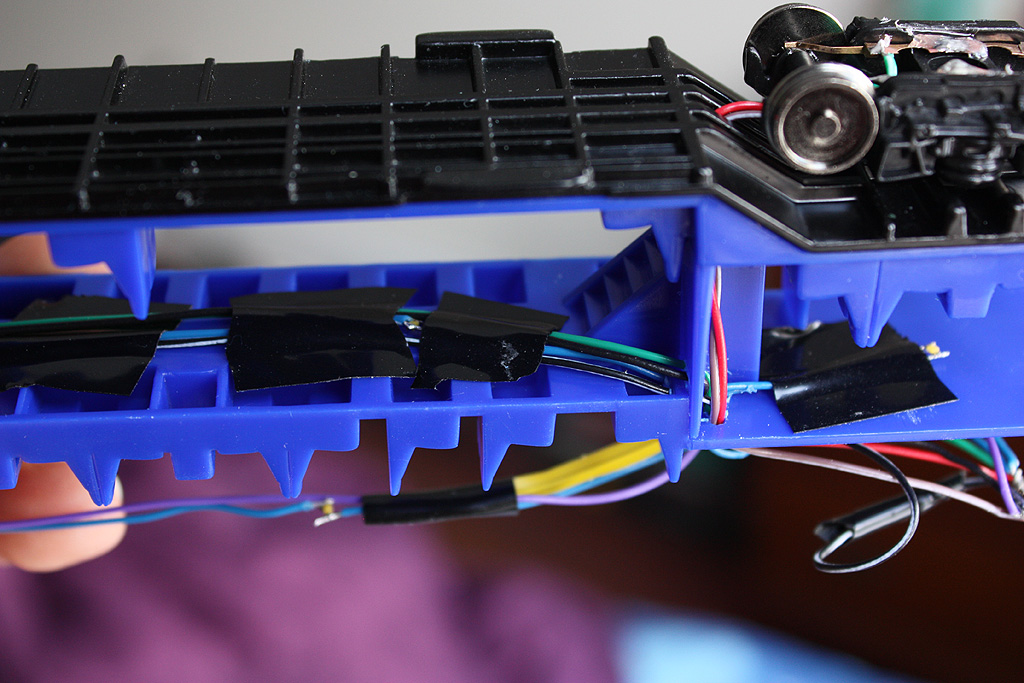
B-end, note the truck pickup wire routing (black/green wires). Blue wire visible under floor runs to intermediate level lighting. I used some handy twist-ties to temporarily span the upper lighting circuit over the interior.
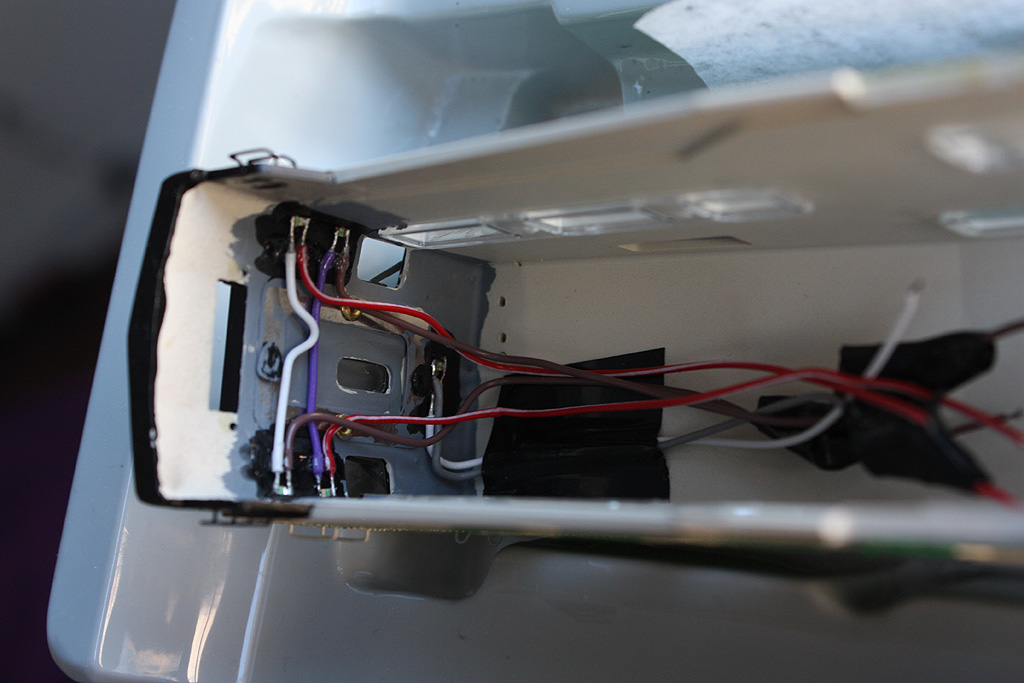
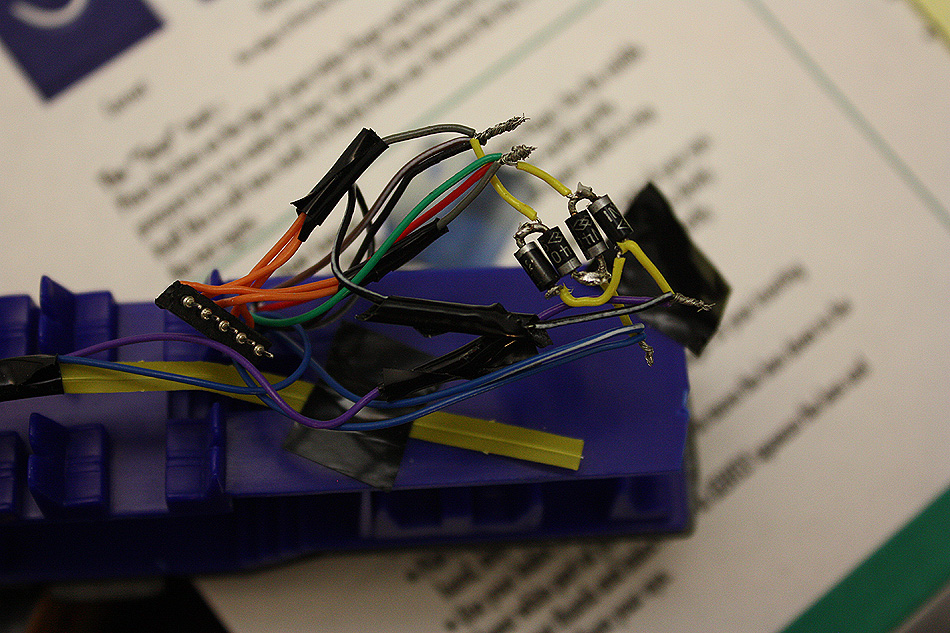
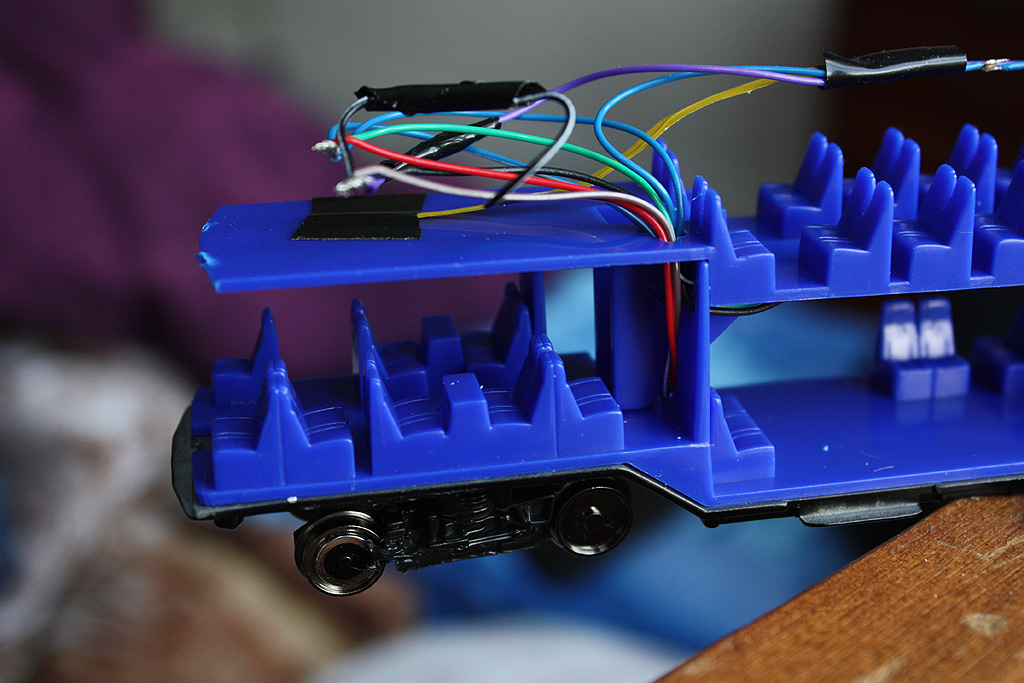
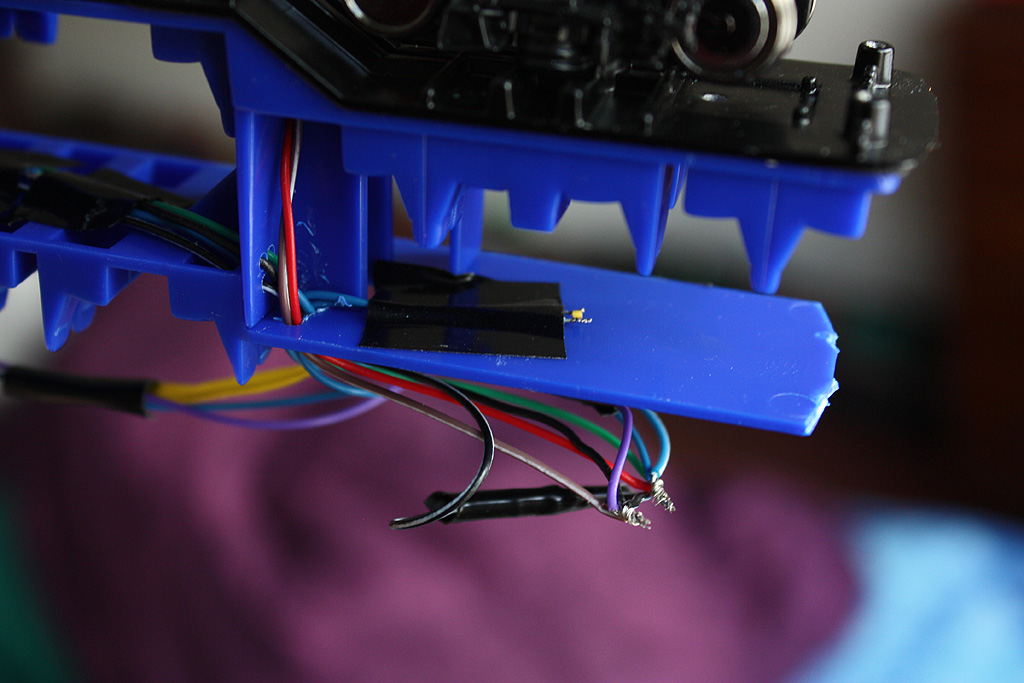
A-end where the wiring "nest" will be. It's best to do all the connections at the top ends as there's ample space and it keeps it out of interior view:
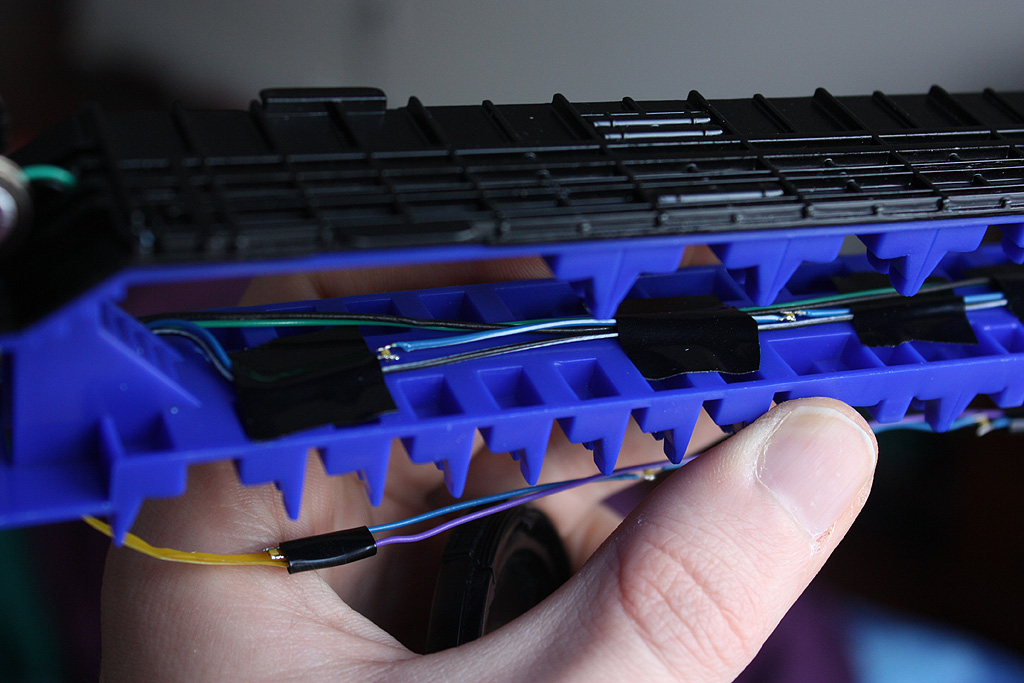
Running the underside wiring (green/black from the B-end truck, blue/black striped for the lighting). You can see the routing through the bulkheads and out the bottom of the floor. You can also see where I drilled through the middle part of the frame to run the truck pickup wiring, and the truck pickups already installed (more photos later). Upper level lighting just suspended along where the roof is for now. Electrical tape is the quickest way to set this up, and will be minimally visible from the outside (plus it sticks good to the slippery plastic floors):
3 SMD LED's were used for the main floor lighting, on the lower level taped to the underside of the (upper) floor, for the upper floor suspended across the top for now (may tape them or rig up a better setup later)
(* My exclusive highly-paid hand model was away in the Bahamas, so I had to reluctantly fill in for her)
End mid-levels used only one SMD, again taped to the roof:
One of the big hurdles was rigging up electrical pickups on the trucks, which didn't come with any provisions for interior lighting whatsoever. Following a suggestion I heard somewhere else once, I cut up a few Kadee springs, soldered them together and used those for pickuo wipers. Rolling resistance on the Athearn trucks has always been a bit annoying, but these makeshift wipers contribute very little.
Modified springs, cut in half with the end of the flat area bent over to get the "whisker" on the outside:
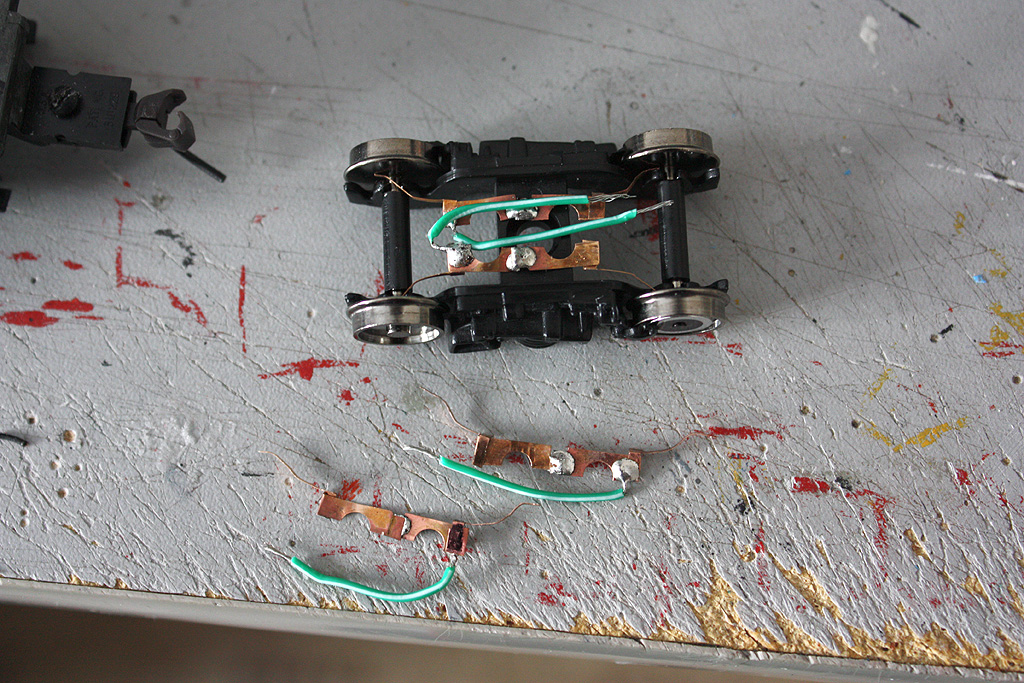
There's ample room for a bit of extra wire, which is always nice to reduce pulling/pushing forces on the pickups. My quickie glue-gun hot glue insulation method works fine as there's no heat sources in the area:
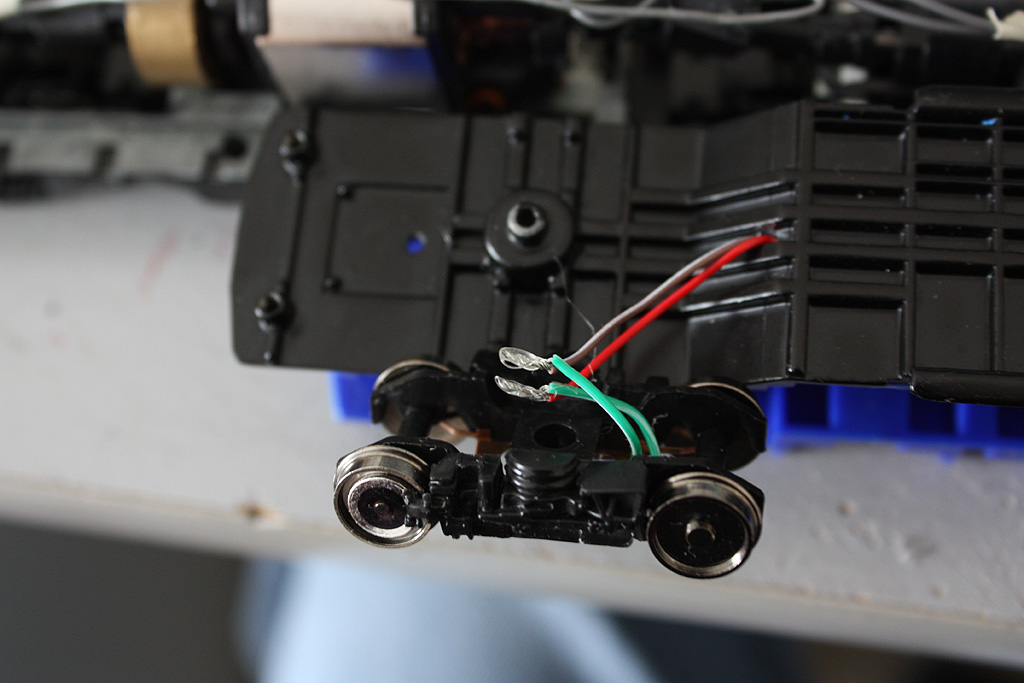
The pickups were secured on the inside with more hot glue. Watch clearances for the bolster screw and washer area:
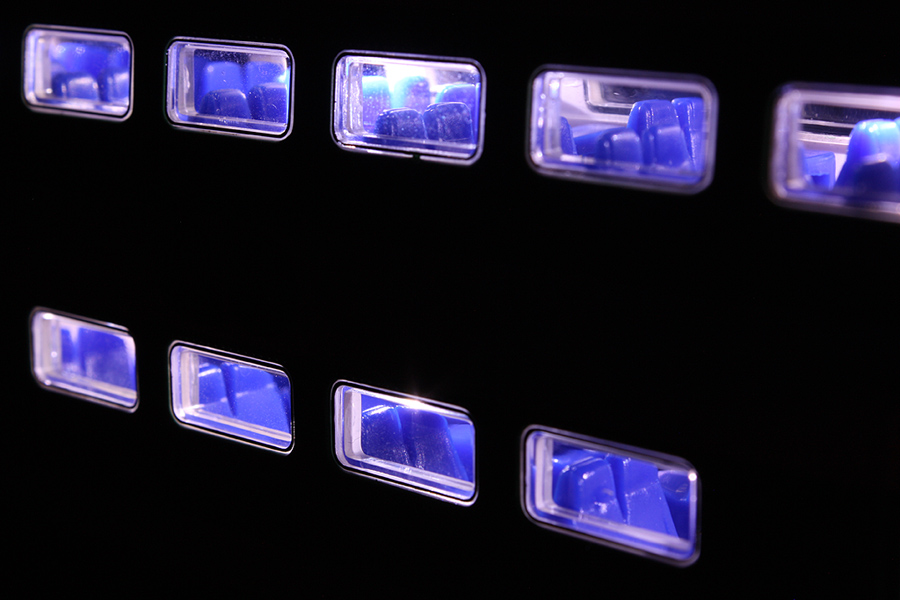
Initial interior lighting beta tests. Little bit of roof bleed-through (the LED wires shifted a bit):
Just waiting to pick up some little commuters from Bramalea or Long Branch (beware of the * dreaded foot riders (click here)* - keep those miniature dirty feet off the miniature seats!):
Next, the cab-end lighting...
(Note, this is just a lighting setup, with no real effort at this point to modify the bodies or interiors for prototypical accuracy, paint colours, interior bulkheads, etc)
First is to design a lighting scheme, The end lights would all have a single SMD LED per housing, so 2 for the headlights, 2 for the ditch lights, and 2 for the markers. Each pair was wired in series connected to a 550ohm resistor per circuit (the small SMD 0603 LED's taking about 3.0-3.8 volts each - I've seen varying figures and ranges).
The lower level lighting has 3 LED's per level, with a single LED at both intermediate ends. They were done in two circuits wired in parallel with each other, each circuits with 4 SMD LED's wired in series and one 100ohm per circuit. For simplicity of LED wiring, each would cover a main level plus an intermediate end (the upper level lighting and A-end intermediate level was wired together, and the lower level to the B-end intermediate). You can wire it any way - they're always all on together in the real thing.
My setup's not DCC as of yet, so for simplicity everything's hardwired together, keeping in mind decoder installation for the future.
==================================
Now, to work:
I drilled through the bottoms of the metal frame near the truck in the middle (see later photos) and ran the truck pickup wires through there. Then I drilled through the plastic interior behind the mid-upper level staircases, and snuck the wire to the side in a relatively hidden part of the interior by the bulkhead. The wires were then run up through holes drilled in the bulkhead along the upper level floor. The lower lighting wires were also run along the underside here.
B-end, note the truck pickup wire routing (black/green wires). Blue wire visible under floor runs to intermediate level lighting. I used some handy twist-ties to temporarily span the upper lighting circuit over the interior.
A-end where the wiring "nest" will be. It's best to do all the connections at the top ends as there's ample space and it keeps it out of interior view:
Running the underside wiring (green/black from the B-end truck, blue/black striped for the lighting). You can see the routing through the bulkheads and out the bottom of the floor. You can also see where I drilled through the middle part of the frame to run the truck pickup wiring, and the truck pickups already installed (more photos later). Upper level lighting just suspended along where the roof is for now. Electrical tape is the quickest way to set this up, and will be minimally visible from the outside (plus it sticks good to the slippery plastic floors):
3 SMD LED's were used for the main floor lighting, on the lower level taped to the underside of the (upper) floor, for the upper floor suspended across the top for now (may tape them or rig up a better setup later)
(* My exclusive highly-paid hand model was away in the Bahamas, so I had to reluctantly fill in for her)
End mid-levels used only one SMD, again taped to the roof:
One of the big hurdles was rigging up electrical pickups on the trucks, which didn't come with any provisions for interior lighting whatsoever. Following a suggestion I heard somewhere else once, I cut up a few Kadee springs, soldered them together and used those for pickuo wipers. Rolling resistance on the Athearn trucks has always been a bit annoying, but these makeshift wipers contribute very little.
Modified springs, cut in half with the end of the flat area bent over to get the "whisker" on the outside:
There's ample room for a bit of extra wire, which is always nice to reduce pulling/pushing forces on the pickups. My quickie glue-gun hot glue insulation method works fine as there's no heat sources in the area:
The pickups were secured on the inside with more hot glue. Watch clearances for the bolster screw and washer area:
Initial interior lighting beta tests. Little bit of roof bleed-through (the LED wires shifted a bit):
Just waiting to pick up some little commuters from Bramalea or Long Branch (beware of the * dreaded foot riders (click here)* - keep those miniature dirty feet off the miniature seats!):
Next, the cab-end lighting...