|
|
Post by CP_8530 on Feb 21, 2014 3:56:47 GMT -5
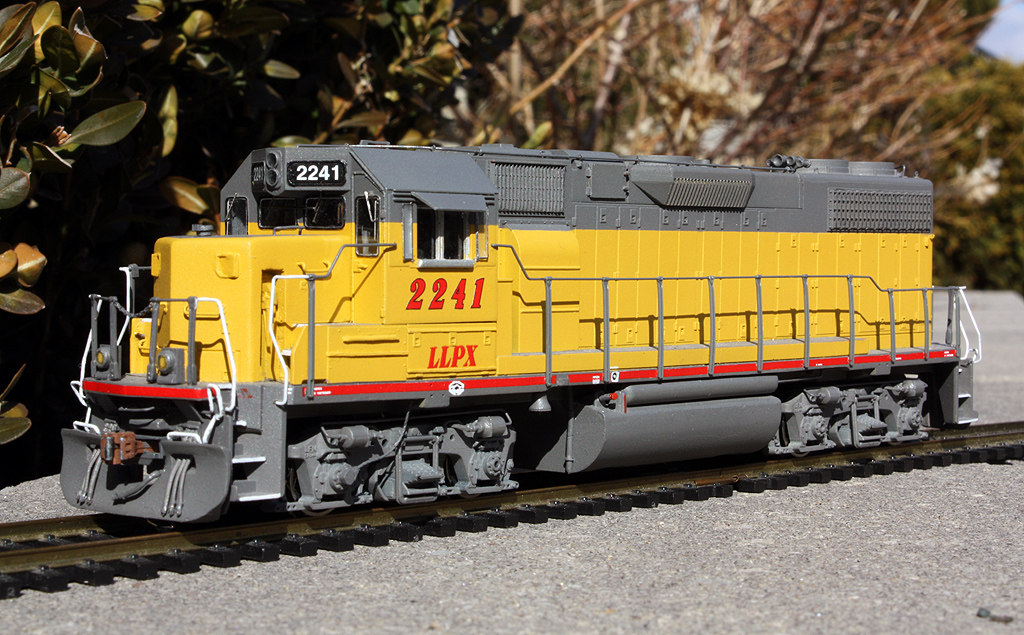
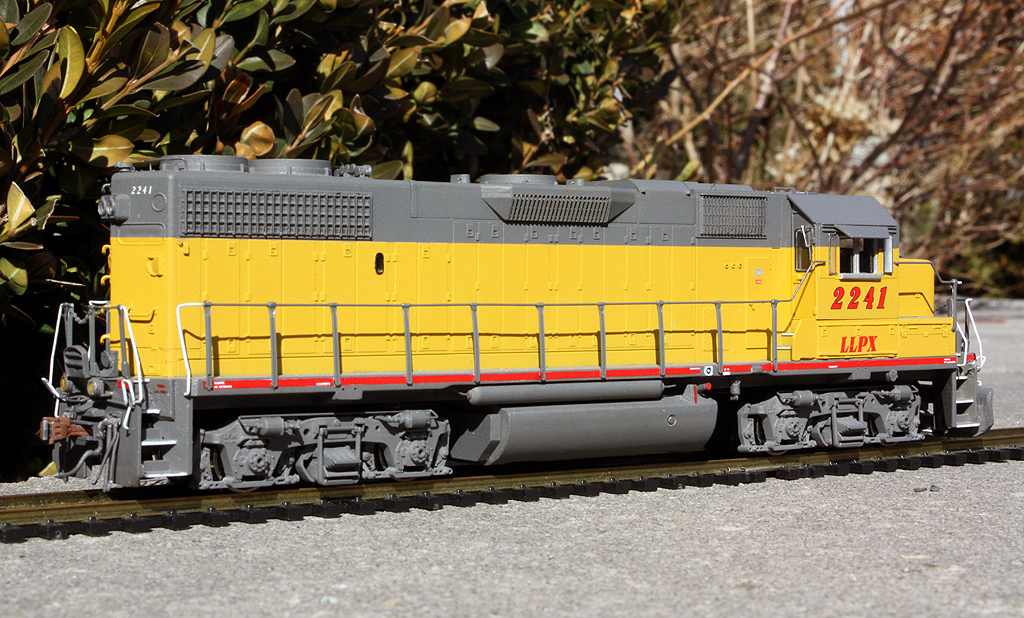
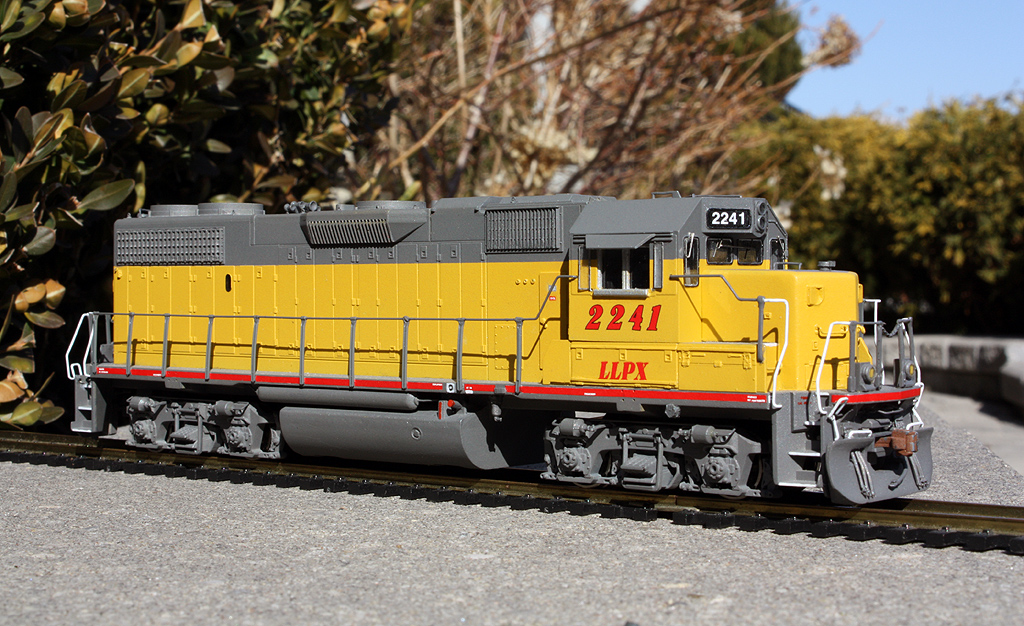
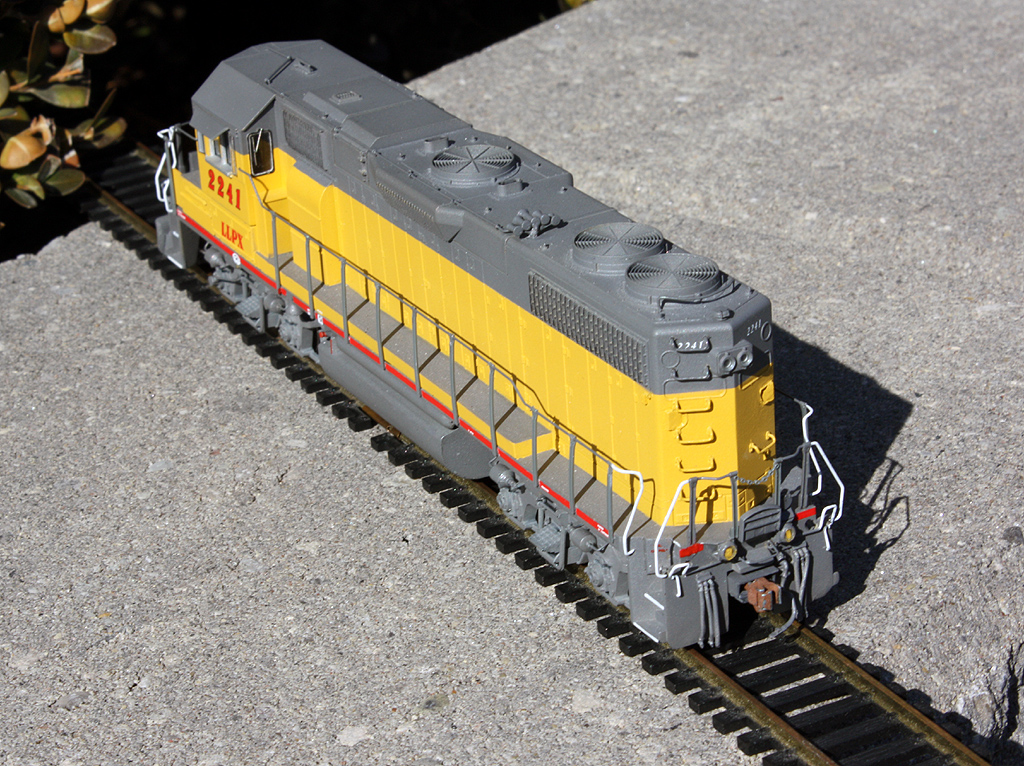
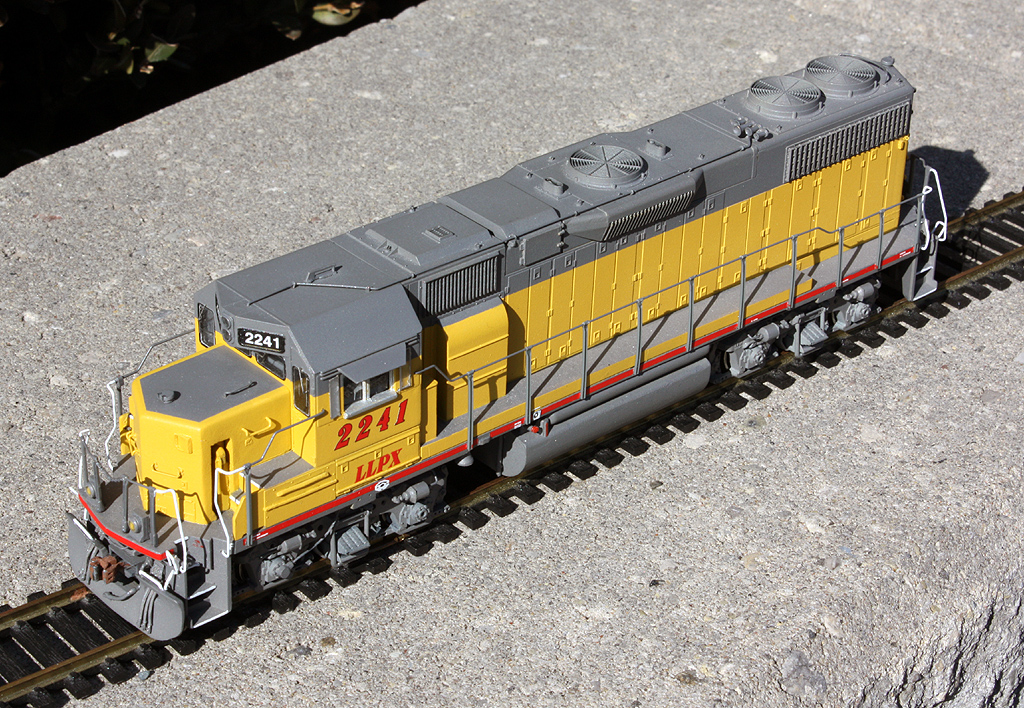
Once upon a time, a bunch of former Long Island Railroad commuter service GP38-2's were retired, and ended up with Locomotive Leasing Power (LLPX). 2234-2251 to be precise. Of that group of ex-LIRR LLPX units, there were two orders: 250-271 delivered in early 1976 with red marker lights seated in nose notches, later style stepwells and 81" noses, and 272-277 delivered early 1977 with flush mounted nose marker lights, later steps and 88" noses. They were (are) leased far and wide, some in the states, some in The Great White North, and two in particular in Ontario: 2236 leased to the Goderich Exeter Railway, and 2241 leased to Ottawa Valley Railink. Both were from the first order, which had the nose markers plated over but notches left in the front and rear where they were, creating a unique look: LLPX 2236: www.railpictures.ca/?attachment_id=8103LLPX 2241: www.railpictures.net/viewphoto.php?id=144283So somebody says they might like a model of 2241, and MrDan looks at it and goes "hmm, looks easy". Sure, that's how it always starts. After a lot of work, most of the unit is now built and I'm working out the finishing touches on it right now (wiring and lighting), so we'll start at the beginning: Initially this was going to be an inexpensive and not overly highly detailed build, so an Athearn blue-box GP38-2 was obtained by the procurement department of "the shop". It was a decent starting point, and importantly was the most dimensionally accurate shell on the market (the Athearn Genesis version hadn't hit the shelves yet). Some compromises like the stepwells would be factored in (modified early steps vs the full later steps, to avoid excess hacking), a better motor, some lights, etc. But, good ol' scope creep came in and things were added, changed, upgraded along the way, and things got a little out of hand as they sometimes do. Basically right out of the box: 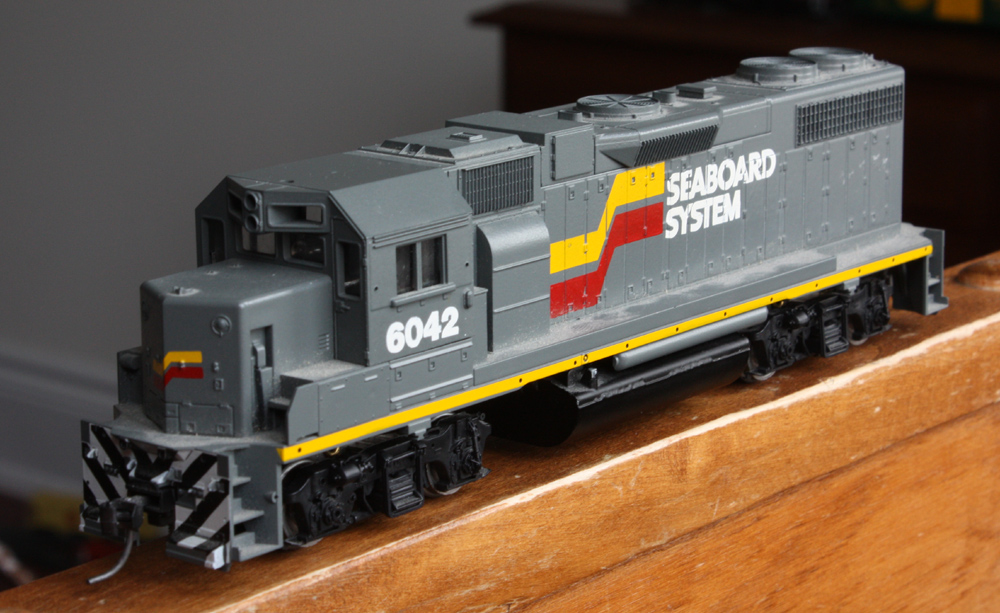 And after stripping in the alcohol. The grey was rather tough, but I got most of it off. Work has already started: we cut the front edge of the walkway/pilot flat and installed a spare anticlimber leftover from an SD40-2 cut-up. The bottom footboard MU hose housings were cut off, the cab armrest area trimmed a bit (at this point I was debating installing a C&C cab). Jack pads cut and modified to the later style with the 4 holes, paper air filter box trimmed and angled at the top (both sides, on the other a new door was made out of styrene). The class lights would have to be cut in both ends of the unit, so the originals were cut off flat. The drill, file and refit with styrene method would have to be utilized, as I couldn't find any parts supplier with those LIRR cut-in class lights (and they'd have to be blanked over anyways). Sitting around on a pair of Rapido caboose shop trucks: 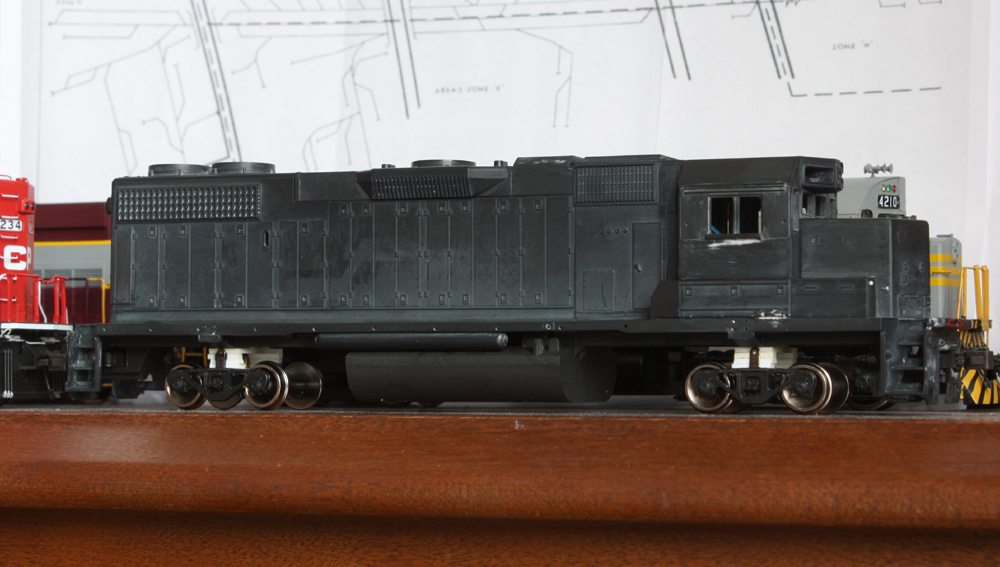 The frame was also cleaned up a bit to get rid of the ugly metal casting lines on the side. The model was basically unassembled new-in-box, but someone somewhere had drilled out the couplers for Kadee boxes and offset-shank couplers were installed. Weird, but it saved me drilling and tapping holes, although I had to file the tops of the mounting pads down to get them the right height for some Sergent couplers. |
|
|
|
Post by iomalley on Feb 21, 2014 11:50:02 GMT -5
So no C&C parts, no strict adherence to prototype, but installing Sargeant couplers? Seems counterintuitive...  Don't forget to mill 0.025" off the bolster to set the height before setting the couplers....  |
|
|
|
Post by CP_8530 on Mar 9, 2014 5:58:10 GMT -5
So no C&C parts, no strict adherence to prototype, but installing Sargeant couplers? Seems counterintuitive...  Don't forget to mill 0.025" off the bolster to set the height before setting the couplers....  The individual prefers Sergents, what can I say  Bolster height will probably also stay the same, ride height is not too bad...I haven't adjusted any of my other units with frame milling yet either. Time for a bit of the ol' nose job. I had initially found some incorrect information so lengthened the nose to 88", but then found it was only the SECOND order...so, I had to shorten it back again. Alotta patch work. It did however allow me to install a Cannon & Co brake ratchet setup, so all was not lost. When the units ran on LIRR they had a signal control box on to the battery box in front of the engineer's side, so the grabs had to be moved to the other side. The split battery box was improvised using some hinge and latch detail from a scrap shell. Some styrene strip was used to make the "mailbox slot" on the other side. To make the class light housings, I measured and marked where they would be, drilled holes, and enlarged them with a small square file. They need them on both ends, so that's 4 holes to do. 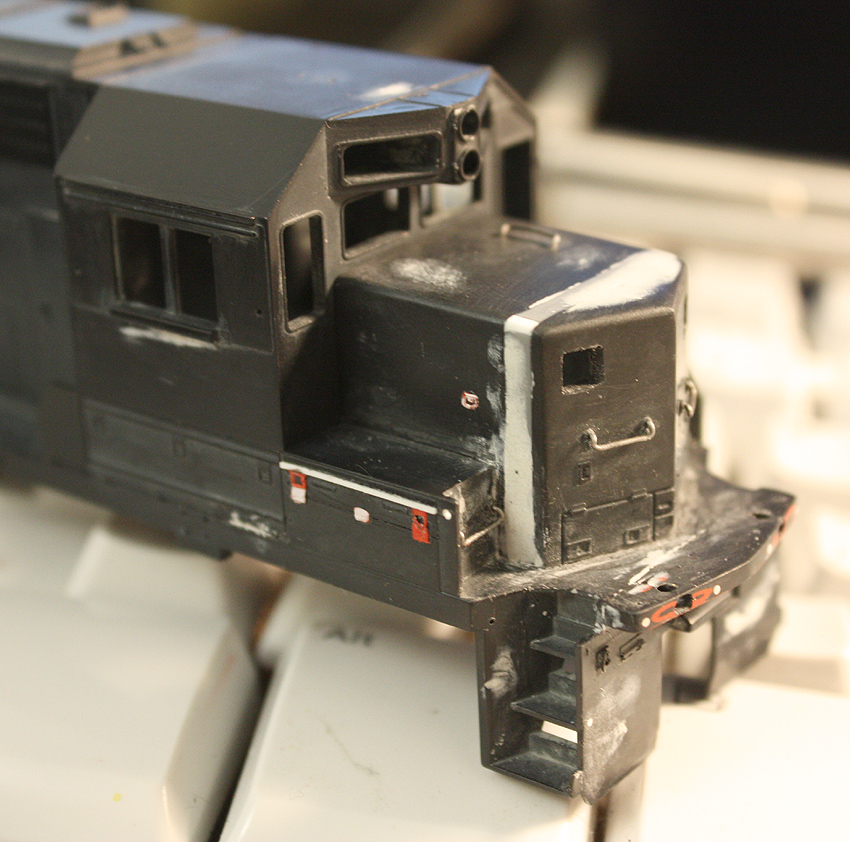 The plow is a modified Kaslo GP9RM plow, spliced wider and reprofiled on the insides to better match the prototype. IIRC, there was a thread on here before discussing how nobody make this style of plow, so I bashed it. An accident while cutting resulted in an angular cut through on the left that was glued together and patched. The MU holes were filled in with styrene cut with smaller openings, everything given a good coat of putty and sanded smooth. You can see where I drilled straight into the anticlimber from the ends to run the ditch lights. This would be patched with styrene and putty to close up the end holes later. MU, cut lever mounts and other details all removed from the end pilots, any imperfections filled and sanded. 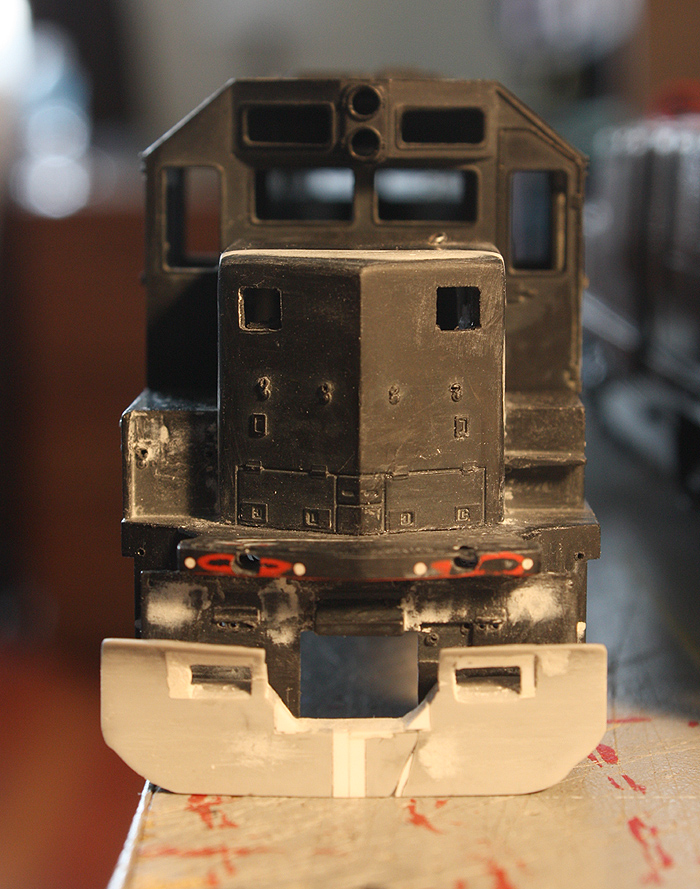 The frame was stripped, some filing here and there was needed to clean it up and lower the couplers, some holes were drilled to mount a better filler, round capacity gauge, etc and it was painted Pollyscale UP harbour mist grey. Hindsight says it would have been easier with a plastic fuel tank, but no guts no glory. Paint booth outside with ghetto airbrush holder: 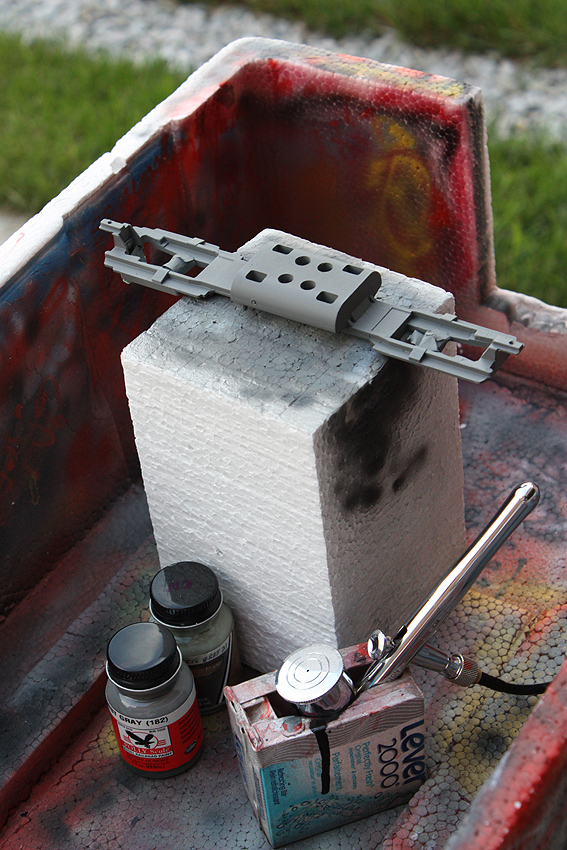 Photos were a bit of an afterthought with this one, for some reason I didn't take many of the left side. Anyway, some Kaslo lift rings added that were handy, cab patching, other styrene details bits added (I shaved the lower lip of the doors under the cab and added new ones lower - this side still needed a bit of work. You can see the "compromised" steps modified, and the nose class light mounted added. I basically added a square of styrene in the squared holes, built the inside lips with thin styrene according to photos, and patched any imperfections. The bottom part of the lips have a 45 degree or so angle to them. 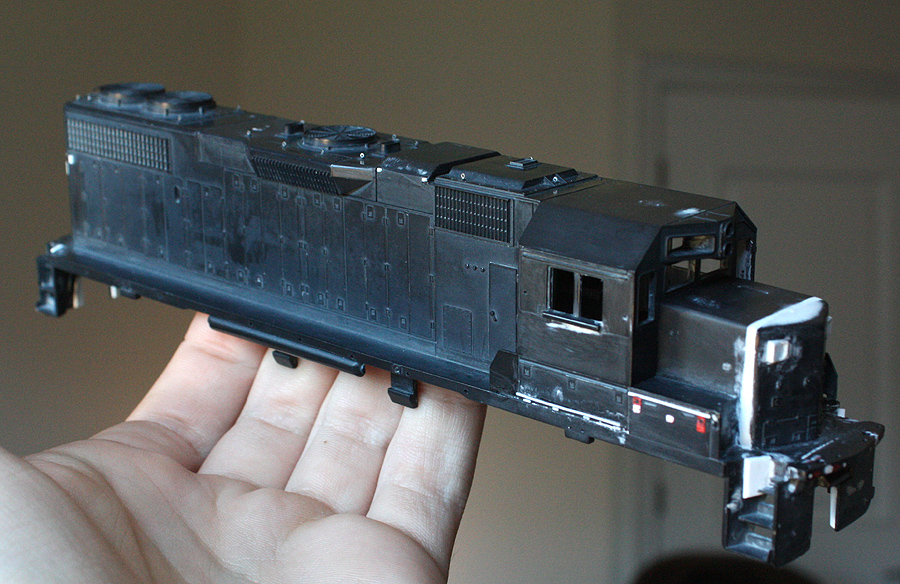 Quick test shot of the unit sitting on the frame. The Blomberg M trucks were swapped with some newly purchased B's that I painted grey and added piping to. The plow was also painted grey, with two grabs added on top of. The handrails are metal 0.015" piano wire bent according to prototype, as were the grab irons. As it was a later unit, the handrails ended higher up, so the Athearn plastic GP38-2 handrails wouldn't have worked. Plus, I wanted to deck mount them on the ends. The Athearn stanchions show here would be chucked in favour of a set of Athearn BB plastic SD40-2 stanchions drilled out, which would later be chucked in favour of a set of newer RTR SD40-2 grey stanchions drilled out once the unit was fully painted, which would cause some chaos because the mounting hole/pin locations were changed. More on that later... 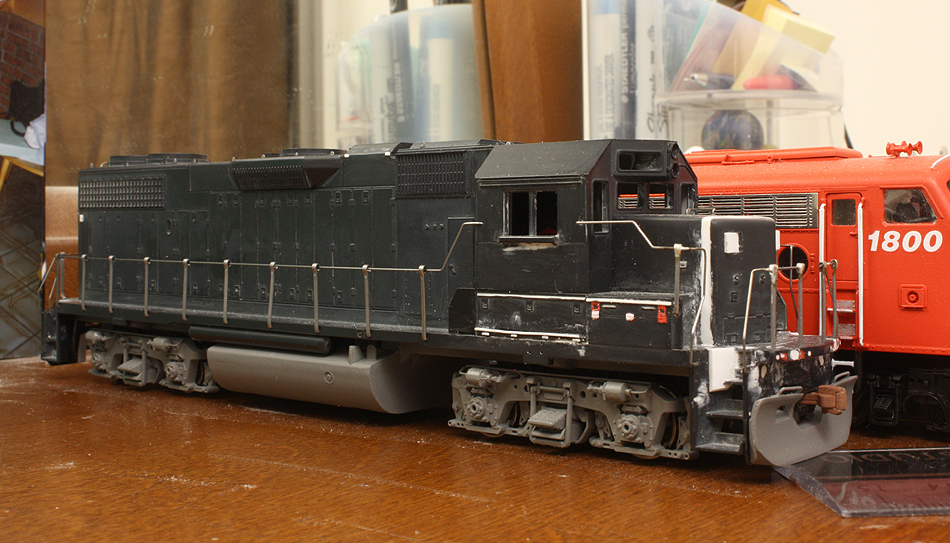 |
|
|
|
Post by CP_8530 on Mar 9, 2014 6:29:19 GMT -5
With most of the little body work knick-knacks tied up, it was paintin' time. Initially I purchased Pollyscale UP Armour Yellow and Harbour Mist Grey. The grey was fine, however upon testing the yellow I found it way too light. Some investigation found other complaints of this too, that it was a better fit for a unit that's been faded with years of desert sun exposure. Ours was still in relatively good shape, so that wouldn't do. Prepared to custom mix it, I then had an idea. I took a test shell out, primered it, and painted it with TLT's CP Diesel Yellow (maroon & grey scheme era), sprayed the grey on and bingo, it looked like a good match. The test shell (an old widebody Athearn BB GP35) outdoor in the sun after a quickie paint test with the TLT CP-D yellow and Pollyscale grey : 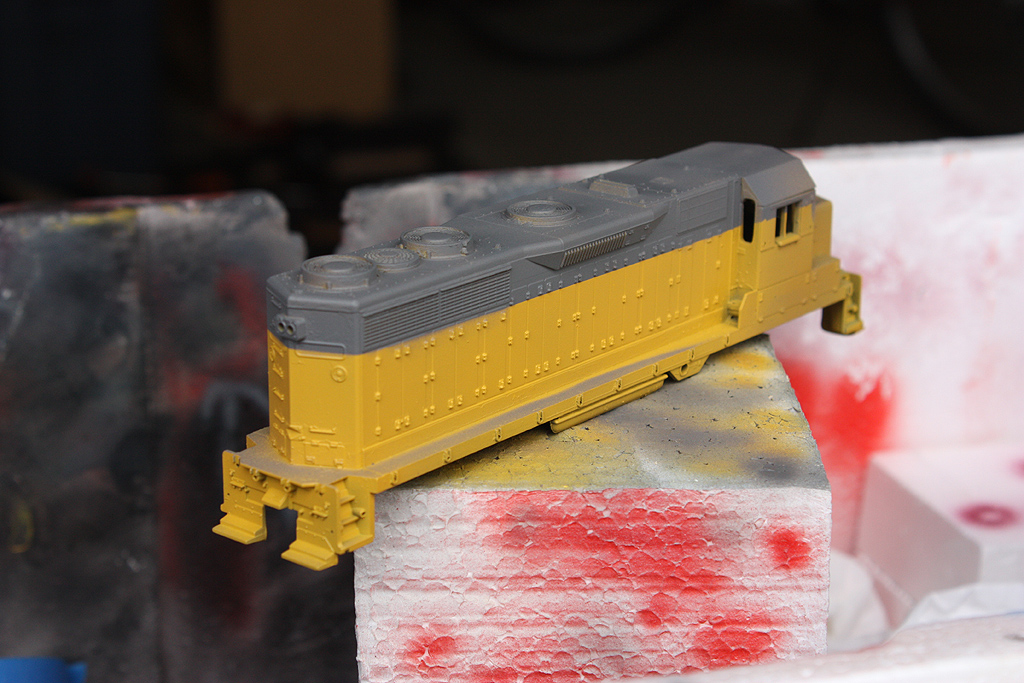 Typically yellow is a pain to get good coverage, so I primed the black plastic shell a medium grey, then laid on a few coats of yellow. I was thinking of priming with white instead of grey, but turns out the grey worked fine with enough yellow. Attention wasn't really given to the roof and pilot ends since it was going to get a coat of dark grey... 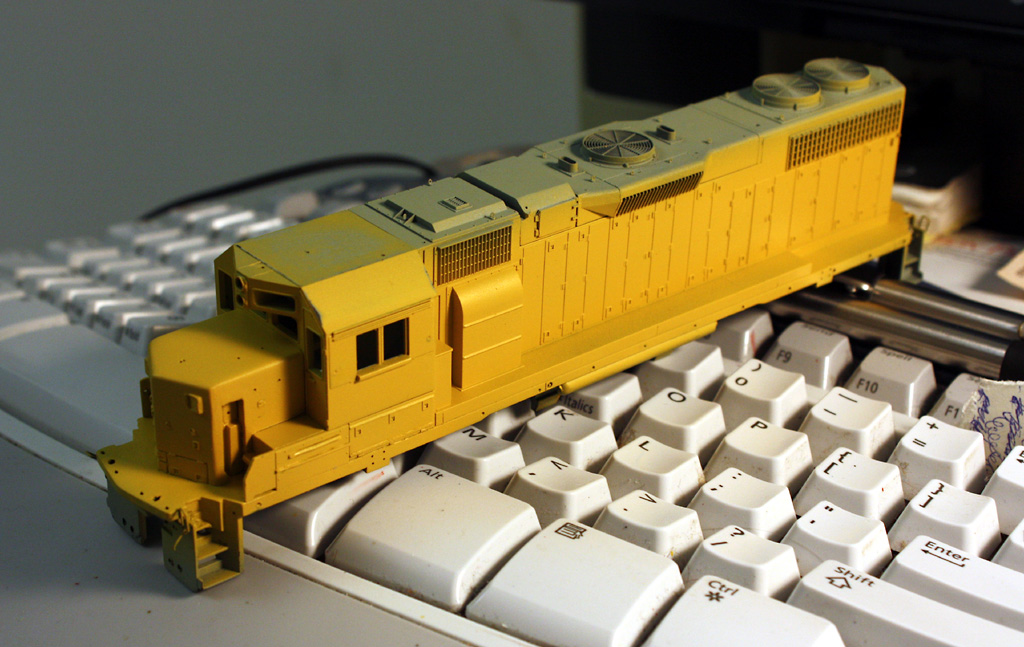 Then the yellow was masked off and the grey top and bottom was sprayed. I'm going to stress that the yellow, like on all the prototype photos of the unit I've viewed, tends to change hue depending on the lighting conditions. Outside and in good lighting it has a bright rich yellow hue, which dulls out to a flatter yellow in the shade, which mellows more with indoor lighting. Inside flash/no flash, with more details like the cut levers (bent out of wire and mounted using some spare Kaslo GP9RM metal mounts), sunshades (P2K plastic with wire underneath that fits in holes drilled in the cab sides), step edges painted white, cab gaskets painted black, and cab window frames silver. You can see the black Athearn BB plastic stanchions drilled out (more on that in a future post). Ignore messy shelf, the root beer keeps one fueled: 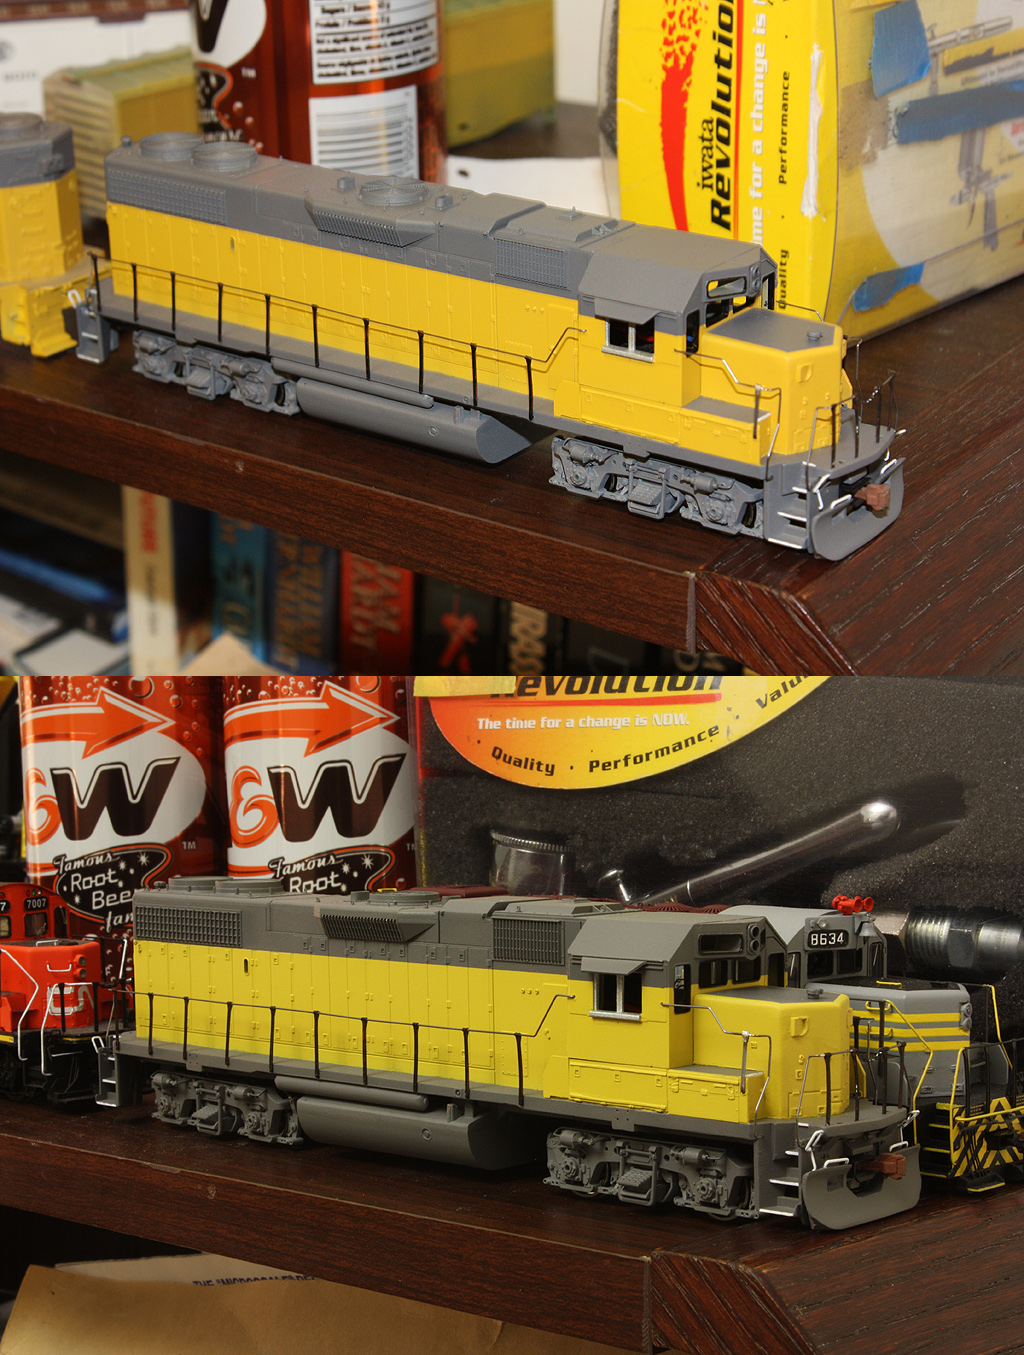 Outside, same paint but on an overcast day making it look dull. Numberboards done with Microscale decals from the LLPX set (more on that later...) and test-fit, so sticking out a bit too much: 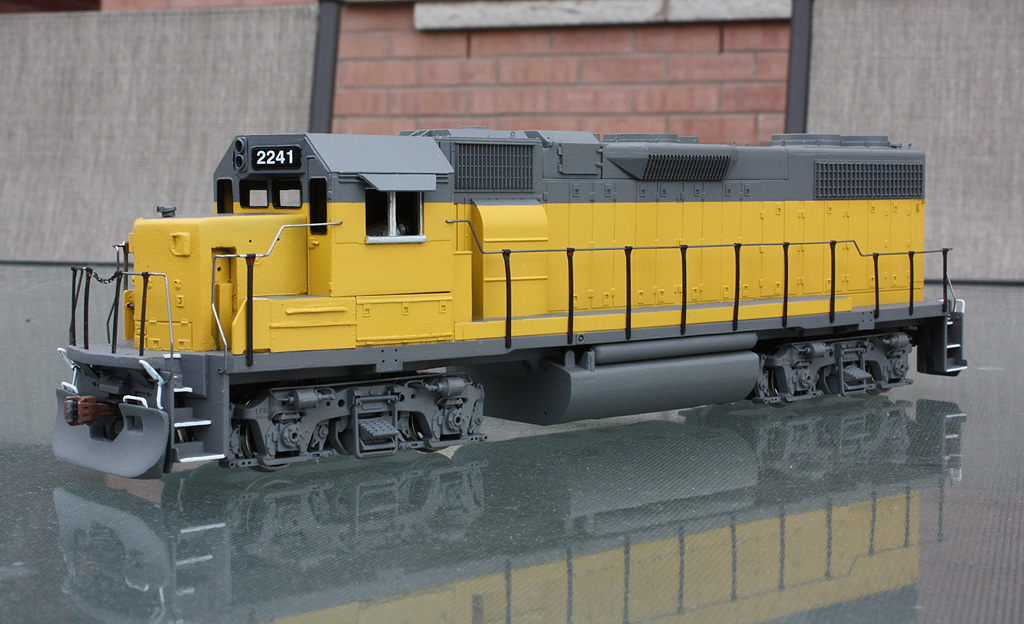 |
|
|
|
Post by iomalley on Mar 9, 2014 9:11:49 GMT -5
 Where are you painting that has grass?  |
|
|
|
Post by CP_8530 on Mar 10, 2014 23:26:44 GMT -5
 Where are you painting that has grass?  That was done last summer, this one's been a slooooooooow mover. |
|
|
|
Post by diesel on Mar 18, 2014 12:13:14 GMT -5
Another great GP38-2! This one is a nice one to watch because it's former LIRR, and those of us
interested in pursuing NY&A 38s will be making those same mods. -there's at least one already
done, but I don't remember if he did the class lights...
Very cool in the X-UP!
|
|
|
|
Post by CP_8530 on Mar 19, 2014 3:39:23 GMT -5
Time to decal. I initially tried applying the red frame stripe decals (from a MS CP ex-GATX set) right to the frame, but they were too transparent and on a grey background looked too dark. So I applied the white stripe decals from the LLPX set, then carefully decaled the red ones over them, resulting in a brighter red frame stripe. Painting it on was also considered, but the edges to mask off along were so narrow the tape probably wouldn't stick to 'em. 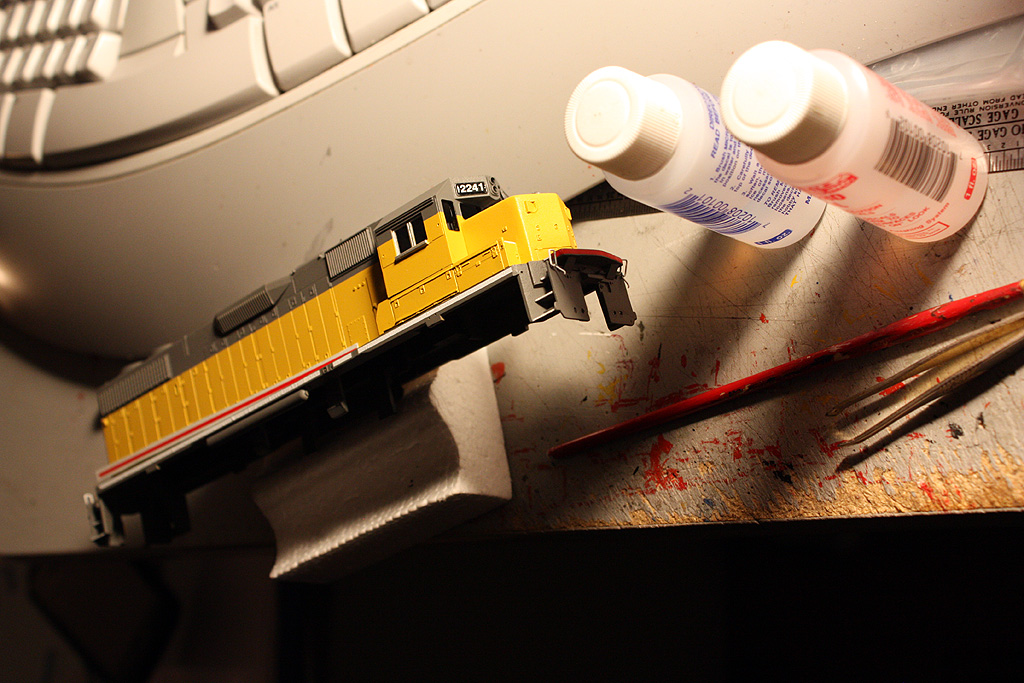 The numbers were a bit of a dilemma. There are two LLPX sets I know of that could work, but they both had inaccuracies: the Microscale set has the correct font but the numbers are slightly too small, and the Highball Graphics set has the correct number size but the incorrect font. Le sigh. It was decided to reluctantly go with the Microscale set since I had it on hand. Since it's only on the cab sides, if anyone ever comes out with accurate numbers (in both size and font), they could probably be sanded off, the cab sides reprepped and new decals applied (I've had to do that once or twice with other projects). The "LLPX" size is fine, it's just the numbers: 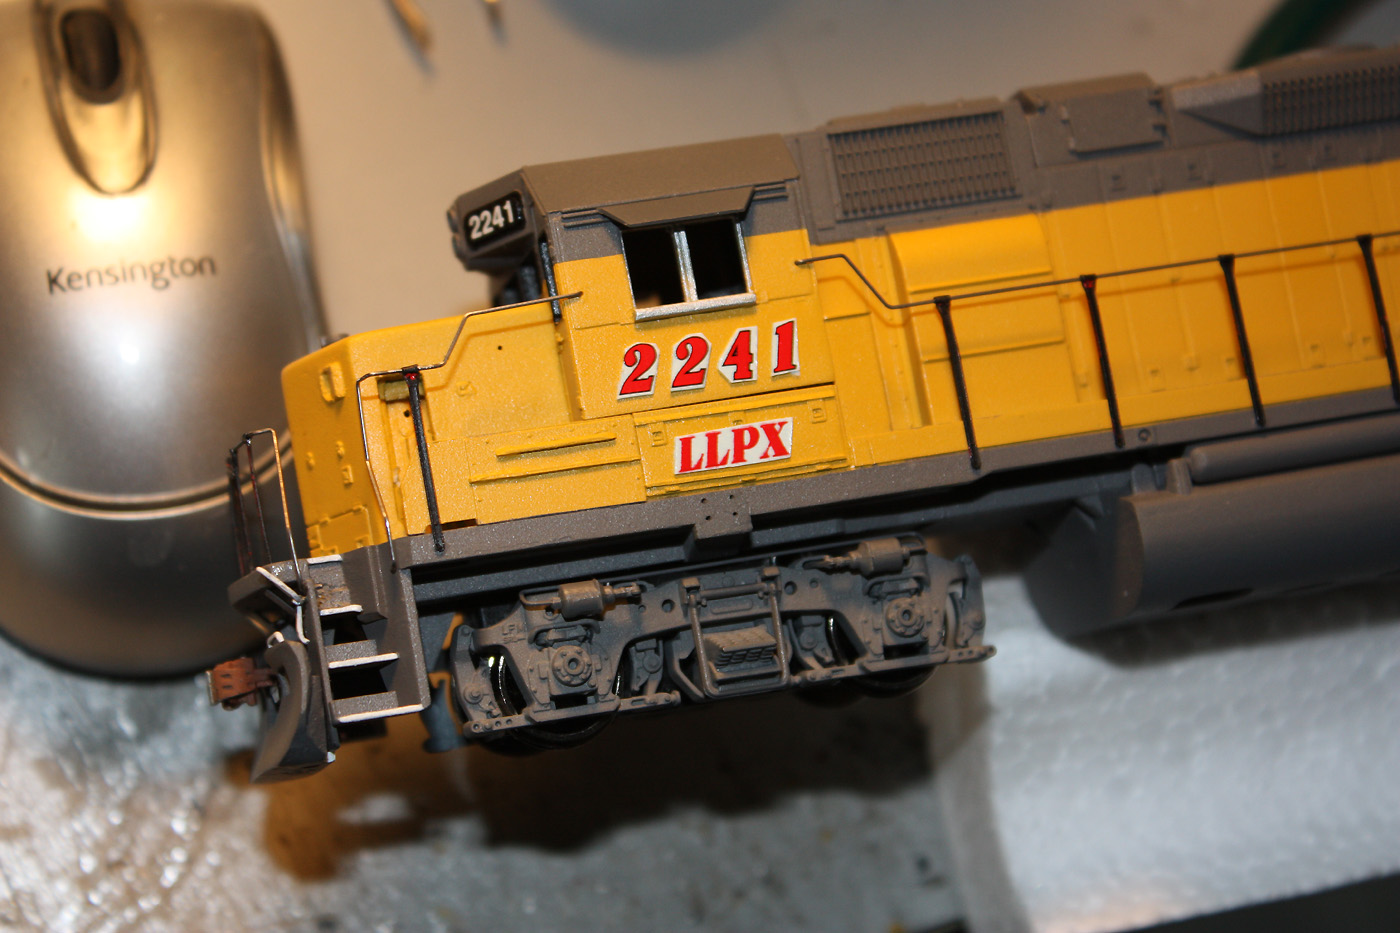 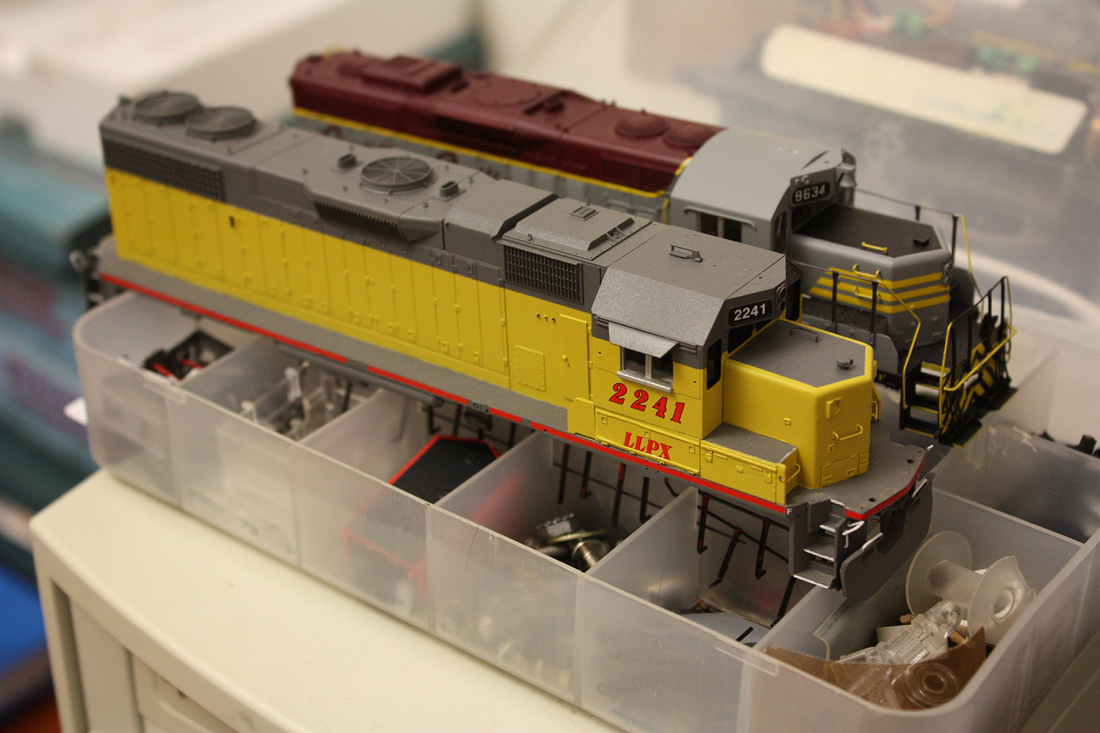 I then used some generic caution, etc lettering from a few different decal sets to represent the various lettering groups along the frame and sealed everything up. |
|
|
|
Post by m a y o r 79 on Mar 19, 2014 6:07:29 GMT -5
Looks really good!
|
|
|
|
Post by hlcx4300 on Mar 21, 2014 17:15:07 GMT -5
Great work!
|
|
|
|
Post by CP_8530 on Apr 10, 2014 0:54:41 GMT -5
Thanks guys, time to clear out some progress shots from my photo queue: Handrails and cut levers (and grab irons) were mostly bent out of 0.015" steel piano wire 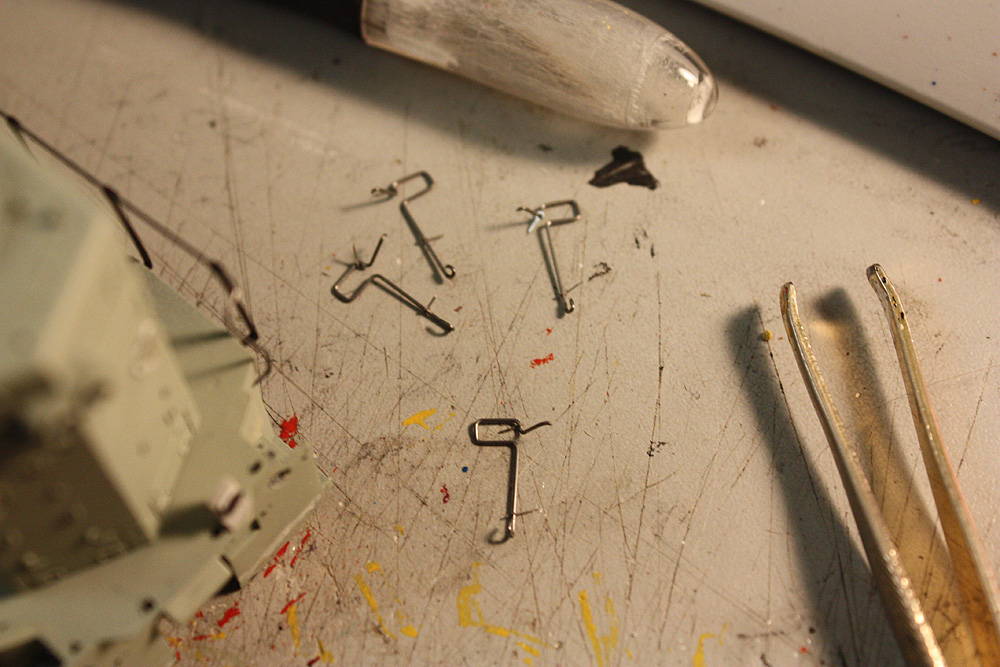 Some Kaslo ditch lights were modified, drilled out and used for the front. The rear ones are slightly different (round housings mounted on flat plates below the deck). SMD LED's with magnet wire were installed and sealed with Krystal Klear later: 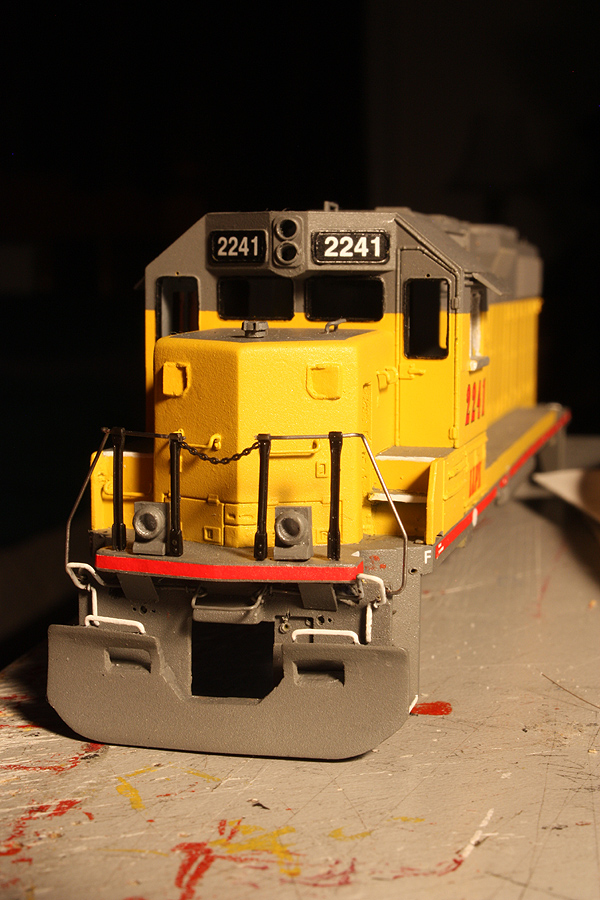 A Cannon & Co interior cab kit was installed (yes, in the stock Athearn cab! Oh yes he did!). I didn't have any really good interior photos available, except for some small Transport Canada shots of the interior when it hit a washout caused by failed beaver dams (Canada's little eco-terrorists!) and derailed. It looked grey with red warning labels and a black control stand, so I did up a bit of a generic interior. Cutout at the top corner is for lighting from the decoder: 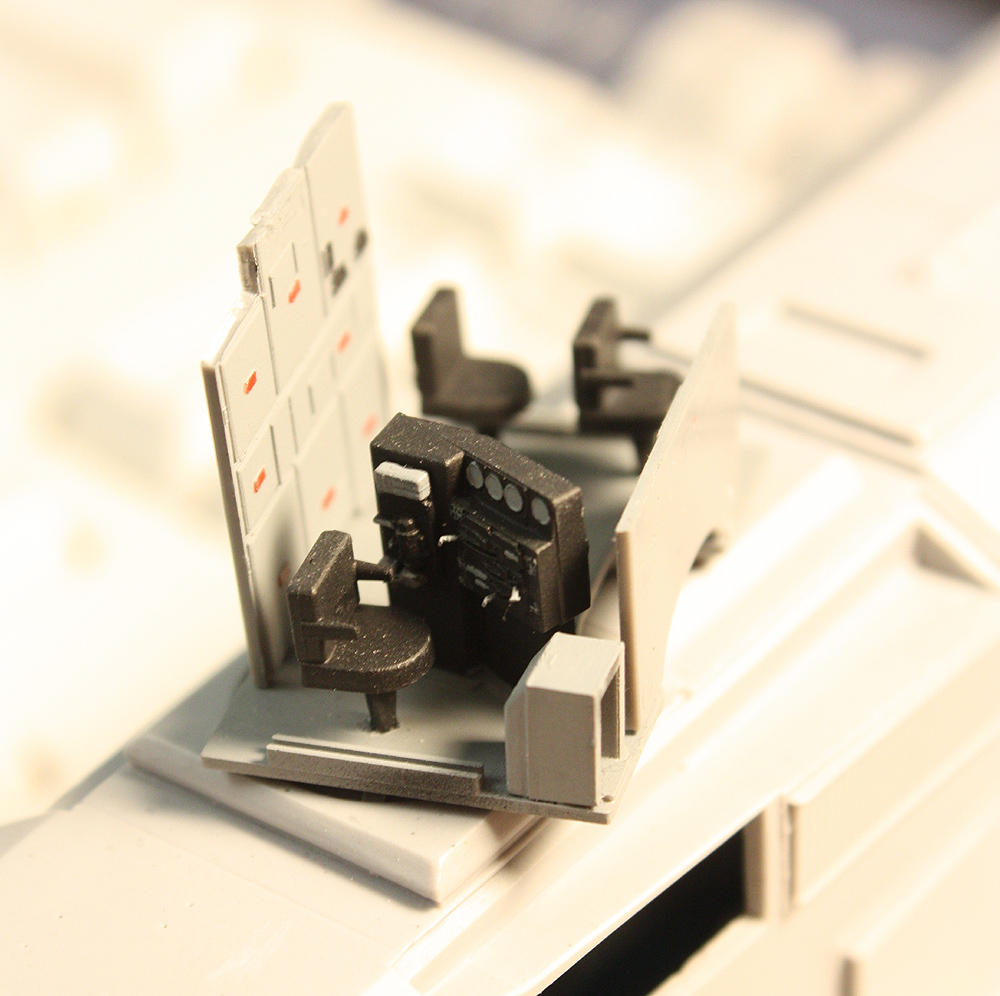 Our stanchions came in! An Athearn RTR SD40-2 handrail set will be cut up and drilled out (which has enough to do the GP38-2), in UP grey so there will be little paint flaking (I had to use a few extra deck mounted ones from another set as I needed a few more for the ends...). The RTR stancions have the mounting pegs slightly higher on the stanchion than the old blue box ones I had used before, so I had to fill and move the stanchion holes in the frame up a bit. Bit of a PITA. 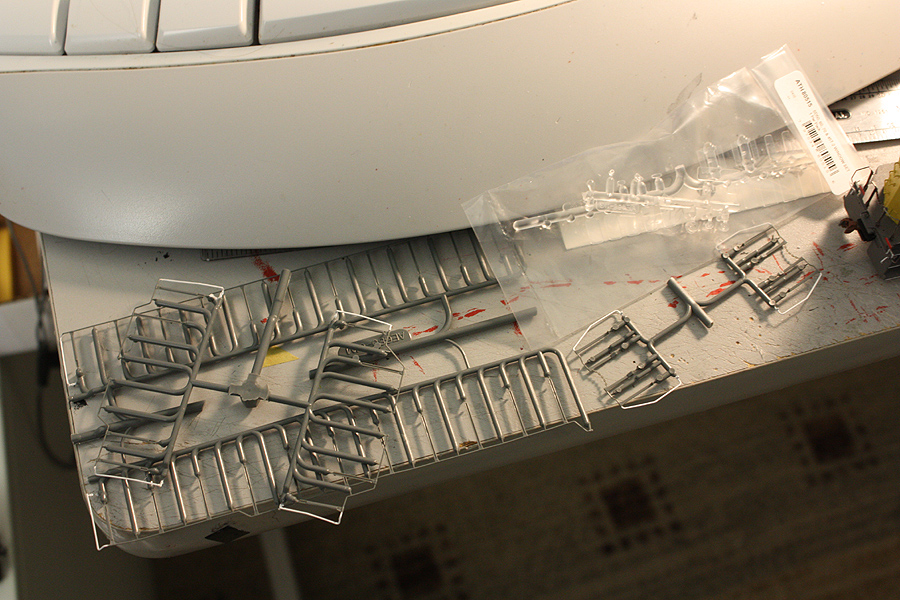 Now, cut all the stanchions out and drill 'em out for metal 0.015" wire. I usually file or sand the side before drilling into it, and use a #80 bit, followed by a #79 or #78 to enlarge the holes as needed. I found the BB plastic stanchions easier to drill out than the RTR ones. It takes practice, and you'll probably ruin 1/3 of them by drilling through or too close to the edge, so an extra pack is always a good idea. Not for the faint of heart: 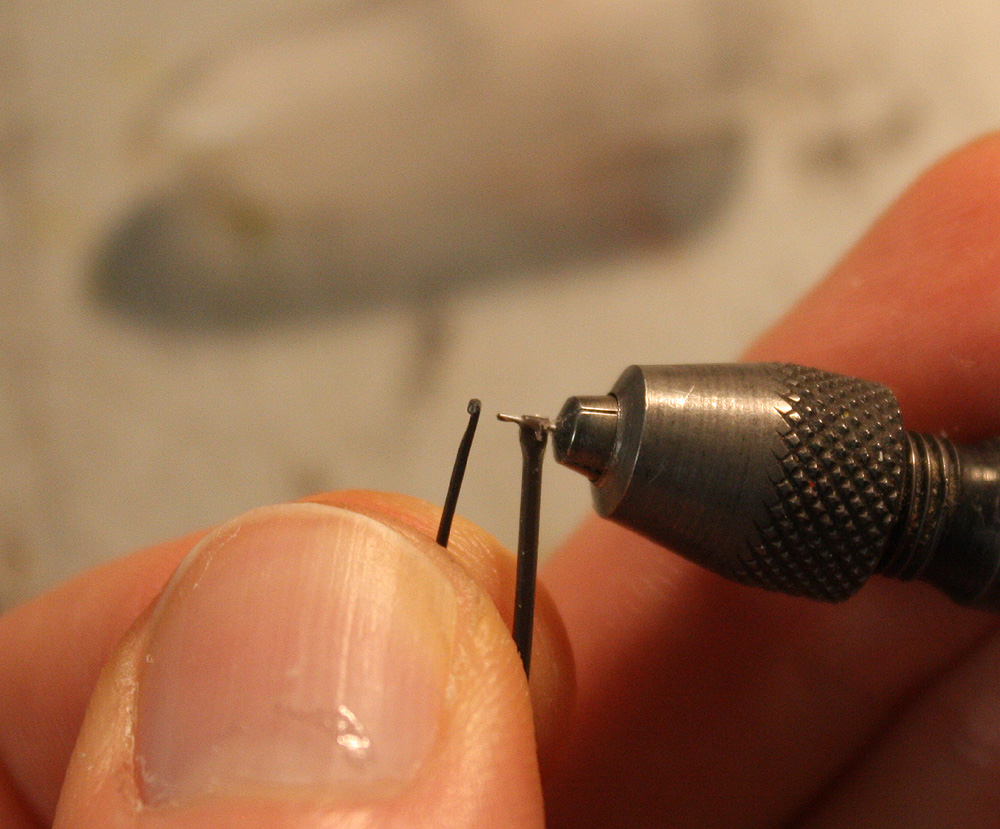 Rigging the lighting. Front headlights lit with standard LED's from a Miniatronics pack I had with a 470 ohm resister per, ditchlights lit with SMD LED's in the housings, wired in pairs (series) with a 540 or so ohm resistor. Wired up to the test track with jumpers to check the lighting and any heat generation (very minimal). 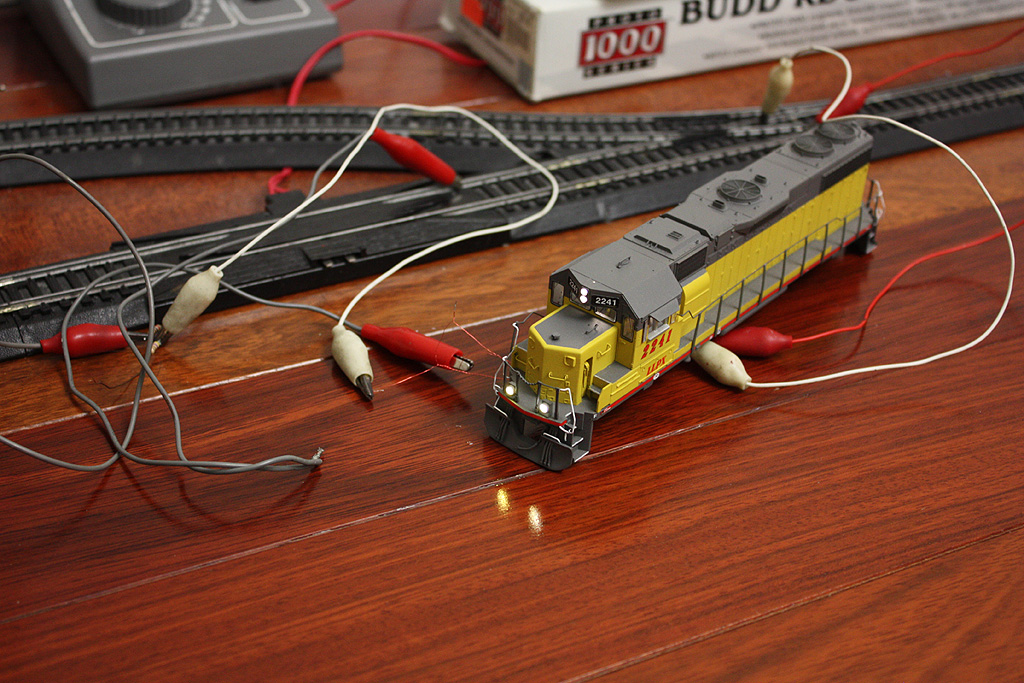 And, because the person who I'm building this for wanted sound, a Loksound ESU Select 16-645E non-turbo was ordered (Loksound specified, and the Select was the only thing that would really fit; the regular boards are too tight on top with the motor and the blue box shell's dip in the roof for the DB housing & weight). Speaker is a Railmaster DS1436-8, in the end of the hood. Decoder was squeezed in the front area. 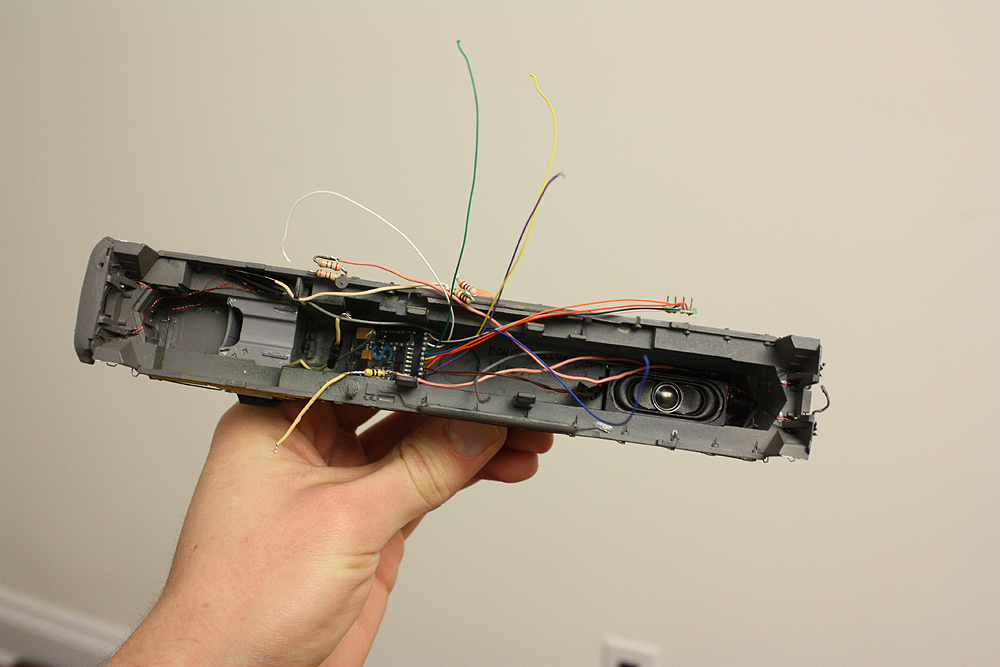 Wiring it up, I cut the lighting and function wires off the 8-pin plug and ran them to the light leads in the shell, and kept the 8-pin plug for a quick connection between the shell and the chassis wiring (motor & pickup leads). |
|
|
|
Post by CP_8530 on Apr 10, 2014 22:45:14 GMT -5
|
|
|
|
Post by m a y o r 79 on Apr 11, 2014 5:57:33 GMT -5
Wow that turned out great!
|
|
|
|
Post by gnsteve on Apr 13, 2014 0:19:51 GMT -5
Nicely done. That's a good looking engine.
Steve
|
|
|
|
Post by iomalley on Apr 14, 2014 17:57:45 GMT -5
Looks great Dan! But it sits too high...  |
|
|
|
Post by CP_8530 on Apr 17, 2014 4:33:06 GMT -5
Looks great Dan! But it sits too high...  Can't win 'em all.  My (future) 2221 will probably be the correct height, it'll likely start off as an Atlas Master GP38 (I know of a Canadian one for cheap I'll probably buy and strip...) |
|
Colin
Probationary Member
Posts: 16 
|
Post by Colin on Apr 29, 2014 23:32:50 GMT -5
Wow!! Great looking GP38-2!
Do you have a part number for the Genesis windshield wipers?
-Colin
|
|
|
|
Post by CP_8530 on Apr 30, 2014 16:46:23 GMT -5
Thanks Colin, I couldn't find a part number so just asked Athearn for them. "Windshield wiper set for [Genesis] GP38-2 is available for $5.98" is what I got back. Make sure you mention you need the whole set. I initially ordered 2 sets but got only two wiper blades per set (rather than the 5-6), contacted them to tell them I didn't get a full set, and they said they'd send more. Then right after I reminded them I needed enough for both sets I ordered. Week or so later, I get two separate envelopes for Athearn in the mail at the same time  . But to their credit, they are nice etched wipers and they did get the order correct in the end. |
|
Colin
Probationary Member
Posts: 16 
|
Post by Colin on May 1, 2014 14:28:16 GMT -5
Thanks for the information Dan!
-Colin
|
|
|
|
Post by CP_8530 on May 7, 2014 0:28:48 GMT -5
As I had mentioned earlier, the LLPX Microscale number decals were too small (and the current Highball ones of the wrong font). Some decals recently came my way (thanks iomalley) and included in them were the correctly sized ones of the proper font. Shown here in a comparison with the MS sheet: 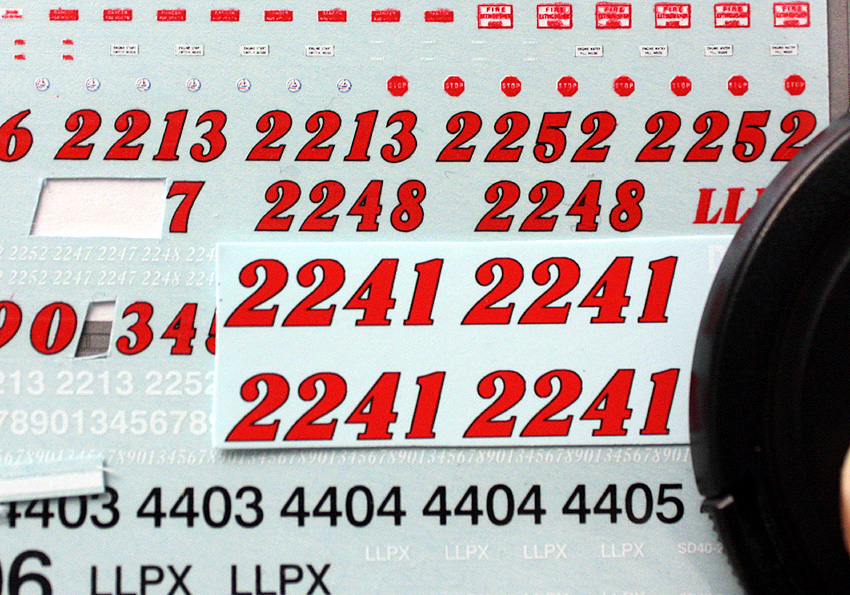 After sanding the old numbers and clear off the cab side that were previously applied (using 800 grit automotive sandpaper and then 1200 to finish), a light coat of yellow was applied, then a coat of clear gloss for the decal application, done according to photos with the wonky spacing of the 4 and 1: 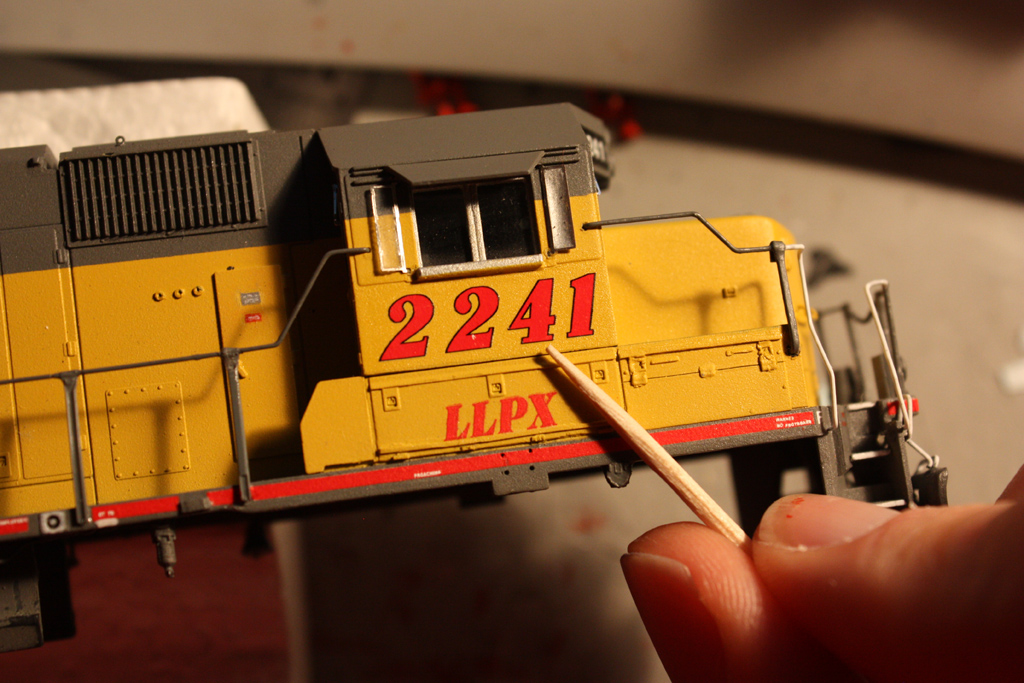 Then sealing, and doing the same for the small rear numbers at the top ends of the long hood (too small as well from the MS sheet) and presto. I'll have to upload an updated unit shot in a bit. I'm not sure if I mentioned it before, but that one conductors' side front stanchion is an old metal Athearn one. I needed to use this because the one here was shorter than any commercially available EMD ones I could find, it was likely added when the cab signal box there was removed and the handrail redone. |
|


