|
|
Post by tjmfishing on Dec 2, 2013 20:28:26 GMT -5
I also use the 10mm Tamiya tape for my stripes! Who makes CN Grey 17...would be nice not to have to mix paint anymore. Is it acrylic or enamal?
|
|
|
|
Post by CP_8530 on Dec 2, 2013 22:41:19 GMT -5
Yeah I'm not sure what they were looking at, or if mine isn't one of a batch of bad ones. (I did get it off my LHS for $100) so, this side's looking to get repainted. (the other side's fine) Sorry for the hijack MrDan! Geez, WTF happened there Athearn?! That middle one especially looks narrower. Simply amazing... Thread creep happens  I also use the 10mm Tamiya tape for my stripes! Who makes CN Grey 17...would be nice not to have to mix paint anymore. Is it acrylic or enamal? I measured mine that I cut with a scale ruler, and the horizontal tops of the tape cut at 45 degrees comes out to pretty much 4 scale feet / 48 inches. I spaced them out about 4.5 feet (54"). The paint I used was TLT acrylics #10012 Lettering Grey 17. And now: paint it black! Paint it all black! The SD60F makes a trip to my ghetto-style paint booth (a simple styrofoam box, which probably could use better ventilation than a table fan set on high, but I usually take it outside and do all my painting outdoors. Curse you winter.) 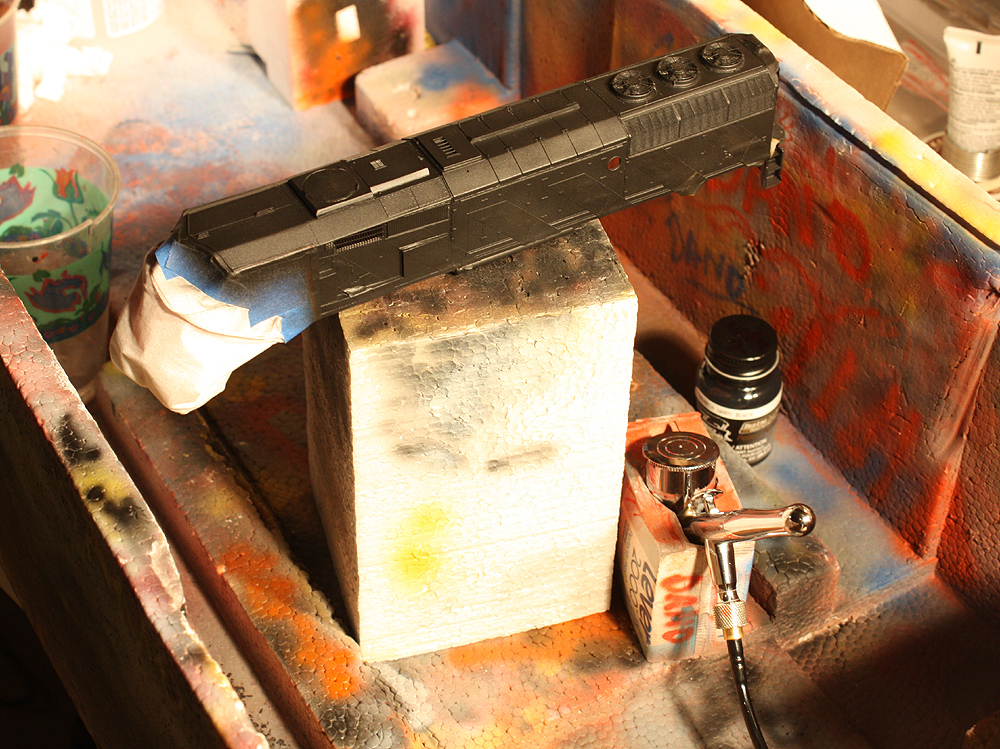 Time to remove the masking. My hand model had to book off sick, so here I am substituting for her... 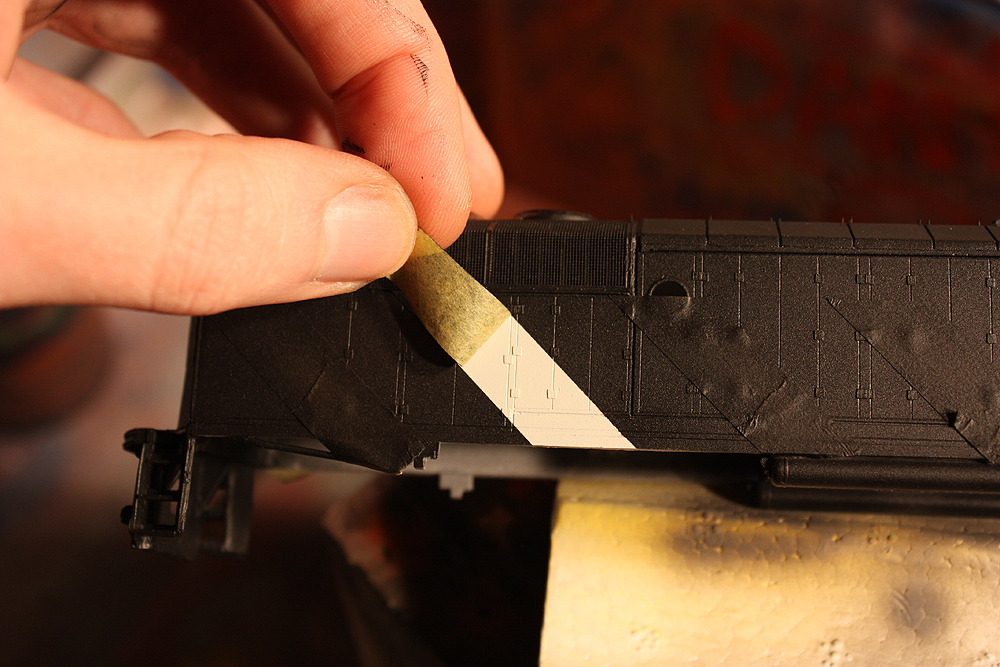 Next step is to mask off the frame and paint it black. Because of previous experience, I usually sand down the paint a bit at the separation lines along the frame to avoid any ridges from the stripe masking. Fine 1500 grit automotive sandpaper works good. |
|
|
|
Post by CP_8530 on Dec 7, 2013 0:45:07 GMT -5
Time to mask off the bottom to spray the frame black over the stripe overspray. As mentioned earlier, it's easier to do it this way than trying to cut each of the stripes the exact height. 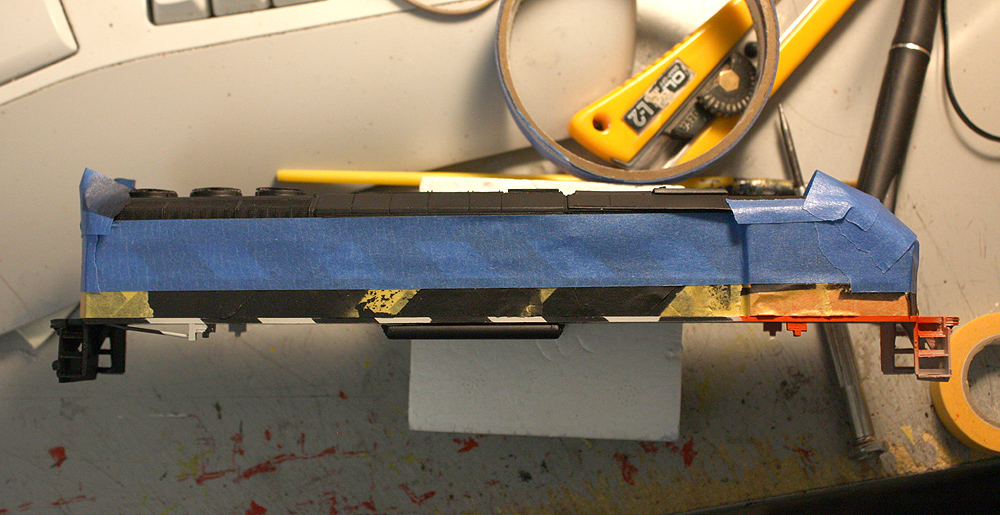 Once that was done, onto masking the black anti-glare tread on the nose. Easier said than done of course: 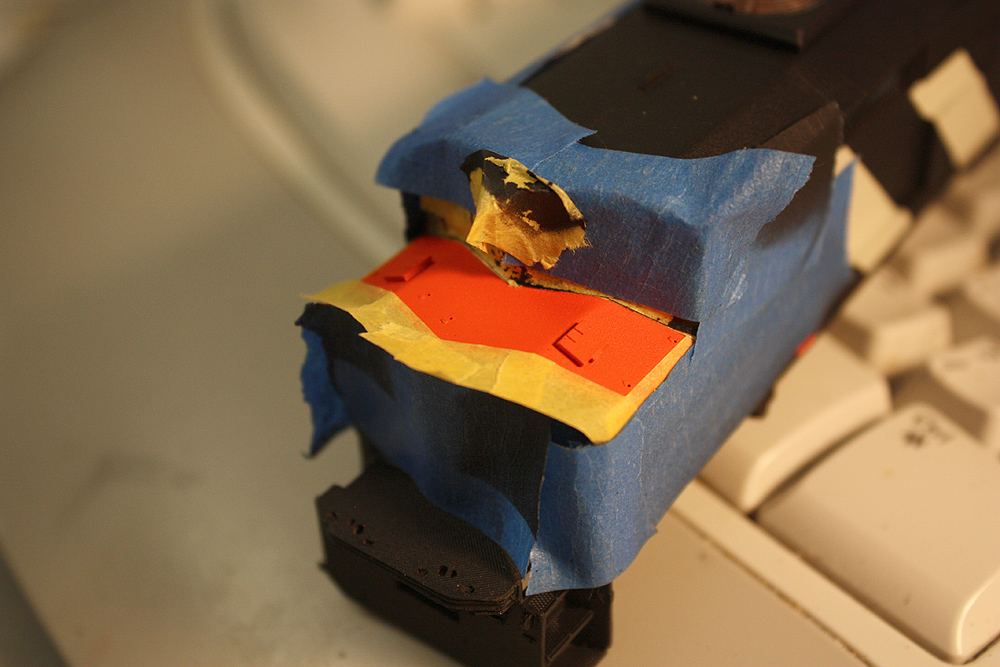 And all unwrapped and with any touch ups, we have a shell awaiting a coat of clear and some decals. Make sure to paint those cab gaskets black, among other things. Now, the EMD "Radial" dynamic brake fan. The Kaslo has the blades inaccurately cast on the roof, directly visible under the grill. On the real thing, they were located below the six resistor grids that can be seen through the grill of the real thing. After having some discussions with a friend, I painted the interior of this area on the model a rusty brown for the resistor grids underneath, first installing the grill (I don't like gluing main body parts to paint), then spraying the brown through the fan, and wiping it off the grills before it dried. I made a round tape mask to cover it while I sprayed the shell black. 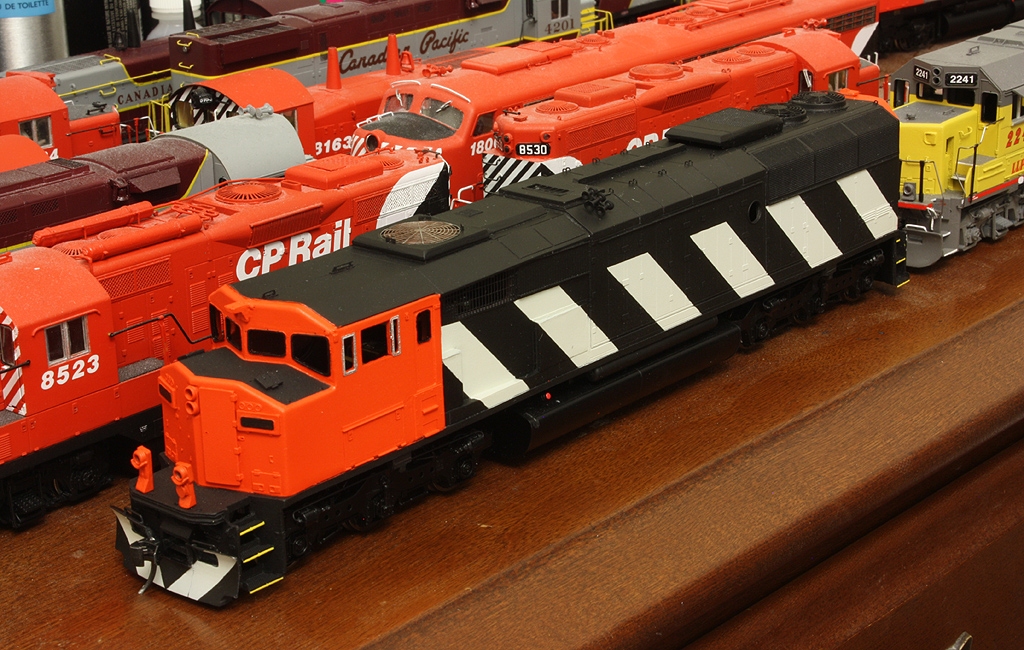 As well as the front plow, the rear pilot needs the white-grey "V", which I had initially forgotten and later sprayed on. I had also initially sprayed the cast-on fan blades inside silver prior to adding the very fragile top fan screening before painting, but they didn't seem to survive all the black. Oh well: 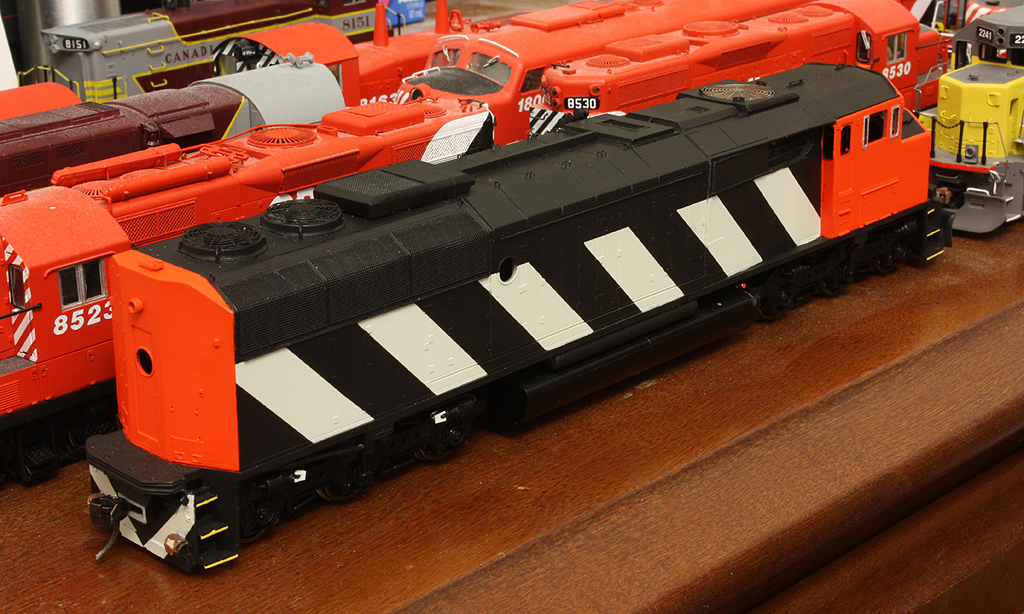 Next, the clear and on to decalling. |
|
|
|
Post by spud7378 on Dec 7, 2013 8:16:28 GMT -5
Looking good Dan. I'm absorbing all your techniques for painting the cn models they look amazing I would have never thought to paint the stripes I would have just used the microscale stripe set
|
|
|
|
Post by iomalley on Dec 7, 2013 10:28:01 GMT -5
Yeah My dad would agree with you, as he always painted on his stripes. That mostly stems from the fact that when he got started in the hobby, Launch Pad CN decals were the only stripes available, and they were garbage! Then came CDS and the awesome accu-cals, but by then he was 'set in his ways'.
I have to redo the side of my Athearn 38W, I'm going to give it a try as Athearn's attempt is closer to white.
|
|
|
|
Post by analogbeatmaker on Dec 11, 2013 12:25:18 GMT -5
Real nice work Dan! The paint is looking sweet. I look forward to seeing it completed.
|
|
|
|
Post by CP_8530 on Dec 12, 2013 0:45:34 GMT -5
It took about the same amount of time to apply all the zebra stripe masks according to photos as it probably would have applying the decals, and without all the trying to settle them down/adjust them/cut off excess film. It actually seemed quicker and easier going with the painting, but that's just my opinion. Decalling. A few compromises with decalling had to be made: the CN logo at the front was slightly larger and wraps around the side of the door a bit. The Microscale decal numbers used also seem like the later style as found on such units as the SD75i, rather than the slightly rounder/wider style on the 80's GM units. But, since I had the set on hand, and other MS CN ones all looked basically the same as that, and I didn't want to go on a wild goose chase finding the right ones, they were used. The front cab face and numberboard numbers came from a CP Black Cat decals set, although I had to use smaller numbers in the numberboards so they would look right. I cut off as much decal film as I could from the noodles and striping (as well as around the cab numbers) to minimize any issues with it not settling right around the doors and body-frame gap area. The class lights were painted black (including the round gasket) and then dabbed with paint of the appropriate colour of the lens (the housings were one solid stainless steel part with no holes for lenses, so I chose this method rather than drilling them out). I'll probably apply some Krystal Clear as lenses over them a little later. The winterization hatch is off as it needs some patching and cleanup, and minor mods to mount the screen flush. I need to dust again... 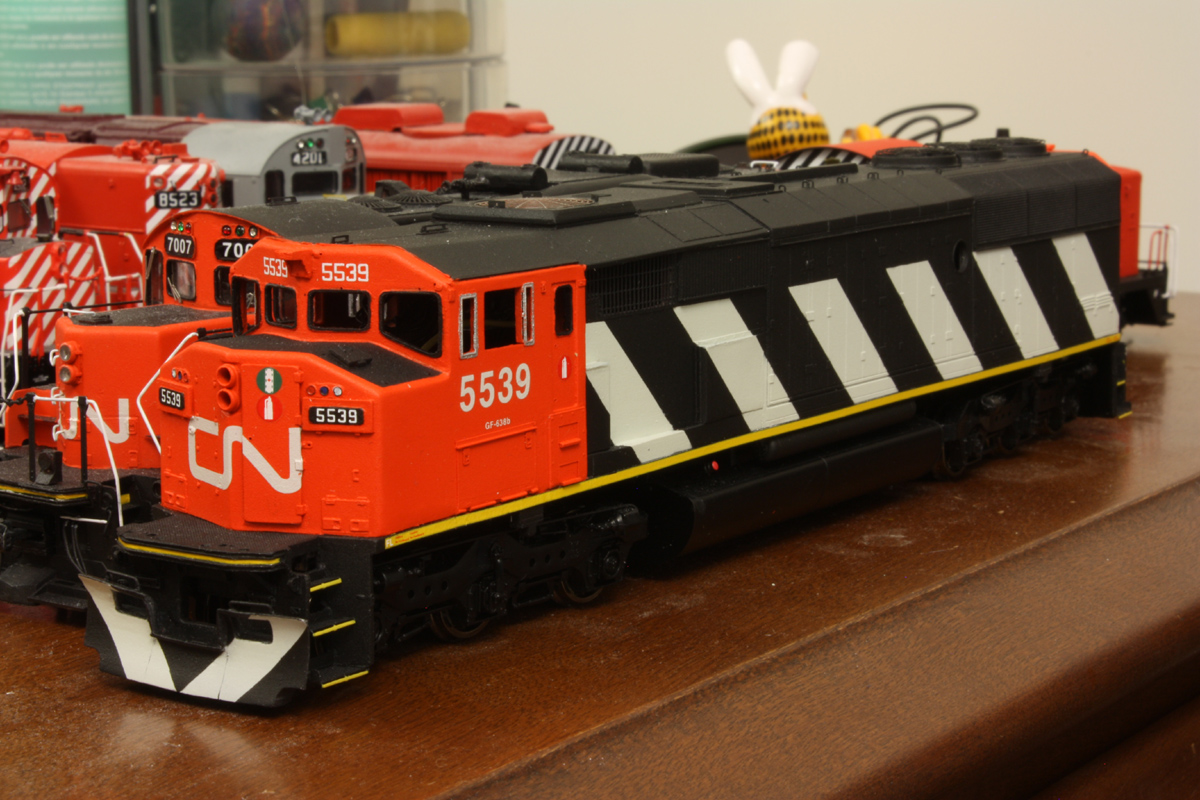 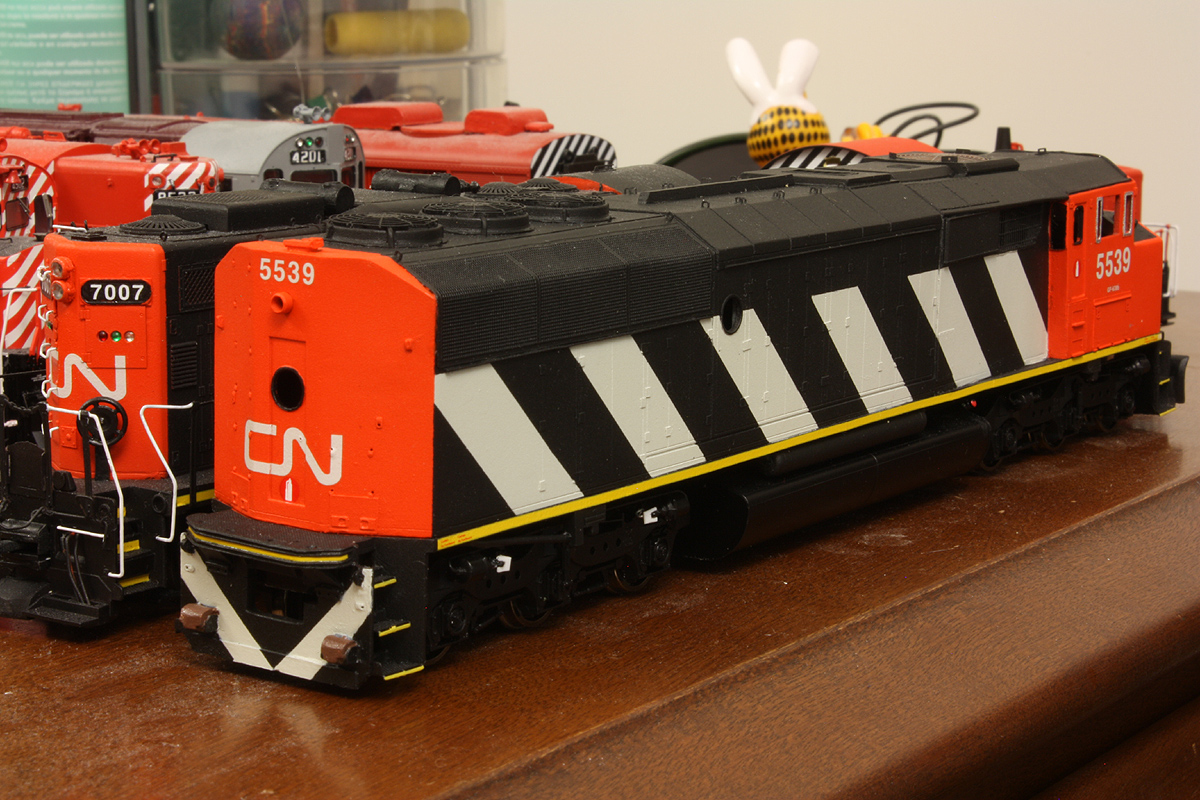 Next is a clear coat to seal the decals, and bending time for all the handrails...oh joy. |
|
|
|
Post by Mark R. on Dec 12, 2013 14:27:43 GMT -5
Great job. Contemplated painting my white stripes as well, but opted to go with decals instead. One number down from yours (picture is kinda washed out) .... 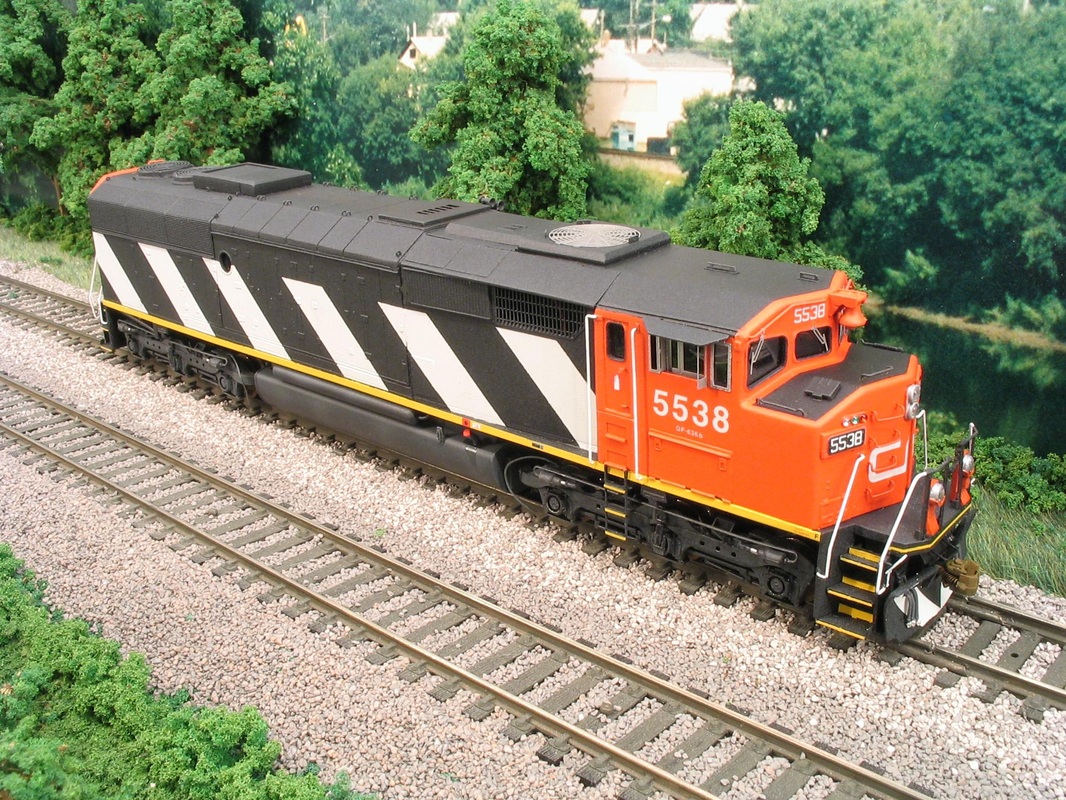 Mark. |
|
|
|
Post by CP_8530 on Dec 31, 2013 20:35:41 GMT -5
Thanks Mark, your 5538 is quite the looker there. P2K chassis? Here's my Happy New Year post:  Still a few parts to add, including MU cables, cab glazing, windshield wipers, and some air tank piping. I had initially broken off the small flimsy tabs on the side cab door steps, and was wondering how I would mount them to the body. After experimenting with some wire, hot glue, and soldering, I eventually worked out the best solution for durability: solder a U-shaped piece of wire behind the steps and drill holes along the edge of the shell for them to insert into. I had to roughen up the rear stainless steel surface as it's quite slippery to solder to. The kinks in the wire bring it closer to the middle of the shell sides. I left the side tab holes as the cab door handrails on the SD60F had them fasten to the steps, but on the SD50F they bolted to the frame.  Also, the grab irons that came with the kit were trimmed and installed on the ends. New handrails were bent for the side nose grabs, top cab grabs, side and all handrails from 0.015" piano wire. The end handrails were soldered to the stock stanchions, and small wire was also soldered to loop the chain over (Precision Scale chain was used, like the brake rigging chain pictured - more on the brake rigging setup in the next post). The end step handrails that attach to the main body have an odd kink in them that brings the handrail closer to the body, which was bent from photos (have a look at the 5553 here: www.railpictures.ca/?attachment_id=8294 ). The bottoms of the side door handrails also have a slight kink to them around the frame area (see 5515 here: www.railpictures.ca/?attachment_id=12000). I opted to also use wire to bend the cab door latches, as the etchings that came with the kit were kind of flat. The winterization hatch was also mounted to the cab (I glued wires to its inside and drilled holes in the cab roof, so if I ever need to remove it for whatever reason it'll be easy). I cleaned up the casting first and cut the screen smaller so it would be a flush fit with the top of it. I also used a piece of styrene under the grill to simulate the bar that ran across it. The ditch lights were drilled out, painted silver inside, and surface mount LED bulbs installed (still need to wire the unit all up). The customer said the stock 1.5v headlight bulbs that came with the SD50 chassis were fine, but we'll see. Whoever owned the unit before replaced them all with aftermarket ones as the Athearn bulbs were burnt out. The ditch light wiring (nice thin magnet wire) was routed into holes drilled in the ditch light stands, through the anticlimber and to the inside of the unit, and sealed in with Microscale Krystal Klear as lenses. As well, holes were drilled in the bottoms of the ditch light stands to insert piano wire into for a sturdier mount to the anticlimber. The bell was also drilled through and mounted to the bracket using a piece of steel piano wire. The sunshades were mounted on wire glued to their undersides, and inserted into holes drilled near the roof so they line up with the sunshade channels on the cab roofs. I've test-fit one of the wind deflector/mirrors on the side as well. I did a quickie job using styrene to fabricate the waste retention tank on the rear of fuel tank. I didn't do too much superdetailing on the underframe piping, but will install some air tank piping in the future. Still a bit more work to do of course |
|
|
|
Post by enginseer on Dec 31, 2013 21:56:34 GMT -5
Nice work on locos from my second favorite road!
|
|
|
|
Post by CP_8530 on Jan 4, 2014 4:03:57 GMT -5
Thanks enginseer. I'm taking a break from the body detailing, and now working on the wiring. All the outputs on the Athearn board are 1.5v, which is insufficient for the 3.1-3.4v LED's I'm planning to use, so I'll likely have to hardwire the entire unit up to a 9-pin DCC plug. Here's the pair of SMD LED's installed in the ditch light housings, which were drilled out along with the anticlimber to accept them and the thin magnet wire. I set them up in series, with a 540 ohm resistor load (well, two 270's in series), and they seem to be just the right brightness at full output. The incandescent 1.5v Athearn bulbs are quite dim compared to them. I'll probably just mount a single large LED behind the headlights for the front and back, as I need to order more SMD's.  |
|
|
|
Post by nwrrtrader on Jan 5, 2014 14:55:13 GMT -5
Extremely nice!! I am impressed with the results of the Kaslo kit. You did an excellent job on the fine details of that locomotive.
Phil
|
|
|
|
Post by shwrailroader on Jan 8, 2014 1:33:38 GMT -5
Amazing. I did not know anyone sold the individual CP Red Barn shells. I'll have to look them up as I was planning on kitbashing my own from a 1993 RMC issue.
|
|
|
|
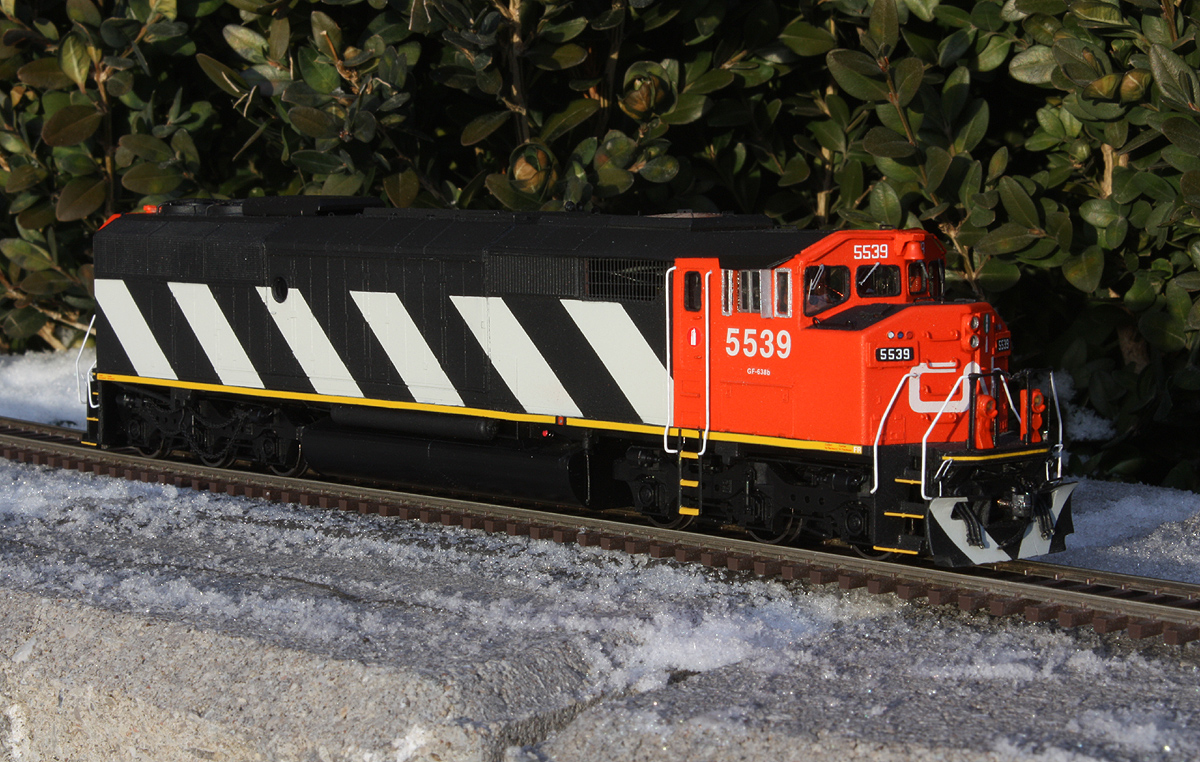
Post by CP_8530 on Jan 24, 2014 4:53:37 GMT -5
|
|
|
|
Post by m a y o r 79 on Jan 24, 2014 7:01:42 GMT -5
Outstanding work! I never realized how complex the painting /masking job would be on a CN unit. This one came out perfect!
Do you put lenses in front of the LEDs or just set the LED into the ditchlight housing (I guess the same would apply to headlights)
|
|
|
|
Post by CP_8530 on Jan 24, 2014 17:10:38 GMT -5
It was a real time consuming job, since it was a one-piece shell. I enjoy working on stuff like P2K Geeps since they can be taken apart and each piece painted by itself, reducing the overall masking.
The ditch lights are SMD LEDs glued in the housings with some Microscale Krystal Klear as lenses. I may have used too much for those as they're partially encased in it, still experimenting with the application. For the headlight lenses I used a lesser amount of KK, and will probably mount a standard sized LED behind them inside the shell (with a single small SMD LED for the single rear light).
|
|
|
|
Post by Canadian Atlantic Railway on Jan 24, 2014 19:17:57 GMT -5
The finished model looks stunning!
|
|
|
|
Post by spud7378 on Jan 25, 2014 9:15:17 GMT -5
Wow very nice. Well detailed and excellent paint job!
|
|
|
|
Post by brgp302300 on Jan 25, 2014 16:09:21 GMT -5
Thats a nice model you have there.........you mentioned about the grills popping off of the shell..........they might hold better if you try to use the Kristal Klear instead of CA.......the KK will have some give unlike CA.
|
|
|
|
Post by CP_8530 on Jan 27, 2014 23:17:27 GMT -5
Thats a nice model you have there.........you mentioned about the grills popping off of the shell..........they might hold better if you try to use the Kristal Klear instead of CA.......the KK will have some give unlike CA. Thx guys, it's probably the sharpest unit I've painted yet (coming from a CP fan too...). Brgp, I was actually considering that, but the CA seemed to form a stronger bond with the slippery stainless steel parts than the KK, and it's what Kaslo recommends using for the resin assembly. I've crosshatched the surface of the grill to be reglued with an x-acto knife and reapplied it with CA, as long as I don't bring it outside for any more freezing cold photo ops it'll probably be fine. |
|