|
|
Post by CP_8530 on Dec 17, 2012 23:42:10 GMT -5
Some of this build has already progressed, but I might as well start at the beginning...  We'll begin with the origins, in the form of me needing a frame for a certain Kaslo Shops/CMLW CN GP9RM shell. A P2K GP7/9/18 would be best, so I kept my eye out for one. One January winter's day a few years ago, on a visit to a hobby shop, I spotted this pair of P2K torpedo-tube passenger GP7's sitting on the used shelf for $34.95 per, unwanted and unloved. They were both fully loaded: DCC and Kadee #5 equipped with new 16v bulbs, and the usual cracked axle gears (but I was able to get some Athearn axle gears to fix them up later). The rub was both were in an unpopular road (it's a Canadian hobby shop, there aren't that many B&O modelers up here  ) and one of each of the ends was covered in flecks of white paint. Naturally I saw them as a deal, but only wanted one, so plucked down some coin for the 3400 to salvage its chassis for my GP9RM project. Upon reviewing the unit and succeeding to clean the flecks of paint off it, I decided I wanted at least one runner, so went back a few days later and bought 3406. 3400's drive went under the GP9RM, and 3406's drive went under 3400's shell. 3406's shell was now surplus to do whatever with. 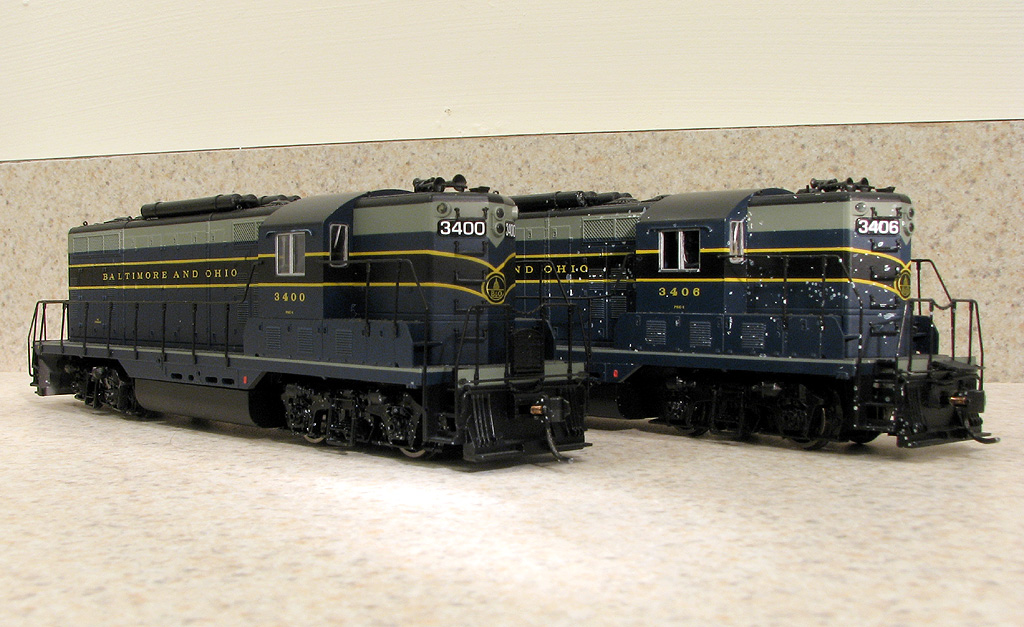 But 3406 has evolved into another more interesting story ( to be told at a later date see the CP 8530 project), this story is about 3400. Eventually, I decided since the unit didn't fit in my CP in the 1970's focus, to strip and do something with it. The drive chassis went back with 3406's shell for another project. What to do with a torpedo-tube, non-dynamic-brake passenger GP7 unit? Examining the cab, nose and frame, I got to thinking I could make a CP passenger GP9 out of them, and swap in a proper GP9 Phase 1 DB hood. Since nobody maked a model of them (properly, P2K released a few CP passenger units, but as incorrect Phase 2's and with no top air tanks) it was a go in my mind. CP's passenger GP9's (8501-8529) were unique in that they were Phase 1 dynamic brake equipped GP9's, but with a pair of smaller ( but thicker) roof mounted air tanks. And further they were divided into two sub-phases, with earlier (8501-8521) and later (8522-8528) stanchions and some other minor variations to the frame skirts. Initially thinking of doing "early" Phase unit 8510, I later settled on 8523 as it looked spiffy in this nearly-just-repainted photo: www.mountainrailway.com/Roster%20Archive/CP%208500A/CP%208523-3.jpgSo without further delay, it was stripped of all its parts, and had a bath in 99% isopropyl alcohol to remove all the paint. Modifications began on the short hood: as CP modified the round S/G exhaust with a square stack later, the round base was chiseled off and the area patched with body putty, as well as two of the four lift ring holes. A styrene strip was added to the right side of the short hood as per prototype, and the new square S/G exhaust stack was scratchbuilt from some photos using thin styrene and glued on. Pieces of styrene were added to simulate flag brackets. 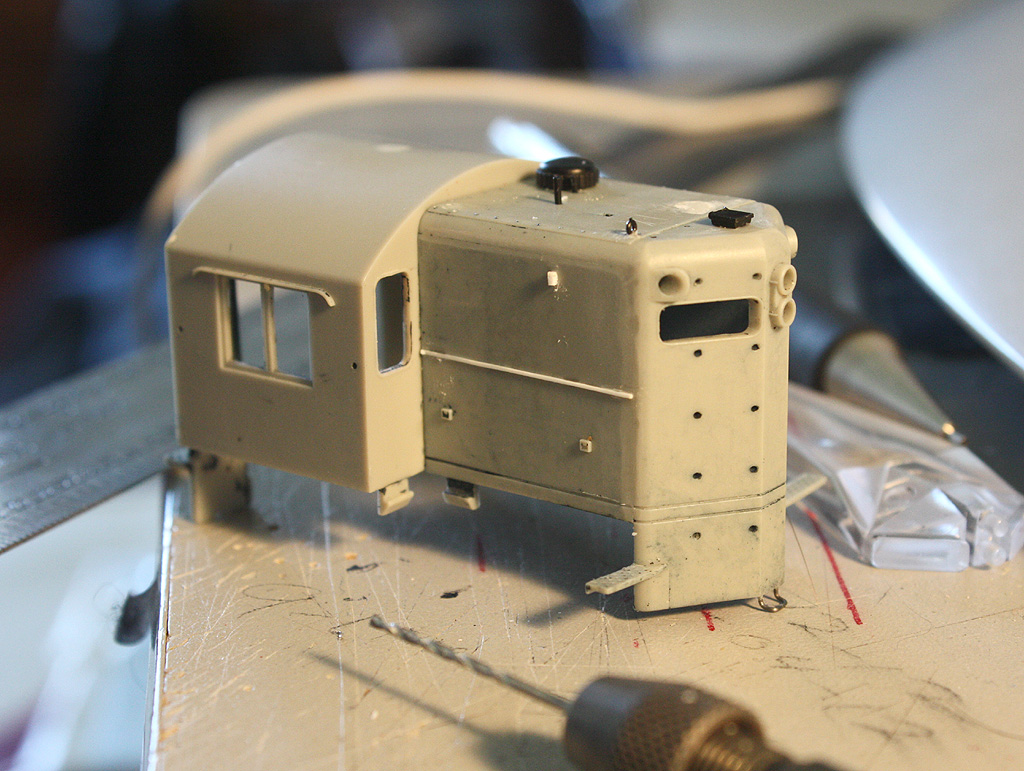 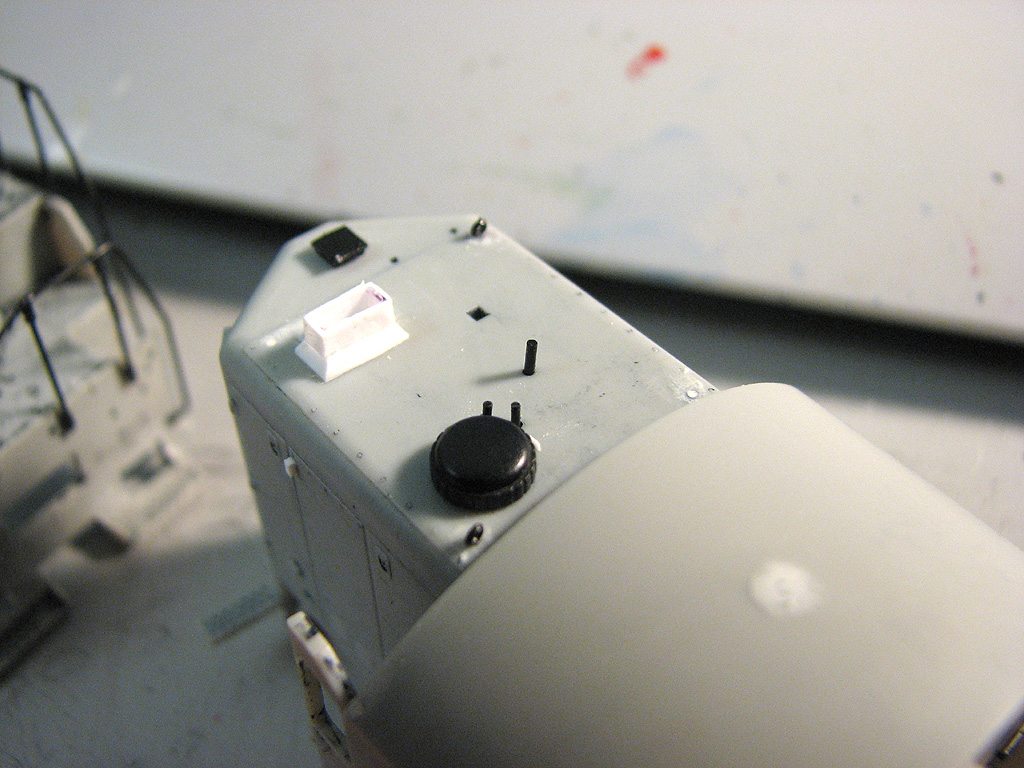 |
|
|
|
Post by spud7378 on Dec 18, 2012 8:10:30 GMT -5
Looking good cant wait to see it finished love the cp pacman on the gps what cars are you using for passenger service?
|
|
|
|
Post by CP_8530 on Dec 19, 2012 0:50:59 GMT -5
Thanks Kevin. It'll be just like in the photo: large multi with early 5" stripes. I've got a bunch of the old Con-Cor cars painted CP after The Canadian, but until the day comes that I buy a Rapido one, this unit will probably be mainly mixed freight. Anywho, as with the nose mods, the frame is somewhat straightforward. The main mods were on the ends: I elected to modify the GP7 style footboards into the later GP9 road style ones (I'd use that early P2K GP footboard part that's a separate piece, but I don't have any spares floating around...). Also, squares were cut in the pilot ends for the GP9-style recesses, and the ends also need some hole patching, as this unit didn't have drop steps yet (CP retrofitted them as time went on). Unfortunately I didn't take many photos of this phase. That also posed a handrail problem for the ends. To solve this, I acquired an old P2K GP18 shell with the later style handrails, cut the chains off, drilled through the ends of the two stanchions and replaced it with a piece of piano wire (note the photo below shows the handrails before I did this, but later photos will show it nicely). Painting time: TLT Action Red and TLT Warm Black were the order of the day, with some Gloss Glaze in preparation of decaling. Decals were used from Microscale CP sets for the 5" lettering, cab numbers and (later) CP Rail on the long hood. The large multimark will come from a Herald King CP GP7/9 set I have handy. All that striping was a bit of a pain to apply. Handrails were painted accordingly. 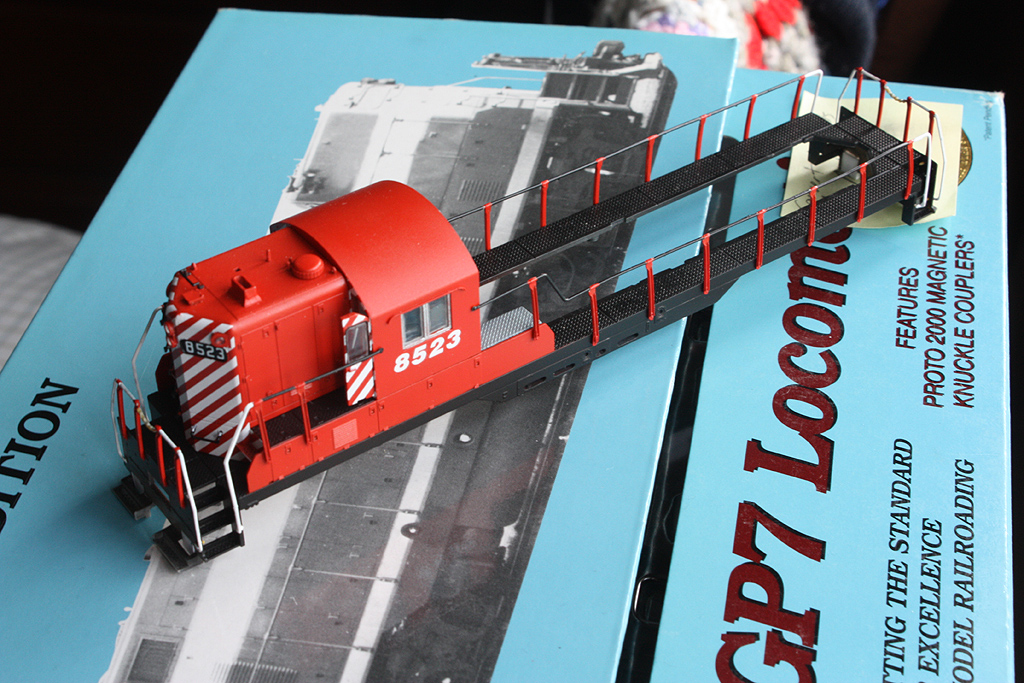 Next installment, we find it a long hood! |
|
|
|
Post by iomalley on Dec 19, 2012 11:21:59 GMT -5
Wow, you paint your stuff in stages, never thought of that...looks awesome, can't wait to see the tubes!
|
|
|
|
Post by tjmfishing on Dec 19, 2012 12:20:10 GMT -5
That s going to look great! Always loved those passenger GP9's that CP had.
I too paint in stages, don't know why, maybe it's because I used to do a lot of cars and planes, and was used to painting in stages from that.
|
|
liengineerbob
Chairman
Sitting at my workbench trying to figure out what to do next!
Posts: 335
|
Post by liengineerbob on Dec 19, 2012 19:31:19 GMT -5
That TLT Action Red looks really good....I might just get a few bottles. How does it spray? What is warm black?? I am guessing it is a ever so slightly lightened black?
|
|
|
|
Post by CP_8530 on Dec 20, 2012 2:14:59 GMT -5
Thanks all... That s going to look great! Always loved those passenger GP9's that CP had. I too paint in stages, don't know why, maybe it's because I used to do a lot of cars and planes, and was used to painting in stages from that. Wow, you paint your stuff in stages, never thought of that...looks awesome, can't wait to see the tubes! Not usually, but this project was a case of "hurry up and wait". What you see above was basically all I could do on it at the time before getting a "donor" GP9 for the chassis and hood. I snuck it in with another job I was working on that went to the paint shop.  Unfortunately, the MbyE torpedo tubes are still on order with the LHS... That TLT Action Red looks really good....I might just get a few bottles. How does it spray? What is warm black?? I am guessing it is a ever so slightly lightened black? It sprays very nicely straight from the bottle and is easy to clean up. No thinning required initially (after using it for a while, I add a bit of diluted water). Based on experience painting half a dozen models with it so far, I'd recommend TLT paint. My only issue was shooting it on at too high a PSI initially (30 PSI) and getting a rough finish, which became somewhat visible when I put the gloss coats on before decaling (I had to strip a model or three to redo them because I was unhappy with this rough shiny finish). Spraying at a lower PSI (20-25) seems to have eliminated this issue; I've done a number of models since with the same paints and airbrush and haven't had that problem again. I find warm black is a slightly shinier than the (flat) black they have. But it's not really a glossy black. I've used both to do frames, Warm black on this unit, and flat black on my C424 build (in the MLW section) I need to update soon. I asked one of the TLT reps about it: |
|
marknycfan
Road Foreman
Trying to get my Proto-Freelanced equipment built & painted
Posts: 65
|
Post by marknycfan on Dec 20, 2012 21:08:36 GMT -5
Off to a great start!
|
|
|
|
Post by CP_8530 on Dec 21, 2012 2:25:49 GMT -5
Next step: get her a hood. As this model started off as a torpedo-tube GP7, the non-DB GP7 hood just wouldn't do for a CP Phase 1 GP9 with DB. If anyone remembers the rebuilt CP GP7u project I did a while ago, that's where the GP7 hood from this unit went before I started on this unit. Anyway, in doing a little digging I found Proto 2000 did offer a Phase 1 GP9 with dynamic brakes, but those are apparently rare as hen's teeth. A Phase 2 GP9 hood is very similar to the Phase 1, and I determined it would just need a few louvres moved around to replicate one. With that, I put out an APB for a P2K GP9 Phase 2 with dynamics (dead or alive, but for a reasonable price - we don't want to pay premium for a brand new unit just to strip and use the hood). When a friend notified me of a used GTW unit in a hobby shop, it became the donor. Naturally, the drive was also used. The GTW unit had a "later" P2K drive with the upgraded universals, but the chassis weight was intended for a unit with short light bars. As I had an earlier GP7 with the longer light bars and had already decalled the numberboards on them, I was lucky to have a spare weight lying around that swapped in, from the chassis that went to the Kaslo GP9RM (weight wouldn't fit the tight shell). 8523 then had a brief identity crisis: 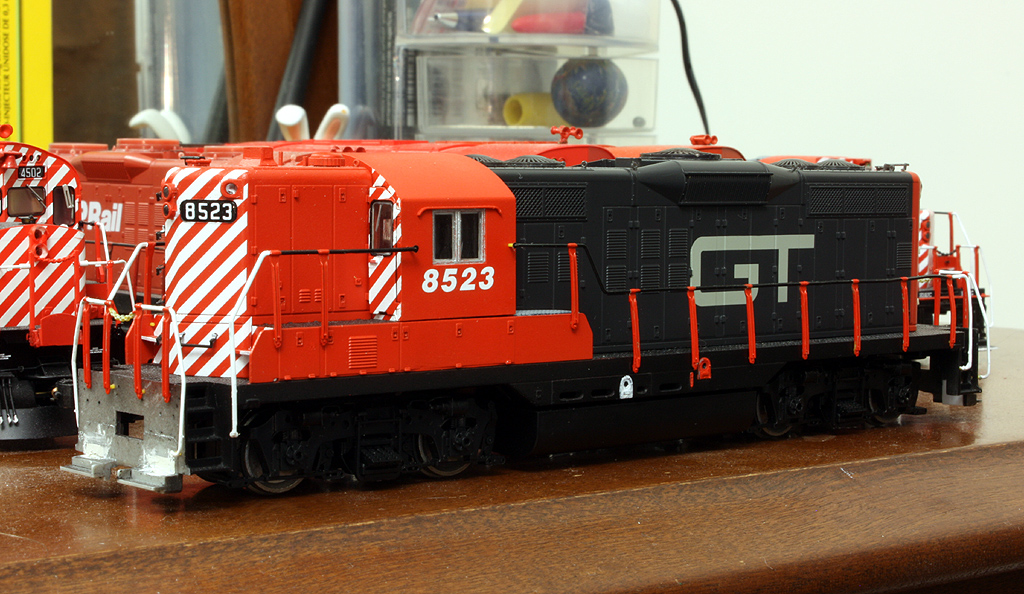 Now, to strip it and make a few mods on that hood before repainting. Whoever owned the damn thing before, among other things, cut all the mounting tabs off the bottom of the long hood (except for a single one at the end) and glued it to the frame. I wasn't exactly impressed when I took the shell off and saw that "handiwork"... |
|
|
|
Post by iomalley on Dec 21, 2012 9:04:13 GMT -5
Ah crap, I'd swap you that GTW hood if I had a phase 2 hood to swap....  |
|
|
|
Post by tjmfishing on Dec 21, 2012 14:24:02 GMT -5
Those mounting tabs are really annoying, I broke three of them off of my first RS-18 I was building and had to glue down the shell. I wish there was a better way.
|
|
dekon
Staff Member
Posts: 635
|
Post by dekon on Dec 22, 2012 22:03:34 GMT -5
Looking real good! Going to be watching this build.
|
|
|
|
Post by CP_8530 on Dec 24, 2012 14:58:33 GMT -5
Once the hood is stripped of all its parts and paint (sorry Sean!) the fun begins. The 2 louvres on the last two doors engine room doors need to be removed, and some added on the hood doors closest to the cab (on on the bottom on the conductor's side, two on the engineer's side as per photos). There are a variety of ways to do this including splicing hood doors, louvre transplanting and aftermarket louvres, but I chose to carefully amputate the old louvres with a sharp knife, file them near-flat and relocate them. Once done, the gashes in the hood doors need to be filled with body putty and sanded smooth (I prefer scraping them smooth with a sharp knife if there are details that could get sanded off). 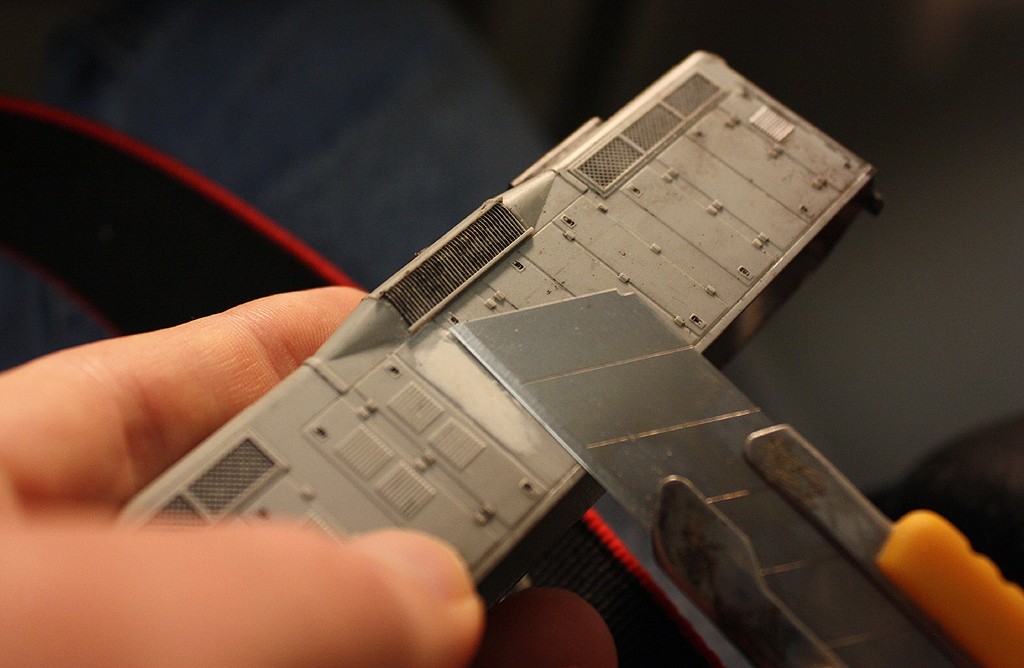 Very little other body modifications are needed as the rest of it is basically stock. I did beef up the DB sections as per prototype by putting 4 pieces of thin sheet styrene styrene behind the curved sections near the exhausts, as they look a bit thin in that area on the P2K shell (no photos unfortunately, I'll see if I can dig something up). Since that order of air tanks is taking a while, they'll be installed later (if they come in after the holidays...Merry Christmas!) |
|
|
|
Post by CP_8530 on Dec 29, 2012 21:45:43 GMT -5
Repairing the long hood tabs: This is a method I've used before on a few P2K Geeps with broken body/shell tabs. Sand/cut the area where the old tab was smooth, and carefully drill holes into the sides of the shell from the bottom where the old tabs were. I started with a #79 bit and went to a #77 after to make the holes slightly bigger. Ideally you want to drill straight as possible, keeping an eye on the sides as you drill in case you notice the bit coming out on the detailed side. I then bent some steel 0.015" piano wire into little metal tabs and inserted them into the body sides where the holes were. I secured them with a dab of the very thin CA glue. Presto. The photo below shows the process being tested on the old GTW unit's short hood. It will be done for each of the tabs on the 8523's long hood. 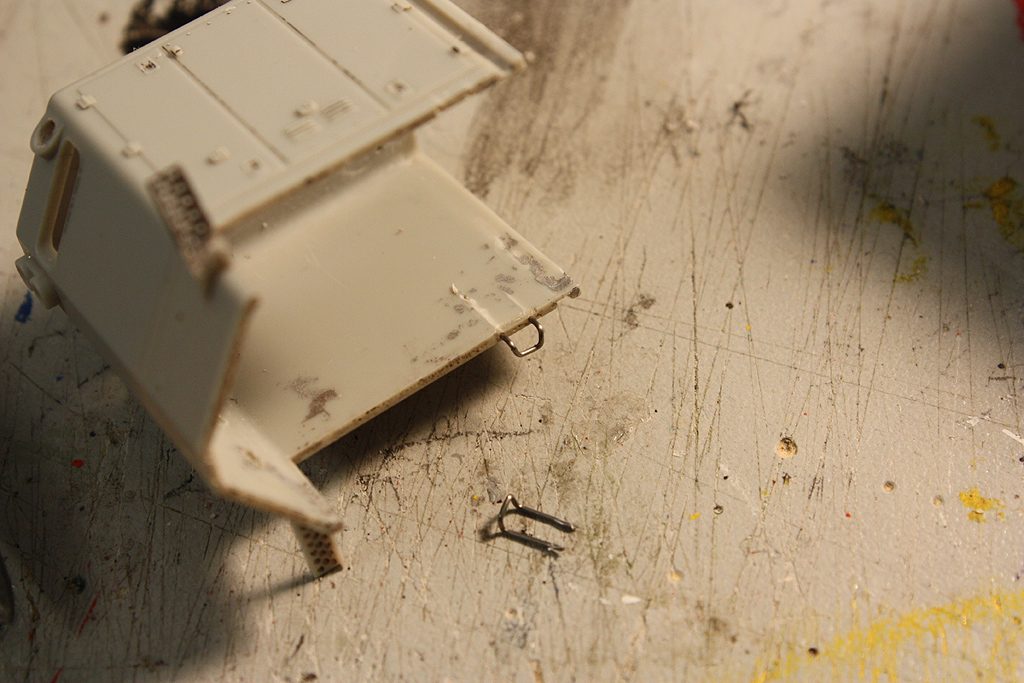 |
|
|
|
Post by CP_8530 on Dec 31, 2012 3:14:06 GMT -5
After the long hood louvre rearrangement mods, it's time to paint the rear. Again, after a light primer coat (with specific attention to those black plastic parts such as the fans), the TLT Action Red was sprayed on the long hood. The rear was then masked off and sprayed Warm Black. Why? The Microscale decal sets are only white stripes, so a black background needs to be applied at the rear end. This was followed by a gloss coat, then decal application. Apply rear stripe decals, then apply multimarks (or "pac-mans", whatever. Apparently the circle symbolizes a globe and the triangle movement across said globe). I used a pair of multis from an old Herald King set I had on hand as they were closer in size to the GP9 ones than the Microscales set. The original 5" scheme had the full rear multi, so use the large ones. Then the CP Rail side decals were applied from a Microscale set. This photo shows the decals very soon after application. 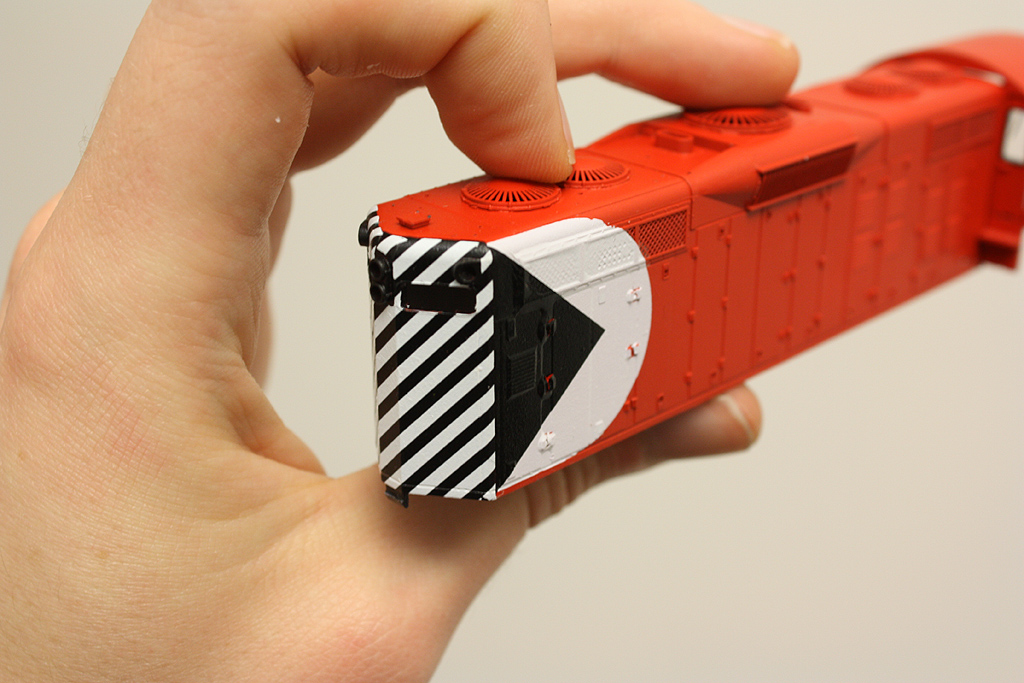 Which involved usual process of Microset, position/apply decal, let sit, followed by a number of Microsol applications to get the decal to fit around the doors, latches and hinges. Some poking and cutting in those areas was necessary, and any imperfections or red spots (visible in the photo) were later touched up with black or white paint. Because the multimark wouldn't settle in the upper radiator grille area after about a dozen coats of Microsol and poking, I later ended up cutting that section of the decal out and brush painting it white/black. The long hood was sealed with another application of gloss once all the decaling was done. Now would be a good time to decal up the rear numberboards. I usually strip off the old numbers/paint with alcohol, paint them gloss or warm black and decal over. A coat of Micro-flat after the decals are settled properly takes care of that. |
|
|
|
Post by iomalley on Dec 31, 2012 8:45:30 GMT -5
so why the process of resurrecting the body tabs? the only reason the manufacturer makes the body in multiple pieces is for casting and mould release. Just glue all the body parts together for an uber strong assembly? The couplers hold the body on, and you won't have that issue of lifting the body and only certain body parts release, ruining your handrails or worse.
|
|
|
|
Post by CP_8530 on Dec 31, 2012 13:39:35 GMT -5
It's more of a personal preference thing. I like the modular assembly in case I need to take everything apart sometime for repairs or parts additions etc. And I'll probably be doing that a few times when I'm figuring out how to route the rooftop piping properly.
|
|
|
|
Post by Randy Earle on Dec 31, 2012 16:16:35 GMT -5
Guys, please, if you can, try to keep your images down to around 800 pixels wide. I have a script that downsizes them, but it takes a long time to load. Not everyone has a fast upload speed. Please help us on this.
|
|
|
|
Post by CP_8530 on Jan 14, 2013 15:58:34 GMT -5
Waiting on the air tanks and some minor frame decals, among other things. Athearn Blomberg B sideframes also added. 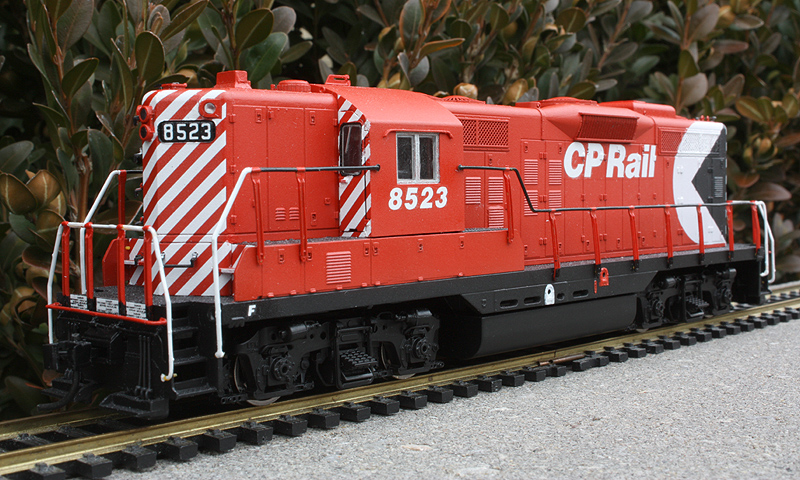 |
|
|
|
Post by spud7378 on Jan 14, 2013 18:15:53 GMT -5
Awesome love those GPS in the pacman paint very nice work
|
|

 ) and one of each of the ends was covered in flecks of white paint.


 ) and one of each of the ends was covered in flecks of white paint.


